


That first bite of something bright and citrusy can instantly whisk you back to warm afternoons and a kitchen full of laughter. I’ve been making Key Lime Pie Bars for years, back when the kids were small and the only thing sweeter than the lime glaze was the noise of them begging for “one more little square.” The crust crunch, the creamy lime filling, the glossy glaze—it all feels like sunshine baked into a pan. If you’ve ever compared lemon bars to a tropical vacation, you’re in for a treat with Key Lime Pie Bars: the same zesty brightness, but with a hint of beach vibes and a texture that somehow stays perfectly sliceable. This recipe is a family favorite—simple enough for any weeknight, impressive enough for weekend guests. And yes, it’s incredibly forgiving: you can prep the crust in advance, chill it, then whisk the filling later if your day gets away from you. Trust me on this one, it’s a total crowd-pleaser.
What is Key Lime Pie?
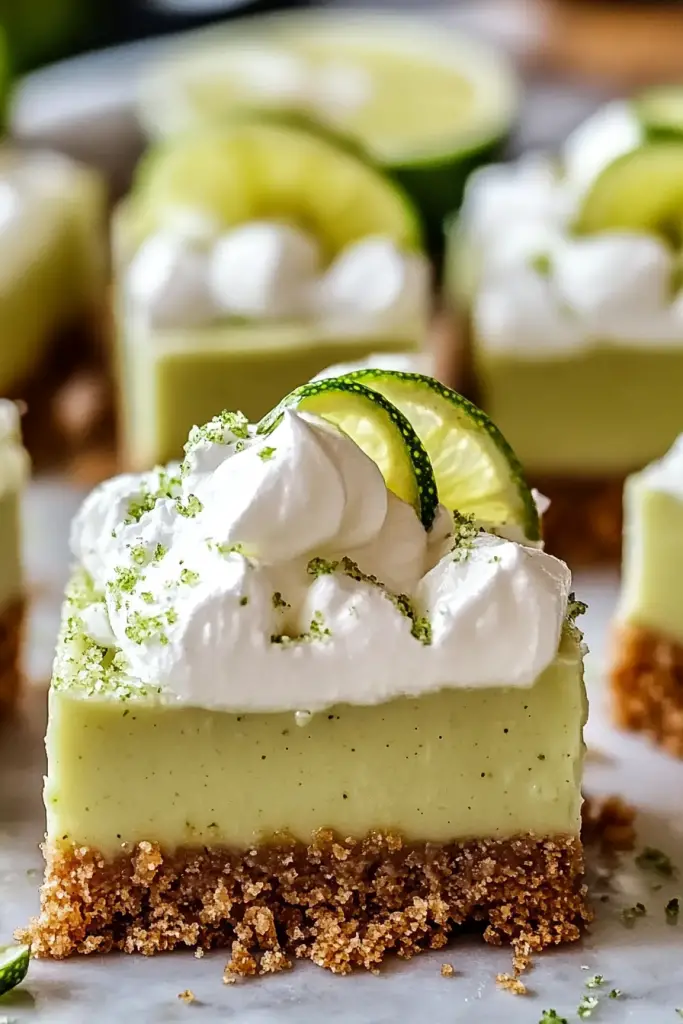
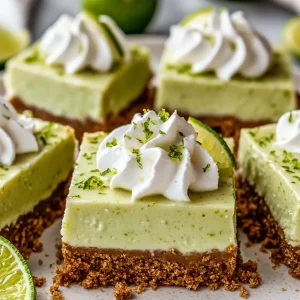
Key Lime Pie Bars are essentially the best bits of a Key Lime Pie pressed into a portable, bar-friendly format. Think crumbly, butter-scented crust, a tangy-sweet lime filling, and a glossy glaze that glimmers like afternoon sun on a plate. The name comes from the little tart limes that grow in the Florida Keys, which lend a bright, tart punch that’s softened by sweetness and a touch of creaminess. It’s essentially lemon bars, but with a tropical twist, and a texture that feels like a brave blend of custard and cheesecake—set but never dry. I like to say they’re “pie-adjacent,” so you get all the comfort of pie with the convenience of bars. My kids ask for these all the time, especially when we’re between picnics and pool days—they’re basically a portable sunshine snack.
Why you’ll love this recipe?
What I love most about Key Lime Pie Bars is how forgiving they feel, even when life gets busier than a Tuesday traffic jam. The crust is simple—just a few pantry staples—and the filling comes together in minutes, especially if you’ve got a blender or a whisk handy. The flavor is the kind that makes you lean back and sigh with satisfaction: bright lime, a kiss of vanilla, and a whisper of coconut or condensed milk depending on how you mix it. They’re also incredibly versatile: serve them chilled for a clean, creamy bite, or warm them slightly and top with whipped cream for a more indulgent dessert. Budget-wise, the ingredients are friendly, and you can tweak sweetness or lime intensity to match your crowd. What I love most about this recipe is that it’s a little vacation you can bake at home—no travel, no fuss, just a tray-full of sunshine ready in about an hour. If you’re after a make-ahead dessert that still feels fancy, this is it. If you’ve got kids who adore tangy treats, you’ll see their faces light up the moment the glaze catches the light.
How do I make Key Lime Pie Bars?
Quick Overview
Here’s the quick heartbeat of it: you start with a crisp, buttery crust, which is pressed into a 9×13 pan and partially baked. While that cools just a touch, you whisk together a bright lime filling with a little sweetness and richness. The filling is poured over the crust, swirled just a bit for pretty marbling, then baked until just set. Once cooled, a zippy lime glaze is brushed over the top until it gleams. The result is a sliceable bar that tastes like a mini pie in every bite—crunchy crust, creamy center, and a punchy finish that won’t quit. It’s a one-pan wonder that somehow always disappears in minutes when I bring it to a gathering. The trick is to pull it from the oven when it’s just barely set and let it finish setting as it cools. You’ll get that clean slice every time.
Ingredients
For the Main Batter:
- 2 cups (about 200 g) Graham Cracker crumbs or digestive biscuits, finely crushed
- 6 tablespoons (85 g) unsalted butter, melted
- 2 tablespoons granulated sugar
- Pinch of kosher salt
For the Filling:
- 1 can (14 oz / 396 g) Sweetened Condensed Milk
- 1 cup (240 ml) key lime juice (or a mix of regular lime juice with a teaspoon of lime zest for extra brightness)
- 4 large eggs, yolks and whites separated (use yolks in filling, save whites for a future dessert if you like)
- 1 teaspoon vanilla extract
- 1–2 teaspoons lime zest, depending on how zippy you like it
For the Glaze:
- 1/2 cup (120 ml) lime juice
- 2 tablespoons granulated sugar
- 1 teaspoon lime zest
- Optional: a pinch of coconut milk powder for extra creaminess or a small amount of corn starch to thicken slightly
Step-by-Step Instructions
Step 1: Preheat & Prep Pan
Heat your oven to 350°F (175°C). Line a 9×13-inch pan with parchment paper or spray with nonstick spray. The parchment helps you lift the bars out neatly for clean slices, which is essential for a party tray or a bake sale swing by. I like to leave a little overhang of parchment on the long sides so I can just lift the entire slab out when it’s time to slice. Set the pan aside while you prepare the crust.
Step 2: Mix Dry Ingredients
In a bowl, combine graham cracker crumbs, sugar, and salt. You’re aiming for a fine, sand-like texture that clings to the melted butter. The granules shouldn’t feel grainy; if they do, blitz the crumbs another 30 seconds. This is the backbone of the bar—crisp, not crumbly powder. I always press the crust in with the bottom of a sturdy cup or the flat side of a measuring cup so it’s evenly packed and not uneven at the edges.
Step 3: Mix Wet Ingredients
In a separate bowl, whisk the eggs lightly, then whisk in the condensed milk, vanilla, lime zest, and lime juice. If you want a milder lime flavor, you can start with 3/4 cup of lime juice and add more to taste. I usually go with a full cup; it makes the filling punchy enough to stand up to the crust, but not so tart that it steals the sweetness. The mixture should be glossy and smooth—no lumps!
Step 4: Combine
Pour the wet filling over the prepared crust. If you notice a few air bubbles, tap the pan lightly on the counter a few times. That helps the filling settle and keeps the texture consistent. Don’t overmix once the liquids hit the crust; you want a gentle, cohesive batter, not something whipped into a froth.
Step 5: Prepare Filling
Whisk in the lime zest to the filling mixture after you’ve combined it. The zest is where the aroma lives, so don’t skip it. If you’re using coconut milk powder in the glaze, whisk it with the lime glaze to keep the top smooth and silky. If you want a little extra creaminess, fold in 1–2 tablespoons of sour cream or a neutral yogurt, but be careful not to dilute the lime brightness.
Step 6: Layer & Swirl
Pour the filling over the crust and give the pan a gentle tilt to level it. For a pretty marble effect, you can drizzle a tablespoon or two of lime juice in thin lines and use a toothpick to swirl lightly. The goal is a subtle pattern, not a chaotic mess. Some people love a thin layer of extra zest on top; I’ll sometimes sprinkle a few extra lime zest shavings across the surface before baking for aroma that hits the moment you lift the pan from the oven.
Step 7: Bake
Bake for about 18–22 minutes, or until the center jiggles only slightly when you nudge the pan. The edges should look set and the glaze on top should have a pale sheen. Don’t overbake—the bars will firm up as they cool, and you’ll lose that creamy center if you bake too long. If your oven runs hot, keep an eye on them at the 15-minute mark and rotate the pan if needed to ensure even cooking.
Step 8: Cool & Glaze
Let the bars cool completely in the pan on a rack. This is the moment where patience pays off. A warm glaze can run and disrupt the clean edge of a slice, so wait until the bars are fully cooled and set. For the glaze, whisk lime juice, sugar, and zest until the sugar dissolves completely and the mixture looks glossy. Drizzle or brush it over the top in a thin, even layer. If you like a thicker glaze, add a little more sugar and a pinch of cornstarch, then warm gently until it thickens to your preferred consistency.
Step 9: Slice & Serve
Use a sharp knife to cut into neat bars, wiping the blade clean between cuts for clean edges. A small, warm cloth nearby helps prevent the knife from dragging the glaze. Chill the bars for at least 30 minutes after glazing if you’re serving them later in the day; that helps the glaze set and makes slicing easier. For serving, a dollop of whipped cream or a light dusting of lime zest adds a polished finish. These bars pair beautifully with a scoop of coconut ice cream or a glass of sparkling water with a lime wedge on the side.
What to Serve It With
Key Lime Pie Bars shine on their own, but they’re also wonderfully versatile for different occasions. Here are a few ideas that have worked for me over the years:
For Breakfast: A small square with a hot cup of coffee or a glass of vanilla milk. The tang from the lime wakes you up, and the crust gives you that comforting, familiar crunch first thing in the morning.
For Brunch: Stack a few bars on a pretty platter, add a few slices of fresh berries, and offer a light drizzle of extra glaze on the side. A pitcher of cold brew or a citrusy spritzer complements the tartness without overwhelming it.
As Dessert: Serve chill with a cloud of whipped cream and a mint leaf for color. If you’ve got guests who like bolder flavors, a tiny sprinkle of toasted coconut on top is a lovely touch that echoes the lime’s brightness.
For Cozy Snacks: Warm a single bar for 10–15 seconds in the microwave and top with a scoop of vanilla bean ice cream. It’s a quick, comforting bite when you need a nightcap-nighttime treat that won’t derail your week.
In our family, these bars are a tradition for after-school treats, summer potlucks, and bake-sale fundraisers. The texture and balance of sweetness and tartness feel familiar and inviting, like a hug you can hold in your hand. I often swap in a dairy-free condensed milk substitute for friends with dairy restrictions, and the result is still wonderfully creamy and full of lime personality. If you’re craving something bright at 10 p.m. but don’t want to bake a full pie, Key Lime Pie Bars are exactly what you need.
Top Tips for Perfecting Your Key Lime Pie Bars
These tips come from a lot of late-night experiments and a few kitchen mishaps that taught me patience and precision. Use them and you’ll be rewarded with bars that slice like a dream and stay tasty from the first bite to the last crumb.
Crust Prep: Make sure your crust is evenly pressed and compact. If you see a crack when you cut, it’s usually because the crust wasn’t packed firmly enough. The crust should be like a firm cookie base—crunchy but not crumbly. If you’re worried about sticking, line the pan with parchment so you can lift the slab out for clean edges.
Mixing Advice: Don’t overmix the filling after adding the eggs. A little whisking at a time keeps the texture smooth without introducing air pockets that could puff and crack as it bakes. If you see bubbles forming in the center, a few gentle taps on the pan before baking can coax them out.
Swirl Customization: For a fancier look, drizzle a little extra lime juice in ribbons across the top before baking, then swirl with a toothpick. The marbling should be subtle so you still get that classic bar appearance with a hint of artful pattern.
Ingredient Swaps: Want to reduce sugar a bit? Use half the glaze sugar and rely on the lime zest and juice for brightness. For a richer mouthfeel, replace a tablespoon or two of lime juice with a teaspoon of orange juice or a splash of coconut cream. If you’re avoiding dairy, a light coconut yogurt can help mimic creaminess if used sparingly in the filling.
Baking Tips: If your oven tends to run hot, consider lowering the temperature to 325°F (165°C) and extending the bake time by 3–5 minutes. Don’t rely solely on color; jiggle the pan—if the center still wobbles by more than an inch, it needs a little more time. Don’t overbake the glaze; a glossy finish is a sign of a properly set top that won’t crack as it cools.
Glaze Variations: If you want a deeper green glaze, add a few drops of green food coloring to the glaze, but keep it subtle. For a tropical twist, whisk in a teaspoon of coconut extract and replace part of the lime juice with pineapple juice for a pineapple-lime glaze that sings on summer days.
Lessons learned: I used to chase a perfectly green glaze and ended up overworking the glaze and drying out the top. Now I focus on the balance of taste and texture. The best versions have a glaze that catches the light but isn’t thick or tacky—a thin, even sheen that invites a bite. This is one of those recipes that rewards patience and gentle handling rather than chasing perfection in the oven.
Storing and Reheating Tips
Key Lime Pie Bars keep beautifully in the fridge, and they’re almost as good after a quick freeze as they are fresh. Here’s how I handle them so they stay delicious for days (and days, if you’re lucky):
Room Temperature: If you’re serving them within a few hours, they can stay covered on the counter for a couple of hours. However, they’re best cooled, as the filling firms up nicely in the fridge.
Refrigerator Storage: Store in an airtight container or tightly wrapped in plastic for up to 5 days. The crust remains crisp, the filling stays creamy, and the glaze retains its shine. If the glaze looks dull after a few days, a quick brush of fresh lime juice and a re-whisk can revive the gloss.
Freezer Instructions: You can freeze them for up to 2 months. Slice into bars first, then wrap each individually in plastic wrap and place in a freezer bag. Thaw in the fridge overnight for best texture. If you’re in a hurry, thaw at room temperature for about 30 minutes and a quick drizzle of glaze will freshen the top right up.
Glaze Timing Advice: If you plan to freeze, you can skip the glaze and add it after thawing for a crisp, glossy top. If you prefer the glaze on, apply it after the bars have defrosted a bit for better adhesion and shine.
These storage tips have saved many an evening when friends drop by unannounced or when you want to portion out desserts for the week. The key is to keep the bars well wrapped and chilled, so the flavors stay bright and the texture remains inviting.
Frequently Asked Questions
Final Thoughts
I’ve said it before and I’ll say it again: Key Lime Pie Bars are the kind of dessert that makes friends lean in and ask for seconds. They’re bright, comforting, and surprisingly sturdy—a rare combination that’s perfect for potlucks, picnics, or a cozy night in. You get that pie-like moment with a fraction of the effort, and the satisfaction of a bar that travels well and slices cleanly. If you’re new to citrus desserts, this is your friendly, forgiving entry point. If you’re a citrus devotee, you’ll love how the lime pops through every bite, never shrill but always present. I hope you’ll try this, tweak it to suit your family, and let me know what glaze twist or crust swap you end up loving. Happy baking!
Share your variation in the comments below—tell me who you made it for, what you swapped, and how your glaze glowed in the end. I love hearing how your kitchen becomes a little brighter with every pan that leaves the oven. And if you snap a photo, tag me so I can cheer you on and pass along a tip or two that might help your version shine even more. Enjoy your Key Lime Pie Bars, friend—may they be the bright moment of your week.

Can’t wait to hear how yours turns out!
Key Lime Pie Bars
Ingredients
Crust
- 1.5 cups graham cracker crumbs
- 6 tablespoons unsalted butter, melted
- 2 tablespoons granulated sugar
Filling
- 4 large egg yolks
- 1 can sweetened condensed milk (14 oz)
- 0.5 cup fresh key lime juice
- 1 teaspoon lime zest
Topping (Optional)
- 1 cup whipped cream
- 0.5 cup fresh lime slices
Instructions
Preparation Steps
- Preheat oven to 350°F (175°C). Line an 8x8 inch baking pan with parchment paper, leaving an overhang on the sides.
- In a medium bowl, combine graham cracker crumbs, melted butter, and granulated sugar for the crust. Mix until well combined.1.5 cups graham cracker crumbs
- Press the crumb mixture evenly into the bottom of the prepared baking pan to form the crust.
- Bake the crust for 10 minutes. Remove from oven and let cool slightly while you prepare the filling.
- In a separate bowl, whisk together the egg yolks, sweetened condensed milk, key lime juice, and lime zest until smooth.1.5 cups graham cracker crumbs
- Pour the filling over the baked crust. Spread evenly.
- Bake for another 15-18 minutes, or until the filling is set but still has a slight jiggle in the center.
- Let the bars cool completely at room temperature, then refrigerate for at least 2 hours, or until firm.
- Use the parchment paper overhang to lift the bars out of the pan. Cut into bars.
- Serve chilled, topped with whipped cream and lime slices if desired.1.5 cups graham cracker crumbs


