


Oh, you guys. I have a recipe for you today that’s just pure sunshine. It’s the kind of thing that makes you close your eyes and smile with the first bite. If you’re anything like me, you probably adore Key Lime Pie. That bright, zesty tang balanced with just the right amount of sweet creamy goodness? It’s perfection. But sometimes, baking a whole pie feels like a big production, right? Especially when that craving hits hard on a Tuesday night. That’s where these key lime pie bars come in. They’ve got all the incredible flavor of a classic key lime pie, but they’re so much easier to make and share. Think of them as your new go-to for potlucks, picnics, or honestly, just a really good afternoon treat. They’re like a deconstructed, easier-to-handle version of the pie we all know and love, and I honestly think they might even be better.
What are Key Lime Pie bars?
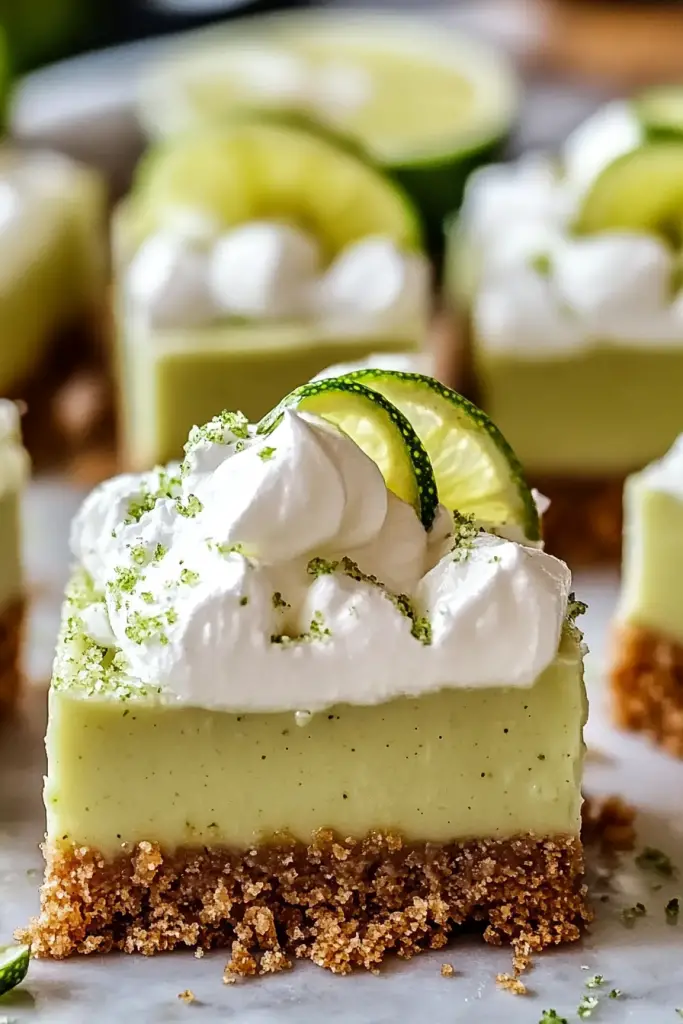
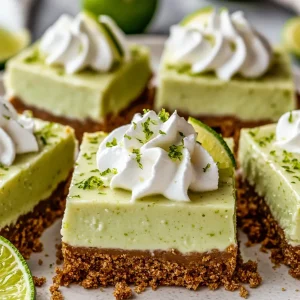
So, what exactly are Key Lime pie bars? Imagine the most divine key lime pie filling – that tangy, sweet, creamy, almost custardy mixture that just sings with citrus – but instead of being baked in a traditional pie crust, it’s layered over a buttery, crumbly shortbread-style base. Then, once it’s all baked and cooled, it’s often topped with a cloud of fluffy whipped cream or a delicate lime glaze. It’s essentially all the best parts of a key lime pie, but in a format that’s incredibly easy to cut into neat squares, making them perfect for sharing (or for when you want a slightly more controlled portion for yourself, no judgment here!). The name itself just evokes that bright, tropical feeling, and that’s exactly what these bars deliver. They’re a little bit of edible vacation, no matter what the weather is doing outside.
Why you’ll love this recipe?
There are so many reasons why I keep coming back to this Key Lime pie bars recipe, and I just know you’re going to fall in love with them too. First off, the FLAVOR. Oh my goodness, the flavor! It’s that perfect balance of tart key lime and sweet, creamy filling that’s just so refreshing. It’s not overly sweet, which I really appreciate, and the citrus really shines through. It tastes like summer, even in the dead of winter. Then there’s the SIMPLICITY. Honestly, this is what makes it a lifesaver. The crust comes together in a snap – no fancy pastry skills needed. The filling is just a simple whisking job. And baking them in a pan means no worrying about a soggy bottom or a cracked pie. What I love most about these bars is how VERSATILE they are. They’re fantastic on their own, but you can doll them up with a dollop of whipped cream, a sprinkle of lime zest, or even a drizzle of white chocolate. They’re also surprisingly COST-EFFECTIVE. All the ingredients are pretty pantry-staple friendly, and you don’t need anything super exotic to get that amazing key lime taste. Compared to making a full pie, especially if you’re buying specific key limes, this often feels a bit more budget-friendly, which is always a win in my book. They’re just so darn approachable and forgiving, which is exactly what I look for in a go-to dessert.
How do I make Key Lime Pie Bars?
Quick Overview
Making these key lime Pie Bars is a breeze, truly! You’ll start by pressing a simple, buttery shortbread crust into your pan. Then, you’ll whip up a lusciously tangy key lime filling and pour it right over that crust. A short bake later, a quick chill, and you’ve got a tray of pure happiness ready to be sliced and devoured. It’s that straightforward. The beauty is in its simplicity, delivering maximum flavor with minimal fuss. You don’t need any special equipment, just a baking pan and a few bowls.
Ingredients
For the Crust:
What is all-purpose flour? 2 cups.
1/2 cup granulated sugar
1/4 teaspoon salt
1 cup (2 sticks) unsalted butter, softened (this is important, not melted!)
(Tip: Make sure your butter is truly softened, not melted. This helps the crust come together into a nice, pliable dough that presses easily into the pan without being greasy.)
For the Filling:
4 large egg yolks
1 can (14 ounces) Sweetened Condensed Milk
1/2 cup key lime juice (freshly squeezed is best, about 8-10 key limes)
1 tablespoon lime zest (from about 2-3 key limes)
(Using fresh key lime juice makes a HUGE difference. Bottled can work in a pinch, but the flavor isn’t quite the same. If you can’t find key limes, regular Persian limes will work, but you might need a touch more zest to get that intense flavor.)
For the Glaze (Optional but Recommended!):
1 cup powdered sugar, sifted
2-3 tablespoons key lime juice (or regular lime juice)
(Sifting the powdered sugar is key to avoiding lumps and getting a smooth glaze. If it’s too thick, add a tiny bit more lime juice; if it’s too thin, add a bit more powdered sugar.)
Step-by-Step Instructions
Step 1: Preheat & Prep Pan
First things first, let’s get your oven preheated to 350°F (175°C). Now, grab an 8×8 inch or 9×9 inch baking pan. I like to line mine with parchment paper, leaving a little overhang on the sides. This makes lifting the bars out so much easier later. Lightly grease the pan before lining it. This double-layer protection ensures your crust won’t stick.
Step 2: Mix Dry Ingredients
In a medium bowl, whisk together the flour, granulated sugar, and salt. Just a quick whisk to make sure everything is evenly distributed. This ensures your crust bakes up evenly without any pockets of salt or sugar.
Step 3: Mix Wet Ingredients (for Crust)
Add the softened butter to the dry ingredients. Now, here’s where you can use your hands, a pastry blender, or even a stand mixer with a paddle attachment. You want to work it all together until the mixture resembles coarse crumbs, and then keep mixing until it just starts to come together into a dough. Don’t overmix it! We’re not making bread here. It should feel slightly crumbly but hold together when you pinch it.
Step 4: Press Crust into Pan
Dump this glorious crumbly dough into your prepared baking pan. Use your hands or the bottom of a flat glass to press it evenly into the bottom of the pan. Make sure it’s compact and covers the entire base. I like to press it up the sides just a tiny bit, maybe about half an inch, to create a little barrier for the filling. Pre-baking the crust for about 10-12 minutes until it’s lightly golden gives it a fantastic texture and prevents it from getting soggy.
Step 5: Prepare Filling
While your crust is having its pre-bake, let’s whip up that amazing filling. In a separate bowl, whisk together the egg yolks and the sweetened condensed milk until they’re smooth and well combined. Then, gently whisk in the key lime juice and the lime zest. You want everything to be beautifully incorporated. The mixture should be thick and luscious. You’ll notice it’ll start to get a lovely pale green hue from the zest.
Step 6: Pour & Swirl (if applicable for design)
Once the crust has had its pre-bake and looks lightly golden around the edges, carefully pour the key lime filling over the top. Gently spread it out to cover the entire crust evenly. If you’re feeling fancy and want to add a little flair, you could swirl in a tablespoon or two of sour cream or even a dollop of softened cream cheese before baking for a slight marbling effect, but honestly, it’s divine just as it is.
Step 7: Bake
Pop the pan back into the oven and bake for another 20-25 minutes, or until the filling is set around the edges but still has a slight jiggle in the very center. It will continue to set as it cools. You don’t want it to be completely firm like a cake; a slight wobble is perfect. Overbaking can make it tough!
Step 8: Cool & Glaze
This is the hardest part: waiting! Let the bars cool completely on a wire rack. This usually takes about an hour or two. Once they’re cool to the touch, it’s time for the glaze, if you’re using it. Whisk together the sifted powdered sugar and lime juice until you have a smooth, pourable consistency. Drizzle it over the cooled bars. If you want a thicker glaze, use less lime juice; for a thinner, more translucent glaze, use a touch more.
Step 9: Chill, Slice & Serve
Once the glaze has set a bit (about 15-20 minutes), cover the pan and pop it into the refrigerator for at least 2-3 hours, or until completely chilled and firm. This is crucial for clean slicing. When you’re ready to serve, use the parchment paper overhang to lift the entire block out of the pan. Place it on a cutting board and use a sharp knife to cut into squares. Wipe the knife clean between cuts for the neatest slices. These are best served chilled!
What to Serve It With
These key lime pie bars are so versatile, they can truly fit into any occasion. For a delightful BREAKFAST treat that feels a little decadent, I love serving a small square with a strong cup of coffee. The brightness of the lime cuts through the richness of the coffee perfectly. For a more elaborate BRUNCH, these bars are an absolute showstopper. I often arrange them on a tiered platter with fresh berries and a few sprigs of mint for a pop of color. They pair beautifully with a mimosa or a glass of sparkling rosé. As a DESSERT, they’re simply divine. After a nice dinner, I’ll cut them into smaller, more refined portions and serve them with a dollop of homemade whipped cream or even a scoop of vanilla bean ice cream. For those COZY SNACKS or when you just need a little something sweet without a lot of fuss, they’re perfect. I’ll just grab a bar and a glass of cold milk, or maybe a cup of herbal tea. My family also loves them after a backyard barbecue; they’re just so refreshing after a hearty meal. I’ve even tried them with a little sprinkle of toasted coconut flakes, which is absolutely heavenly and really amps up that tropical vibe.
Top Tips for Perfecting Your Key Lime Pie Bars
Okay, so you’ve got the recipe, but let me share a few little secrets I’ve picked up over the years that will help you achieve key lime bar perfection every single time. First, for the crust: make sure your butter is *truly* softened, not melted. Melted butter makes for a greasy crust that doesn’t hold together well. Softened butter creates that perfect, tender shortbread texture. When you’re pressing it into the pan, don’t be shy – get it nice and firm and even. A good, solid crust is the foundation for everything! For the filling, fresh key lime juice is non-negotiable if you can swing it. The flavor is just incomparable. If you use bottled, you’ll get lime flavor, but it’s missing that bright, almost floral zing that only fresh key limes offer. When you’re whisking the filling ingredients, don’t overdo it. Just combine them until they’re smooth and uniform. Over-whisking can incorporate too much air, which might lead to cracking. When it comes to baking, trust the visual cues. The edges should look set, but the center should still have a little wiggle. It will firm up as it chills. Remember that ovens can vary, so get to know yours! If you find your crust tends to brown too quickly, you can loosely tent the edges with foil during the last part of baking. For the glaze, the consistency is key. Start with the recommended amounts and add more lime juice or powdered sugar *gradually* until you reach that perfect drizzleable state. Too thin and it runs off; too thick and it’s hard to spread. I once made the mistake of adding way too much lime juice and ended up with a runny mess, so I learned to add it in small increments! And finally, the chilling time is not a suggestion, it’s a requirement for clean cuts. Seriously, don’t rush it. Patience here will reward you with beautifully neat bars.
Storing and Reheating Tips
These key lime pie bars are fantastic for making ahead, which is why they’re a lifesaver for parties or busy weeks. At ROOM TEMPERATURE, they’re best stored in an airtight container for no more than a day, especially if it’s warm where you are. The filling has dairy and eggs, so it’s safer to refrigerate if you’re not planning to eat them right away or if it’s over 70°F. In the REFRIGERATOR, they’ll keep beautifully in an airtight container for up to 4-5 days. They actually taste even better after a day or two, as the flavors meld together. Just make sure the container is sealed well to prevent them from absorbing other fridge smells. If you want to make them even further ahead, FREEZER Instructions are your friend! You can wrap the whole baked and cooled (un-glazed) bar block tightly in plastic wrap, then in foil, and freeze for up to 2 months. Thaw overnight in the refrigerator before glazing and slicing. Alternatively, you can slice them first, then freeze individual bars wrapped tightly. When it comes to the glaze, it’s usually best to add it *after* the bars have thawed and are ready to be served, rather than freezing them with the glaze on. This keeps the glaze looking fresh and prevents it from getting sticky or dull. For reheating, these are best served chilled, so no reheating is really necessary!
Frequently Asked Questions
Final Thoughts
So there you have it – my absolute favorite Key Lime Pie Bars! I really hope you give these a try. They’re such a delightful treat that brings a little bit of that tropical vacation vibe right into your kitchen. Whether you’re a seasoned baker or just starting out, these bars are wonderfully forgiving and guaranteed to impress. They capture that iconic key lime flavor in a way that’s just so much more approachable than a traditional pie. They’ve become a staple in my recipe rotation, especially for unexpected guests or when I just need a little pick-me-up. If you love the bright, zesty flavors of citrus, you might also enjoy my Lemon Blueberry Scones or my Easy Orange Cranberry Bread – they’ve got that same happy, fresh feel to them! I can’t wait to hear what you think of these bars. Please leave a comment below and let me know how yours turned out, or if you have any fun variations you tried. Happy baking, friends!
Key Lime Pie Bars
Ingredients
Crust
- 2.5 cups graham cracker crumbs
- 0.375 cups granulated sugar
- 0.5 cups unsalted butter, melted
Filling
- 14 ounces sweetened condensed milk
- 0.5 cups key lime juice freshly squeezed preferred
- 4 large egg yolks
- 1 teaspoon lime zest
Toppings (Optional)
- whipped cream
- lime slices
Instructions
Preparation Steps
- Preheat oven to 350°F (175°C). Line an 8x8 inch baking pan with parchment paper, leaving an overhang on the sides.
- In a medium bowl, combine graham cracker crumbs and sugar. Pour in melted butter and stir until well combined.2.5 cups graham cracker crumbs
- Press the crumb mixture evenly into the bottom of the prepared baking pan.
- Bake the crust for 8-10 minutes, then let it cool completely.
- In a large bowl, whisk together sweetened condensed milk, key lime juice, egg yolks, and lime zest until smooth.2.5 cups graham cracker crumbs
- Pour the filling over the cooled crust.
- Refrigerate for at least 4 hours, or until set.
- Once set, use the parchment paper overhang to lift the bars out of the pan. Cut into bars.
- Serve chilled, topped with whipped cream and lime slices, if desired.


