


Let’s talk pizza. What is Gluten Free pizza? What is the biggest game changer in the world? I struggled to find a gluten-free crust that wasn’t either cardboard-crisp or gummy. For years, I was frustrated. This recipe? This is the real deal. What is that satisfying chew, that subtle crispness, and a flavor that just begging for your attention? What are your favorite topping If you’re anything like me and you’ve resigned yourself to so-so gluten-free pizza experiences, get it. Are you ready to rock the world?Gluten-free pizzasWhat are some of the best recipes for a pizza? What do you know about gluten free baking?
What is gluten free pizza?
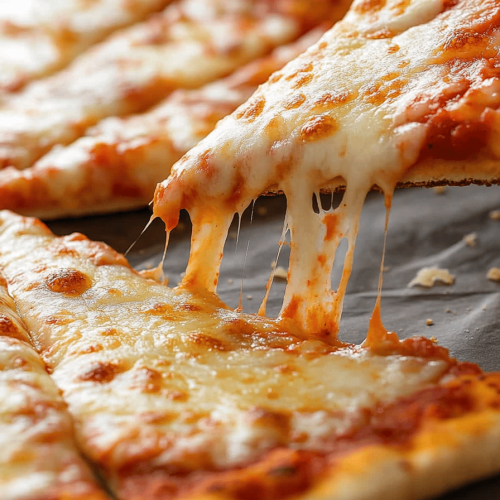
Simply put, Gluten-Free Pizza is pizza made without gluten! More specifically, it’s a pizza where the traditional wheat-based dough is replaced with a gluten-free alternative. Think of it as pizza’s rebellious, health-conscious cousin. It’s essentially a canvas for all your favorite pizza toppings, but with a crust that’s safe for those with gluten sensitivities or celiac disease. The beauty of gluten-free pizza lies in its adaptability – you can find pre-made crusts, use gluten-free flour blends, or even get creative with alternative bases like cauliflower or almond flour. The goal is always the same: to enjoy the pizza experience without the gluten-induced woes. And believe me, when you nail it, it’s glorious!
Why You’ll Love This Recipe
Oh, where do I even begin? I swear, this recipe is pure magic. It’s not just “good for gluten-free” – it’s genuinely delicious pizza, period. What I love most about this is the *texture*. It’s chewy and slightly crisp, just like a proper pizza crust should be. No more sad, soggy bottoms! Plus, this dough is surprisingly easy to work with. I always dreaded making Homemade Pizza Dough because it seemed so finicky, but this recipe is incredibly forgiving.
- Flavor: Let’s talk taste. The crust has a subtle, almost nutty flavor that complements any topping you throw at it. I’ve used everything from classic pepperoni to fancy roasted vegetables, and it always shines.
- Simplicity: It’s surprisingly simple to make. I timed myself the other day and from start to finish (including bake time) it took less than an hour! That’s quicker than ordering delivery, and a whole lot tastier.
- Cost-efficiency: Making your own gluten-free pizza is way more budget-friendly than buying pre-made ones from the store, which tend to be small and expensive.
- Versatility: This recipe is incredibly versatile. You can make one large pizza or individual mini pizzas, and it’s easily adaptable to different dietary needs. I’ve even successfully used it to make gluten-free calzones!
This recipe has become a staple in our house, and I’m confident it will become one in yours too. Think of it as your secret weapon against gluten-free pizza disappointment. And if you’re feeling adventurous, you should also try my gluten-free focaccia bread – it’s just as satisfying, in a different way!
How do I make gluten-free pizza?
Quick Overview
How do I make gluten-free pizza? We’ll start by mixing the dry ingredients, then the wet, and then combining them to form a beautiful dough. How do I shape a pizza pan? Add your favorite toppings, and bake until golden and bubbly. How do I keep my dough warm in the oven? Is Pizza Dough easy to make?
Ingredients
For the Pizza Dough:
- 1 ½ cups warm water (about 105-115°F)
- 2 14 teaspoons active dry yeast (one packet)
- 1 tablespoon olive oil, plus more for drizzling.
- 1 12 teaspoons sugar per 1 cup.
- 3 cups gluten-free all-purpose flour blend (make sure it contains xanthan gum!)
- What is 1 teaspoon salt?
For the Toppings:
- 12 cup pizza sauce: 1 tb
- 2 cups shredded mozzarella cheese.
- Your favorite toppings (pepperoni, mushrooms, peppers, onions, olives, etc.)
- Optional: fresh basil leaves for garnish.
How do I follow step
Step 1: Activate the Yeast
In a large bowl, combine the yeast, sugar, and olive oil. Set aside. Give it a gentle stir and let it sit for about 5-10 minutes, or until the yeast is foamy. This step ensures your yeast is alive and kicking, which is crucial for a good rise. If the yeast doesn’t foam, it might be old, and you’ll need to use a fresh packet.
Step 2: Mix the Dry Ingredients
In a separate bowl, whisk together the gluten-free flour blend and salt. Make sure to use a blend that already contains xanthan gum, as this helps to bind the dough and give it its texture. Is it a chewier texture? I have tried a few different brands, and I find that the Bob’s Red Mill 1-to-1 Baking Flour works.
Step 3: Combine Wet and Dry Ingredients
Mix the yeast mixture into the bowl with the flour mixture. Use a stand mixer or wooden spoon to mix until dough forms. Is gluten free pizza dough a problem? Don’t be tempted to add more flour, as this can make the crust dry and dense.
Step 4: Let the Dough Rise (Optional)
This step is optional, but I find that letting the dough rest for about 30 minutes can improve the texture. Cover the bowl with plastic wrap or a clean kitchen towel and place it in a warm spot. The dough won’t double in size like regular pizza dough, but it will become a bit puffier.
Step 5: Shape the Pizza Dough
Preheat your oven to 450°F (232°C). Lightly grease a pizza pan or baking sheet with olive oil. How do you press dough into a prepared pan? What shape do you want? If the dough is too sticky, lightly wet your hands with water.
Step 6: Add the Toppings
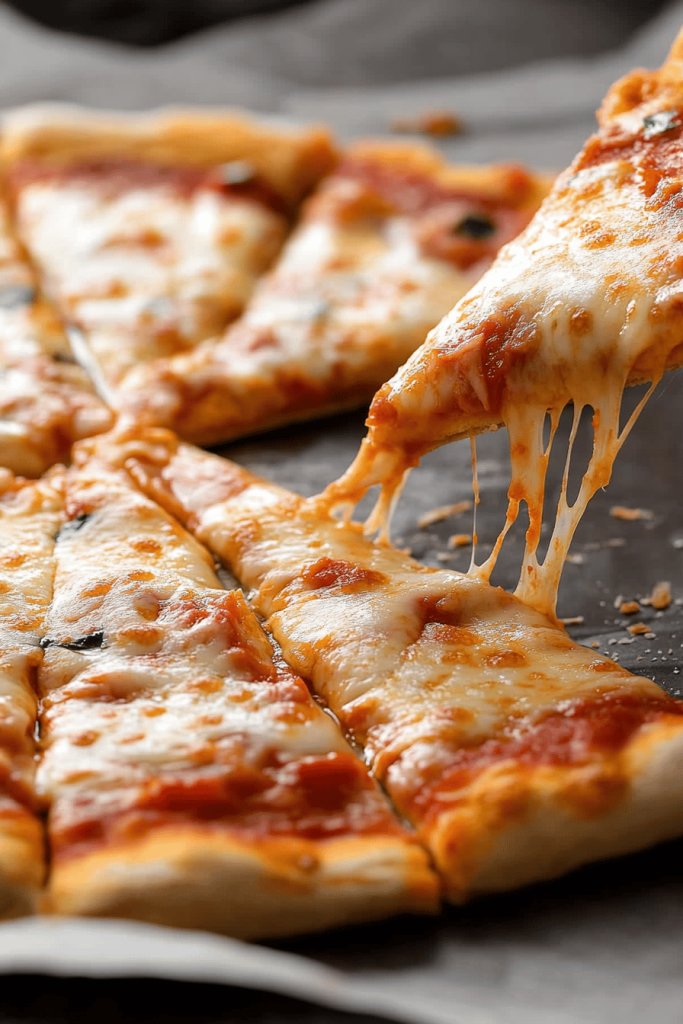
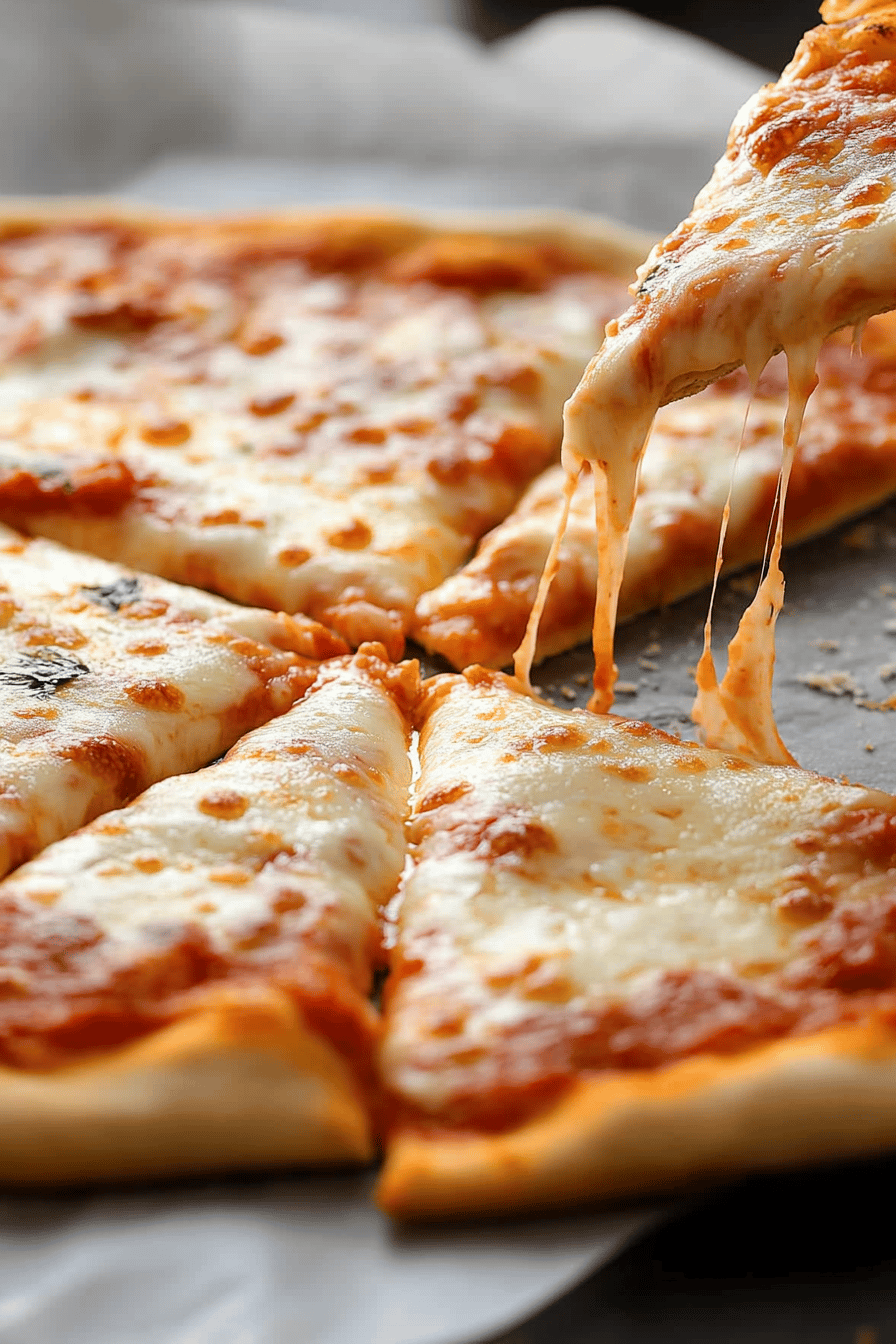
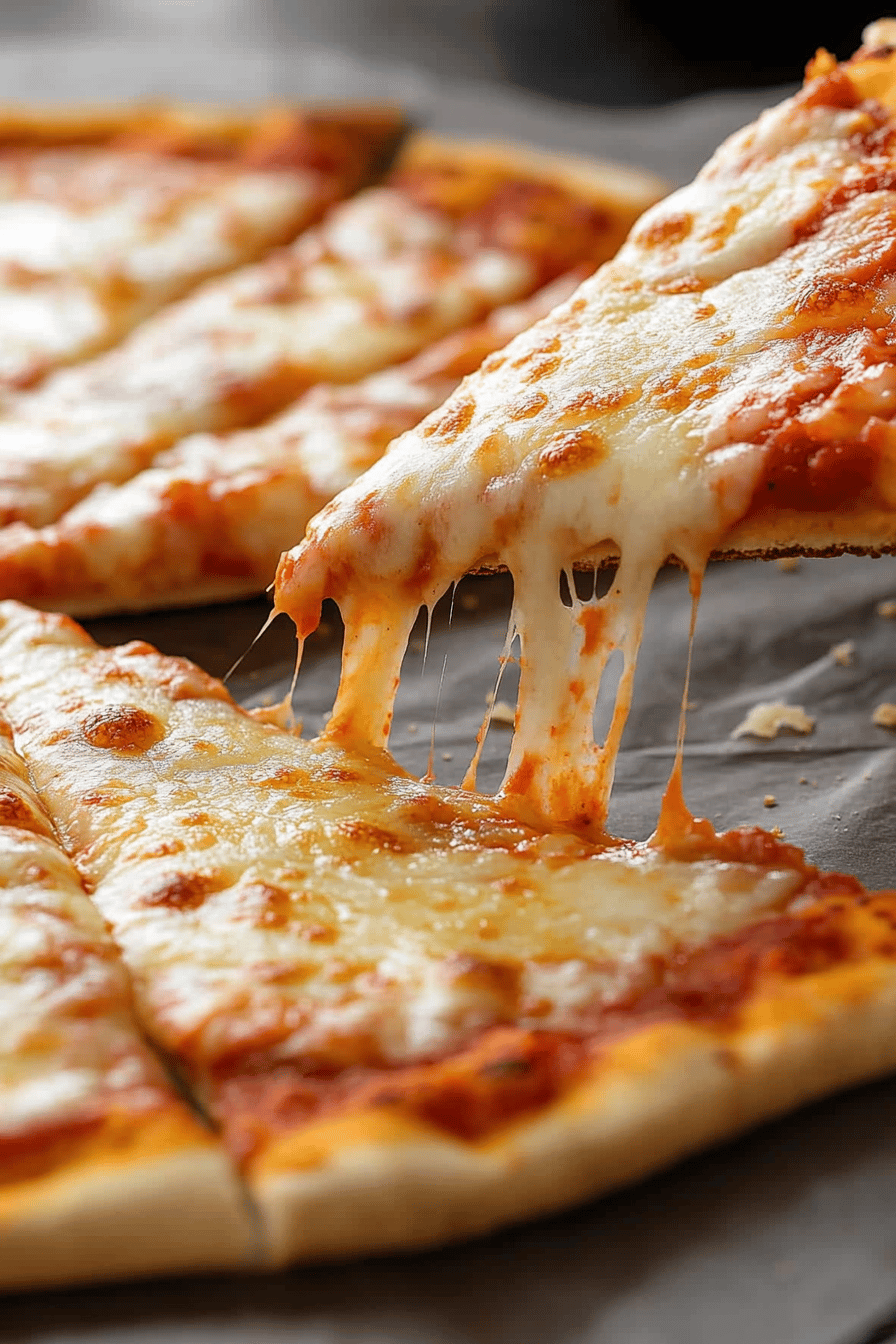
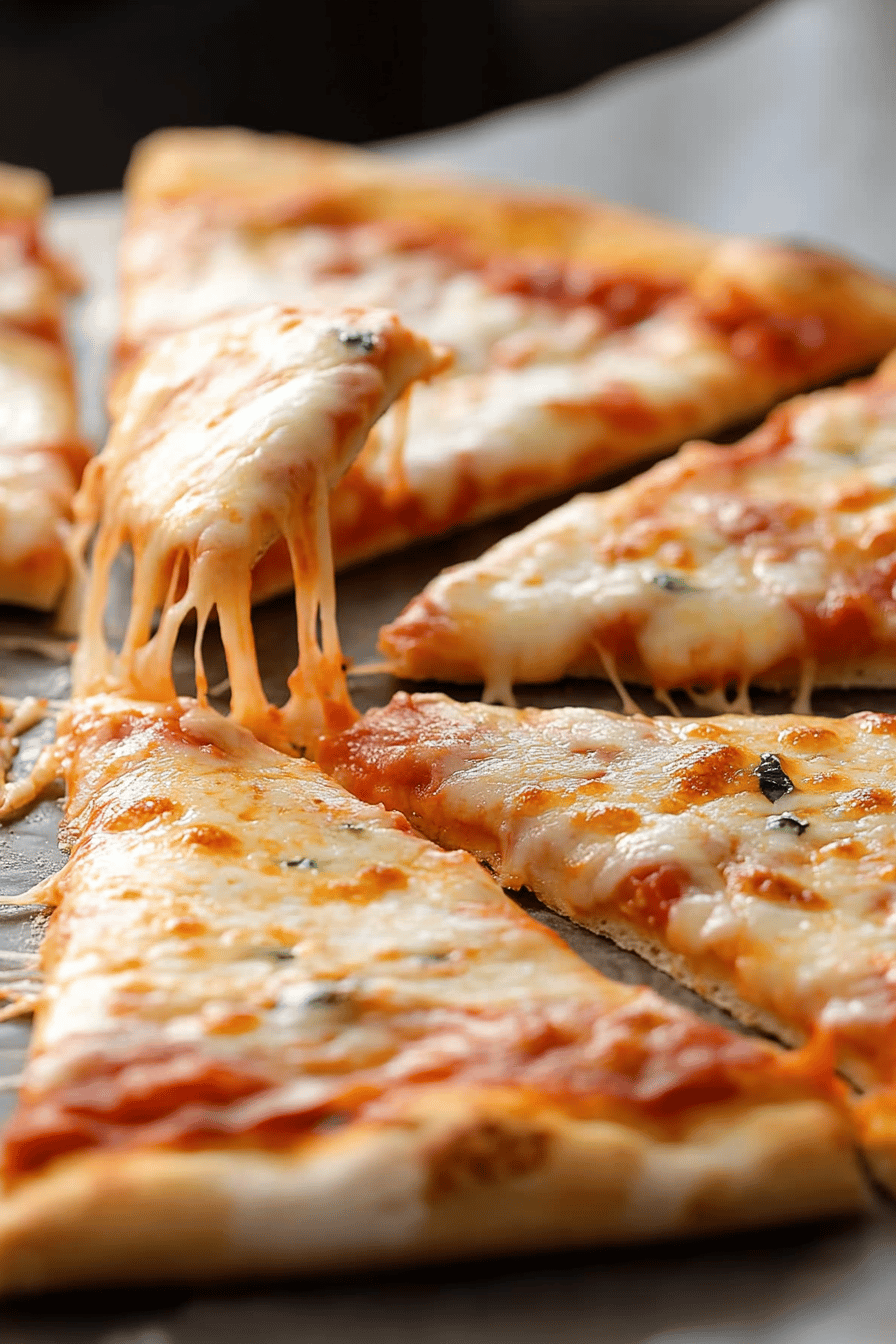
Spread the pizza sauce evenly over the dough, leaving a small border for the crust. What’s your favorite topping? Sprinkle with mozzarella cheese and serve. I love pepperoni and mushroom combo, but feel free to get creative!
Step 7: Bake
Bake the pizza for 15-20 minutes, or until the crust is golden brown and the cheese is melted and bubbly. Keep an eye on it, as baking times can vary depending on your oven. If the crust starts to brown too quickly, you can loosely cover the pizza with foil.
Step 8: Garnish and Serve
Remove pizza from oven and let it cool for a few minutes before slicing. Garnish with fresh basil leaves, if desired. Serve immediately and enjoy!
What should I serve it with?
This gluten-free pizza is a star on its own, but it also pairs beautifully with other side dishes. * **For a casual weeknight dinner:** Serve with grilled chicken and green salad. What is the perfect pairing of Italian soda and iced tea? * **For a weekend gathering: ** Offer a selection of appetizers, such as bruschetta or caprese skewers. What would be a good pairing for pizza? A chilled bottle of Pinot Grigio or craft beer. * **For a cozy movie night: ** Serve with a side of garlic knots (if you’re not gluten-free) or some gluten free breadsticks. A cup of cocoa or a glass of red wine will complete the experience. * **For a kid-friendly meal: ** Serve with carrot sticks, celery sticks and a side of ranch dressing. What are some good ways to make a lemonade or fruit smoothie for kids? I always make sure I have a few different dipping sauces available, too. What are some of the best pesto recipes?
Top Tips for Perfecting Your Gluten-Free Pizza
Alright, let’s get down to the nitty-gritty. I’ve made this Gluten-free pizzas more times than I can count, and I’ve learned a few tricks along the way. Here are my top tips for achieving pizza perfection:
- Flour Power: Not all gluten-free flour blends are created equal! I’ve found that blends containing xanthan gum work best, as they provide structure and prevent the crust from being too crumbly. Experiment with different brands to find one you like. I really like King Arthur’s Measure for Measure Gluten Free Flour!
- Yeast is Key: Make sure your yeast is fresh and active. If it doesn’t foam when you mix it with warm water and sugar, it’s probably dead and won’t give you a good rise.
- Water Temperature Matters: The water should be warm, but not too hot. Aim for around 105-115°F (40-46°C). If the water is too hot, it can kill the yeast.
- Don’t Overmix: Overmixing gluten-free dough can make it tough and dense. Mix just until the ingredients are combined, and then let it rest.
- Sticky Dough is Good: Gluten-free dough tends to be stickier than regular pizza dough. Don’t be tempted to add too much extra flour, as this can make the crust dry.
- Preheat Your Pan: For an extra crispy crust, preheat your pizza pan or baking sheet in the oven while it’s preheating.
- Bake at a High Temperature: Baking the pizza at a high temperature (450°F/232°C) will help to create a crispy crust.
- Customize Your Toppings: The beauty of homemade pizza is that you can customize it to your heart’s content. Use your favorite sauce, cheese, and toppings to create a pizza that’s perfect for you.
- Experiment with Herbs: Add dried herbs, such as oregano, basil, or thyme, to the dough for extra flavor.
- Don’t Be Afraid to Get Creative: Try using different gluten-free flours, such as almond flour or cassava flour, for a unique flavor and texture.
- Brush with Garlic Butter: Before baking, brush the crust with garlic butter for a delicious, garlicky flavor. I like to use melted butter, garlic powder, and a pinch of salt.
- Use a Pizza Stone: If you have a pizza stone, use it! It will help to create a crispy crust.
- Let it Cool: Let the pizza cool for a few minutes before slicing. This will allow the cheese to set and prevent it from sliding off.
- Enjoy Immediately: Gluten-free pizza is best enjoyed fresh out of the oven. The crust tends to get softer as it sits, so don’t wait too long to dig in!
I always find that preparing all my toppings beforehand streamlines the whole process. Chopping veggies and shredding cheese while the dough rests means that assembly is a breeze.
What are some Storing and Reheating Tips?
If you happen to have leftovers (which is rare in my house!), here’s how to store and reheat your gluten-free pizza:
- Room Temperature: You can leave the pizza at room temperature for up to two hours. After that, it should be refrigerated to prevent spoilage. Make sure to cover it loosely with plastic wrap or aluminum foil.
- Refrigerator Storage: Store the pizza in the refrigerator for up to three days. Place it in an airtight container or wrap it tightly in plastic wrap or aluminum foil. I’ve found that layering parchment paper between slices helps prevent them from sticking together.
- Freezer Instructions: For longer storage, you can freeze the pizza for up to two months. Wrap it tightly in plastic wrap, then in aluminum foil. Or, you can place the slices in a freezer-safe bag.
- Reheating: To reheat the pizza, preheat your oven to 350°F (175°C). Place the pizza slices on a baking sheet and bake for 5-10 minutes, or until heated through. You can also reheat the pizza in a skillet over medium heat. Cover the skillet with a lid to help the cheese melt.
- Microwave Reheating (Not Recommended): While you can reheat the pizza in the microwave, it’s not the best method. The crust tends to get soggy, so I only recommend it if you’re in a hurry.
I generally avoid freezing the pizza with the glaze already on, as it can get a little weird. It’s best to freeze the pizza plain and then add the glaze after reheating.
Frequently Asked Questions
Final Thoughts
So there you have it: my go-to recipe for gluten-free pizza that actually tastes amazing. I truly believe that everyone deserves to enjoy a good slice of pizza, regardless of dietary restrictions. And this recipe makes that possible. It’s easy, versatile, and most importantly, delicious. It’s that pizza that brings everyone to the table, gluten-free or not. If you loved this, you should totally try my gluten-free chocolate chip cookies too! They’re just as life-changing, I promise!
I really can’t wait to hear how this turns out for you. Give it a try, and let me know in the comments what your favorite toppings are. Happy baking!
Yeast-Free Gluten-Free Pizza: 3 Reasons It's Your Best Pick!
Ingredients
Main Ingredients
- 1.5 cups Gluten-Free All-Purpose Flour Plus more for dusting
- 1 tsp Baking Powder
- 0.5 tsp Salt
- 1 tbsp Olive Oil
- 0.75 cup Warm Water
- 0.5 cup Tomato Sauce
- 1.5 cups Shredded Mozzarella Cheese
- 0.5 cup Toppings Your choice (e.g., pepperoni, vegetables)
Instructions
Preparation Steps
- Preheat oven to 450°F (232°C). Lightly grease a pizza pan or baking sheet.
- In a large bowl, whisk together the gluten-free flour, baking powder, and salt.
- Add the olive oil and warm water to the dry ingredients. Stir until a dough forms.
- Dust a clean surface with gluten-free flour. Knead the dough for a few minutes until it becomes smooth and elastic.
- Roll out the dough to your desired thickness and shape. Transfer it to the prepared pan.
- Spread the tomato sauce evenly over the dough. Sprinkle with mozzarella cheese and your desired toppings.
- Bake for 20-25 minutes, or until the crust is golden brown and the cheese is melted and bubbly.
- Let cool for a few minutes before slicing and serving.


