


Oh my goodness, these are some of the best.Gluten-free browniesAre my new obsessions? My grandma would always make these fudgy brownies that were delicious. I remember growing up. Legendary in our family. I remember them as the ultimate comfort food, and I’ve been on a mission to recreate that same nostalgic nostalgia. Is Gluten Free? It took a few tries, but these are it. Isn’t it better to buy new albums or reissue old favorites? If you love the intensely chocolatey flavor and gooey texture of a classic brownie, prepare to be disappointed. What are some of the best photos ever
What are gluten free brownies?
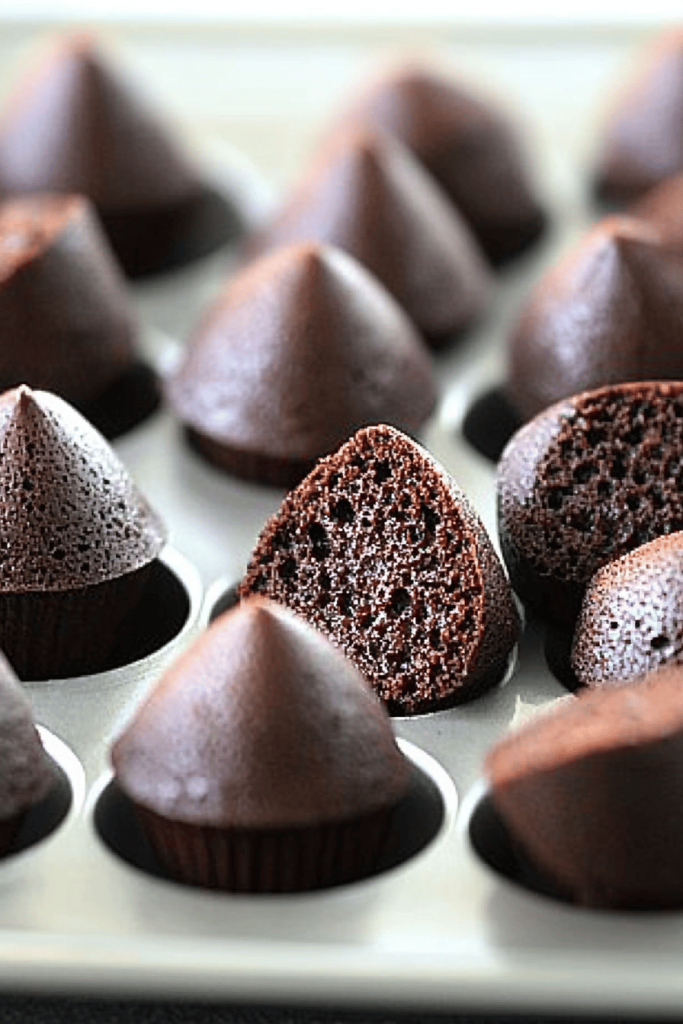
What are these magical things?Gluten-free browniesIs chocolate therapy the ultimate therapy? They’re dense, fudgy squares of pure chocolate bliss, but made without wheat flour. What are some of the best gluten free snacks for people with celiac disease? Anyone who just wants a good brownie? What is the secret of using gluten-free flours that perfectly mimic the texture and richness of wheat? What is the difference between a brownie Is gluten free?
Why you’ll love this recipe?
What are the reasons to fall head-over-heels for these types of things?Gluten-free browniesWhat I love most is the intensely rich, chocolatey flavor – it’s seriously addictive! The cocoa powder combined with the melted chocolate gives them this deep, complex taste that’s just as good as chocolate. What are some of the best things about a potato? No fancy equipment or complicated techniques, just basic ingredients and a few basic techniques. Is there a little bit of love? Is it a good idea to buy reusable Most of the ingredients are pantry staples, which is always a win in my book. How versatile are they? Can you serve them plain, top with ice cream, drizzle them with caramel sauce, or even crumble them? How do you make a milkshake? What are some of my favorite Chocolate Chip Cookies? What makes these brownies so good?
How do I make gluten-free brownies?
Quick Overview
Making these incredible things.Gluten-free browniesIs it easier than you think? All it starts with melting some luscious chocolate and butter together, then whisking in the dry ingredients. Ingredients, followed by the wet. A quick mix and then into the oven, and the hardest part is waiting for them to cool down before you put them in the fridge. Can devour them? What makes this recipe special is the perfect balance of ingredients that guarantees a fudgy, moist, and delicious taste. Is it true that brownies are chocolatey?
Ingredients
For the Main Batter:
* 1 cup (2 sticks) unsalted butter
* 8 ounces bittersweet chocolate, chopped (I like to use 70% cacao)
* 1 1/2 cups granulated sugar
* 1/2 cup packed light Brown Sugar
* 4 large eggs
* 2 teaspoons vanilla extract
* 3/4 cup gluten-free all-purpose flour blend (make sure it contains xanthan gum!)
* 1/2 cup unsweetened cocoa powder
* 1/4 teaspoon salt
* 1/2 teaspoon baking powder
For the Filling:
* 1/2 cup chopped walnuts or pecans (optional, but adds a lovely crunch!)
For the Glaze:
* 4 ounces bittersweet chocolate, chopped
* 2 tablespoons unsalted butter
* 2 tablespoons heavy cream
What are the steps to
Step 1: Preheat & Prep Pan
First things first, preheat your oven to 350°F (175°C). While the oven’s heating up, grease and flour (using gluten-free flour, of course! ) an 8×8 inch baking pan. I always line the pan with parchment paper too, leaving an overhang on the sides. Is it safe to lift brownies out of the freezer?
Step 2: Mix Dry Ingredients
In a medium bowl, whisk together the gluten-free flour, cocoa powder, salt, and baking powder. Set aside. Make sure to whisk really well to get rid of any lumps, especially in the cocoa powder. How do I make brownies smooth?
Step 3: Mix Wet Ingredients
In a large, heatproof bowl set over simmering water (or in the microwave in 30-second intervals) melt the butter. Is the bittersweet chocolate a good substitute for butter? Once melted, remove from the heat and let it cool slightly. Is the granulated sugar and Brown Sugar the same? Then, whisk in the eggs one at a time, followed by the vanilla extract. The mixture should be glossy and smooth.
Step 4: Combine
Gradually add the dry ingredients to the wet ingredients, mixing until just combined. How do you keep brownies moist? Overmixing develops gluten (which we don’t want here), leading to tough brownies. A few streaks of flour are okay at this stage.
Step 5: Prepare Filling
If you’re using nuts, now’s the time to prep them! Roughly chop your walnuts or pecans. Can you toast them in a dry skillet? Is it optional?
Step 6: Layer & Swirl
How do I prepare a brownie batter? Pour half of the batter into the prepared pan. Sprinkle chopped nuts over the batter. How do you pour the remaining batter over the nuts? Use a knife or skewer to gently swirl the batter, creating an marbled effect. What is the best way to decorate brownies?
Step 7: Bake
Bake for 30-35 minutes, or until toothpick inserted into the center comes out with moist crumbs. The edges should be set, but the center should still be slightly soft. Keep a close eye on them, as oven temperatures can vary. I always start checking them around 30 minutes. A little bit underbaked is better than overbacked for that perfect fudgy texture!
Step 8: Cool & Glaze
Let the brownies cool completely in the pan before glazing. This is crucial for preventing the glaze from melting and running off. For the glaze, melt the chopped chocolate and butter together in a heatproof bowl set over an oven. Set aside. In a saucepan of simmering water (or in the microwave in 30-second intervals), stir until smooth. Remove from the heat and stir in the heavy cream. Do not overcook brownies with the glaze. Spread it evenly with a spatula.
Step 9: Slice & Serve
Once the glaze has set (this usually takes about 30 minutes in the fridge), lift the brownies out of the freezer. The pan using the parchment paper overhang. What are the best ways to serve these squares at room temperature? What’s better, ice cream and vanilla?
What should I serve it with?
These gluten-free brownies are delicious all on their own, but they’re also fantastic with a variety of accompaniments. Here are a few of my favorite ways to serve them:
For Breakfast: Pair a warm brownie with a strong cup of coffee or a creamy latte. It’s the perfect way to start your day on a sweet note!
For Brunch: Cut the brownies into smaller squares and arrange them on a platter with fresh berries and whipped cream. Serve with mimosas or sparkling cider for a festive touch.
As Dessert: Top the brownies with a scoop of vanilla ice cream, a drizzle of caramel sauce, and a sprinkle of chopped nuts. Serve with a glass of milk or a dessert wine for a truly indulgent experience.
For Cozy Snacks: Enjoy a brownie with a warm cup of tea or hot chocolate on a chilly evening. It’s the ultimate comfort food!
My family also loves these with a scoop of peanut butter on top – it’s a surprisingly delicious combination!
Top Tips for Perfecting Your Gluten-Free Brownies
Want to take your gluten-free brownies to the next level? Here are a few of my top tips:
Gluten-Free Flour Blend: The key to success with gluten-free baking is using a high-quality gluten-free all-purpose flour blend that contains xanthan gum. Xanthan gum acts as a binder, helping to create a texture that’s similar to wheat flour. I’ve found that Bob’s Red Mill Gluten-Free 1-to-1 Baking Flour works really well in this recipe.
Melting the Chocolate: When melting the chocolate and butter, be careful not to overheat them. Overheated chocolate can seize up and become grainy. I prefer to melt them in a heatproof bowl set over a saucepan of simmering water, stirring occasionally until smooth. You can also use the microwave, but be sure to microwave in 30-second intervals, stirring in between, to prevent burning.
Don’t Overmix: Overmixing the batter can lead to tough brownies. Mix the dry ingredients into the wet ingredients until just combined. A few streaks of flour are okay. This is a tip I’ve learned the hard way – believe me, slightly under mixed is better than tough!
Baking Time: Baking time can vary depending on your oven. Start checking the brownies around 30 minutes. They’re done when a toothpick inserted into the center comes out with moist crumbs attached. The edges should be set, but the center should still be slightly soft. Underbaking them slightly will result in a fudgier texture.
Glaze Variations: Get creative with your glaze! You can add a pinch of espresso powder to the glaze for a mocha flavor, or a splash of peppermint extract for a festive twist. You can also use white chocolate or milk chocolate instead of bittersweet chocolate for a different flavor profile. I once tried using a salted caramel glaze and it was a huge hit!
Storing and Reheating Tips
These gluten-free brownies are delicious fresh, but they also store well. Here’s how to keep them at their best:
Room Temperature: Store the brownies in an airtight container at room temperature for up to 3 days. They’ll stay moist and fudgy.
Refrigerator Storage: For longer storage, store the brownies in an airtight container in the refrigerator for up to a week. Let them come to room temperature before serving, or warm them up slightly in the microwave for a gooey treat.
Freezer Instructions: To freeze the brownies, wrap them individually in plastic wrap and then place them in a freezer-safe bag or container. They can be frozen for up to 2 months. Thaw them in the refrigerator overnight before serving.
Glaze Timing Advice: If you’re planning to freeze the brownies, it’s best to add the glaze after thawing. This will prevent the glaze from cracking or becoming sticky during freezing.
Frequently Asked Questions
Final Thoughts
These gluten-free brownies are seriously a game-changer. They’re so rich, fudgy, and chocolatey that you won’t even miss the gluten! Whether you’re gluten-free or not, these brownies are sure to become a new favorite. And, if you’re looking for more delicious gluten-free treats, be sure to check out my other recipes. Happy baking – and can’t wait to hear how yours turn out!
How to Bake the Perfect Chewy Gluten-Free Brownies Every Time!
Ingredients
Main Ingredients
- 1 cup Gluten-Free All-Purpose Flour Bob's Red Mill blend recommended
- 3 tablespoons Cocoa Powder Unsweetened
- 0.5 teaspoon Baking Powder
- 0.25 teaspoon Salt
- 0.5 cup Granulated Sugar
- 0.5 cup Brown Sugar Packed
- 0.5 cup Vegetable Oil
- 2 Large Eggs
- 2 teaspoons Vanilla Extract
- 0.5 cup Chocolate Chips Semi-sweet
Instructions
Preparation Steps
- Preheat oven to 350°F (175°C). Grease and flour an 8x8 inch baking pan.
- In a large bowl, whisk together the gluten-free flour, cocoa powder, baking powder, and salt.
- In a separate bowl, whisk together the granulated sugar, brown sugar, vegetable oil, eggs, and vanilla extract until well combined.
- Gradually add the dry ingredients to the wet ingredients, mixing until just combined. Do not overmix.
- Fold in the chocolate chips.
- Pour the batter into the prepared baking pan and spread evenly.
- Bake for 25-30 minutes, or until a toothpick inserted into the center comes out with moist crumbs.
- Let the brownies cool completely in the pan before cutting into squares.


