


The Ultimate Chocolate Fudge Recipe You’ll Want to Make Again and Again
You know that moment when you’re craving something rich, chocolatey, and melt-in-your-mouth perfect? That’s exactly why I’m sharing my go-to chocolate fudge recipe with you today. This isn’t just any fudge—it’s the kind that makes people pause mid-bite and say, “Wait… what’s in this? It’s incredible.” I’ve made it for holidays, potlucks, late-night cravings, and even as a gift wrapped in wax paper with a little ribbon. It’s foolproof, deeply satisfying, and honestly, one of those recipes that feels like a warm hug in dessert form. Plus, it only takes about 20 minutes of active time, which means you can whip it up even when your schedule’s crazy. So grab your favorite mug of coffee (or tea!), because I’m about to walk you through the creamiest, dreamiest chocolate fudge you’ll ever taste—made with love, a pinch of patience, and zero fancy equipment.
What Is Chocolate Fudge?
Chocolate fudge is a classic American confection known for its smooth, velvety texture and intense chocolate flavor. Unlike brittle or hard candies, fudge is soft and sliceable—almost like a dense brownie in candy form. Traditionally made by combining sugar, butter, and milk (or cream) and heating them to a precise temperature, then stirring in chocolate until glossy and thick, real fudge relies on careful timing and a little bit of chemistry to get that perfect bite. But don’t let that scare you! The version I’m sharing uses a simplified approach that skips the candy thermometer while still delivering that rich, creamy consistency we all crave. Whether you grew up eating homemade fudge during the holidays or you’re trying it for the first time, this recipe brings back that nostalgic sweetness with a modern, easy twist. It’s indulgent without being overwhelming, and once you taste it, you’ll understand why fudge has been a beloved treat for generations.
Why You’ll Love This Recipe
This chocolate fudge recipe is everything you want in a dessert: simple, decadent, and totally customizable. First off, it uses just six ingredients—most of which you probably already have in your pantry. No need for special tools or hard-to-find items. Second, it’s incredibly forgiving. I’ve made it in rush, doubled it for parties, and even tweaked it with add-ins like sea salt, nuts, or espresso powder, and it always turns out beautifully. The texture? Oh, it’s that ideal balance between fudgy and firm—smooth enough to melt on your tongue but sturdy enough to slice neatly for gifting or serving. And let’s talk flavor: it’s deeply chocolatey, not overly sweet, with a richness that comes from real cocoa and quality chocolate. Plus, it’s naturally gluten-free and can easily be made dairy-free with a few swaps if needed. Whether you’re making it for a holiday platter, a thoughtful homemade gift, or just because you deserve a little treat, this fudge hits the spot every single time. Trust me—your friends will be begging for the recipe (and maybe even showing up at your door with empty plates).
How to Make Chocolate Fudge
Quick Overview
This chocolate fudge comes together in under 30 minutes from start to finish. You’ll melt butter and chocolate, stir in sweetened condensed milk and vanilla, pour into a pan, and let it chill until set. It’s a no-bake method that skips the fuss of candy thermometers and double boilers, making it perfect for beginners and busy bakers alike. The result is a luxuriously smooth, rich fudge that slices cleanly and tastes like pure chocolate heaven.
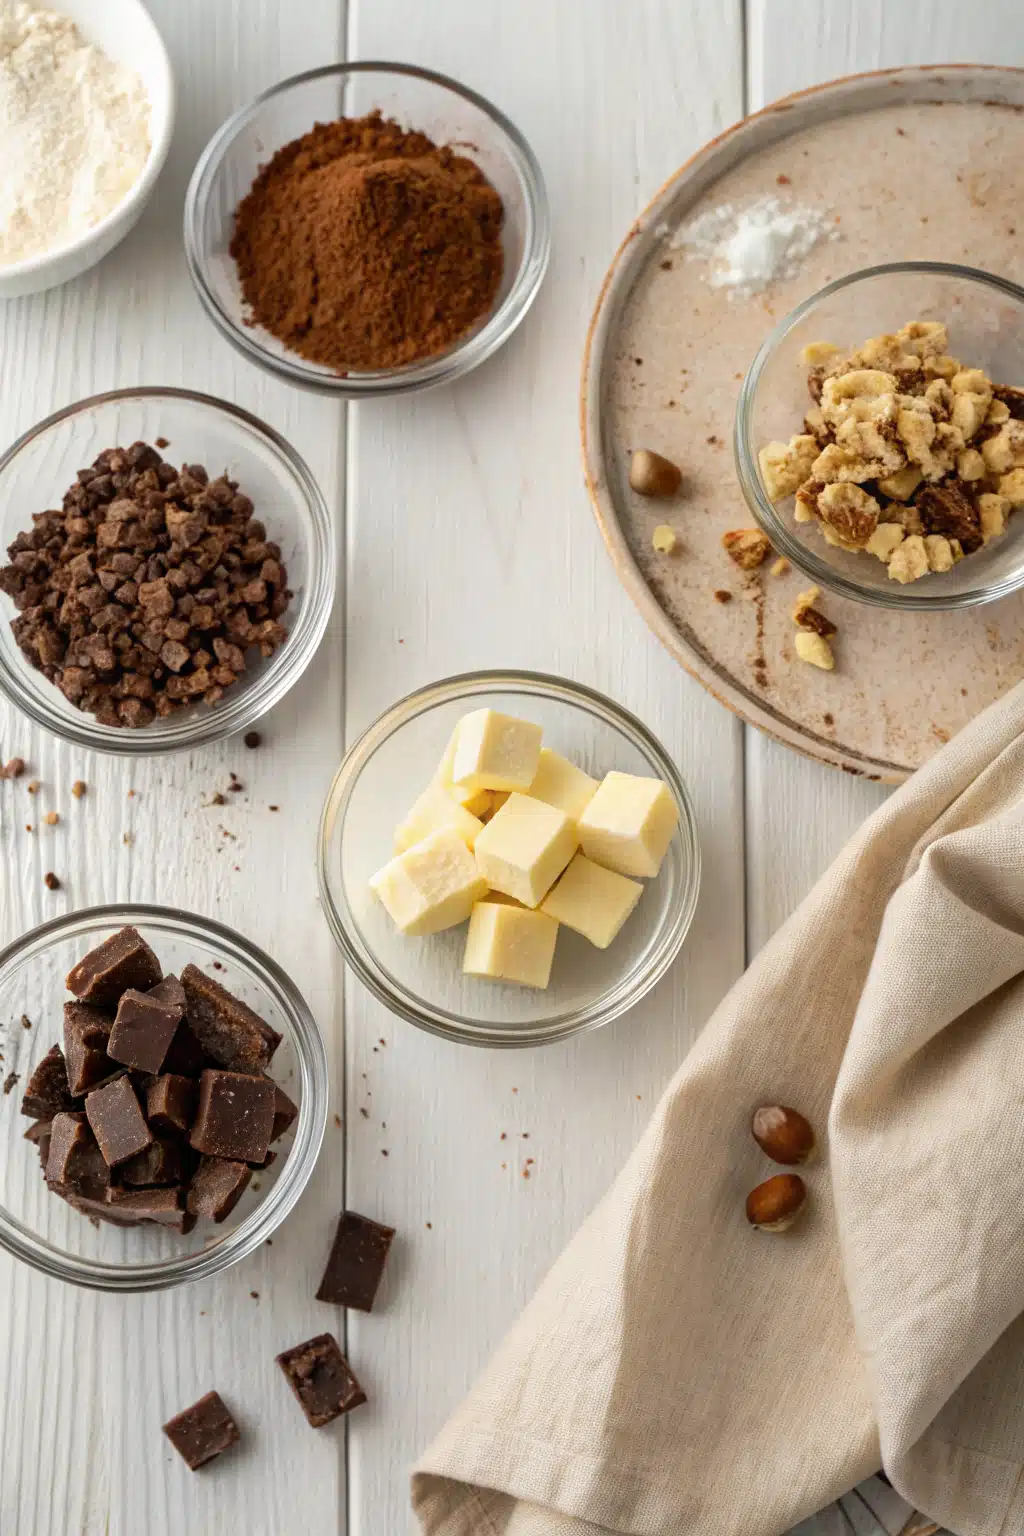
Ingredients
You’ll need: 1 cup (2 sticks) unsalted butter, chopped; 12 ounces semi-sweet chocolate chips or chopped chocolate bar; 1 can (14 oz) sweetened condensed milk; 1 teaspoon pure vanilla extract; ¼ teaspoon salt; and optional add-ins like ½ cup chopped walnuts, 1 tablespoon instant espresso powder, or a pinch of flaky sea salt for topping.
Step-by-Step Instructions
Step 1: Preheat & Prep Pan
Line an 8×8-inch baking pan with parchment paper, leaving an overhang on the sides for easy removal later. Set aside.
Step 2: Melt Butter and Chocolate
In a medium saucepan over low heat, melt the butter until just bubbling. Remove from heat and immediately add the chocolate chips. Let sit for 1 minute, then stir gently with a silicone spatula until completely smooth and glossy. If needed, return to low heat for 10-second intervals, stirring constantly, until fully melted.
Step 3: Add Remaining Ingredients
Stir in the sweetened condensed milk, vanilla extract, and salt until fully combined. If using add-ins like nuts or espresso powder, fold them in now. The mixture should be thick, shiny, and homogenous.
Step 4: Pour and Chill
Pour the fudge mixture into the prepared pan and spread evenly with a spatula. If desired, sprinkle with flaky sea salt or extra nuts. Refrigerate for at least 2 hours, or until firm.
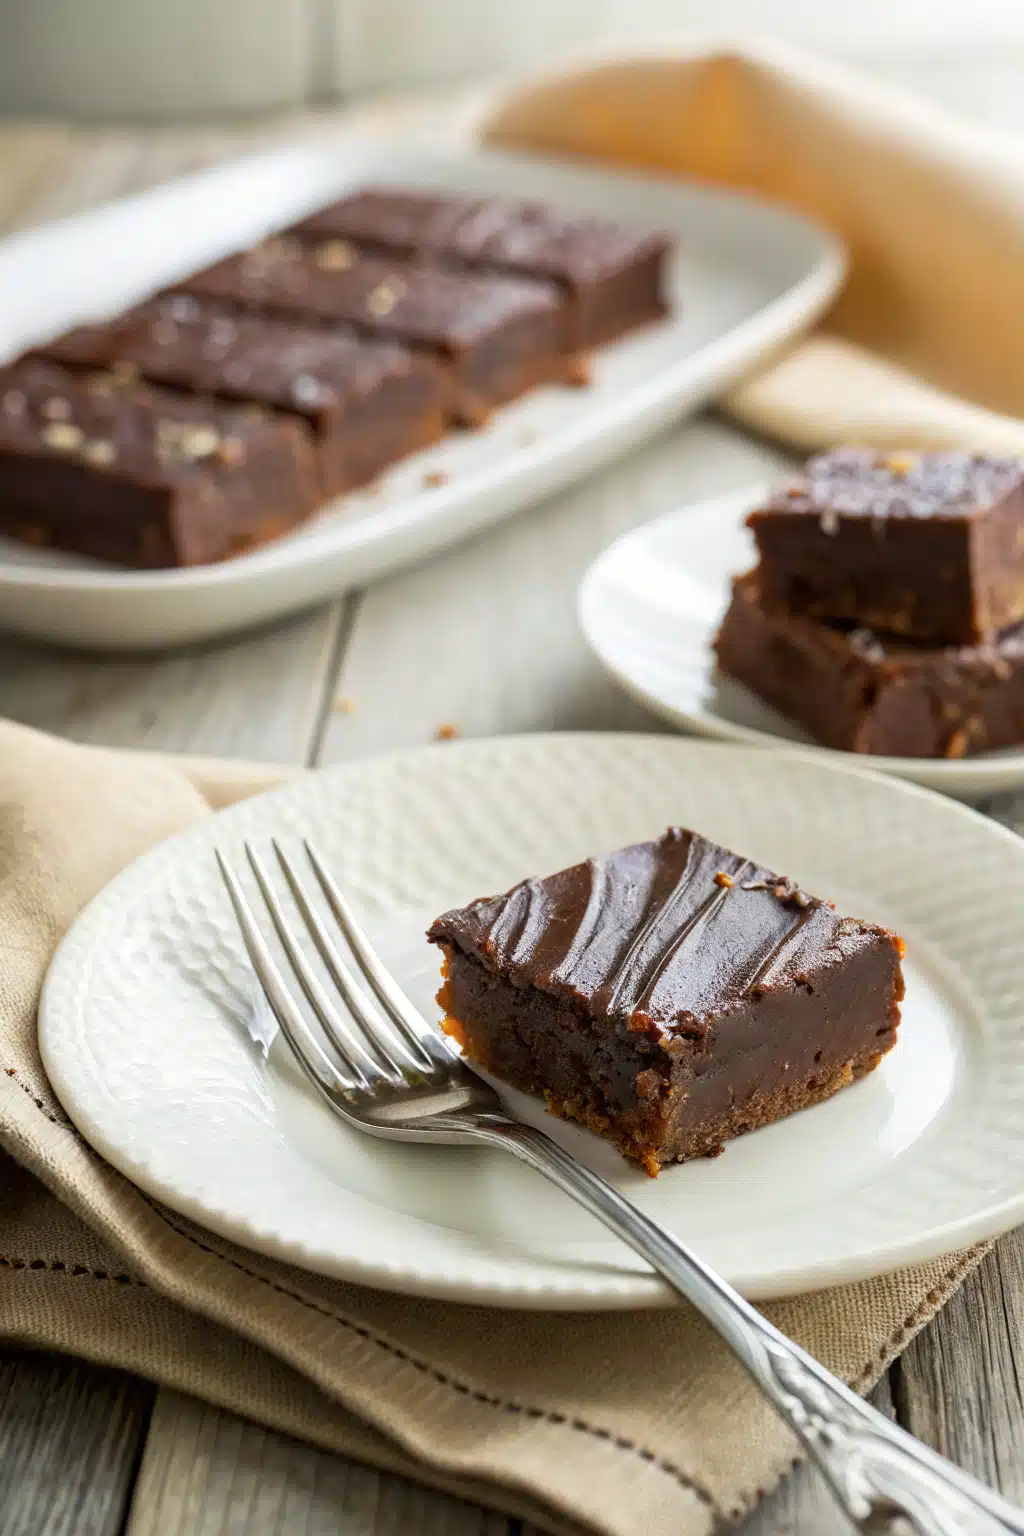
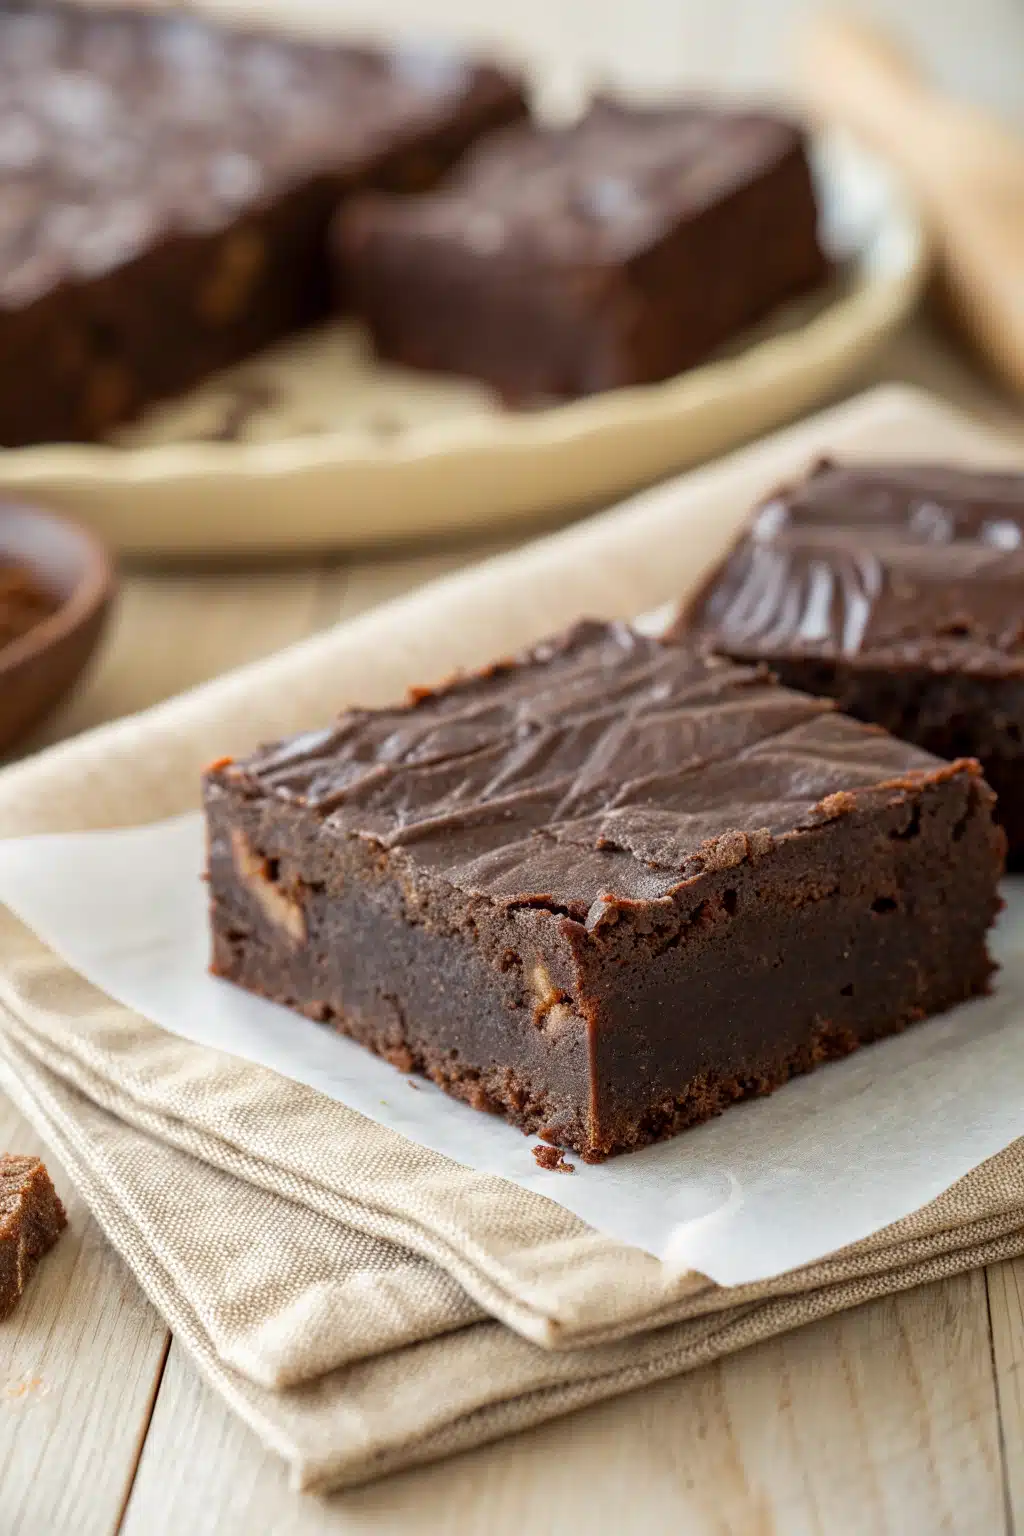
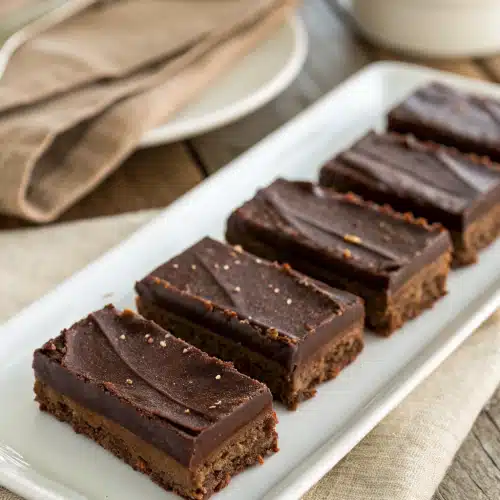
Step 5: Slice and Serve
Use the parchment overhang to lift the fudge out of the pan. Cut into 1-inch squares using a sharp knife. Store in an airtight container.
What to Serve It With
This chocolate fudge shines on its own, but it’s also amazing alongside a scoop of vanilla ice cream, a drizzle of caramel sauce, or a handful of fresh berries. It pairs beautifully with coffee or red wine for an after-dinner treat, and it’s a star player on holiday dessert trays. Try wrapping individual pieces in cellophane with a ribbon for a thoughtful homemade gift—they’re always a hit!
Top Tips for Perfecting Your Chocolate Fudge
For the creamiest texture, use high-quality chocolate (I love Ghirardelli or Valrhona). Avoid overheating the mixture—low and slow is the way to go. If your fudge seems too soft after chilling, it likely needed a bit more time in the fridge. Conversely, if it’s too hard, next time reduce the chilling time slightly or add a tablespoon more condensed milk. And don’t skip the parchment lining—it makes removal so much easier!
Storing and Reheating Tips
Store fudge in an airtight container in the refrigerator for up to 2 weeks, or freeze for up to 3 months. Let frozen fudge thaw in the fridge overnight before serving. It’s best served chilled, but if you prefer it at room temperature, let it sit out for 10–15 minutes before slicing.
Frequently Asked Questions
Final Thoughts
There’s something truly special about making fudge from scratch—it’s cozy, comforting, and deeply rewarding. Every time I make this recipe, I’m reminded of childhood holidays, kitchen windows fogged with steam, and the sweet smell of chocolate filling the house. Whether you’re sharing it with loved ones or keeping it all to yourself (no judgment here!), I hope this chocolate fudge brings you as much joy as it’s brought me over the years. Give it a try, tweak it to your taste, and don’t be surprised if it becomes your new go-to dessert. After all, life’s too short not to enjoy a little chocolate magic now and then.
Chocolate Fudge
Ingredients
Main Ingredients
- 3 cups semi-sweet chocolate chips
- 1 can sweetened condensed milk 14 oz / 397g
- 0.25 cup unsalted butter
- 1 teaspoon vanilla extract
- 0.25 teaspoon salt
Instructions
Preparation Steps
- Line an 8x8-inch baking pan with parchment paper, leaving an overhang on the sides for easy removal.
- In a medium saucepan, combine chocolate chips, sweetened condensed milk, and butter.
- Heat over low heat, stirring constantly, until the chocolate and butter are completely melted and the mixture is smooth.
- Remove from heat and stir in vanilla extract and salt until fully combined.
- Pour the fudge mixture into the prepared pan and spread evenly with a spatula.
- Refrigerate for at least 2 hours, or until firm.
- Lift the fudge out of the pan using the parchment overhang and cut into 16 squares.
- Store in an airtight container in the refrigerator for up to 2 weeks.


