


Oh, friend, do I have a treat for you today! You know how sometimes you’re just craving something truly decadent, something that hits all the right notes – fudgy, chewy, sweet, and a little salty? Well, get ready, because I’m about to share the ultimate indulgence that’s been a secret weapon in my kitchen for years: my go-to Snickers Brownies Recipe. Imagine your favorite classic brownie, only it’s been whisked away to a candy bar wonderland, studded with chunks of Snickers, swirled with caramel, and topped with a glorious chocolate glaze. It’s not just a dessert; it’s an experience, a little bite of pure joy that honestly, once you try it, you’ll wonder how you ever lived without it. My kids ask for these by name, and trust me, they disappear faster than a magician’s rabbit! If you love a rich chocolate brownie but want to elevate it to something truly unforgettable, something even more special than your grandma’s beloved Chocolate Chip Cookies, then this is the one. It’s perfect for a weekend treat, a special occasion, or, let’s be real, any Tuesday that needs a little extra sparkle.

What are Snickers Brownies?
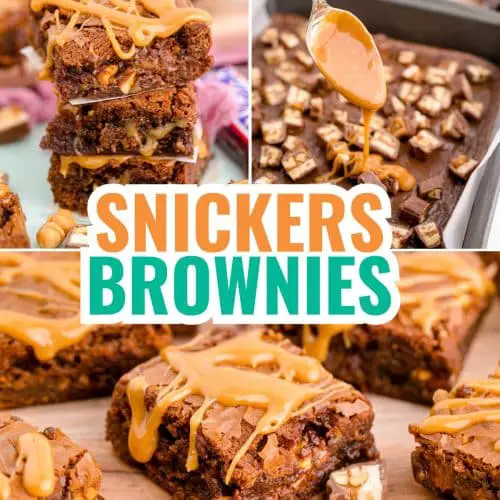
So, what exactly are Snickers Brownies? Think of it as the ultimate mash-up between a deeply fudgy, incredibly rich chocolate brownie and your absolute favorite candy bar, the Snickers. It’s essentially a thick, chewy brownie base that’s generously loaded with chopped Snickers bars, often featuring an extra layer of caramel or a gooey nougat-like swirl baked right into the middle. The beauty of this Snickers Brownies Recipe is that it takes all those textures and flavors we adore from a Snickers bar – the milk chocolate, the creamy nougat, the luscious caramel, and the salty peanuts – and embeds them into the fudgiest brownie you could ever dream of. It’s more than just adding candy to a brownie; it’s a symphony of textures and tastes, creating something familiar yet entirely new and exciting. It’s truly a dessert that brings together the best of both worlds, making it an instant hit with anyone who tries a bite.
Why you’ll love this recipe?
There are so many reasons why this Snickers Brownies Recipe has become a cherished staple in my home, and I know you’ll feel the same way! What I love most about this is just how utterly satisfying it is. It’s not just “good”; it’s a showstopper. You know how some desserts are just okay? This isn’t one of those. This one makes people’s eyes light up!
- Flavor Explosion: What is the flavor of a cigarette? Oh, the flavor! Each bite is a journey. You get that intense, deep chocolate from the brownie, then the chewy caramel, the nutty crunch of peanuts, and that distinct Snickers nougat, all covered in a smooth chocolate. It’s sweet, it’s salty, it’s everything you could possibly want. It’s honestly better than any store-bought brownie I’ve ever tasted, and that’s saying something!
- Surprising Simplicity: What is the best way to describe Simplicity? You might look at these and think they’re complicated, but honestly, they’re not! The base is a straightforward one-bowl brownie recipe, and then it’s just about adding those glorious Snickers chunks and a quick swirl. It’s a lifesaver on busy nights when you want something impressive without spending hours in the kitchen.
- Budget-Friendly Decadence: You get so much bang for your buck with this recipe. Brownie ingredients are super accessible and affordable, and a few Snickers bars turn them into something truly gourmet. It’s way cheaper than buying fancy desserts from a bakery, but tastes just as good, if not better!
- Incredible Versatility: These brownies are amazing warm with a scoop of vanilla ice cream, perfect chilled straight from the fridge for a midday pick-me-up, or just as they are for dessert. They’re fantastic for potlucks, birthday parties, or just a cozy night in. I’ve even wrapped them up individually as homemade gifts during the holidays, and people absolutely adore them. They’re a step above even my fudgiest chocolate fudge cake when it comes to sheer crowd-pleasing power.
This Snickers Brownies Recipe truly stands out because it combines the nostalgic comfort of a classic candy bar with the irresistible allure of homemade brownies. It’s pure comfort in every single square, and I promise, once you try it, you’ll be hooked!

How to Make Snickers Brownies
Quick Overview
Making these Snickers Brownies is surprisingly simple, and that’s part of their charm! We’re essentially going to whip up a gloriously rich and fudgy Brownie Batter, fold in generous chunks of everyone’s favorite Snickers bars, and then bake it to gooey perfection. The magic happens when those Snickers pieces melt and create little pockets of caramel, nougat, and peanuts throughout the brownie. There’s no fancy equipment needed, just a bowl, a whisk, and a little love. It’s a pretty quick process from start to finish, perfect for when that chocolate craving hits hard!
Ingredients
Gathering your ingredients is the first step to brownie bliss. Quality matters here, especially for your chocolate, but don’t stress too much – even standard pantry items will make these incredible!
For the Main Batter:
- 1 cup (2 sticks) unsalted butter, melted (I always use unsalted so I can control the salt level!)
- 2 cups granulated sugar
- 4 large eggs, at room temperature (this really helps with the emulsification!)
- 1 teaspoon vanilla extract (the good stuff, please!)
- 1 cup all-purpose flour
- ¾ cup unsweetened cocoa powder (Dutch-processed gives a darker, less bitter flavor, which I love)
- ½ teaspoon baking powder
- ¼ teaspoon salt (enhances all that chocolatey goodness)
- 1 ½ cups (about 6-8 regular size bars) Snickers candy bars, roughly chopped (I like to chill them first so they don’t melt too much when chopping)
For the Filling:
- ½ cup caramel sauce (homemade or a good quality store-bought one works wonders)
- ¼ cup chopped roasted peanuts (optional, but adds an extra layer of crunch and nuttiness!)
For the Glaze:
- ½ cup semi-sweet chocolate chips (or finely chopped chocolate)
- 2 tablespoons unsalted butter
- 1 tablespoon light corn syrup (gives it that lovely shine and prevents cracking)
- 1 teaspoon vanilla extract
- Pinch of salt
Step-by-Step Instructions
Step 1: Preheat & Prep Pan
First things first, let’s get that oven ready. Preheat your oven to a cozy 350°F (175°C). Then, grab a 9×13 inch baking pan. This is my go-to size for brownies – gives you plenty to share, or, let’s be honest, plenty for yourself! Line it with parchment paper, leaving a slight overhang on the sides. This little trick is a lifesaver, trust me. It makes lifting the cooled brownies out of the pan an absolute breeze, no sticking, no mess. A light spray with non-stick cooking spray before the parchment doesn’t hurt either, just for extra insurance.
Step 2: Mix Dry Ingredients
In a medium bowl, whisk together your all-purpose flour, unsweetened cocoa powder, baking powder, and salt. Give it a good whisk for about 30 seconds to a minute, making sure everything is evenly combined. This is important because it ensures that the baking powder is distributed properly, so you don’t end up with unevenly risen spots. You’re looking for a uniform, light brown mixture. Set this aside for a moment.
Step 3: Mix Wet Ingredients
Now for the good stuff! In a large mixing bowl, combine your melted butter and granulated sugar. Whisk them together really well until they’re smooth and glossy – this usually takes about a minute or two. Then, one by one, beat in your eggs, mixing well after each addition. The mixture should start to look thick and slightly lighter in color. Finally, stir in the vanilla extract. Make sure your eggs are at room temperature; it really helps them incorporate smoothly into the batter, leading to a much fudgier brownie!
Step 4: Combine
It’s time to bring it all together! Gradually add your dry ingredient mixture into the wet ingredients. Mix on low speed, or gently fold with a spatula, until just combined. The key here is to not overmix! Overmixing develops the gluten in the flour, which can lead to tough, cakey brownies, and we want fudgy, chewy Snickers brownies, right? Stop mixing as soon as you see no more streaks of flour. A few small lumps are perfectly fine, even preferred!
Step 5: Prepare Filling
Take about two-thirds of your brownie batter and spread it evenly into your prepared 9×13 inch pan. Now, for the star of the show! Sprinkle about two-thirds of your chopped Snickers bars evenly over this first layer of brownie batter. If you’re using extra chopped peanuts, scatter about half of those over the Snickers now too. Then, drizzle your caramel sauce generously over the Snickers and peanuts. I like to warm my caramel slightly if it’s too thick, just to make it easier to drizzle evenly.
Step 6: Layer & Swirl
Carefully spoon the remaining brownie batter over the caramel and Snickers layer. It might not cover everything perfectly, and that’s totally okay – part of the charm is those little peek-a-boo candy bits! Gently spread it out as best you can. Now, for the fun part: grab a butter knife or a skewer and gently swirl through the layers a few times. Don’t go crazy; you’re not trying to fully combine everything, just create some lovely marbling with the caramel. Finally, sprinkle the remaining chopped Snickers and peanuts (if using) over the top of the batter. This ensures you get that beautiful Snickers crown on your finished brownies!
Step 7: Bake
Pop your glorious pan of Snickers brownie batter into the preheated oven. Bake for about 25-30 minutes. Now, ovens can be tricky, so keep an eye on them! You’ll know they’re done when a toothpick inserted into the center comes out with moist crumbs attached, but not wet batter. You don’t want it to come out completely clean, as that usually means dry brownies. For that perfect fudgy texture, it’s better to slightly underbake than overbake. The edges should look set, but the center will still be a bit soft. Trust your instincts! My oven tends to run a little hot, so I usually check at 23 minutes.
Step 8: Cool & Glaze
Once baked, pull those beautiful Snickers brownies out of the oven and let them cool completely in the pan on a wire rack. This is probably the hardest part of the entire process, but resist the urge to cut into them right away! Cooling allows them to set up properly, giving you those perfect, clean-cut squares. While they’re cooling, you can whip up the glaze. In a small microwave-safe bowl, combine the chocolate chips, butter, corn syrup, vanilla extract, and salt. Microwave in 30-second intervals, stirring after each, until smooth and glossy. Once the brownies are completely cool (and I mean completely!), drizzle that luscious glaze over the top. You can spread it gently with an offset spatula if you like a more even coating.
Step 9: Slice & Serve
After the glaze has set (you can pop them in the fridge for about 15-20 minutes to speed this up, if you’re impatient like me!), it’s time to slice into your masterpiece. Use the parchment paper overhang to carefully lift the entire slab of brownies out of the pan and onto a cutting board. For clean cuts, use a sharp, warm knife – I like to run mine under hot water and wipe it clean between each slice. Cut them into squares, whatever size suits your craving! These Snickers brownies are amazing served at room temperature, but they’re also fantastic slightly warmed or even chilled. Enjoy every single bite!

What to Serve It With
Okay, so you’ve made these incredible Snickers brownies. Now, how do you make them even more special? Honestly, they’re so good on their own, but sometimes a little something extra just makes the experience that much better. Here are some of my favorite ways to enjoy them, depending on the mood or occasion:
For Breakfast: Yes, I said breakfast! Don’t judge. Sometimes you just need a little treat to kickstart a lazy weekend morning.
- Coffee Pairings: A warm square of Snickers brownie with a steaming mug of black coffee or a creamy latte is pure bliss. The slight bitterness of the coffee really balances the sweetness of the brownie.
- Morning Presentation Ideas: Slice them into smaller, more “breakfast-appropriate” squares (or just one big one, no judgment here!) and serve alongside a simple fruit salad. It feels indulgent but also a little balanced.
For Brunch: Elevate your brunch game!
- Elegant Plating: Cut them into elegant rectangles and serve with a dollop of fresh whipped cream and a sprinkle of flaky sea salt. Maybe a few fresh raspberries on the side for color.
- Beverage Recommendations: Pair with a mimosa or a sparkling cider for a sophisticated touch. The bubbles cut through the richness beautifully.
As Dessert: This is where they truly shine!
- After-dinner Styling: My absolute favorite way to serve them for dessert is slightly warm with a scoop (or two!) of really good vanilla bean ice cream. The cold, creamy ice cream melting into the warm, fudgy brownie with all those Snickers bits is just *chef’s kiss*. A drizzle of extra caramel sauce on top makes it even more decadent.
- Complementary Flavors: Try a scoop of salted caramel ice cream or even a coffee-flavored one. A light dusting of cocoa powder or a few more chopped peanuts always looks lovely.
For Cozy Snacks: When you just need a little something extra.
- Casual Serving: These are fantastic just as they are, straight from the container. Keep them on the counter for easy grabbing. My kids grab them for after-school snacks, and I’ve been known to sneak a square with a cup of tea in the afternoon.
- Comfort Pairings: A tall glass of cold milk is a classic for a reason – it’s the perfect companion to a rich brownie. Or cozy up with a mug of hot chocolate on a chilly evening.
No matter how you serve them, this Snickers Brownies Recipe is bound to bring smiles. My family tradition is always warm with ice cream for birthdays – it never fails!
Top Tips for Perfecting Your Snickers Brownies
I’ve made these Snickers brownies countless times, and through all the baking (and a few learning experiences!), I’ve picked up some tips and tricks that truly make a difference. These little nuggets of wisdom will help you achieve that perfect, fudgy, and utterly irresistible batch every single time. Trust me on these ones!
Chocolate Selection:
- Quality Matters: For the brownie batter itself, don’t skimp on the cocoa powder. A good quality Dutch-processed cocoa powder will give you a darker, richer, and less acidic chocolate flavor, which is exactly what we want in a fudgy brownie. You’ll notice the difference.
- The Snickers: Make sure your Snickers bars are chilled before you chop them. This prevents them from getting too sticky and messy, making for cleaner cuts and better distribution in your batter. Plus, it helps them hold their shape a little better during baking.
Mixing Advice:
- Don’t Overmix! This is probably the most crucial brownie rule. Once you add the dry ingredients to the wet, mix only until just combined. Overmixing develops gluten, which leads to tough, cakey brownies, and we are absolutely aiming for fudgy! A few streaks of flour are better than a perfectly smooth, overmixed batter.
- Room Temperature Eggs: Seriously, this makes a huge difference. Room temperature eggs emulsify much better into the butter and sugar mixture, leading to a smoother, more uniform batter and ultimately a better texture in your finished Snickers brownies.
Swirl Customization:
- Gentle Swirls Only: When you’re swirling in the caramel, use a light hand. You want ribbons and pockets of caramel, not a fully integrated caramel-flavored batter. I usually make just a few broad S-shapes with a knife or skewer.
- Top it Off: Don’t forget to sprinkle some extra chopped Snickers on top before baking! Not only does it look beautiful, but it creates those delightful caramelized, slightly crunchy bits on the surface that everyone fights over.
Ingredient Swaps:
- Butter vs. Oil: I prefer butter for flavor, but you can swap out half the butter for a neutral oil (like vegetable or canola) for an even chewier brownie, if that’s your jam. It’s a trick I learned from a friend and it really works!
- Candy Bar Variations: While these are Snickers brownies, feel free to experiment with other caramel-based candy bars like Milky Way or even Rolos. Just chop them up and use them in the same way. The world is your oyster!
- Nut-Free? If you have a nut allergy, you can absolutely omit the extra peanuts in the filling and glaze. You could even use a nut-free chocolate bar in place of Snickers, though it wouldn’t truly be a Snickers brownie then!
Baking Tips:
- Know Your Oven: Every oven is different. Your brownies might be done in 25 minutes or they might need 35. Start checking at the lower end of the time range. For fudgy brownies, you want a toothpick inserted into the center to come out with moist crumbs, not liquid batter, but not completely clean either. A slightly underbaked brownie is a fudgy brownie.
- Don’t Overbake: This is a cardinal sin in brownie baking. Overbaking turns fudgy brownies into dry, cakey ones. Pull them out when the edges are set and the center still looks a tiny bit jiggly. They’ll continue to set as they cool.
Glaze Variations:
- Consistency is Key: If your glaze is too thick, add a tiny splash of milk or cream. If it’s too thin, stir in a few more chocolate chips and let it sit for a minute to melt, then stir again.
- Salted Caramel Drizzle: Instead of the chocolate glaze, sometimes I just do a simple drizzle of salted caramel sauce on top for an extra layer of sweet and salty goodness. So good!
- No Glaze? No Problem! These Snickers brownies are delicious even without the glaze. A simple dusting of powdered sugar can be a pretty and tasty alternative if you’re short on time.
These tips are really born from trial and error in my own kitchen. I’ve definitely had my share of dry brownies or messy candy chunks, so learning these little tricks has been a game-changer. I hope they help you make your best batch of Snickers brownies yet!
Storing and Reheating Tips
Once you’ve got a batch of these glorious Snickers brownies, you’ll want to make sure they stay fresh and delicious for as long as possible. (Though, let’s be real, they usually don’t last long enough for storage to be a major concern in my house!) Here’s how I store them, based on my own trial-and-error.
Room Temperature:
- Duration: These brownies keep beautifully at room temperature for up to 3-4 days. I find they actually get even fudgier and more flavorful on the second day as all those Snickers flavors meld together.
- Covering Methods: The key here is airtight! Store them in an airtight container or individually wrap squares tightly in plastic wrap. This prevents them from drying out and keeps them wonderfully moist.
- Freshness Maintenance: Keep them away from direct sunlight or heat, which can cause the chocolate to melt or the brownies to get stale faster. A cool, dry spot on your counter is perfect.
Refrigerator Storage:
- Container Types: Again, an airtight container is your best friend here. Layer the brownies with parchment paper if you’re stacking them to prevent sticking.
- Shelf Life: In the fridge, these Snickers brownies will stay fresh for up to a week. Chilling them also makes them super dense and chewy, which is a texture I absolutely adore!
- Quality Preservation: Make sure they’re completely cool before placing them in the fridge. Putting warm brownies into a cold environment can create condensation, making them soggy. No one wants soggy brownies!
Freezer Instructions:
- Wrapping Techniques: Yes, you can freeze brownies! Wrap individual squares tightly in plastic wrap, then place them in a freezer-safe zip-top bag or airtight container. This double layer of protection helps prevent freezer burn.
- Duration: They’ll last happily in the freezer for up to 2-3 months. Perfect for when you need a quick chocolate fix without baking. I always make a double batch and freeze half for later!
- Thawing Methods: When you’re ready to enjoy, simply take them out of the freezer and let them thaw at room temperature for an hour or two. You can also pop a frozen square in the microwave for 15-30 seconds for a warm, gooey treat.
Glaze Timing Advice:
- Glazed vs. Unglazed: If you plan on freezing a batch, I recommend freezing them unglazed. Then, whip up a fresh batch of glaze when you thaw them. It just keeps the glaze looking its best and avoids any weird textures after thawing. If you’re just refrigerating, glazing beforehand is perfectly fine.
I’ve found that even after a few days, these Snickers brownies are still incredibly good, a testament to their rich, fudgy nature. So don’t hesitate to make a big batch!
Frequently Asked Questions
Final Thoughts
And there you have it, my friend! This Snickers Brownies Recipe isn’t just another dessert; it’s a testament to how simple ingredients can come together to create something truly magical and incredibly comforting. Every time I bake a batch, the smell alone brings everyone to the kitchen, and seeing the smiles on my family’s faces as they bite into that perfect fudgy, chewy, sweet, and salty square? That’s what it’s all about for me. It’s perfect when you’re craving something sweet at 10pm but don’t want to bake a whole cake, or when you need a surefire crowd-pleaser for any gathering. It’s a recipe that delivers on all fronts: flavor, fun, and pure satisfaction.
If you loved this, you might also enjoy my Salted Caramel Chocolate Chip Cookies or my Ultimate Fudgy Brownies if you’re in a pure chocolate mood. But for now, I truly hope you give these Snickers brownies a try. I can’t wait to hear how yours turn out! Please leave a comment below with your thoughts, ratings, or any variations you might try. Happy baking!
Snickers Brownies Recipe
Ingredients
Brownie Base & Filling
- 1 box Betty Crocker milk chocolate brownie mix
- 2 large eggs
- 0.5 cup vegetable oil
- 3 tablespoons water
- 6 ounces caramel bits or squares
- 3 tablespoons heavy cream
- 1.5 cups Snickers bars chopped (about 3 full-size or 10 fun-size bars)
Instructions
Preparation Steps
- Preheat your oven to the temperature recommended on the brownie mix package. Lightly spray a 9" x 9" baking pan with non-stick cooking spray or line it with parchment paper to ensure the brownies are easy to remove.
- Prepare the brownie mix according to the package directions. Pour half of the prepared batter into the baking pan and bake for 6 minutes. Remove from the oven and set aside.
- In a microwave-safe bowl, combine the caramel bits or squares with the heavy cream. Microwave for 25 seconds, then stir well. Repeat this process until the caramels are completely melted and smooth.
- Evenly spread the chopped Snickers bars over the bottom half of the baked brownies in the pan. Drizzle all of the melted caramel evenly over the Snickers layer.
- Carefully pour the remaining brownie batter over the Snickers and caramel layer. Use a spatula to gently spread the batter evenly across the top, covering the filling.
- Bake the brownies for the remaining cooking time specified on the brownie package, or until a toothpick inserted into the center comes out clean, free of uncooked batter.
- Allow the brownies to cool in the pan for several minutes before slicing. They are easier to cut once cooled, but are also delicious served warm.


