


Oh, where do I even begin with these Peanut Butter Chocolate Chip cookies? They’re not just cookies, you know? They’re happiness baked into a perfect, chewy, chocolate-studded disc. I swear, the moment the aroma starts wafting from the oven, my entire house just seems to exhale. It’s that distinct, comforting smell of warm peanut butter mingling with rich chocolate, a scent that instantly takes me back to my grandma’s kitchen. We’ve tried so many recipes over the years, searching for *that* perfect balance – not too cakey, not too crispy, just utterly divine. And while a good chocolate chip cookie is a classic for a reason, there’s something about adding that nutty depth of peanut butter that just elevates everything. It’s like the best of both worlds, a collaboration of legends. This particular peanut butter chocolate chip cookie recipe is the one that’s truly stolen our hearts (and demolished our cookie jars) repeatedly. It’s the one my kids beg for when they have friends over, the one I whip up when I need a quick treat after a long day, and honestly, the one I sneak into my purse for a little midday pick-me-up.
What is peanut butter chocolate chip cookie?
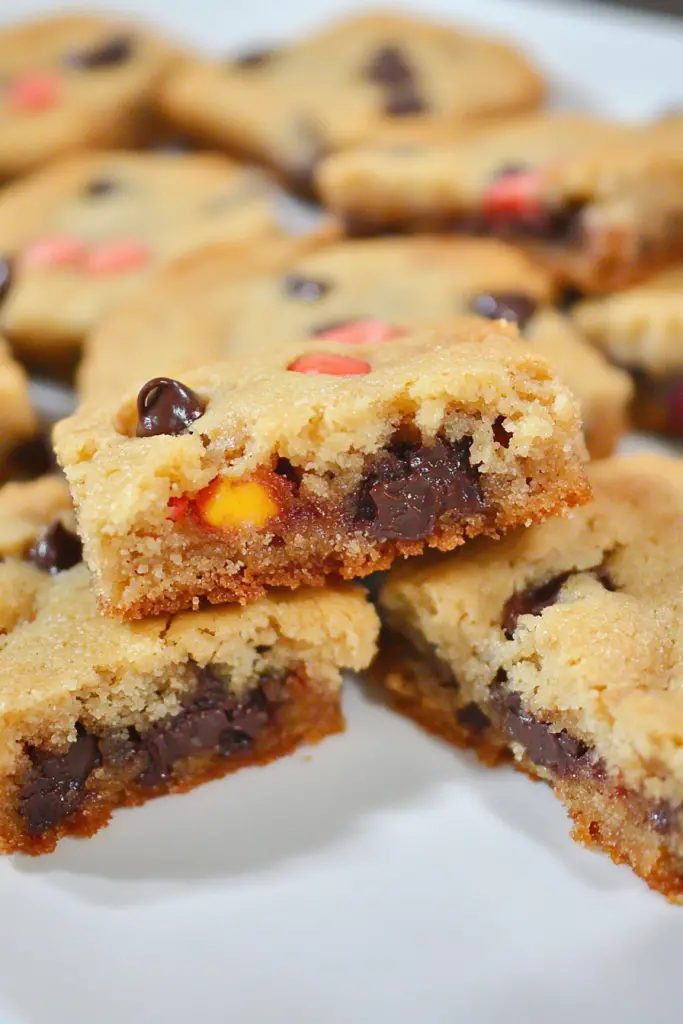
So, what exactly are these magical little things? At their core, they’re a delightful mashup of two universally loved treats: the classic chocolate chip cookie and the humble Peanut Butter Cookie. Imagine your favorite soft and chewy chocolate chip cookie, but then someone whispered a secret ingredient into its ear: creamy, dreamy peanut butter. That peanut butter doesn’t just add flavor; it contributes to an incredible texture, making these cookies wonderfully tender and delightfully rich. They’re not just a simple cookie; they’re an experience. Think of it as a flavor hug, a comforting embrace in cookie form. It’s essentially a peanut butter cookie that’s been generously invited to a chocolate chip party, and they’re both having an absolute blast. They’re approachable, familiar, yet always manage to surprise with their depth of flavor.
Why you
There are so many reasons why I keep coming back to this Peanut Butter Chocolate Chip cookie recipe, and I just know you’re going to fall in love with it too. First and foremost, the FLAVOR is absolutely out of this world. You get that satisfying nutty richness from the peanut butter perfectly balanced with pockets of gooey, melted chocolate. It’s not overly sweet, which I really appreciate, and the peanut butter flavor really shines through. Then there’s the SIMPLICITY. Honestly, if you can cream butter and sugar, you can make these cookies. The steps are straightforward, and you don’t need any fancy equipment. I’ve made these when I’ve had exactly 30 minutes to spare, and they’ve come out beautifully. They’re also incredibly COST-EFFECTIVE. Most of the ingredients are pantry staples, and even if you need to pick up a few things, they’re generally very budget-friendly, especially when you consider how many cookies you get from one batch! And the VERSATILITY is fantastic. While they’re perfect on their own, I love them warm with a glass of cold milk, but they’re also wonderful crumbled over ice cream or even used to sandwich a scoop of ice cream between two for a decadent treat. What I love most about this recipe, though, is its reliability. I’ve tried countless variations over the years, some too dry, some too greasy, some that spread too much. This one just *works*. It delivers that perfect, soft-baked texture every single time. It’s the kind of cookie that makes people ask, “Oh, what recipe is this?!” and that, my friends, is the highest compliment.
How do I make chocolate chip cookies?
Quick Overview
This recipe is all about creating a perfectly balanced dough that bakes up into chewy, flavorful cookies. We’ll start by creaming butter and sugars with Peanut Butter to build our flavor base, then incorporate eggs and vanilla. Dry ingredients are whisked together separately and then gently combined. Finally, we’ll fold in plenty of chocolate chips. The key is not to overmix once the flour is added, which ensures that signature tender crumb. It’s a simple, no-fuss process that yields incredible results, making it my go-to for any cookie craving.
Ingredients
For the Main Batter:
* 1 cup (2 sticks or 226g) unsalted butter, softened: Make sure it’s properly softened but not melted! This is crucial for proper creaming, which gives cookies their structure. I usually take mine out about an hour before I plan to start baking.
* 3/4 cup (150g) granulated sugar: This contributes to tenderness and sweetness.
* 3/4 cup (160g) packed light brown sugar: Brown sugar adds moisture and a lovely caramel note, making the cookies chewier.
* 1 cup (260g) Creamy Peanut Butter: Use your favorite creamy, no-stir peanut butter. Natural peanut butter can sometimes affect the texture, so I stick to standard varieties here for consistency.
* 2 large eggs: Room temperature eggs incorporate better into the batter.
* 2 teaspoons pure vanilla extract: Don’t skimp on good quality vanilla; it really makes a difference!
* 2 1/2 cups (315g) all-purpose flour: Measure this accurately by spooning it into your measuring cup and leveling off with a straight edge. Too much flour can make your cookies dry.
* 1 teaspoon baking soda: This is what gives the cookies their lift.
* 1/2 teaspoon baking powder: A little extra lift and chewiness comes from this.
* 1/2 teaspoon salt: Balances the sweetness and enhances all the other flavors.
* 1 1/2 cups (255g) semi-sweet chocolate chips: Feel free to use milk chocolate, dark chocolate, or even a mix! Mini chips are also great for more even distribution.
For Extra Flavor Boost (Optional):
* 1/4 cup chopped roasted peanuts: For an extra peanutty crunch. I love this addition!
* 1/4 teaspoon cinnamon: A subtle warmth that pairs beautifully with peanut butter and chocolate.
Step-by-Step Instructions
Step 1: Preheat & Prep Pan
Preheat your oven to 375°F (190°C). Line baking sheets with parchment paper. This is a game-changer for easy cleanup and preventing cookies from sticking. If you don’t have parchment paper, you can lightly grease your baking sheets, but parchment is definitely preferred.
Step 2: Mix Dry Ingredients
In a medium bowl, whisk together the all-purpose flour, baking soda, baking powder, and salt. Make sure everything is thoroughly combined. This ensures that the leavening agents and salt are evenly distributed, which is key for consistent cookie texture and flavor. I like to give it a good few whisks to aerate it a bit, too.
Step 3: Mix Wet Ingredients
In a large bowl, or the bowl of your stand mixer fitted with the paddle attachment, cream together the softened butter, granulated sugar, and light brown sugar until light and fluffy. This usually takes about 3-5 minutes. Then, beat in the creamy peanut butter until well combined. Next, add the eggs one at a time, beating well after each addition. Stir in the vanilla extract. The mixture should look smooth and well-emulsified.
Step 4: Combine
Gradually add the dry ingredients to the wet ingredients, mixing on low speed until *just* combined. Be careful not to overmix here! Overmixing develops the gluten in the flour, which can lead to tough cookies. Stop mixing as soon as you no longer see streaks of dry flour. If you’re adding the optional chopped peanuts or cinnamon, stir them in gently at this stage.
Step 5: Prepare Filling
Now, fold in the semi-sweet chocolate chips. Use a sturdy spoon or spatula and gently fold them into the dough until they’re evenly distributed. Again, avoid overmixing. You want to see all those glorious chocolate chips!
Step 6: Layer & Swirl
This step is actually more about portioning and shaping your cookies! Drop rounded tablespoons of dough onto the prepared baking sheets, leaving about 2 inches between each cookie to allow for spreading. I find a cookie scoop is perfect for this, ensuring uniform size. You can gently flatten the tops of the dough balls slightly with your palm or the bottom of a glass if you prefer a flatter cookie, but they’ll spread on their own.
Step 7: Bake
Bake for 9-12 minutes, or until the edges are lightly golden brown and the centers look slightly underbaked. They will continue to set up as they cool. My oven tends to run a little hot, so I often check around the 9-minute mark. Trust your eyes more than the timer for that perfect chewy texture!
Step 8: Cool & Glaze
Let the cookies cool on the baking sheets for about 5 minutes before transferring them to a wire rack to cool completely. This is important because they are fragile when hot and need that little bit of time on the sheet to firm up. Once completely cooled, you can drizzle them with a simple glaze if you like, or just enjoy them as is!
Step 9: Slice & Serve
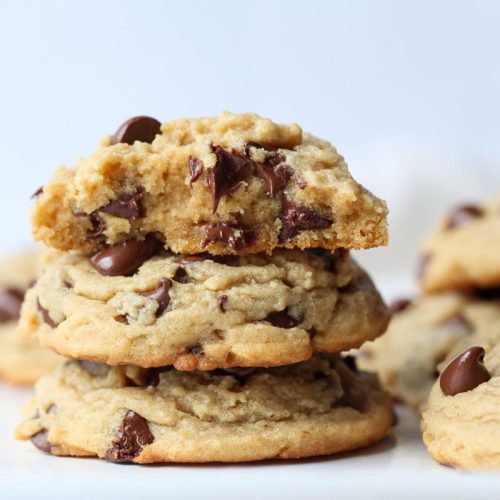
These cookies are best served at room temperature. They’re perfect for dunking in milk or coffee. If you’ve made a large batch, they’re fantastic for sharing with friends and family, or for packing in lunchboxes. The visual appeal of the chocolate chips peeking out is always a winner!
What to Serve It With
These peanut butter chocolate chip cookies are pretty spectacular all on their own, but they can certainly elevate a meal or a snack occasion. For breakfast, I love having one (or two, shh!) with my morning coffee. The rich flavors are a perfect start to the day. If you’re thinking brunch, these cookies make a wonderful addition to a sweeter spread. Imagine them alongside some fresh fruit and maybe a light yogurt parfait – they offer that satisfying treat without being overwhelmingly heavy. As a dessert, they’re a no-brainer, of course! Serve them warm with a scoop of vanilla bean ice cream, or perhaps with a drizzle of extra chocolate sauce for ultimate decadence. They also pair beautifully with a rich, dark roast coffee or even a small glass of red wine if you’re feeling adventurous. For cozy snacks, they are the ultimate comfort food. They’re perfect for an afternoon tea, a movie night with the family, or just a little treat when you need a pick-me-up. My personal family tradition is to always have a batch ready for my son’s soccer games, packaged up in a tin for easy distribution to the team after a win (or just to celebrate their hard work!). They’re also a lifesaver for unexpected guests; you can pull a few out of the cookie jar, and suddenly, you’re the most hospitable person ever.
Top Tips for Perfecting Your Peanut Butter Chocolate Chip Cookies
I’ve made these peanut butter chocolate chip cookies more times than I can count, and through trial and error (and a few slightly less-than-perfect batches!), I’ve picked up a few tricks that I think really make a difference. First, and I can’t stress this enough, the PEANUT BUTTER is key. Use a standard creamy peanut butter – the kind you find in the middle aisle of the grocery store, not the natural stuff that separates. Natural peanut butters can have a higher oil content and less stability, which can lead to greasy or spread-out cookies. My other big piece of advice is about the SUGARS. Using a combination of granulated and light brown sugar is essential for that perfect chewy texture. Brown sugar has molasses, which keeps the cookies moist and adds that lovely caramel note. For MIXING, remember the golden rule: don’t overmix once the flour is added. Seriously, mix until *just* combined. Overmixing activates the gluten in the flour, resulting in a tougher, more cake-like cookie, which is not what we’re going for here. We want tender and chewy! For the CHOCOLATE CHIPS, I love using a mix of semi-sweet and dark chocolate chunks. The chunks tend to melt into gooey pools, while the chips provide smaller bursts of chocolate. If you want to make them extra special, try pressing a few extra chocolate chips onto the tops of the dough balls before baking for that picture-perfect look. When it comes to BAKING, ovens can be finicky! My best tip is to bake until the edges are set and lightly golden, but the centers still look a little soft and underdone. They’ll continue to bake on the hot baking sheet for a few minutes after you pull them out of the oven, giving you that ultimate chewy texture. If you’re finding your cookies are spreading too much, try chilling the dough for at least 30 minutes before baking. This helps the butter solidify, preventing excessive spreading. Lastly, for ingredient swaps, I’ve successfully subbed half the all-purpose flour for whole wheat flour for a slightly nuttier flavor, but I wouldn’t go higher than that. And for the chocolate, feel free to experiment with white chocolate chips or butterscotch chips too!
Storing and Reheating Tips
One of the best things about these peanut butter chocolate chip cookies is how well they keep. If you’ve managed to resist eating them all in one sitting, here’s how to store them to maintain that deliciousness. At ROOM TEMPERATURE, well-stored cookies will stay fresh for about 3-4 days. The key is to keep them in an airtight container. I usually use a cookie tin or a good quality plastic container. Make sure they’ve cooled completely before storing, or you’ll end up with condensation and soggy cookies! For REFRIGERATOR STORAGE, they can last a bit longer, up to a week. Again, an airtight container is your best friend. The cooler temperature might make them slightly firmer, but they’re still wonderfully chewy. If you want to FREEZER INSTRUCTIONS, they’re perfect for long-term storage. You can freeze baked cookies in a single layer on a baking sheet until firm, then transfer them to a freezer-safe bag or container for up to 3 months. When you’re ready to enjoy them, you can thaw them at room temperature for a few hours, or pop them in a low oven (around 300°F or 150°C) for a few minutes to warm them up and bring back that fresh-baked quality. For the GLAZE TIMING advice, I highly recommend only glazing cookies that you plan to eat within a day or two. Glaze doesn’t freeze particularly well and can make stored cookies sticky. It’s best to apply the glaze just before serving for the freshest taste and best texture.
Frequently Asked Questions
Final Thoughts
So there you have it – my tried-and-true recipe for peanut butter chocolate chip cookies. I truly believe this recipe strikes that perfect balance of rich peanut butter flavor, melty chocolate goodness, and that wonderfully chewy texture that we all crave. It’s a recipe that’s brought so much joy to my kitchen, and I’m so excited for you to bring it into yours. Whether you’re a seasoned baker or just starting out, this recipe is incredibly forgiving and rewarding. It’s the kind of treat that makes any day feel a little brighter. If you love these, you might also enjoy my classic chocolate chip cookie recipe or my chewy oatmeal raisin cookies for more comforting bakes! I really hope you give these peanut butter chocolate chip cookies a try. I can’t wait to hear what you think and see your delicious creations! Let me know in the comments below how yours turned out, or if you have any fun variations you’ve tried.
Peanut Butter Chocolate Chip Cookies
Ingredients
Main Ingredients
- 0.5 cup butter, room temperature
- 0.5 cup creamy peanut butter
- 0.5 cup granulated sugar
- 0.5 cup light brown sugar
- 1 large egg egg
- 1.5 teaspoons vanilla extract
- 1 teaspoon cornstarch
- 0.5 teaspoon baking soda
- 0.5 teaspoon baking powder
- 0.5 teaspoon kosher salt
- 1 cup all-purpose flour
- 1 cup semi-sweet chocolate chips
Instructions
Preparation Steps
- Preheat the oven to 350°F (175°C). Line a baking sheet with parchment paper and set aside.
- In the bowl of your stand mixer fitted with the paddle attachment, cream together the softened butter and peanut butter on medium speed for 1 minute until smooth.
- Add in the granulated sugar and light brown sugar. Mix for 2 minutes until the mixture is pale in color and fluffy, scraping down the sides of the bowl as needed.
- Add the large egg and vanilla extract. Continue mixing for another 45 seconds until well combined and smooth.
- In a small bowl, whisk together the cornstarch, baking soda, baking powder, and kosher salt. Add this mixture to the wet ingredients and mix for a few seconds until just combined.
- Turn the mixer to low speed. Gradually add the all-purpose flour and mix until the dough just comes together. Stir in the semi-sweet chocolate chips evenly.
- Using a medium cookie scoop (about 2 tablespoons), drop rounded balls of dough onto the prepared baking sheet, spacing them about 2 inches apart.
- Bake for 9-10 minutes, or until the edges of the cookies are golden brown. The centers may still look slightly soft.
- Remove the baking sheet from the oven and let the cookies cool on the sheet for 2-3 minutes. Then, carefully transfer them to a wire rack to cool completely.


