


I first learned this recipe from a friend who swore it could turn any Tuesday into a celebration. The moment I took a bite, the kitchen filled with the cozy scent of cocoa and warm strawberry brightness—the kind of aroma that makes you slow down, pour another coffee, and savor the moment. This Strawberry Red Velvet Cheesecake isn’t just dessert; it’s a little memory you can share with people you love. It’s got the drama of red velvet without requiring a full cake, plus the creaminess of cheesecake that somehow stays light enough to serve after dinner. It’s incredibly forgiving, too—the velvet color stays vibrant, the strawberry ribbons look pretty, and the whole thing slices like a dream. If you’ve got a busy week, this is my go-to because it feels fancy but comes together with calm, patient steps. It’s a nice reminder that good things aren’t always hard to pull off. And yes, I’ll admit this one disappeared in minutes at my house when friends stopped by for coffee.
What is strawberry red velvet cheesecake?
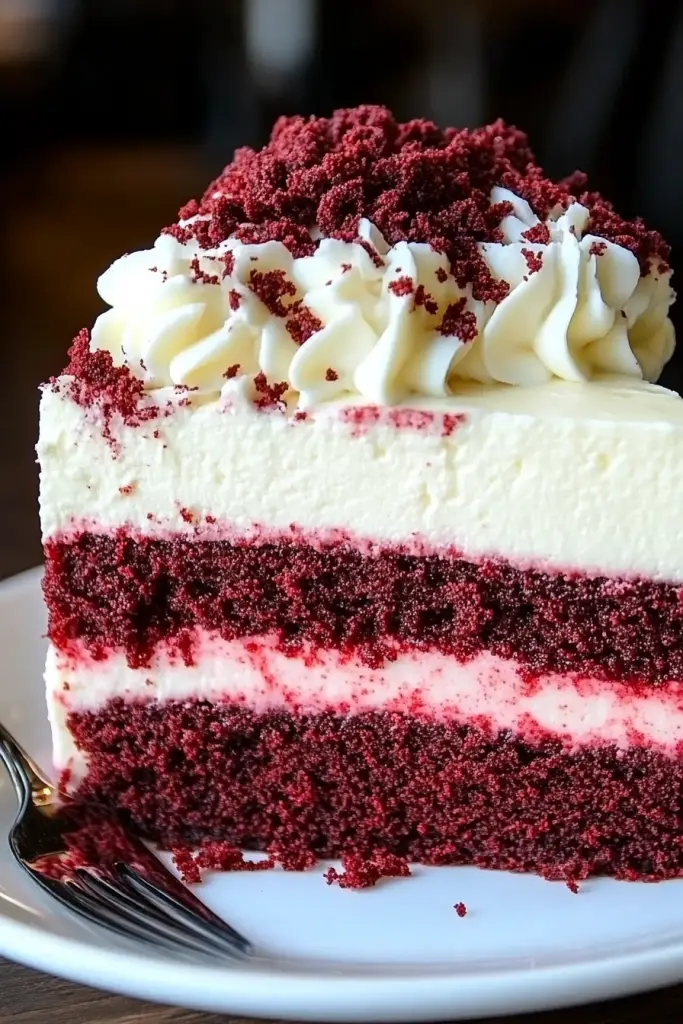
Think of Strawberry Red Velvet Cheesecake as the cozy fusion of a velvety chocolate cake and a tangy, creamy cheesecake—tinted with a hint of cocoa to evoke red velvet, brightened with strawberry accents, and finished with a glossy glaze. It’s essentially a cheesecakey filling swirled with strawberry puree, all set on a crunchy, chocolate-tinged crust. The name comes from the two flavors you’ll taste in every bite: the familiar, cocoa-kissed red velvet personality and the lush, tangy cheesecake that anchors it. It’s not a heavy, post-dinner slab; it’s a charming, dessert-for-sharing kind of treat that looks as pretty as it tastes. I love that you can dial up or down the chocolate intensity or strawberry brightness depending on how you mix the batters. It’s a crowd-pleaser that doesn’t demand a long, looming bake time—and honestly, it feels a little like baking a more stylish version of your favorite slice-and-sip coffee shop staple, but in your own kitchen.
Why you
What I love most about this Strawberry Red Velvet Cheesecake is the balance between flavors and textures. The crust brings a mild chocolate crust crunch that plays so nicely with the creamy, tangy filling. The red velvet component gives you that faint cocoa kiss and a whisper of vanilla, while the strawberry ribbon streaks through the center like sunshine in a cheesecake. It’s a win on presentation and taste. It’s also wonderfully forgiving—you can tint the batter to your preferred shade of red, adjust the strawberry swirl for a brighter or subtler pop, and still end up with a luscious slice. It’s a lifesaver on busy nights because you can prep the crust and batters ahead, then bake and chill as you fit it into your schedule. My kids ask for this all the time, and it’s become a family favorite for birthdays, casual Fridays, or unexpected drop-ins. The ingredient list is approachable, the steps feel familiar, and the payoff is always a smile at the table. If you’ve enjoyed classic cheesecake or chocolatey velvet flavors, you’ll quickly see why this mashup lands so beautifully every time.
How do you make strawberry red velvet cheesecake?
Quick Overview
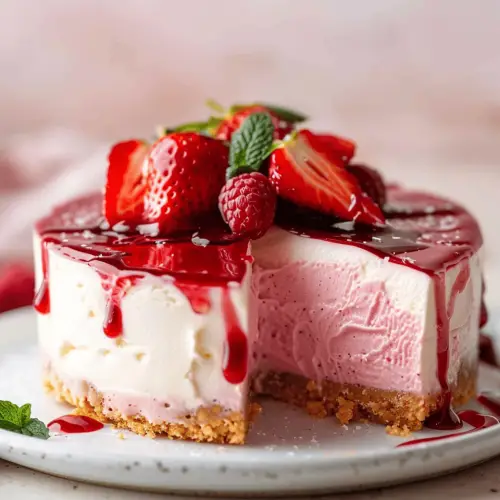
This Strawberry Red Velvet Cheesecake starts with a chocolate crust that sets the stage for a velvety cheesecake batter tinted a rosy red. You’ll dollop ribbons of bright strawberry puree through the filling, then bake the whole thing in a snug water bath to keep it creamy and smooth. After it cools, a glossy strawberry glaze brings everything together and makes the top shimmer. The result is a slice that looks fancy, tastes like a party, but takes friendly, straightforward steps to get there. If you’re short on oven time, you can prepare the crust in advance and store it wrapped in the fridge until you’re ready to assemble. The key is to keep an eye on the water bath and avoid overmixing, so you end up with a silken, slice-able cheesecake instead of a dense or cracked one.
Ingredients
For the Main Batter (Crust & Velvet Cheesecake Base):
– 1 1/2 cups Graham Cracker crumbs
– 2 tablespoons cocoa powder
– 1/4 cup granulated sugar
– 1/4 cup unsalted butter, melted
– pinch of salt
For the Filling:
– 24 oz (three 8 oz) cream cheese, softened
– 3/4 cup granulated sugar
– 3 large eggs + 1 yolk
– 1/2 cup sour cream
– 1 teaspoon vanilla extract
– 2 tablespoons cocoa powder
– 1–2 tablespoons red food coloring (more for a deeper red)
– 1/2 cup strawberry purée or well-melted strawberry jam (thinned with 1 tablespoon water if needed)
For the Glaze:
– 1/2 cup strawberry purée (or jam thinned with 1 teaspoon lemon juice)
– 1–2 tablespoons granulated sugar (to taste)
– 1 teaspoon lemon juice (optional, for brightness)
Step-by-Step Instructions
Step 1: Preheat & Prep Pan
Heat the oven to 325°F (163°C). Wrap a 9-inch springform pan with a double layer of heavy-duty foil to seal the bottom. The crust will bake in a water bath, and you don’t want any leaks spoiling the bath or the crust. Grease the sides lightly or spray with nonstick, and set the pan aside while you get everything ready.
Step 2: Mix Dry Ingredients
In a small bowl, whisk together the graham cracker crumbs, cocoa powder, sugar, and salt. The cocoa whispers through the crust, giving a faint chocolate kiss that ties nicely to the red velvet filling. These dry ingredients get you a sturdy, flavorful base that doesn’t crumble when you slice the cheesecake later.
Step 3: Mix Wet Ingredients
In a separate bowl, beat the softened cream cheese until silky, about 2 minutes. Add sugar and beat until smooth, then mix in the eggs one at a time, followed by the yolk. Beat in the sour cream, vanilla, cocoa powder, and red food coloring. The mixture should be smooth and evenly colored, with no lumps.
Step 4: Combine
Fold the dry ingredients into the wet mixture just until combined. Overmixing makes the cheesecake tough, so stop as soon as everything comes together. Stir in the strawberry purée in a couple of small swirls to keep the color marbled rather than fully blended.
Step 5: Prepare Filling
Pour the velvet cheesecake batter into the prepared crust until it’s about 3/4 full. Spoon, in small ribbons, the strawberry purée onto the surface. This is your first chance to see pretty pink swirls appear—don’t overdo it, you want color, not a pink puree puddle. If you’d like an extra pop of strawberry flavor, drizzle a few more spoonfuls of purée over the top and lightly swirl again with a knife.
Step 6: Layer & Swirl
Carefully pour the remaining batter over the top. Use a knife or spoon to make broad, gentle swirls by drawing from the center to the edge and back, creating a marbled look that hints at strawberry inside the velvet. Don’t over-swirl; you want distinct ribbons that bake into a pretty pattern.
Step 7: Bake
Set the pan in a larger baking dish and pour hot water halfway up the sides of the springform to create a convection-like environment for even cooking. Bake for 60–70 minutes until the center barely jiggles when nudged. If the top looks too glossy, it’s fine—the glaze will finish the surface after chilling. If a crust edge starts to crack, don’t panic; it’s common and will be hidden by the glaze.
Step 8: Cool & Glaze
Turn off the oven and let the cheesecake sit in the oven with the door ajar for about 30 minutes to ease into a gentle cool. Remove from the water bath and cool on a rack for 1–2 hours, then refrigerate for at least 4 hours, ideally overnight. Whisk together the strawberry purée, sugar, and lemon juice to form a glossy glaze. Once the cheesecake is fully chilled, spoon or brush the glaze over the top and let it set for 15–20 minutes before slicing.
Step 9: Slice & Serve
Keep your knife clean and warm between cuts for clean slices. A long serrated knife, wiped with a hot towel, makes clean, wide wedges that show off the marbled pattern. Garnish with fresh berries or a light dusting of cocoa powder if you like. This is the moment where you plate with a flourish and a smile, because you’ve earned it.
What to Serve It With
This cheesecake shines with a light, coffee-friendly accompaniment. I love a small cup of black coffee or a creamy latte on the side, which balances the tangy cream cheese and the chocolate edge. For a brunch version, a dollop of lightly whipped cream rounds out the richness without dulling the flavors. If you’re serving this after dinner, a simple espresso or a glass of sparkling rosé can be a delightful choice. For a more playful approach, cup-sized portions on mini dessert spoons with a single fresh strawberry perched on top look absolutely restaurant-worthy. My family tradition is to serve it with a handful of crushed pistachios for a gentle crunch and a pop of color. It’s flexible enough for breakfast mingling, dessert-focused gatherings, or casual family nights, and it never feels out of place.
For Breakfast: A tiny wedge with a dollop of yogurt and fresh berries pairs nicely with coffee and a quiet morning moment.
For Brunch: Slice into neat squares, arrange on a tray, and drizzle with extra strawberry glaze for a vibrant centerpiece.
As Dessert: Plate with extra berry compote and a mint leaf to elevate the color and aroma.
For Cozy Snacks: A chilled slice in the afternoon with a hot cup of tea hits the spot when you crave something sweet but not too heavy.
Top Tips for Perfecting Your Strawberry Red Velvet Cheesecake
Here are a few tricks I’ve learned after making this countless times. They keep the texture lush, the color true, and the flavors balanced.
Strawberry Prep: If you’re using fresh berries, simmer them briefly with a teaspoon of sugar and a squeeze of lemon to intensify flavor, then mash lightly for a bright puree. If you’re short on time, canned strawberry purée works beautifully and saves a step without sacrificing taste.
Mixing Advice: Cream cheese loves to be beaten until silky, but stop before you start to hear the mixture pulling away from the bowl. If you overbeat, the texture can become airy and bouncy rather than dense and creamy. Scrape the sides and bottom often to keep everything evenly blended.
Swirl Customization: For deeper marbling, layer a small amount of plain batter, then a ribbon of strawberry purée, repeat once, and finish with the rest of the batter. A light swirl makes pretty patterns, while a heavy swirl yields bold color waves.
Ingredient Swaps: Swap part of the cream cheese for mascarpone for a silkier mouthfeel, or use Greek yogurt in place of sour cream for a tangier, lighter texture. If you want a dairy-free version, try a full-fat coconut cream cheese, but expect a slightly different texture and set time.
Baking Tips: Use a water bath to keep the surface from cracking and bake until just set with a slight jiggle. If the edges brown too quickly, tent loosely with foil during the last 15 minutes. The center should still give slightly when moved.
Glaze Variations: If you prefer a glossy, clear finish, pass the glaze through a sieve to remove seeds. For a tangier finish, add a splash of lemon zest or a drop of orange liqueur. If you want a white contrast, a simple vanilla glaze works nicely over the pink stripe.
Lesson learned: keep your ingredients at room temperature when you’re mixing—soft cream cheese blends with other ingredients more smoothly, resulting in a silkier texture. Don’t rush the chill; the set time is part of what makes this cheesecake slice perfectly sliceable and not crumbly.
Storing and Reheating Tips
Storage can actually improve the flavor of this cheesecake as the flavors have a moment to mingle. Here’s how I keep it at its best.
Room Temperature: Not more than 2 hours out of the fridge. If you’re serving later in the day, refrigerate right after your slice ritual is done and bring to room temp for 15–20 minutes before serving for optimal creaminess.
Refrigerator Storage: Cover tightly or slice and store in an airtight container for up to 4 days. The glaze holds up well, but you’ll notice the color softens after a couple of days, so best enjoyed fresh-ish.
Freezer Instructions: Cheesecake freezes beautifully; wrap slices tightly in plastic wrap and then foil, or freeze the whole cake wrapped well. It will keep for up to 2 months. Thaw overnight in the fridge or at room temperature for a few hours before slicing. The glaze may need a quick reheat or fresh drizzle after thawing to regain its shine.
Glaze Timing Advice: If you’re freezing, apply the glaze after thawing for a crisp, bright finish. If you’re not, you can glaze before refrigerating and it’ll set into a glossy surface that doesn’t run.
Quality indicators: the cheesecake should still feel creamy, not rubbery; the crust should be crisp but not hard; the glaze should look shiny and appealing, with the strawberry color peeking through in ribbons.
Frequently Asked Questions
Final Thoughts
This Strawberry Red Velvet Cheesecake isn’t just a dessert; it’s a reminder that simple ingredients, treated with a little care, can turn into something extraordinary. The velvet chocolate note, balanced by tangy cream cheese and bright strawberry, feels festive without being fussy. It’s a recipe I keep coming back to because it travels well—from family dinners to weekend gatherings, it travels well in both flavor and mood. If you try it, I’d love to hear how you customize the color, the swirl, or the glaze. Do you go bold with more red? Do you keep the glaze ultra glossy or prefer a matte finish? Share your tweaks in the comments, rate the recipe, and bring your own memories to the table. Happy baking!
Strawberry Red Velvet Cheesecake
Ingredients
For the Crust
- 2.5 cups Graham cracker crumbs
- 0.375 cups Granulated sugar
- 0.375 cups Unsalted butter, melted
For the Red Velvet Cheesecake Filling
- 3 packages Cream cheese, softened 8 ounces each
- 1.5 cups Granulated sugar
- 4 large Eggs
- 1 teaspoon Vanilla extract
- 2 tablespoons Unsweetened cocoa powder
- 1 tablespoon Red food coloring
- 0.5 cup Sour cream
For the Strawberry Swirl
- 1 cup Fresh strawberries, hulled and sliced
- 0.25 cup Granulated sugar
- 1 tablespoon Lemon juice
Instructions
Preparation Steps
- Preheat oven to 350°F (175°C). Line the bottom of a 9-inch springform pan with parchment paper.
- In a medium bowl, combine graham cracker crumbs, 0.375 cups sugar, and melted butter. Press evenly into the bottom of the prepared springform pan to form the crust.
- Bake the crust for 8-10 minutes, or until lightly golden. Remove from oven and let cool completely.
- While the crust cools, prepare the strawberry swirl. In a small saucepan, combine sliced strawberries, 0.25 cups sugar, and lemon juice. Cook over medium heat, stirring occasionally, until strawberries have softened and the mixture has thickened, about 10-15 minutes. Mash some of the strawberries with a fork. Let cool.
- In a large bowl, beat cream cheese until smooth and creamy. Gradually beat in 1.5 cups sugar until well combined.
- Add eggs one at a time, beating well after each addition. Stir in vanilla extract, cocoa powder, red food coloring, and sour cream until just combined. Do not overmix.
- Pour half of the red velvet cheesecake batter over the cooled crust. Dollop spoonfuls of the cooled strawberry mixture over the batter. Swirl the strawberry mixture into the batter using a knife or skewer.
- Pour the remaining red velvet cheesecake batter over the swirled mixture. Dollop more strawberry mixture on top and swirl again.
- Bake in a water bath (place the springform pan in a larger roasting pan and fill the larger pan with about 1 inch of hot water) for 55-65 minutes, or until the edges are set and the center is slightly jiggly.
- Turn off the oven and leave the cheesecake inside with the door slightly ajar for 1 hour to prevent cracking. Remove from oven and let cool completely on a wire rack.
- Cover the cheesecake and refrigerate for at least 4 hours, or preferably overnight, before serving.


