


Red Velvet Cheesecake
You know that feeling when you want to make something that looks straight out of a fancy patisserie window—but doesn’t require hours in the kitchen or a degree in pastry arts? That’s exactly how I felt when I created this Red Velvet Cheesecake. It’s bold, beautiful, and surprisingly simple. No baking required, just a little patience while it chills, and voilà—a showstopper dessert that tastes as luxurious as it looks. The deep burgundy filling is rich with dark chocolate, lightly sweet, and has that dreamy velvety texture that melts on your tongue. I made this on a whim one afternoon when my recipe feed was looking a bit too beige—I needed colour! And boy, did I deliver. This isn’t just a cheesecake; it’s a conversation starter, a “wow” moment on a plate. Whether it’s for a birthday, dinner party, or just because you deserve something special, this recipe never fails to impress. And honestly? It’s way easier than you’d think.
What Is Red Velvet Cheesecake?
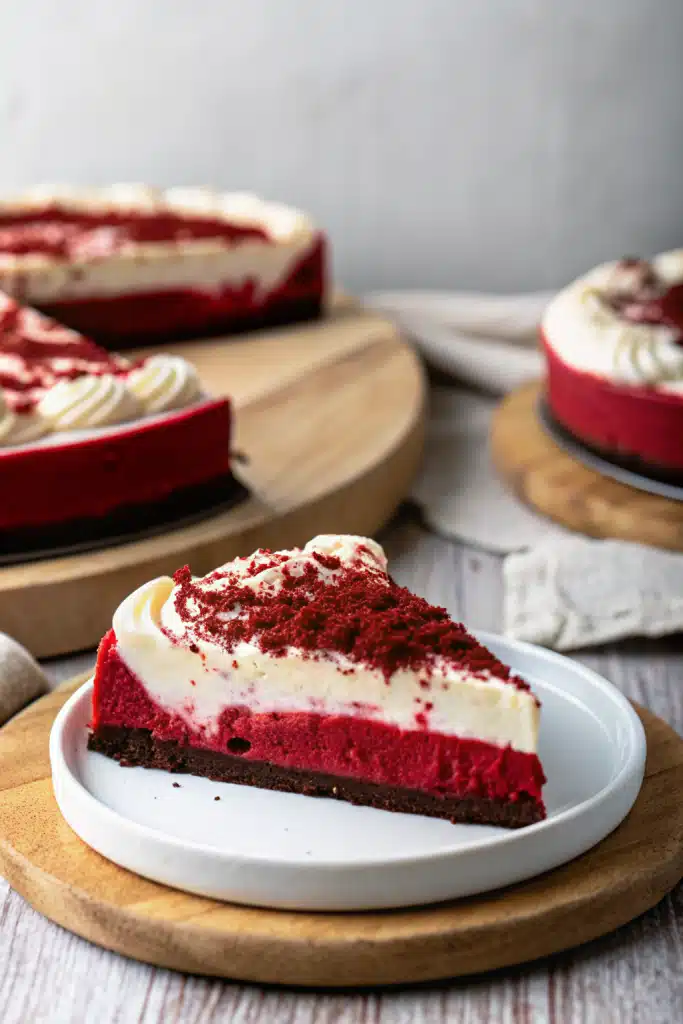
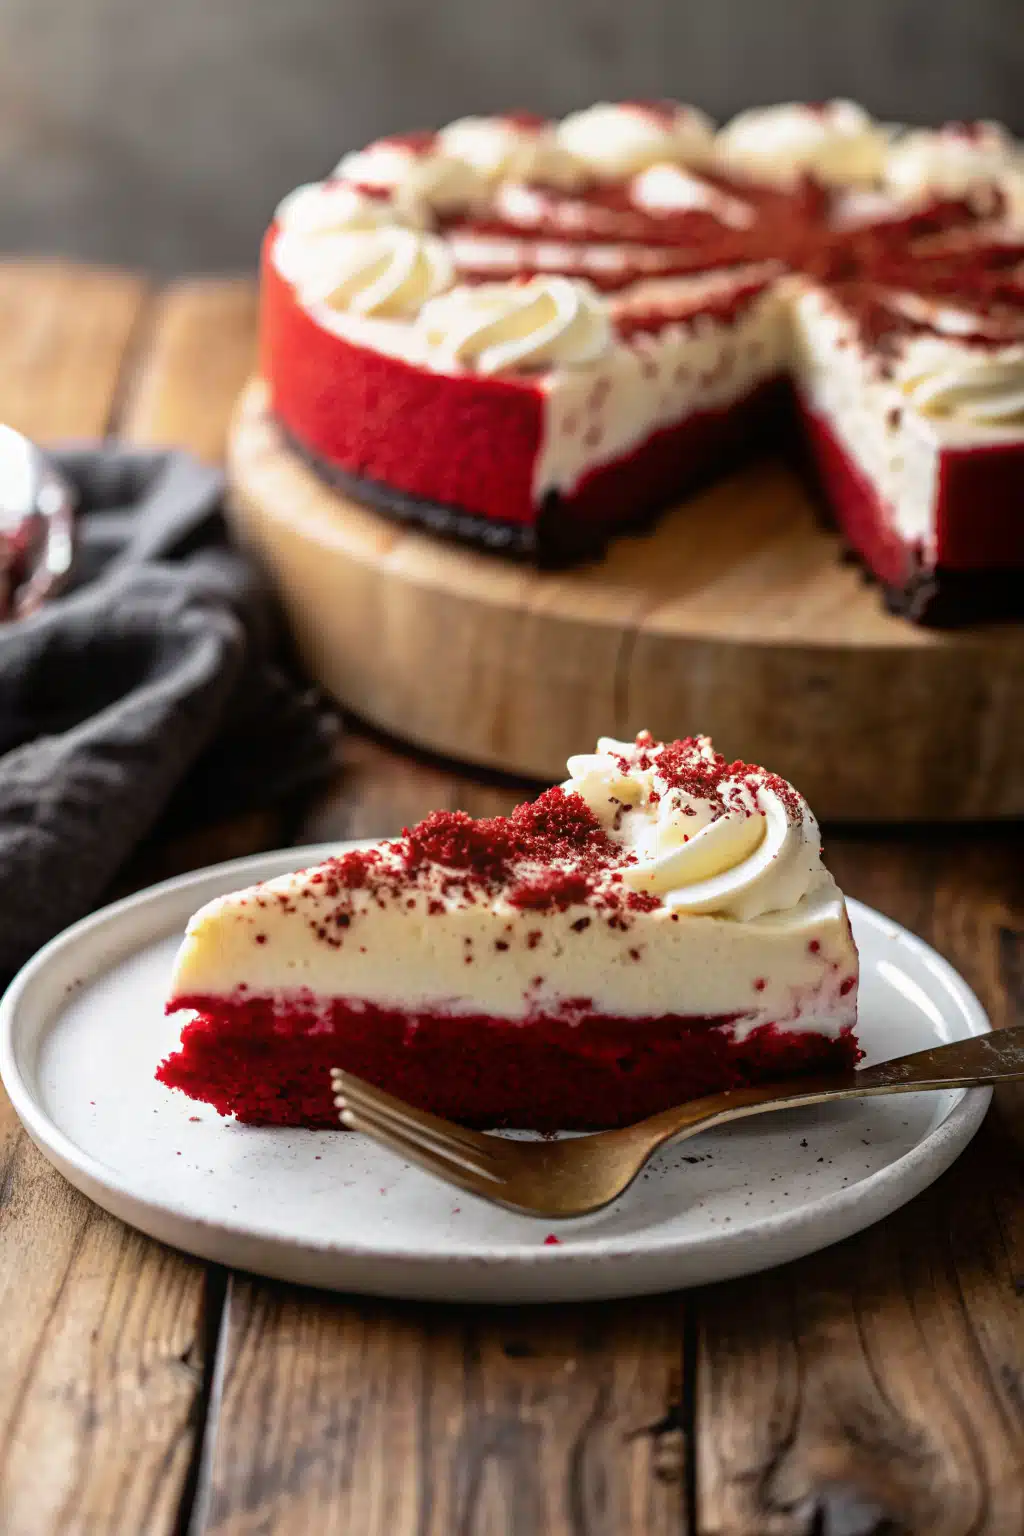
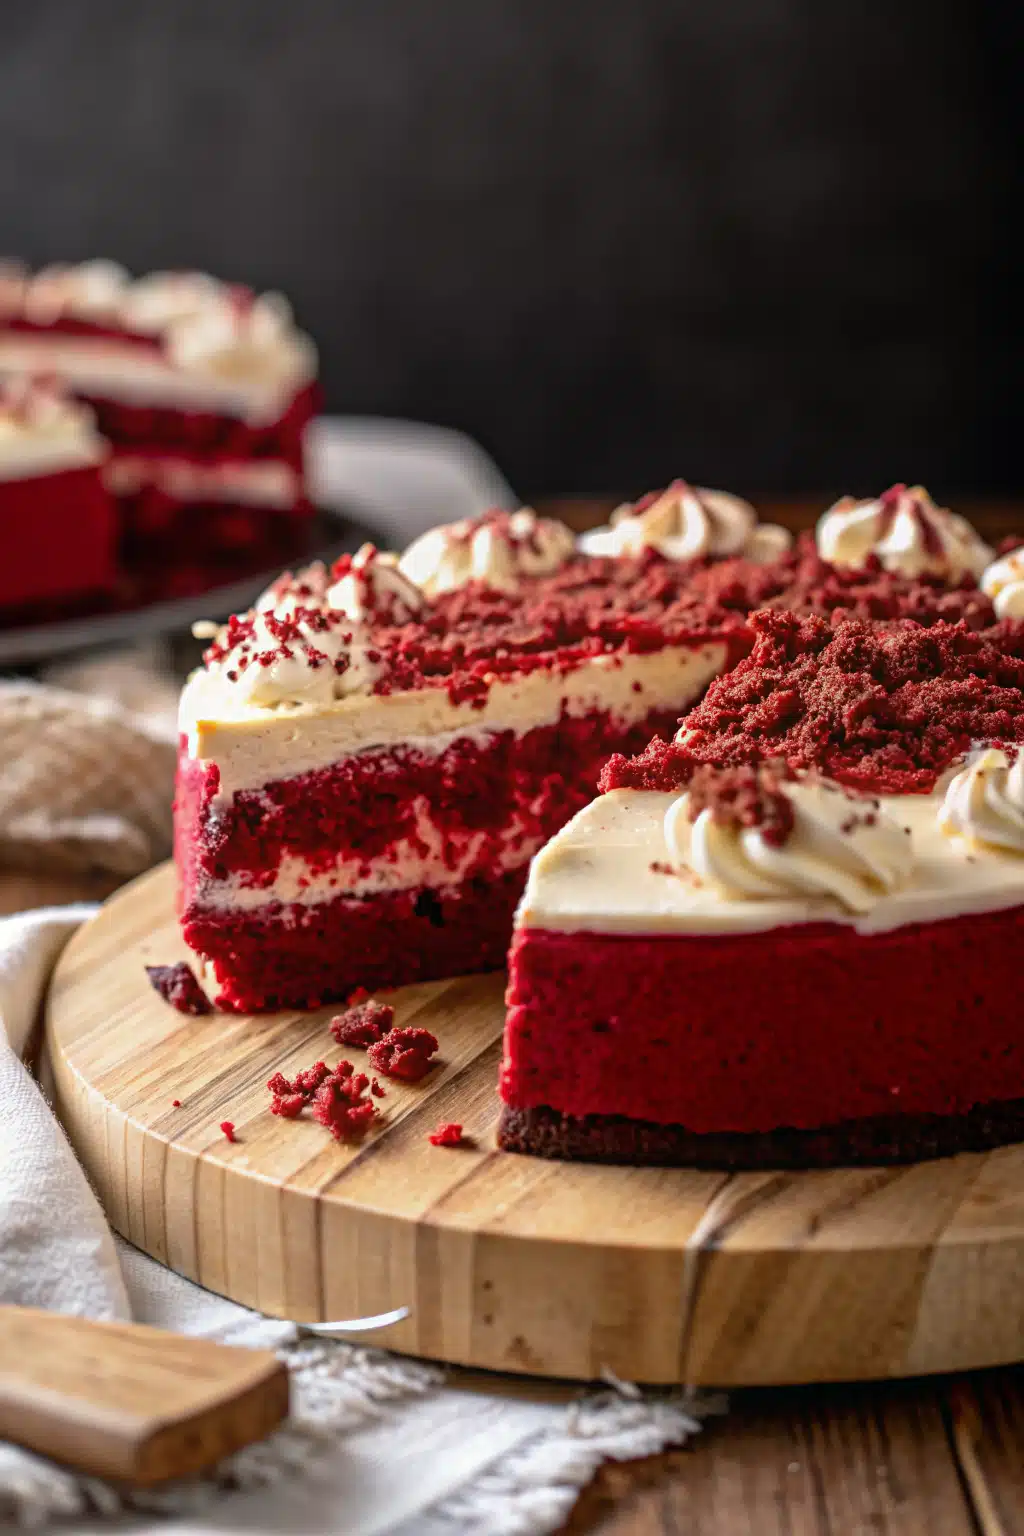
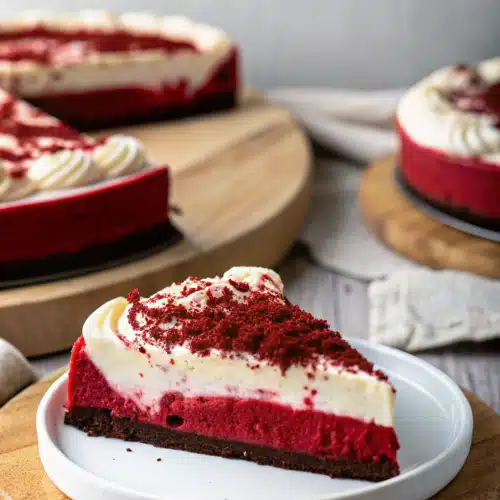
Red Velvet Cheesecake is where two beloved desserts come together in perfect harmony: the iconic crimson hue and subtle cocoa kick of red velvet cake meets the creamy, luscious texture of a no-bake cheesecake. Unlike traditional baked versions, this one skips the oven entirely—making it ideal for warm days or when you’re short on time but still want to serve something extraordinary. The magic lies in the filling: melted 70% dark chocolate gives it that deep, sophisticated red (not neon pink!), while gelatine ensures it sets firm enough to slice cleanly but stays light and airy. Paired with a crunchy Oreo crust that contrasts beautifully against the vibrant filling, every bite is a balance of rich chocolate, tangy cream cheese, and just the right amount of sweetness. It’s decadent without being heavy, and visually stunning without being fussy. Think of it as your go-to dessert for impressing guests—or treating yourself like the star you are.
Why You’ll Love This Recipe
This Red Velvet Cheesecake is more than just a pretty face—it’s packed with thoughtful details that make it a joy to make and even better to eat. First off, it’s no-bake, which means no risk of cracking, overbaking, or stressing about water baths. Just mix, chill, and enjoy! The texture is what truly sets it apart: thanks to whipped cream and just the right amount of gelatine, it’s fluffy yet creamy, cutting neatly into slices but melting luxuriously in your mouth. I’ve kept the sugar modest—only ¾ cup—so the chocolate and vanilla shine through without being cloying. Plus, using melted dark chocolate instead of cocoa powder deepens both the flavour and the colour, giving you that dramatic burgundy tone that’s so much more elegant than bright red. The Oreo base adds a satisfying crunch and a gorgeous visual contrast, and the whole thing holds up beautifully for days (though good luck keeping it that long!). Whether you’re cooking for a crowd or just want to feel a little fancy on a Tuesday night, this cheesecake delivers elegance with ease. And let’s be real—who doesn’t love a dessert that looks this good without breaking a sweat?
How to Make Red Velvet Cheesecake
Quick Overview
This recipe takes about 30 minutes of hands-on time, plus 6 hours (or ideally overnight) to chill and set. You’ll need a 20cm (8-inch) springform pan, a food processor or blender, and a handheld mixer—or a stand mixer if you prefer. The key steps are prepping the inverted pan base, making the Oreo crust, blooming the gelatine, whipping the cream and cream cheese, folding everything together, and letting it chill until firm. Decorating is optional but highly recommended: a swirl of whipped cream and some chocolate shavings make it look professionally crafted. Don’t worry if you’re new to no-bake cheesecakes—I’ve included plenty of tips to ensure success, even on your first try!
Ingredients
For the base: 200g (about 1.5 packs) Oreo cookies (cream filling included), 60g (4 tbsp) unsalted butter, melted.
For the red velvet filling: 2 tsp unflavoured gelatine powder, 2 tbsp water, 1 cup heavy/thickened cream (cold), 500g (1 lb) block cream cheese (softened), ¾ cup caster sugar (superfine), 1 tsp vanilla extract, 150g (5 oz) 70% dark chocolate (chopped, melted, and cooled slightly), 6 tsp red liquid food colouring (or gel—see notes).
For the topping: 1¼ cups heavy/thickened cream (cold), 3 tbsp caster sugar, 1 tsp vanilla extract, 2 tbsp dark chocolate shavings (optional).
Step-by-Step Instructions
Step 1: Prep the Pan
Flip the base of your 20cm (8”) springform pan upside down—this clever trick eliminates the raised lip, making it way easier to slide the finished cheesecake off without cracking the crust. Lightly butter the base, then press a square of baking paper onto it. Clip the sides onto the base, letting the paper overhang. Line the sides with another strip of baking paper, greased lightly to help it stick.
Step 2: Make the Oreo Base
Break the Oreos roughly by hand, then blitz in a food processor until they resemble fine sand. Add the melted butter and pulse just until combined. Tip the mixture into your prepared pan and press firmly and evenly into the base using the bottom of a measuring cup or flat glass. Set aside.
Step 3: Bloom the Gelatine
In a small bowl, sprinkle the gelatine over 2 tbsp cold water. Stir briefly, then let sit for 5 minutes—it’ll turn into a rubbery blob (that’s normal!). Microwave for 15 seconds until liquid, stir, then let cool for 3–5 minutes. It must be warm and liquid when added later—not hot, not set.
Step 4: Whip the Cream
In a large bowl, whip the cold cream on high until stiff peaks form (about 2–3 minutes). Set aside.
Step 5: Beat Cream Cheese Mixture
In another bowl, beat the softened cream cheese and sugar on high for 2 minutes until smooth and fluffy. Add the cooled gelatine liquid and vanilla, and beat for 30 seconds to combine. Stir in the lukewarm melted chocolate and red food colouring, beating for 1 full minute until fully incorporated and deeply red.
Step 6: Fold and Chill
Gently fold one-third of the whipped cream into the cream cheese mixture to lighten it, then fold in the rest until just combined. Pour over the Oreo base, smooth the top, and refrigerate for at least 6 hours (overnight is best).
Step 7: Decorate and Serve
Remove the springform sides, slide the cheesecake onto a platter using the paper overhang, and peel off the paper. Whip the topping cream with sugar and vanilla until soft peaks form, pile it in the center leaving a 1-inch border, and sprinkle with chocolate shavings. Slice, serve, and bask in the compliments!
What to Serve It With
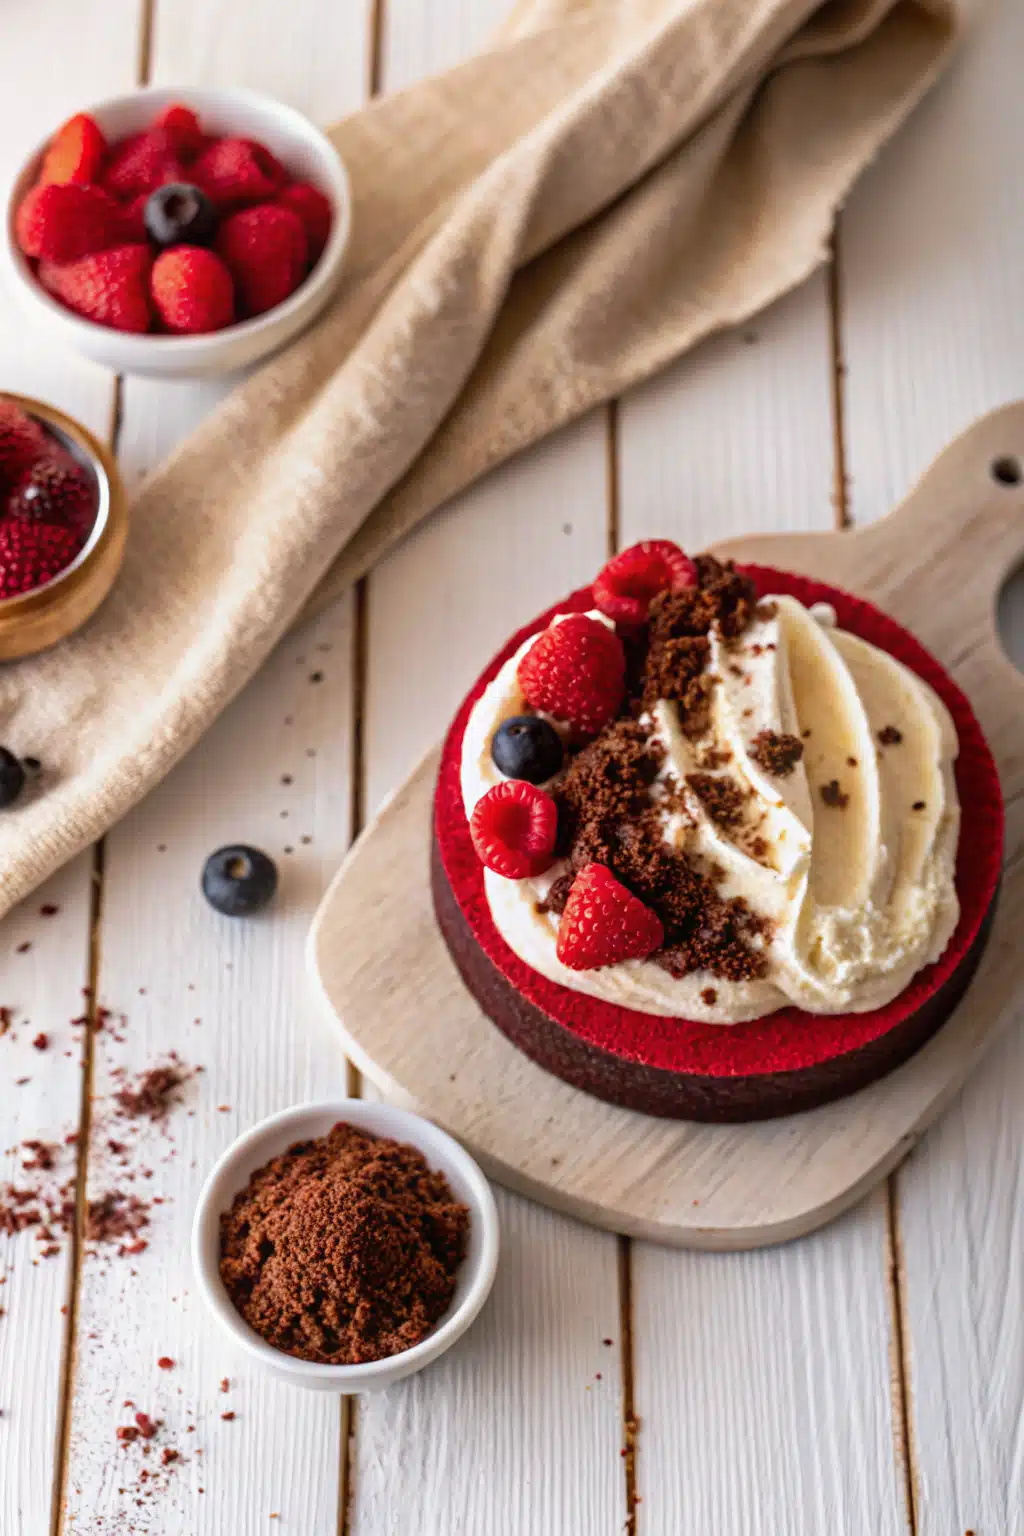
This Red Velvet Cheesecake stands beautifully on its own, but if you’re feeling extra festive, pair it with fresh raspberries, a drizzle of berry coulis, or a scoop of vanilla ice cream. A glass of chilled Prosecco or a rich espresso makes for a lovely adult pairing. For birthdays or celebrations, add a few edible gold flakes or a custom candle—it’s already showstopping, but a little sparkle never hurts!
Top Tips for Perfecting Your Red Velvet Cheesecake
Always use block cream cheese—not tubs—for the best texture. If you only have spreadable cream cheese, add an extra ½ tsp gelatine to help it set. Melt your chocolate gently and let it cool just until lukewarm—too hot, and it’ll melt the cream cheese; too cool, and you’ll get lumps. For the deepest red, stick with liquid food colouring (6 tsp is really needed!), but if you’re in the UK or EU, opt for concentrated gel like Sugarflair—it’s more effective under stricter dye regulations. And don’t skip the inverted pan trick—it’s a game-changer for clean removal!
Storing and Reheating Tips
This cheesecake keeps beautifully in the fridge for up to 5 days. The filling stays creamy and light the whole time, though the Oreo base will soften slightly after day one (still delicious!). Do not freeze—it alters the texture of both the cream and crust. Serve straight from the fridge for the best consistency, or let it sit at room temperature for 15–20 minutes if you prefer it a touch softer.
Frequently Asked Questions
Final Thoughts
This Red Velvet Cheesecake has become one of my most treasured recipes—not just because it wows every time, but because it reminds me that great desserts don’t need to be complicated to feel special. It’s the kind of treat that brings people together, sparks joy, and maybe even earns you a few “you made THAT?” looks. Whether you’re celebrating something big or just treating yourself on a regular old Wednesday, this cheesecake delivers magic in every slice. I hope it becomes a favourite in your kitchen too—and if you do make it, please tag me! I’d love to see your creation and hear how it turned out. Happy baking (or should I say, chilling)! ❤️
Red Velvet Cheesecake
Ingredients
Crust
- 24 cookies chocolate sandwich cookies (such as Oreos), crushed
- 0.25 cup unsalted butter, melted
Filling
- 24 oz cream cheese, softened
- 1 cup granulated sugar
- 3 large eggs
- 0.25 cup buttermilk
- 1 tablespoon red food coloring (liquid or gel)
- 1 teaspoon vanilla extract
- 0.25 cup all-purpose flour
- 0.25 cup unsweetened cocoa powder
- 0.5 teaspoon baking soda
- 0.25 teaspoon salt
- 0.5 cup sour cream
Frosting
- 4 oz cream cheese, softened
- 0.25 cup unsalted butter, softened
- 2 cups powdered sugar
- 1 teaspoon vanilla extract
Instructions
Preparation Steps
- Preheat oven to 325°F (160°C). Grease a 9-inch springform pan and wrap the outside with aluminum foil to prevent leaks.
- In a food processor, pulse the chocolate sandwich cookies until fine crumbs form. Add melted butter and pulse until combined. Press mixture firmly into the bottom of the prepared pan. Set aside.
- In a large bowl, beat cream cheese and sugar until smooth. Add eggs one at a time, beating well after each addition. Mix in buttermilk, red food coloring, and vanilla.
- In a separate bowl, whisk together flour, cocoa powder, baking soda, and salt. Gradually add dry ingredients to the cream cheese mixture, mixing until just combined. Fold in sour cream.
- Pour batter over the crust in the springform pan. Smooth the top. Place the pan in a larger baking dish and fill the dish with hot water until it reaches halfway up the sides of the springform pan (water bath).
- Bake for 55–65 minutes, or until the center is almost set. Turn off the oven, crack the door open, and let the cheesecake cool in the oven for 1 hour.
- Remove from oven and water bath. Run a knife around the edge to loosen. Cool completely at room temperature, then refrigerate for at least 4 hours or overnight.
- For the frosting: Beat cream cheese and butter until smooth. Gradually add powdered sugar and vanilla, beating until creamy. Spread over chilled cheesecake before serving.


