


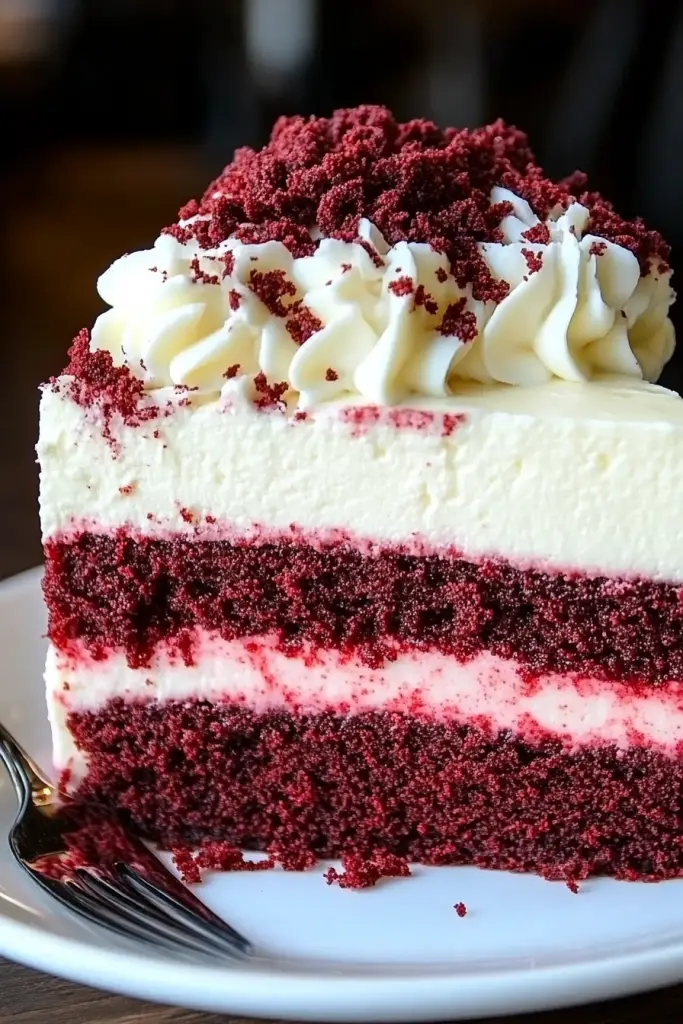
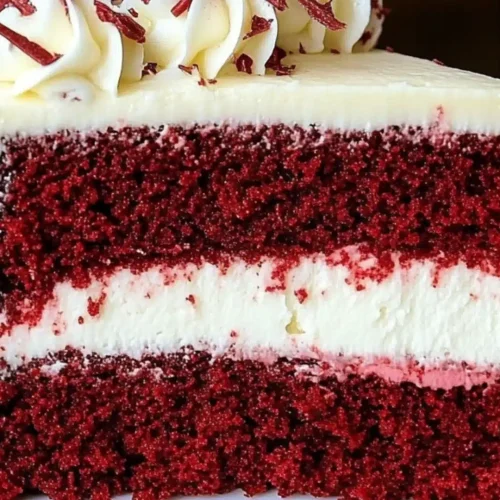
Okay, so if there’s one dessert that has a permanent spot in my heart (and my recipe binder!), it’s a really, really good Red Velvet Cheesecake. You know, the kind that makes you close your eyes with the first bite and lets out a little “mmmph.” It’s not just about the stunning color, though let’s be honest, that deep, rich red is just gorgeous. It’s that perfect harmony between the slightly tangy, fudgy red velvet cake and the creamy, dreamy cheesecake filling that’s pure magic. Honestly, sometimes I crave this more than a regular cake! It’s the perfect compromise when you want that classic red velvet flavor but with the decadent, smooth texture of cheesecake. My family devours this every single time I make it, and guests always ask for the recipe. It’s become my signature, my special occasion showstopper that, surprisingly, isn’t even that hard to make.
What is Red Velvet Cheesecake?
So, what exactly is this glorious creation? Think of it as a love affair between two iconic desserts. On one hand, you have the soul of a red velvet cake – that distinct cocoa-infused flavor with a hint of tanginess, often brought to life with a touch of vinegar and buttermilk. On the other hand, you have the incredibly smooth, rich, and luxurious cheesecake. In this recipe, we’re essentially creating a red velvet cake batter that forms the luscious base and sometimes even a marbled swirl throughout a creamy cheesecake filling. It’s not just a layer of cake *on top* of cheesecake, oh no. It’s more integrated, more harmonious. The name itself just sounds decadent, doesn’t it? Red Velvet Cheesecake. It promises something special, something that’s both comforting and sophisticated.
Why you’ll love this recipe?
Where do I even start with why you’ll absolutely adore this Red Velvet Cheesecake? First and foremost, the flavor is out of this world. That subtle cocoa in the red velvet layer plays so beautifully with the creamy, sweet cheesecake. It’s not overly sweet, which I love. Then there’s the texture. It’s just heavenly – that super smooth, almost melt-in-your-mouth cheesecake contrasted with the tender cakey bits. What I really appreciate about this particular recipe is that it’s surprisingly approachable for home bakers. Yes, it looks impressive, but the steps are totally manageable. I’ve tested this recipe more times than I can count, and it always delivers. Plus, the ingredients are pretty standard, nothing too crazy or hard to find. And let’s talk versatility! While it’s spectacular on its own, it’s also fantastic with a dollop of whipped cream or a scattering of chocolate shavings. It’s that perfect dessert for birthdays, holidays, or just because you deserve a treat. It’s genuinely one of those recipes that makes people happy, and isn’t that what baking is all about? It’s a winner for any occasion, truly.
How do I make Red Velvet Cheesecake?
Quick Overview
This Red Velvet Cheesecake is all about creating layers of flavor and texture. We start with a simple Red Velvet Cake batter that acts as our base, then create a luscious cheesecake filling that gets swirled through for that beautiful marbled effect. It involves a bit of mixing, careful layering, and patient baking, but the end result is so worth it. It’s designed to be foolproof, even if you’re new to cheesecake making. Just follow the steps, and you’ll have a showstopper!
Ingredients
For the Red Velvet Cake Base & Swirl: For the Red Velvet Cake Base & Swirl: For
All-purpose flour: About 1 ½ cups, sifted. Sifting is key here to keep things light.
Granulated sugar: 1 cup. For sweetness and structure.
Unsweetened cocoa powder: 2 tablespoons. This gives it that classic red velvet depth.
Baking soda: 1 teaspoon. Our leavening agent.
Salt: ½ teaspoon. To balance the flavors.
Vegetable oil or melted unsalted butter: ½ cup. I lean towards oil for extra moisture.
Buttermilk: ½ cup. This is non-negotiable for that signature tang and tenderness! If you don’t have buttermilk, you can make a quick substitute: add 1 tablespoon of white vinegar or lemon juice to ½ cup of milk, let it sit for 5-10 minutes.
Large eggs: 2. For binding and richness.
Red food coloring: 1-2 tablespoons, or to your desired shade. Gel or liquid works, but gel gives a more vibrant color without adding too much liquid. I always use gel!
Vanilla extract: 1 teaspoon. For that lovely aroma and flavor.
White vinegar: 1 teaspoon. Works with the baking soda for leavening and adds to the tang.
For the Cheesecake Filling:
Cream Cheese: 3 (8-ounce) packages, softened. Make sure it’s truly softened, room temperature is best for a smooth filling.
Granulated sugar: 1 cup. For sweetness.
Large eggs: 3. For richness and setting the filling.
Sour cream: ½ cup. This is my secret to an extra creamy cheesecake. It adds richness and a slight tang.
Vanilla extract: 1 teaspoon. Always more vanilla!
For the Glaze (Optional but Recommended!):
Powdered sugar: 1 cup, sifted. For a smooth glaze.
Milk or heavy cream: 2-3 tablespoons. To reach your desired drizzling consistency.
Cocoa powder: 1 tablespoon (optional, for a chocolate glaze).
Step-by-Step Instructions
Step 1: Preheat & Prep Pan
First things first, preheat your oven to 325°F (160°C). You’ll need a 9-inch springform pan for this. Now, don’t skip this next part: grease the pan really well and then line the bottom with parchment paper. I find this extra step makes releasing the cheesecake SO much easier later on. You can even lightly grease the parchment paper too. Some people like to wrap the outside of the springform pan in heavy-duty foil if they’re using a water bath, but I find this recipe doesn’t strictly need one if you’re careful with your oven temp. Let’s get this ready!
Step 2: Mix Dry Ingredients
In a medium bowl, whisk together your sifted flour, granulated sugar, unsweetened cocoa powder, baking soda, and salt. Whisk it good! You want to make sure everything is evenly distributed. This helps prevent any pockets of unincorporated ingredients later on. It’s a simple step, but it makes a difference in the final texture of your red velvet cake portion.
Step 3: Mix Wet Ingredients
In a separate, larger bowl, whisk together the vegetable oil (or melted butter), buttermilk, eggs, red food coloring, vanilla extract, and white vinegar. Make sure the eggs are fully incorporated and the mixture is a uniform, vibrant red. If you’re using liquid food coloring, you might need more to get a really deep color. I always opt for gel when I can!
Step 4: Combine
Now, it’s time to bring those wet and dry ingredients together. Pour the wet ingredients into the dry ingredients and mix *just until combined*. Seriously, don’t overmix! Overmixing can lead to a tough cake. A few small lumps are perfectly fine. You want a smooth, batter-like consistency that’s that gorgeous red velvet hue. This is going to form the delicious base and swirls of our cheesecake.
Step 5: Prepare Filling
In a large bowl (or the bowl of your stand mixer), beat the softened cream cheese on medium speed until it’s completely smooth and creamy. No lumps allowed! Then, gradually add the granulated sugar and continue beating until well combined and smooth. Scrape down the sides of the bowl often. Next, add the eggs, one at a time, beating just until each one is incorporated. Don’t overbeat here either, as too much air can cause cracks. Finally, gently stir in the sour cream and vanilla extract until just combined and the filling is silky smooth. We’re aiming for pure decadence!
Step 6: Layer & Swirl
Here’s where the magic happens! Pour about half of the red velvet batter into the prepared springform pan as your base layer. Gently spread it out. Now, carefully spoon about half of the cheesecake filling over the red velvet batter. Dollop spoonfuls of the remaining red velvet batter over the cheesecake filling. Then, spoon the rest of the cheesecake filling over that. Now, grab a butter knife or a skewer and gently swirl the batters together. Don’t go crazy; you want distinct swirls, not a muddy mess! A few passes through are usually enough. Aim for a marbled effect.
Step 7: Bake
Place your springform pan in the preheated oven. Bake for 50-65 minutes, or until the edges are set and the center is mostly firm but still has a slight wobble when you gently jiggle the pan. Ovens can vary, so keep an eye on it. If the top starts browning too quickly, you can loosely tent it with foil. The key to a great cheesecake is gentle, even baking. This recipe is pretty forgiving, but patience is a virtue here!
Step 8: Cool & Glaze
Once baked, turn off the oven and let the cheesecake cool inside the oven with the door cracked open for about an hour. This gradual cooling helps prevent cracking. After that, remove it from the oven and let it cool completely on a wire rack. Once it’s fully cooled, you can pop it into the refrigerator for at least 4 hours, or ideally overnight, to firm up completely. For the glaze: whisk together powdered sugar, 2 tablespoons of milk/cream, and cocoa powder (if using) until smooth. Add more liquid a teaspoon at a time if needed to reach a drizzling consistency. Drizzle this over the chilled cheesecake just before serving.
Step 9: Slice & Serve
The moment of truth! Run a thin knife around the edge of the springform pan before releasing the sides. Slice with a sharp knife dipped in hot water and wiped clean between each cut for the neatest slices. Serve chilled. The contrast between the cool, creamy cheesecake and the slightly denser red velvet is just divine. Enjoy every single bite!
What to Serve It With
This Red Velvet Cheesecake is such a star on its own, but it also plays well with others! For a truly decadent breakfast treat (because who says cheesecake can’t be breakfast?), I love serving a small slice with a strong cup of coffee and maybe some fresh berries like raspberries or strawberries to cut through the richness. For a more elegant brunch spread, I like to present it on a beautiful platter, perhaps with a side of lightly sweetened whipped cream and a scattering of chopped dark chocolate or even a raspberry coulis. It just elevates the whole experience! As a dessert, it’s simply perfect. I often serve it after a hearty meal, and a little goes a long way. Sometimes, I’ll serve it with a small glass of dessert wine, like a port, for an extra touch of luxury. And for those cozy, quiet evenings when you just need a little something sweet? A slice of this with a tall glass of cold milk is pure comfort. My kids always go wild for it this way. The key is to let the cheesecake shine, so I usually keep the accompaniments simple but high-quality.
Top Tips for Perfecting Your Red Velvet Cheesecake
Over the years, I’ve picked up a few tricks that I think make a big difference in getting this Red Velvet Cheesecake just right. For the red velvet cake part, make sure your cocoa powder isn’t too old; a stale cocoa can really affect the flavor. I also learned the hard way that using gel food coloring gives you a much more intense, vibrant red without watering down the batter, which is super important for that signature look. When it comes to the cheesecake filling, the absolute *most critical* thing is to make sure your cream cheese is truly at room temperature. If it’s cold, you’ll end up with lumps, and nobody wants lumpy cheesecake! I always take mine out at least an hour before I start. Also, try not to overbeat the filling once you add the eggs. Just mix until they’re incorporated. Too much air whipped in will lead to those dreaded cracks. For the swirling technique, a light hand is best. You want pretty marbled patterns, not a muddled mess. Just a few gentle twists with a knife or skewer will do the trick! And the cooling process is vital. That slow cool-down in the oven after turning it off is what helps prevent cracking. I learned this after a few sadly cracked cheesecakes early in my baking journey! If you’re ever unsure if it’s done, a slight wobble in the center is perfect. It will set up beautifully as it cools. For ingredient swaps, if you can’t find buttermilk, my trick of milk with vinegar or lemon juice really does work wonders – it’s a lifesaver when you’re in a pinch. And don’t be afraid of the glaze! It adds that perfect finishing touch, and it’s so simple to whip up. Just adjust the liquid until it’s a nice drizzling consistency.
Storing and Reheating Tips
Keeping your Red Velvet Cheesecake delicious is pretty straightforward. For room temperature storage, it’s best if it’s fully chilled and not for too long – maybe a couple of hours at most if it’s not too warm in your kitchen. If you plan to store it for more than a day, definitely keep it in the refrigerator. I always use an airtight container or cover it tightly with plastic wrap to prevent it from drying out or absorbing other fridge odors. In the fridge, it will stay wonderfully fresh for about 4-5 days. The quality is usually best within the first 3 days, but it’s still perfectly enjoyable longer. Now, freezing is a great option if you want to make it ahead or have leftovers you want to save for a future craving. To freeze, make sure the cheesecake is completely cooled and chilled, and ideally, don’t add the glaze until you’re ready to serve. Wrap the entire cheesecake tightly in a couple of layers of plastic wrap, then add a layer of aluminum foil. It can be frozen for up to 2-3 months. When you’re ready to thaw, take it out of the freezer and let it thaw slowly in the refrigerator overnight. This gradual thawing helps maintain its texture. If you’re only freezing slices, wrap each slice individually. For reheating, honestly, this cheesecake is best served chilled. There’s no real reheating needed!
Frequently Asked Questions
Final Thoughts
There you have it – my absolute favorite Red Velvet Cheesecake recipe. It’s a labor of love, for sure, but it’s one that always, always pays off with incredible flavor and a show-stopping presentation. This isn’t just a dessert; it’s an experience. It’s that perfect balance of rich, tangy, chocolatey, and creamy that just sings. It’s the kind of treat that makes you feel good, whether you’re baking it for yourself or sharing it with loved ones. If you’re a fan of red velvet, or you’re just looking for that next level of cheesecake indulgence, you absolutely have to give this a try. Trust me, it’s a keeper! If you love this, you might also enjoy my classic New York Cheesecake or my decadent Chocolate Lava Cake recipes. They’re all equally crowd-pleasing! I can’t wait to hear how your Red Velvet Cheesecake turns out. Please leave a comment below and let me know your thoughts, or share your own tips and variations! Happy baking!
Red Velvet Cheesecake
Ingredients
Cheesecake Filling
- 907.18 g cream cheese softened
- 1.5 cup granulated sugar
- 3 large eggs room temperature
- 1 teaspoon vanilla extract
- 0.5 cup sour cream room temperature
- 2 tablespoon unsweetened cocoa powder
- 2 tablespoon red food coloring gel or liquid
Red Velvet Crust
- 300 g chocolate sandwich cookies like Oreos, finely crushed
- 113.4 g unsalted butter melted
Instructions
Preparation Steps
- Preheat oven to 350°F (175°C). Grease and flour a 9-inch springform pan.
- For the crust: In a medium bowl, combine the crushed cookies and melted butter. Press the mixture evenly into the bottom and slightly up the sides of the prepared springform pan.
- Bake the crust for 8-10 minutes. Remove from oven and let cool.
- For the filling: In a large bowl, beat the cream cheese until smooth. Gradually add the granulated sugar and beat until well combined.
- Beat in the eggs one at a time, mixing well after each addition. Stir in the vanilla extract, sour cream, cocoa powder, and red food coloring until just combined. Do not overmix.
- Pour the filling over the cooled crust. Tap the pan gently on the counter to release any air bubbles.
- Bake for 50-60 minutes, or until the edges are set and the center is slightly jiggly. Turn off the oven and let the cheesecake cool in the oven with the door ajar for 1 hour.
- Remove from the oven and let cool completely on a wire rack. Refrigerate for at least 4 hours, or preferably overnight, before serving.


