


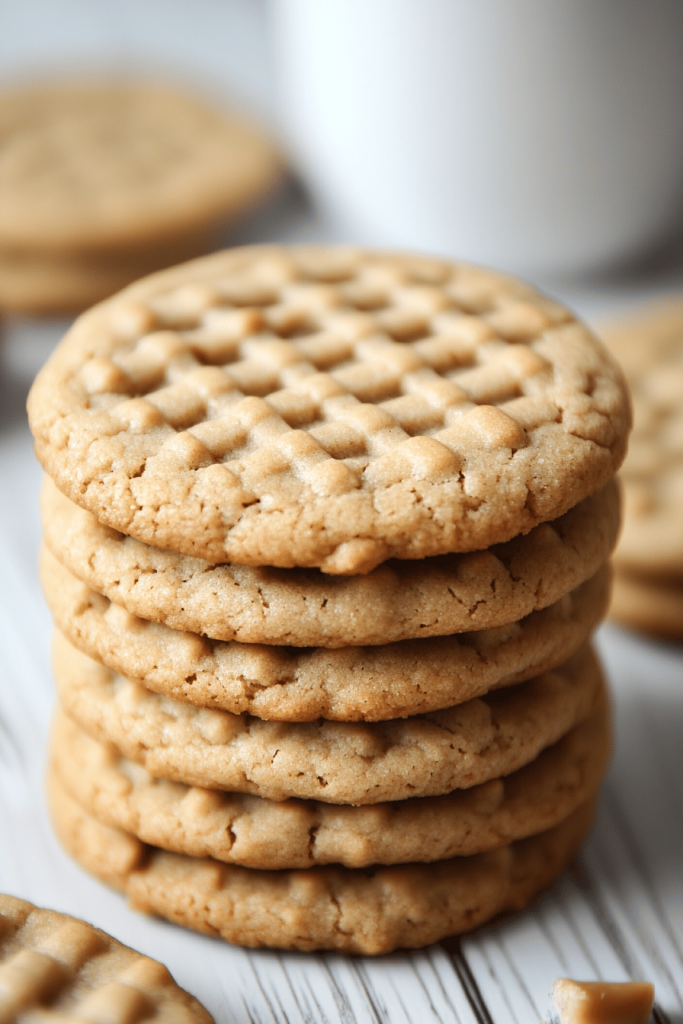
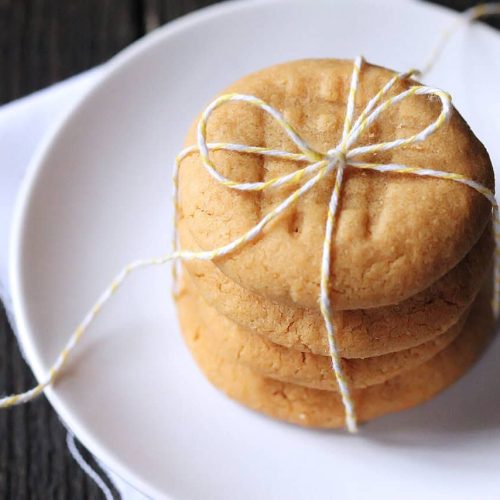
There’s something magical about the scent of roasted peanuts drifting through the kitchen on a Sunday afternoon. I still remember my grandma’s oven glow and the way she’d press the cookies down with a fork, creating those tiny cross-hatch lines that meant they were almost ready to dunk in milk. When I say peanut butter cookies, I’m thinking of that warm, comforting bite—the kind that’s chewy in the center, a little crinkled around the edges, and full of that unmistakable peanut butter sweetness. This recipe is my cozy little version: simple, forgiving, and absolutely crowd-pleasing. It’s the kind of treat you bake when you’re craving something familiar yet special, like a quick hug in cookie form. I’ve found that these cookies taste even better the next day after they’ve rested, and I love that you can customize them with a creamy filling and a glossy glaze for a mini sandwich-cookie moment. This one’s a lifesaver on busy nights and a guaranteed crowd-pleaser for potlucks. It’s also a fun way to show the kids how flavor can be built in layers, from the dough to the filling and beyond.
What is peanut butter cookies?
Peanut butter cookies are little disks of dough that showcase the star ingredient—peanut butter—along with a touch of sweetness and a gentle chew. Think of it as the baked embodiment of that nutty, toasty flavor you reach for when you need a quick comfort. The name itself is straightforward, but the beauty lies in the texture: slightly craggy on the outside, soft and chewy in the middle, with a satisfying peanut butter aroma that fills the kitchen as they bake. This particular version elevates the classic by offering a Creamy Peanut Butter filling and a chocolate glaze, turning a straightforward cookie into a playful, sandwich-style treat. It’s essentially a two-in-one: a great-tasting cookie and a creamy filling, all in one bite. If you’ve never tried a peanut butter cookie with a ganache-like glaze, you’re in for a real treat; it’s a little indulgent without feeling heavy.
Why you’ll love this recipe?
What I love most about this recipe is how forgiving it is. The dough comes together in minutes, and you can tailor the sweetness and texture to your liking. It’s also incredibly versatile, so you can keep the base cookie plain for a classic bite or turn it into a little dessert project with the filling and glaze. Here are the top reasons this version shines:
- Flavor: The cookies deliver that quintessential peanut butter punch—rich, toasty, with a hint of vanilla. The filling adds a creamy contrast, and the chocolate glaze ties everything together in a glossy, irresistible finish. It’s like a peanut butter dream dressed up for guests.
- Simplicity: You’ll whisk, scoop, and bake, not needing any fancy equipment. The dough comes together with basic pantry staples, and the steps are straightforward enough for a weeknight triumph or a relaxed weekend bake.
- Cost-efficiency: What is the best way to measure cost-efficiency? Most pantry staples are affordable, and you can scale the filling and glaze down if you’re baking for a small brood or up for a bigger batch for a party. It’s a dessert that respects your grocery budget without skimping on flavor.
- Versatility: The base cookie is a blank canvas. You can swap in creamy, crunchy, or even almond butter to adjust texture and flavor. If you’ve got allergies or dietary goals, this recipe easily adapts with gluten-free flour or other nut butters.
If you’re curious about similar treats, you might also enjoy my almond butter cookies or my double-Chocolate Peanut Butter bites, but this version with the filling and glaze offers that extra little “wow” factor for family gatherings or a friend coming over for coffee. Trust me on this one—every bite invites a memory, and every bite invites a smile.
How do I make peanut butter cookies?
Quick Overview
Here’s the quick view: it starts with a smooth, chewy cookie dough that’s chilled to set up perfect round disks. I’ll show you how to fold in a creamy Peanut Butter filling for sandwich-style cookies and finish with a glossy chocolate glaze. The steps are straightforward: whisk dry ingredients, whisk wet ingredients, bring them together without overmixing, chill the dough, scoop, bake until the edges brown just so, then pair cookies with a luscious filling and shimmer them with glaze. The result is bakery-worthy taste with everyday ingredients you probably already have. The trick is to keep the dough on the cooler side and not overwork it—trust me, it makes all the difference for that ideal chew.
Ingredients
For the Main Batter:
- 1 cup creamy peanut butter (preferably unsweetened or lightly sweetened, depending on your taste)
- 1/2 cup granulated sugar
- 1/2 cup light brown sugar, packed
- 1 large egg
- 1 teaspoon vanilla extract
- 1/4 teaspoon baking soda
- 1/4 teaspoon fine sea salt
- 2 tablespoons unsalted butter, melted (or 2 tablespoons neutral oil for dairy-free)
- Optional: 1 tablespoon honey or light corn syrup for extra chew
For the Filling:
- 1/2 cup creamy peanut butter
- 2–3 tablespoons powdered sugar, sifted (adjust for sweetness)
- 1–2 tablespoons unsalted butter, softened
- 1/2 teaspoon vanilla extract
- Pinch of salt (optional, to taste)
For the Glaze:
- 1/2 cup semisweet chocolate chips
- 1 tablespoon coconut oil or light cream for shine
- Optional: 1 teaspoon espresso powder or pinch of sea salt for depth
Step-by-Step Instructions
Step 1: Preheat & Prep Pan
Preheat your oven to 350°F (175°C). Line two baking sheets with parchment or a silicone mat. If you’re aiming for ultra-uniform cookies, you can chill the dough later on a Sheet Pan between rounds to keep its shape intact.
Step 2: Mix Dry Ingredients
In a small bowl, whisk the dry ingredients: all-purpose flour (or your gluten-free substitute if needed), baking soda, and salt. This helps keep the cookies evenly risen and prevents any clumps from sneaking into the batter.
Step 3: Mix Wet Ingredients
In a separate large bowl, beat the peanut butter with the sugars until smooth and creamy. The mixture should look a little light and fluffy. Add the egg and vanilla, mixing until fully incorporated. If your peanut butter is a touch oily, the melted butter helps balance the texture and keep things chewy.
Step 4: Combine
Fold the dry ingredients into the wet mixture just until combined. Don’t overmix—this is where tough cookies come from. If the dough feels a touch dry, add a teaspoon of milk or water to bring it together. The dough should be soft but scoopable.
Step 5: Prepare Filling
While the dough rests, blend together the filling ingredients: peanut butter, powdered sugar, butter, vanilla, and a pinch of salt. You want a thick, spreadable consistency—think of it as a sturdy frosting that won’t ooze out when you sandwich the cookies. Taste and adjust sweetness if needed. A quick chill here helps the filling hold its shape.
Step 6: Layer & Swirl
Dust your work surface lightly and roll the dough into roughly 1-inch balls or use a spoon to scoop mounds. Place a small amount of filling in the center of each cookie and top with another dough ball, pressing gently to seal. If you’re feeling fancy, you can flatten half of the cookies and spread a thin layer of filling on the bottom, then sandwich with another cookie for a classic sandwich look. For a pretty swirl, you can lightly press a few extra peanut butter dollops onto the surface before baking, or swirl the filling into the dough with a knife and bake as is.
Step 7: Bake
Bake for 9–11 minutes, until the edges are just golden and the centers look slightly soft. The cookies may seem a touch underdone in the center, which is exactly what you want for that chew. If your oven runs hot, start checking at 9 minutes to prevent overbrowning. Let the cookies cool on the sheet for 5 minutes before transferring to a wire rack to finish cooling completely. They’ll firm up as they rest, which is perfect for sandwich cookies with fillings.
Step 8: Cool & Glaze
While the cookies cool, melt the chocolate with the coconut oil until glossy. Dip the cooled tops of half the cookies, or drizzle a thin line of glaze across the tops, and give them a minute to set. If you’re not glazing, you can dust with a tiny pinch of flaky salt or finish with a light sprinkling of crushed roasted peanuts for crunch.
Step 9: Slice & Serve
For a clean presentation, use a sharp knife to trim any uneven edges from the bottom of the cookies so they stack neatly on a plate. If you made sandwich-style cookies, give the filling a few extra minutes to set before serving. Serve with a cold glass of milk, coffee, or a warm cup of tea—the perfect trifecta for a comforting chocolate-peanut butter moment.
What to Serve It With
These cookies are versatile enough to shine in several little moments. Here are a few ideas that have worked for me, sometimes with a family ritual attached.
For Breakfast: A tiny nibble with a bold cup of coffee is our weekday ritual—dip half a cookie into your coffee for a momentary, delicious soft bite. The cookie’s peanut butter depth holds up nicely against a creamy latte. If you want to feel a touch fancy, serve a small plate with sliced fruit and a dollop of yogurt on the side.
For Brunch: Pair them with a citrusy sparkling beverage or a cinnamon latte. A few cookies on a tiered tray makes a simple, inviting spread that’s sure to evoke brunch nostalgia. My family loves to mix a few cookies with small bowls of berries and whipped cream for a playful bite-sized dessert during late-morning gatherings.
As Dessert: Crumble a cookie or two over vanilla ice cream and drizzle with the remaining glaze for a quick “cookie sundae.” If you’re serving guests, arrange the cookies in a neat circle around a small bowl of glaze for a dessert aesthetic that’s as tasty as it is pretty.
For Cozy Snacks: These cookies are fabulous with a mug of hot cocoa or chai. On chilly nights, I like to bake a batch and keep a few in the fridge for afternoon treat cravings—the filling holds up well when chilled, giving you a nice contrast when you bite into one.
We’ve got a tiny family tradition tied to these: the kids measure out the sugar, I handle the peanut butter, and we trade “taste tests” as the dough comes together. The smell in the kitchen is always a signal that a cozy moment is about to happen. If you’re sharing with friends, tell them the secret is to chill the sandwich cookies for at least 20 minutes before glazing—the flavors settle in beautifully and the texture becomes even more satisfying.
Top Tips for Perfecting Your Peanut Butter Cookies
Here are my best, battle-tested tips to make sure your cookies come out perfect every time.
Peanut Butter Quality: Use a good-quality creamy peanut butter for the main batter. If you’re using natural peanut butter with a lot of oil, whisk it well first or stir to reincorporate the oil. The right consistency ensures a smooth batter that bakes evenly. If you prefer a stronger peanut flavor, swap in a touch more peanut butter, but keep the sugars in balance to prevent over-sweetness.
Mixing & Texture: Don’t overmix once you add the dry ingredients. A few gentle folds are enough, or your cookies may turn out dense rather than tender and chewy. If your batter seems a touch loose, chilling for 15–20 minutes helps set it up for easier scooping and better shape retention.
Swirl & Filling Techniques: The filling can be a little forgiving, but you want it to stay put. For clean edges on sandwich cookies, chill the assembled cookies about 15–20 minutes before filling and then add a compact, even layer of filling. If you love a dramatic look, swirl the filling into the dough in a few places before baking for a marbled effect.
Ingredient Swaps: If you’re gluten-free, try a 1:1 gluten-free all-purpose flour blend. If you’re avoiding dairy, substitute the butter with coconut oil or a neutral oil with slightly less moisture; you may need an extra tablespoon or two of flour to maintain the dough’s structure. For a nuttier twist, you can blend in 1–2 tablespoons of finely chopped roasted peanuts into the dough for texture, but be mindful of how this affects bite and baking time.
Baking Tips: Every oven is different. If your oven tends to run hot, lower the temperature to 340°F (170°C) and extend the bake by 1–2 minutes. You want the edges to be just golden and the centers slightly soft for that signature chew. Use parchment for easy removal and even browning. If you’re plating a lot at once, rotate the sheets halfway through for uniform results.
Glaze Variations: The glaze is where you can play. A dab of espresso powder in the glaze adds depth, while a splash of vanilla or a pinch of flaky salt can elevate the flavor. If you’re dairy-free, skip the butter and use a touch of coconut oil to keep the glaze glossy. For a lighter finish, you can drizzle a thin white chocolate glaze instead of dark chocolate for a different flavor profile that still pairs beautifully with peanut butter.
One lesson I learned after years of making these is that the best cookies come from respecting the chew. If you pull them a bit early, you get that perfect center; if you wait a touch longer, you’ll have firmer cookies with a delightful snap on the edges. It’s a small timing dance, but it makes all the difference. If you’re baking with kids, let them help with shaping and decorating the tops—messy hands make the best memories, after all.
Storing and Reheating Tips
Storing these cookies properly helps maintain their texture and flavor, so they stay delicious from the first bite to the last crumb.
Room Temperature: Store in an airtight container for up to 3–5 days. If you’ve filled the cookies, keep them in the fridge to preserve the filling’s texture; they’ll still be chewy and delicious, just a bit more compact. Layer parchment between cookies to prevent sticking.
Refrigerator Storage: In an airtight container, these cookies will stay fresh for up to 1 week in the fridge. If you’ve added glaze, keep in a cool place to avoid softening or melting the glaze too quickly.
Freezer Instructions: Freeze unbaked dough balls for up to 1 month, then bake from frozen, adding 1–2 minutes to the bake time. You can also freeze fully baked cookies for up to 2–3 months; reheat in a low oven (300–325°F / 150–165°C) for 5–8 minutes to restore the warm, chewy texture. If you’re freezing the filled cookies, place them in a single layer first and then stack with parchment between layers to avoid sticking.
Glaze Timing Advice: If you plan to freeze the cookies, don’t glaze until they’re completely thawed. Glazed cookies stored unglazed will stay crispier longer, and glazing after thawing avoids the glaze from seeping into the cookie’s interior.
These guidelines have kept my batch fresh and tasty for longer, and they’ve saved me from last-minute soggy cookie disasters more than once. The joy is in the little details—how the dough looks before baking, how the glaze shines after it sets, and how your kitchen smells after a batch goes into the oven. It’s all those small moments that remind me why I keep coming back to this recipe time and time again.
Frequently Asked Questions
Final Thoughts
If you’re looking for a recipe that feels like a warm hug from a dear friend, this peanut butter cookies version is exactly that. The dough is forgiving, the filling adds a creamy contrast, and the glaze brings a glossy finish that makes the plate look as good as it tastes. It’s a treat that invites conversation—between siblings, across the table on a sleepy Sunday, or when a friend drops by with no notice. I’ve made this countless times, and it never fails to bring a little spark of delight to the kitchen. It’s comforting, nostalgic, and a little bit fancy in the best possible way. And yes, my kids actually ask for seconds, which is the ultimate seal of approval. If you try the recipe, I’d love to hear which part you loved most—the chewy centers, the creamy filling, or the glossy glaze. Happy baking, friends, and may your kitchen be filled with the scent of roasted peanuts and sweet chocolate today!
Peanut Butter Cookies
Ingredients
Main Ingredients
- 1 cup Peanut Butter creamy or crunchy
- 0.75 cup Granulated Sugar
- 1 large Egg
Instructions
Preparation Steps
- Preheat oven to 350°F (175°C) and line a baking sheet with parchment paper.
- In a medium bowl, combine peanut butter, sugar, and egg. Mix until well combined and a dough forms.
- Roll the dough into small balls, about 1 inch in diameter, and place them on the prepared baking sheet.
- Using a fork, press down on each cookie in a criss-cross pattern.
- Bake for 10-12 minutes, or until the edges are golden brown and the centers are still slightly soft.
- Let the cookies cool on the baking sheet for a few minutes before transferring them to a wire rack to cool completely.


