


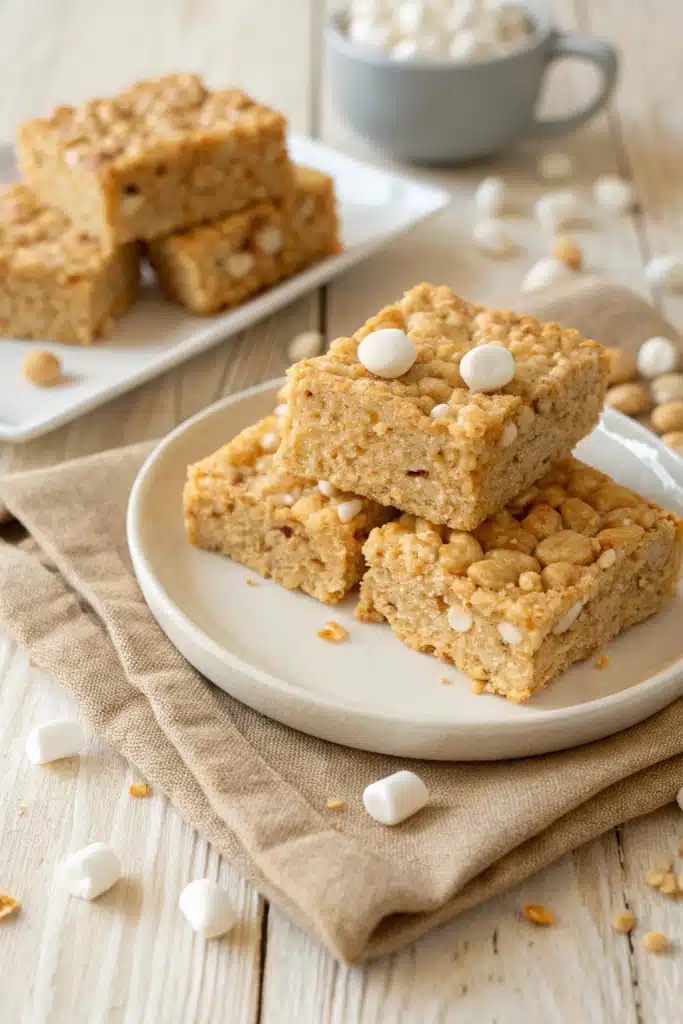
Peanut Butter Rice Krispies Treats
I’ll never forget the first time I made these Peanut Butter Rice Krispies Treats—it was one of those lazy Sunday afternoons when the kitchen smelled like warm butter and nostalgia. My grandma had just sent me her old recipe card, slightly stained with peanut butter (or maybe chocolate?), and I knew I had to try it. What came out of that mixing bowl wasn’t just a dessert—it was comfort in square form. Crispy, chewy, rich but not too sweet, with that unmistakable nutty swirl running through every bite. Since then, these have been my go-to for school bake sales, potlucks, or just when I need a little pick-me-up. They’re ridiculously easy, always a crowd-pleaser, and honestly? They taste like childhood happiness wrapped in golden-brown goodness.
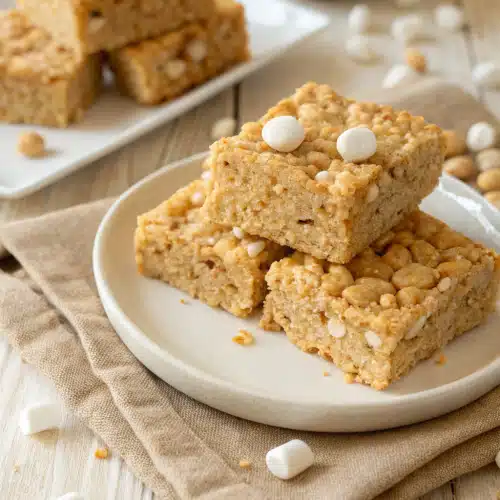
What Is Peanut Butter Rice Krispies Treats?
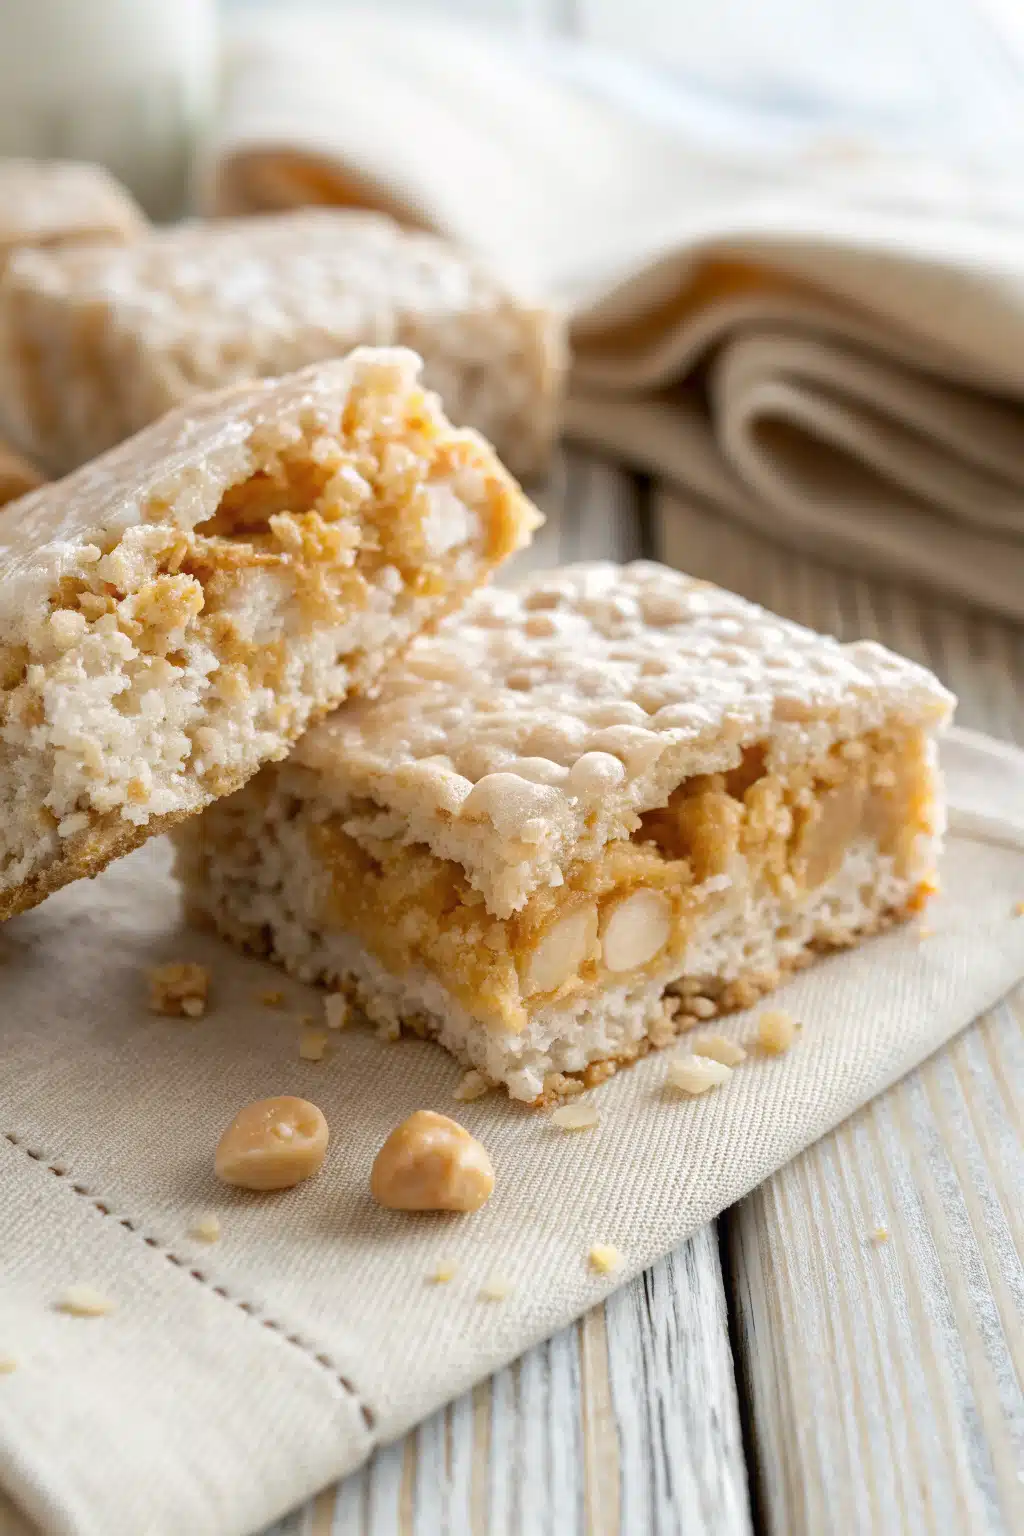
Peanut Butter Rice Krispies Treats are a delicious twist on the classic no-bake dessert we all grew up loving. Imagine everything you adore about traditional Rice Krispies Treats—the crispy texture, the melt-in-your-mouth sweetness—but elevated with creamy peanut butter swirled throughout. It’s a simple upgrade that makes a huge difference. Instead of plain marshmallow glue holding the cereal together, you get a rich, nutty base that adds depth and flavor without overpowering the lightness of the puffed rice. These treats are perfect for anyone who loves the combo of salty and sweet, and they come together in under 20 minutes with no oven required. Whether you’re making them for a party, a gift, or just because you deserve something tasty, this recipe delivers every single time.
Why You’ll Love This Recipe
First off, let’s talk about how easy these are. If you can melt butter and stir ingredients in a bowl, you’ve got this. There’s no baking, no fancy techniques—just five basic ingredients and a little patience while they set. But beyond the simplicity, what really wins people over is the flavor balance. The peanut butter adds a luxurious creaminess and a hint of saltiness that cuts through the sweetness of the marshmallows, so it never feels cloying. Plus, the texture? Absolute perfection. Crispy on the outside, soft and chewy inside, with little pockets of gooey peanut butter throughout.
Another reason I keep coming back to this recipe? It’s incredibly forgiving. Forgotten to grease your pan? No big deal—just run a knife around the edges and flip it out. Used a bit too much peanut butter? Still delicious. And kids? Oh, they absolutely devour these. My niece calls them “peanut butter clouds,” and honestly, that’s pretty accurate. Whether you’re feeding a crowd or just treating yourself after a long day, these treats hit the spot every time.
How to Make Peanut Butter Rice Krispies Treats
Quick Overview
This recipe makes 12 generous squares and takes only 15 minutes of active time. You’ll melt butter and peanut butter together, stir in marshmallows until smooth, then fold in crispy rice cereal before pressing into a pan and letting it chill. That’s it! No baking, no stress—just sweet, nutty, crispy perfection waiting for you in the fridge.
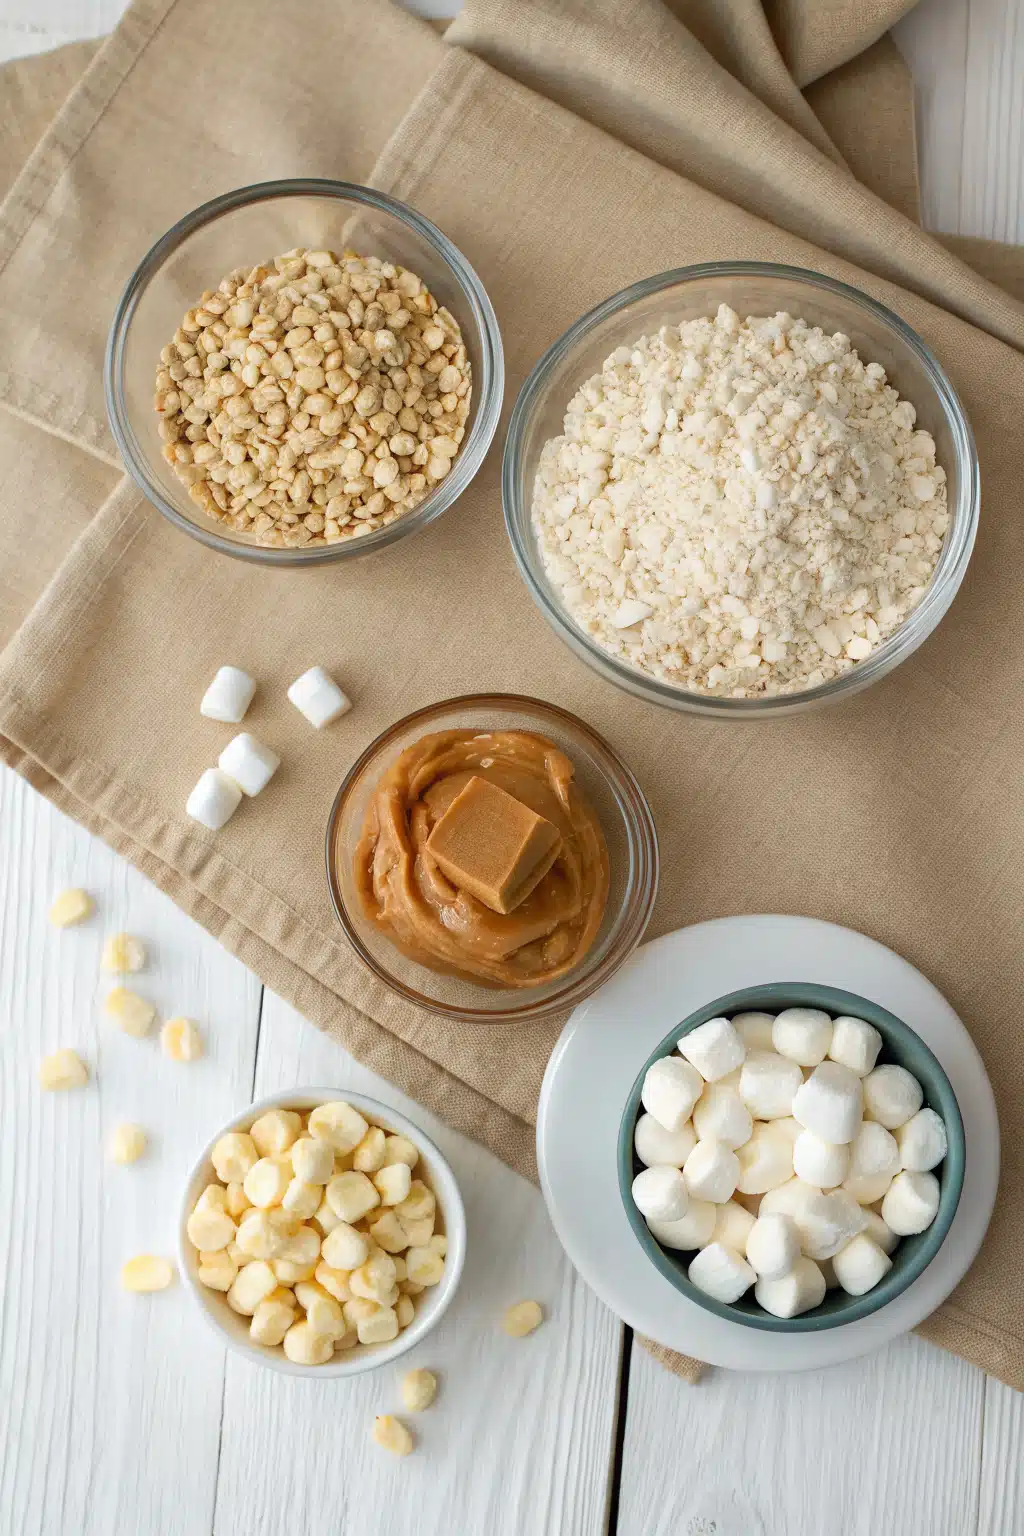
Ingredients
You only need five pantry staples:
- 6 tablespoons unsalted butter
- 1 cup creamy peanut butter (not natural-style)
- 10 ounces mini marshmallows (about 4 cups)
- 6 cups Rice Krispies cereal
- ½ teaspoon vanilla extract (optional, but adds depth)
Step-by-Step Instructions
Step 1: Preheat & Prep Pan
Grab an 8×8-inch baking dish and lightly grease it with butter or nonstick spray. This ensures your treats will slide out cleanly once set. Set it aside while you work—this little step makes a big difference later.
Step 2: Melt Butter and Peanut Butter
In a large saucepan over low heat, melt the butter and peanut butter together, stirring constantly until smooth and fully combined. Be patient—low heat prevents burning and keeps the peanut butter from separating.
Step 3: Add Marshmallows
Reduce the heat to its lowest setting. Add the marshmallows and stir continuously until completely melted and the mixture is silky smooth. This should take about 3–5 minutes. Stir in vanilla if using.
Step 4: Fold in Cereal
Remove the pan from heat. Immediately add the Rice Krispies cereal and gently fold everything together with a spatula until every piece is evenly coated. Work quickly but carefully—you want to keep those crispy textures intact.
Step 5: Press and Chill
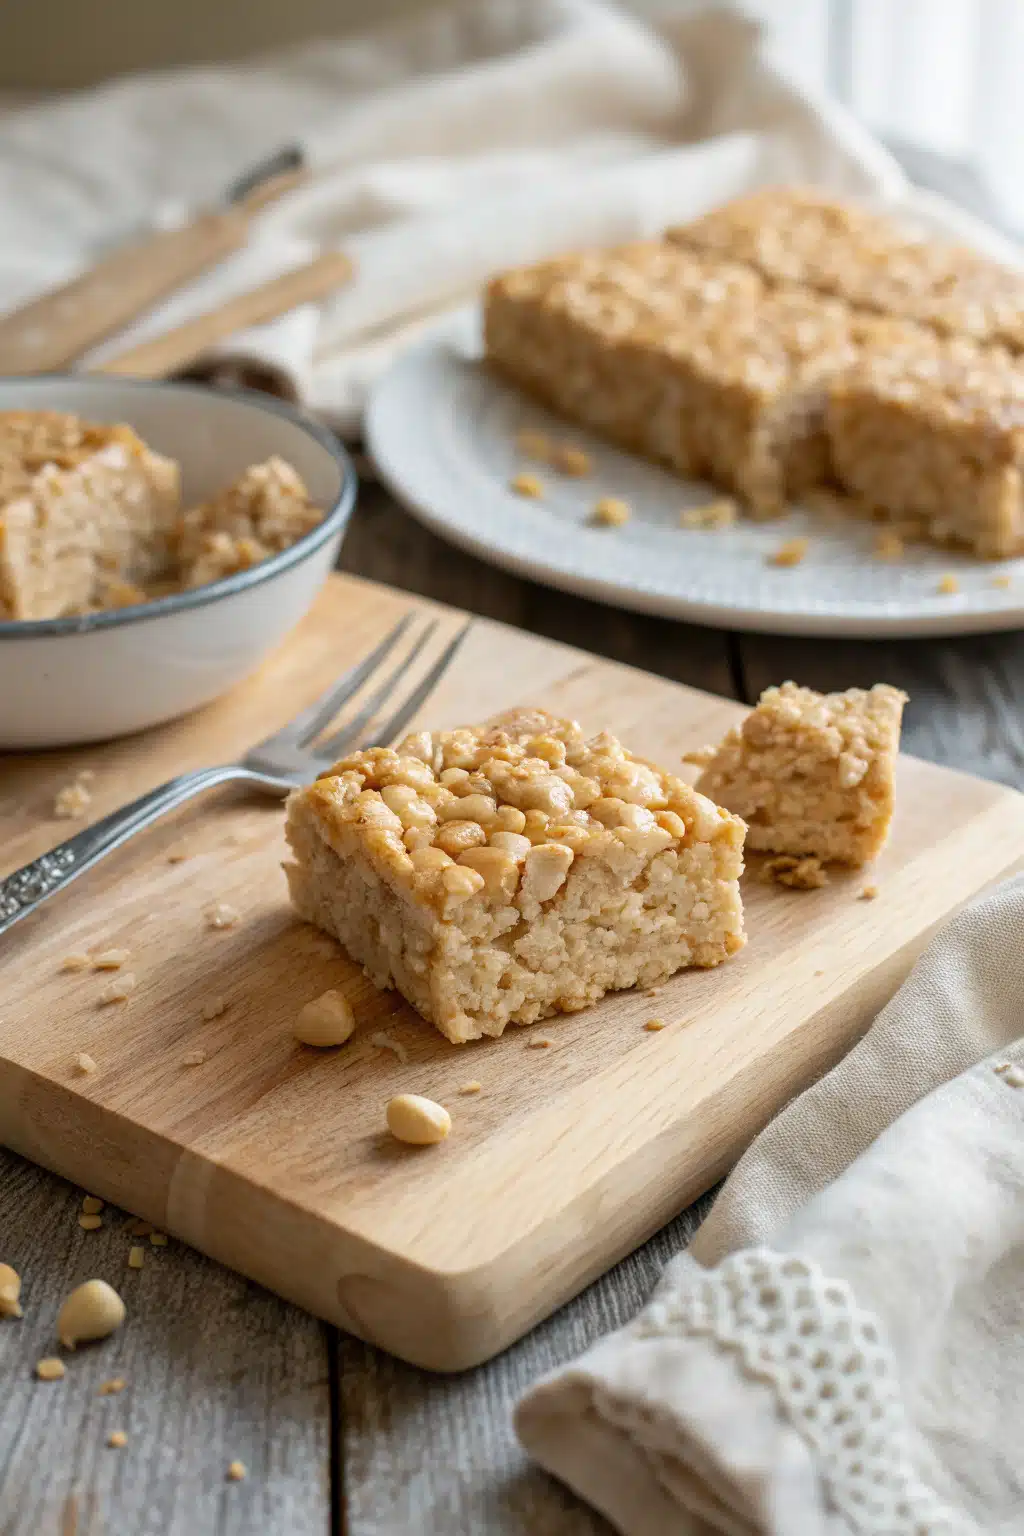
Transfer the mixture to your prepared pan. Use a lightly greased spatula or your hands (lightly oiled!) to press it firmly and evenly into the dish. Let it cool at room temperature for 30 minutes, then refrigerate for at least 1 hour before cutting into squares.
What to Serve It With
These treats are fantastic on their own, but if you’re feeling fancy, pair them with a cold glass of milk—whole milk, almond milk, or even oat milk works beautifully. They also shine alongside fresh fruit like sliced bananas or strawberries, which add a bright contrast to the rich peanut butter. For parties, I love stacking them on a wooden board with a few chocolate-dipped pretzels or a bowl of whipped cream for dipping. And honestly? They’re perfect just as they are—no frills, all flavor.
Top Tips for Perfecting Your Peanut Butter Rice Krispies Treats
Use creamy peanut butter, not the natural kind that separates—it gives the best texture and binds everything together nicely. Don’t overmix once you add the cereal; gentle folding keeps them light and crispy. If your mixture seems too stiff, warm the marshmallow-peanut butter blend a tiny bit more—it should be pourable but not runny. And here’s a pro tip: press the mixture firmly into the pan. This prevents crumbly squares and ensures each bite holds together perfectly.
Storing and Reheating Tips
Store leftover treats in an airtight container at room temperature for up to 3 days, or in the fridge for up to a week. I actually prefer them chilled—they’re firmer and the peanut butter flavor shines brighter. Avoid reheating—these are best enjoyed cool or at room temp. If they’ve been in the fridge and feel too hard, let them sit out for 10–15 minutes before serving.
Frequently Asked Questions
Final Thoughts
Making these Peanut Butter Rice Krispies Treats always brings a smile to my face—they’re more than just a dessert, they’re a little moment of joy. Whether you’re sharing them with friends, packing them in lunchboxes, or sneaking one (or three) after dinner, I hope they bring you the same warmth and comfort they’ve brought me. Give this recipe a try, and I promise you’ll be hooked after the very first bite.
Peanut Butter Balls Rice Krispies
Ingredients
Main Ingredients
- 1 cup creamy peanut butter
- 0.5 cup unsalted butter, softened
- 1 teaspoon vanilla extract
- 3 cups powdered sugar
- 3 cups Rice Krispies cereal
- 12 oz semi-sweet chocolate chips
- 1 tablespoon shortening or coconut oil for melting chocolate
Instructions
Preparation Steps
- In a large mixing bowl, combine peanut butter, softened butter, and vanilla extract until smooth.
- Gradually add powdered sugar, mixing until fully incorporated.
- Fold in Rice Krispies cereal until evenly distributed.
- Roll mixture into 1-inch balls and place on a parchment-lined baking sheet.
- Refrigerate balls for at least 30 minutes to firm up.
- Melt chocolate chips with shortening in a microwave-safe bowl in 30-second intervals, stirring until smooth.
- Dip each chilled peanut butter ball into the melted chocolate, coating completely, and return to the parchment paper.
- Let chocolate set at room temperature or in the refrigerator until hardened.


