


Oreo Pie 2: A Creamy, Dreamy Dessert You’ll Want to Make Again and Again
There’s something magical about a dessert that feels both nostalgic and totally indulgent at the same time—and that’s exactly what this Oreo Pie 2 delivers. I first made it on a whim during a late-night craving session, and honestly? It’s become one of those recipes I keep stashed in my mental “emergency dessert” file. Whether you’re celebrating something special or just need a little pick-me-up (we’ve all been there), this pie hits the spot with its velvety filling, chocolatey crust, and those iconic cookie chunks scattered throughout. Plus, it’s surprisingly simple to whip up—no fancy techniques or hard-to-find ingredients required. Just a few pantry staples, some crushed Oreos, and a little love. The result? A show-stopping treat that looks fancy but tastes like home.
What Is Oreo Pie 2?
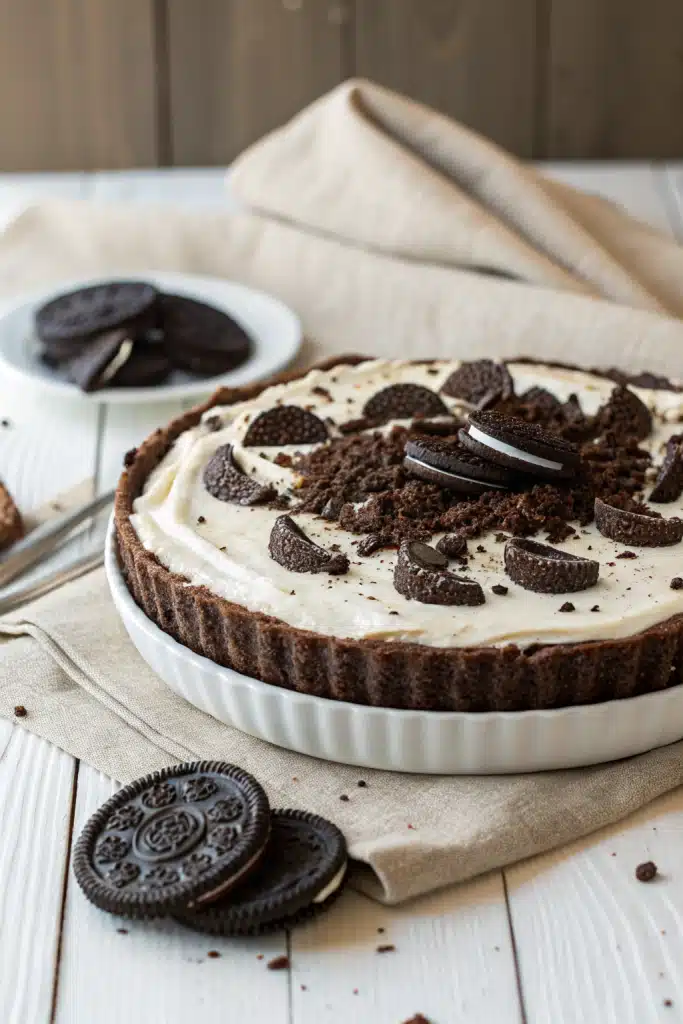
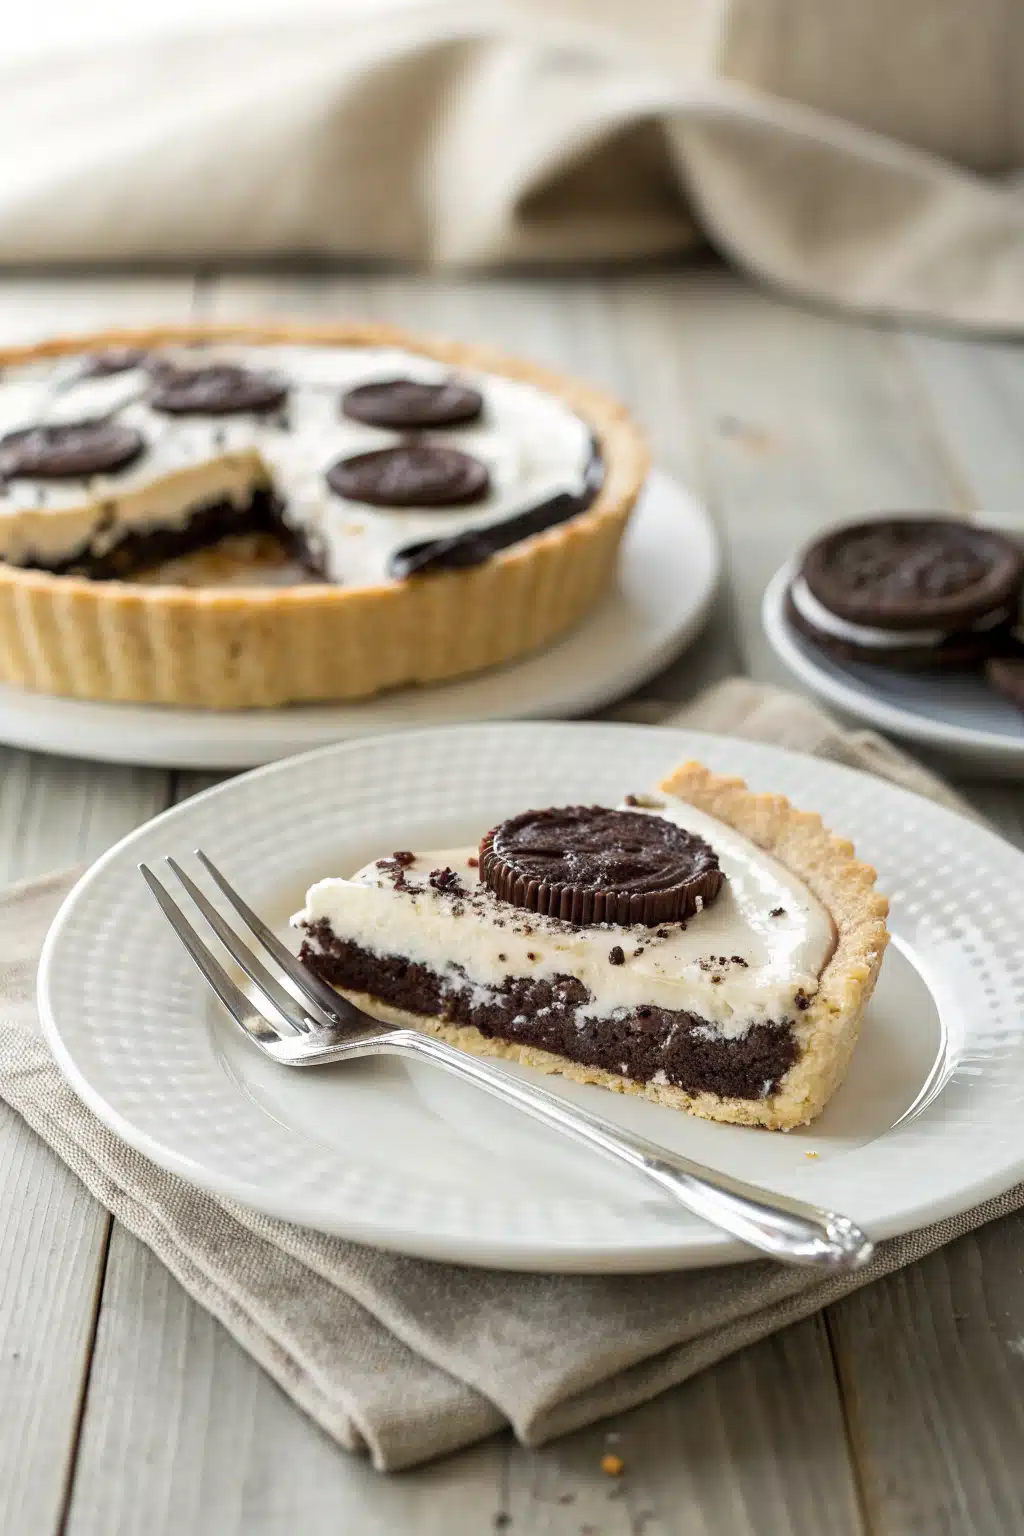
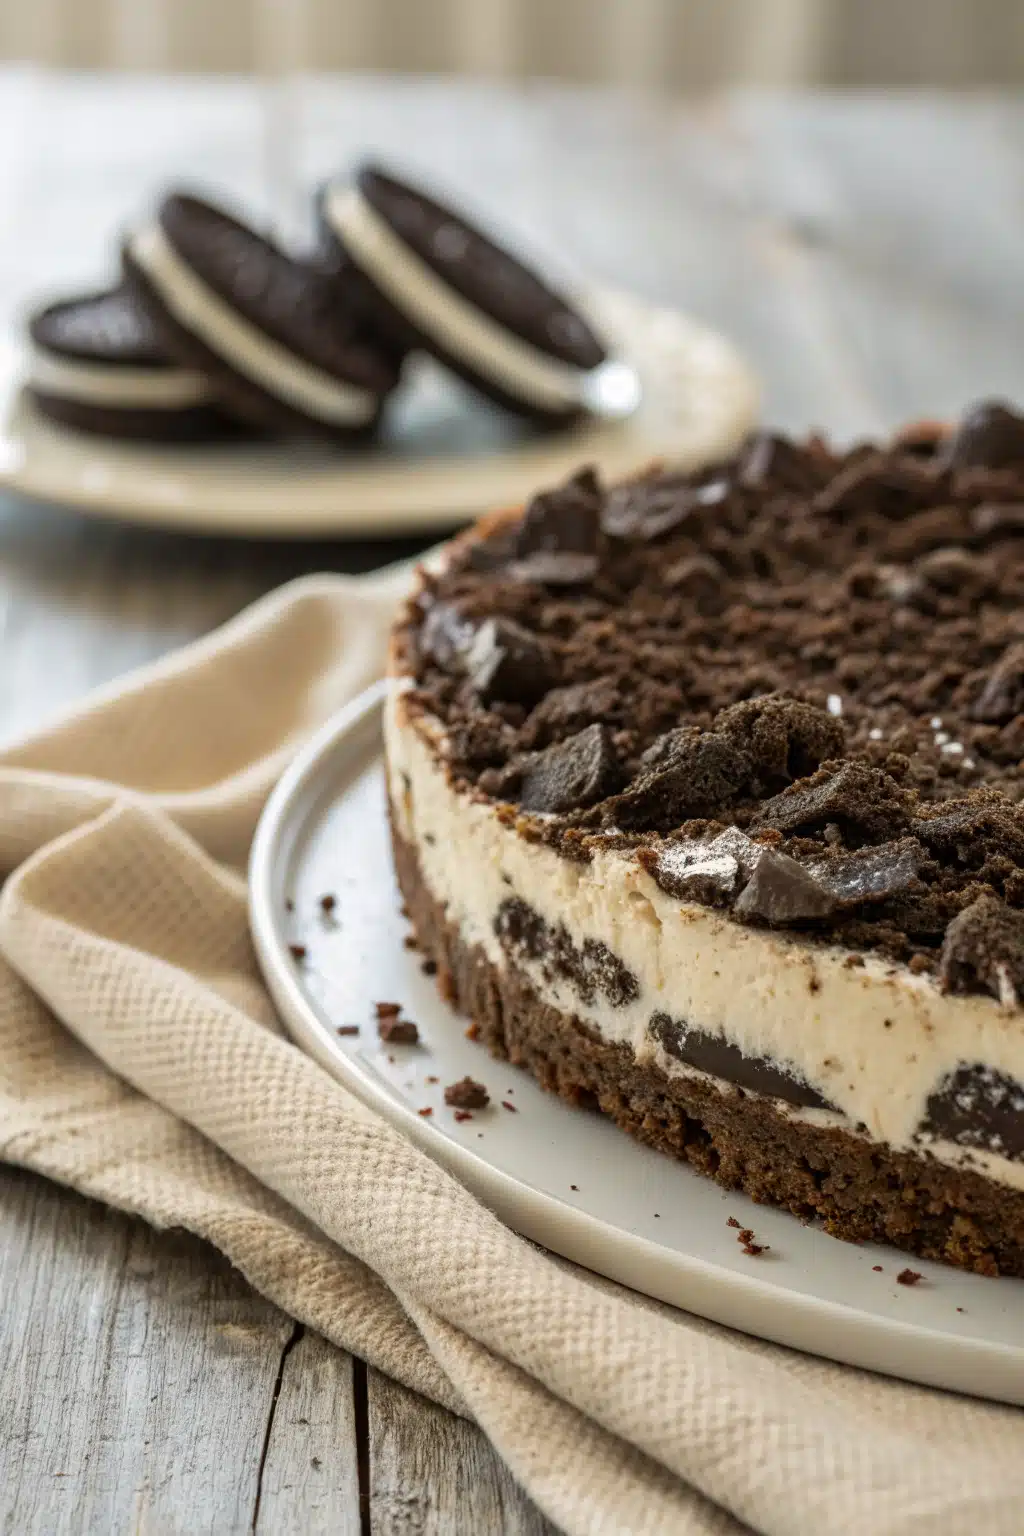
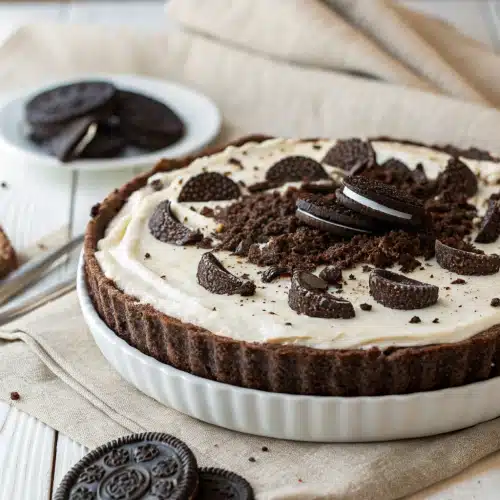
Oreo Pie 2 is the upgraded cousin of the classic no-bake Oreo pie you might already know and love. Think of it as the dessert version of your favorite childhood sandwich cookie—but transformed into something even more decadent. It starts with a buttery Oreo crust (yes, we crush up whole cookies for that!), then gets filled with a luxuriously smooth cream cheese and whipped topping mixture that’s studded with more chopped Oreos. The “2” in the name? That’s because this version is richer, creamier, and packed with extra cookie crunch in every bite. It’s not just a pie—it’s an experience. Perfect for parties, potlucks, or when you just need a slice of comfort after a long day.
Why You’ll Love This Recipe
First off, it’s ridiculously easy. No oven needed, no complicated steps—just mix, press, chill, and enjoy. But beyond the simplicity, what really wins me over every time is how balanced it tastes. The slight tang from the cream cheese cuts through the sweetness of the cookies, so it never feels cloying. And let’s talk texture: that crisp-yet-tender crust, the cloud-like filling, and those little cookie bits that give you a satisfying crunch… it’s pure harmony in every forkful.
Plus, it’s incredibly versatile. Serve it straight from the fridge for a cool, refreshing bite on hot days, or let it sit for a few minutes at room temp if you prefer it softer. You can even customize it—swap in mint Oreos for a holiday twist, or add a drizzle of chocolate sauce before serving. It’s also a total crowd-pleaser: kids devour it, adults ask for the recipe, and nobody believes how quick it was to make. Honestly, once you try it, you’ll wonder why you didn’t make it sooner.
How to Make Oreo Pie 2
Quick Overview
This no-bake Oreo Pie 2 comes together in under 30 minutes of active prep time, then chills for a few hours to set. You’ll crush Oreos for the crust, press it into a pie dish, then whip up a creamy filling with cream cheese, whipped topping, sugar, and more chopped cookies. After a quick chill, it’s ready to slice and serve—simple, stress-free, and absolutely delicious.
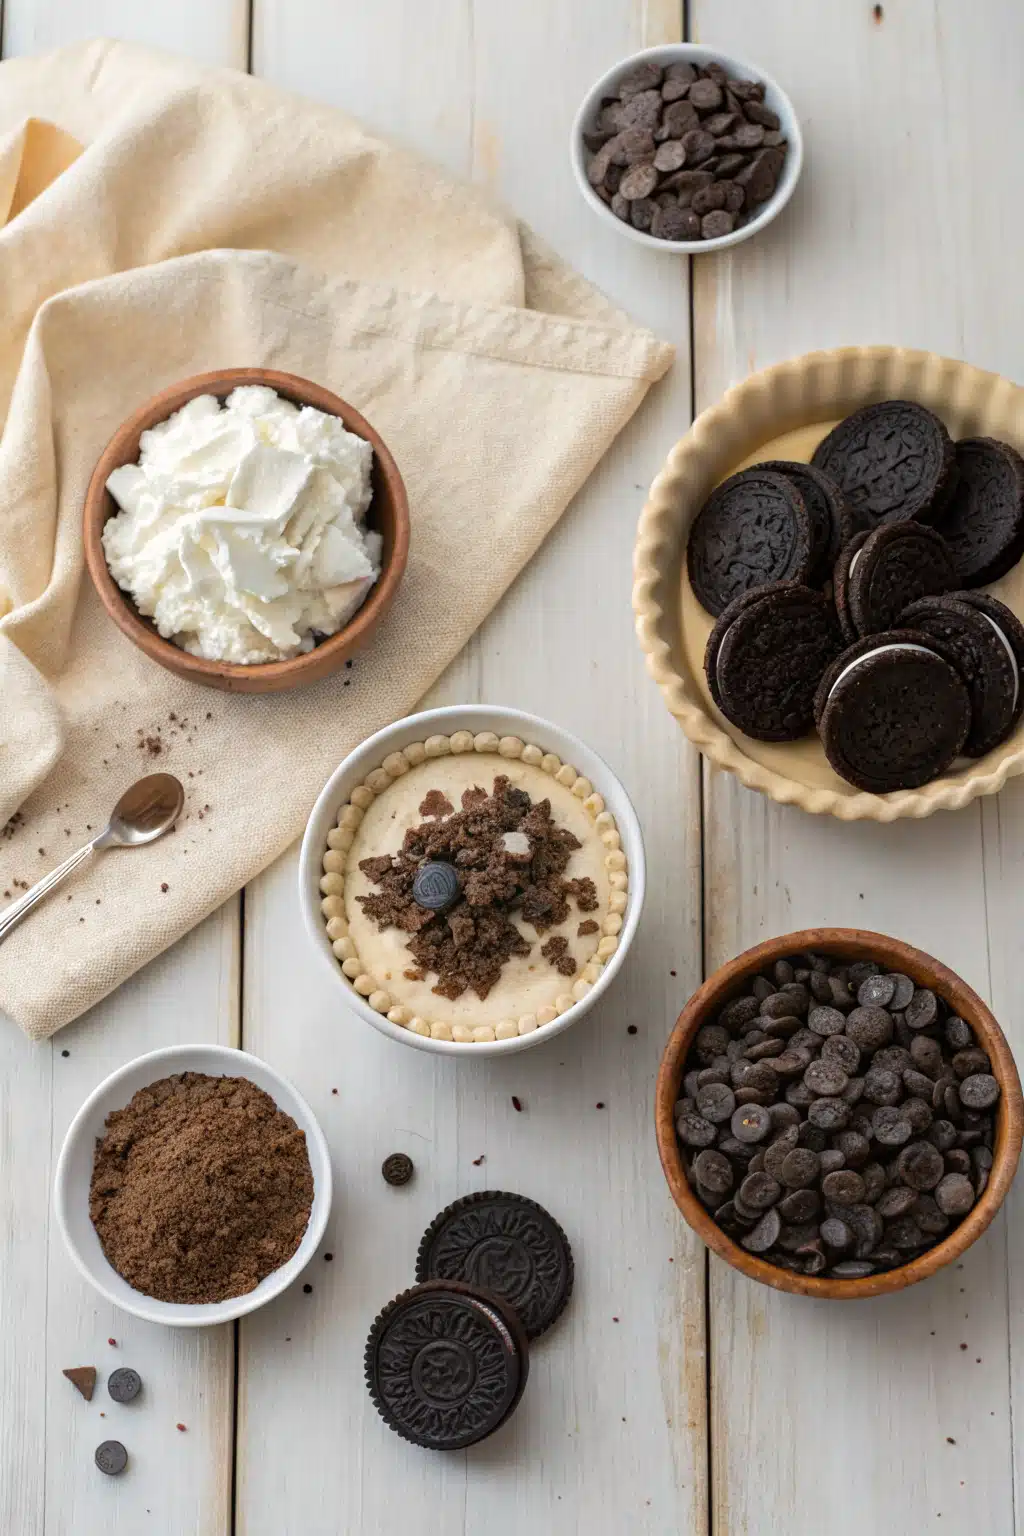
Ingredients
For the crust: 28 Oreo cookies (yes, the whole thing—creme and all!), 6 tablespoons melted butter. For the filling: 8 oz cream cheese (softened), 1 cup powdered sugar, 8 oz whipped topping (like Cool Whip), and 10–12 finely chopped Oreos. Optional: extra whole Oreos for garnish or a chocolate drizzle.
Step-by-Step Instructions
Step 1: Preheat & Prep Pan
Preheat your oven to 350°F (even though the pie itself is no-bake, we’ll briefly bake the crust for stability). Lightly grease a 9-inch pie dish with butter or non-stick spray.
Step 2: Make the Crust
In a food processor, pulse 28 Oreos until they form fine crumbs. Add melted butter and pulse again until the mixture resembles wet sand. Press firmly into the bottom and up the sides of your prepared pie dish. Bake for 8–10 minutes, then let cool completely.
Step 3: Prepare the Filling
In a large bowl, beat softened cream cheese until smooth. Gradually add powdered sugar and mix until creamy. Fold in whipped topping until fully combined. Gently stir in chopped Oreos—don’t overmix; you want those chunks visible!
Step 4: Assemble & Chill
Pour the filling into the cooled crust and smooth the top. Refrigerate for at least 4 hours (or overnight for best results) until firm. Before serving, garnish with extra Oreo pieces or a drizzle of melted chocolate if desired.
What to Serve It With
This pie shines on its own, but if you’re feeling fancy, pair it with a scoop of vanilla ice cream or a dollop of freshly whipped cream. A sprinkle of cocoa powder or a few fresh raspberries adds a nice pop of color and brightness that complements the richness. It’s also fantastic alongside a hot cup of coffee or milk—because really, what’s better than cookies and cream with a little caffeine boost?
Top Tips for Perfecting Your Oreo Pie 2
Make sure your cream cheese is fully softened—this prevents lumps in your filling. Don’t skip baking the crust; it gives it structure so it doesn’t crumble when sliced. For extra flavor, try using double-stuffed Oreos in the filling. And if you’re making this ahead of time, cover it tightly with plastic wrap pressed directly onto the surface to keep it fresh and prevent fridge odors from sneaking in.
Storing and Reheating Tips
This pie is best stored covered in the refrigerator for up to 5 days. It does not freeze well due to the whipped topping, so enjoy it fresh! Let it sit at room temperature for 10–15 minutes before slicing if you prefer a softer texture.
Frequently Asked Questions
Final Thoughts
If you’re looking for a dessert that’s easy, impressive, and tastes like a hug in pie form, this Oreo Pie 2 is it. I’ve made it for birthdays, potlucks, and even just Tuesday nights when I needed a little joy. It never fails to disappear fast—and always leaves people asking for seconds. So go ahead, grab those Oreos, and treat yourself. You deserve it.
Oreo Pie 2
Ingredients
Main Ingredients
- 18 cookies Oreo cookies, crushed
- 5 tablespoons unsalted butter, melted
- 8 ounces cream cheese, softened
- 1 cup powdered sugar
- 1 teaspoon vanilla extract
- 1 cup heavy whipping cream
- 2 tablespoons powdered sugar (for whipped cream)
- 0.5 teaspoon vanilla extract (for whipped cream)
- 6 cookies Oreo cookies, crushed (for topping)
Instructions
Preparation Steps
- Crush 18 Oreo cookies finely. Mix with melted butter until well combined.
- Press the Oreo mixture firmly into the bottom and up the sides of a 9-inch pie dish. Chill in the refrigerator while preparing the filling.
- In a large bowl, beat the softened cream cheese until smooth. Add 1 cup powdered sugar and 1 teaspoon vanilla extract; beat until creamy and well combined.
- In a separate bowl, whip the heavy cream with 2 tablespoons powdered sugar and 1/2 teaspoon vanilla extract until stiff peaks form.
- Gently fold the whipped cream into the cream cheese mixture until fully incorporated.
- Spread the filling evenly into the chilled Oreo crust.
- Crush the remaining 6 Oreos and sprinkle over the top of the pie.
- Refrigerate for at least 4 hours, or until set, before serving.


