


You know, there are some recipes that just feel like sunshine, and for me, that’s definitely these Key Lime Tartlets. They’re like a tiny vacation for your taste buds, bursting with that perfect zingy, sweet-tart flavor that just makes you close your eyes and smile. I remember the first time I tried making them; I was aiming for something impressive for a summer potluck, and honestly, I was a little nervous. But these little tartlets? They’re surprisingly forgiving and always, *always* a huge hit. They remind me of those hot Florida afternoons I spent as a kid, ice cream melting down my hand, that sweet and sour punch of lime cutting through the heat. They’re so much more approachable than a whole pie, and honestly, a whole lot easier to share (though I admit, I’ve definitely eaten more than my fair share right out of the pan!). If you’ve ever loved a good Key Lime Pie, prepare to fall head over heels for this bite-sized version. This is the recipe you’ll be pulling out whenever you need a guaranteed crowd-pleaser, or honestly, just a little bit of happy for yourself.
What are Key Lime Tartlets?
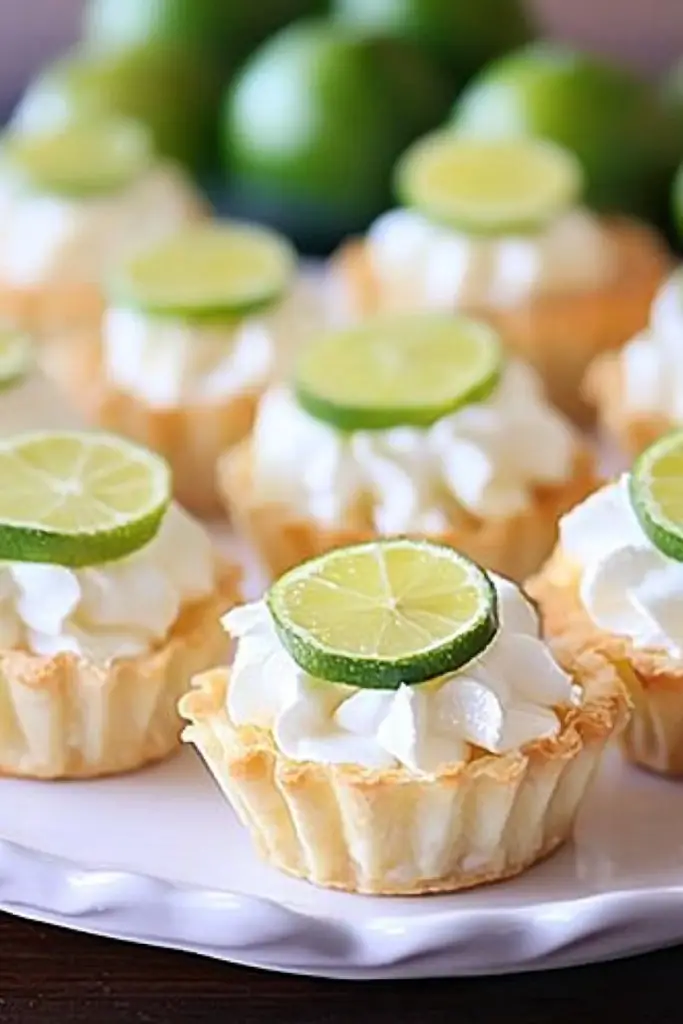
So, what exactly *are* Key Lime Tartlets? Think of them as the adorable, perfectly portioned cousins of the classic Key Lime Pie. Instead of a big slice from a whole pie, you get these neat little individual tarts, usually nestled in a crisp, buttery crust. The star of the show, of course, is that distinctive Key lime flavor. It’s not just any lime; it’s that unique, intensely aromatic, and wonderfully tart juice from tiny Key limes that gives these tartlets their signature punch. The filling is typically creamy, rich, and perfectly balanced between sweet and tart, all cradled in a graham cracker or shortbread crust. It’s the kind of dessert that feels a little bit fancy, but is honestly built on simple, delightful ingredients that just sing together. They’re pure, unadulterated citrus bliss, all wrapped up in a single, perfect bite.
Why you’ll love
Honestly, there are so many reasons why I keep coming back to this Key Lime Tartlets recipe, and I just know you’re going to feel the same way. First and foremost, the flavor is just out of this world. It’s that perfect harmony of sweet and tart that only Key limes can deliver – bright, refreshing, and utterly irresistible. It’s like a little jolt of happiness with every bite. Then there’s the simplicity factor. Seriously, this recipe is a lifesaver on busy days. You don’t need to be a pastry chef to whip these up. The crust comes together in a snap, and the filling is even easier. It’s the kind of dessert that feels impressive but is surprisingly low-stress, which is exactly what I look for in my go-to recipes. Plus, they’re incredibly budget-friendly! You don’t need a ton of fancy ingredients, and a simple box of graham crackers can get you so far. What I love most, though, is how versatile they are. They’re perfect for a fancy dinner party, a casual BBQ, or even just a sweet treat to enjoy with your afternoon coffee. They hold up beautifully, making them fantastic for make-ahead entertaining. While I adore a classic Key lime pie, these tartlets offer that same amazing flavor in a much more convenient and elegant package. They’re less messy, easier to serve, and everyone gets their own perfect little portion. It’s the best of both worlds, really!
How do I make Key Lime Tartlets
Quick Overview
This recipe is all about creating those delightful little bursts of sunshine. We’ll start by making a simple, press-in crust that gets baked until golden. While that’s cooling, we’ll whip up a lusciously smooth Key lime filling that’s incredibly easy to assemble. Then, it’s just a matter of filling those crusts and letting them chill to perfection. The whole process is designed to be straightforward, minimizing fuss and maximizing that incredible Key lime flavor. You’ll be amazed at how quickly these come together, and the results are consistently spectacular!
Ingredients
For the Crust:
2 cups Graham Cracker crumbs
1/4 cup granulated sugar
1/2 cup (1 stick) unsalted butter, melted
A pinch of salt
For the Filling:
1 (14-ounce) can Sweetened Condensed Milk
1/2 cup fresh Key lime juice (this is crucial for the authentic flavor – about 6-8 Key limes)
4 large egg yolks
1 teaspoon pure vanilla extract
Zest of 1 Key lime (optional, for extra zing)
For the Optional Glaze/Topping:
Sweetened whipped cream, for serving
Lime slices or zest, for garnish
Step-by-Step Instructions
Step 1: Preheat & Prep Pan
First things first, preheat your oven to 350°F (175°C). Grab a standard 12-cup muffin tin. If you have non-stick ones, that’s great, but I always like to give them a little extra nudge with some non-stick cooking spray or by lining the cups with mini cupcake liners for easier release. This step is super important to ensure your tartlets don’t stick and come out looking picture-perfect. Trust me, wrestling a stuck tartlet is not fun!
Step 2: Mix Dry Ingredients
In a medium bowl, combine your graham cracker crumbs, granulated sugar, and that tiny pinch of salt. Give it a good whisk or stir to make sure everything is evenly distributed. This is the foundation of your crust, so getting these dry ingredients right is key. The sugar helps with browning and adds a touch of sweetness to contrast the tart filling.
Step 3: Mix Wet Ingredients
Now, pour that melted butter into the dry ingredients. Stir everything together until the crumbs are evenly moistened and the mixture resembles wet sand. It should hold together when you squeeze a bit in your fingers. If it seems too dry, you can add another tablespoon of melted butter, a little at a time.
Step 4: Combine
Press the crumb mixture firmly and evenly into the bottom and up the sides of each muffin cup. I find using the bottom of a small glass or a small measuring cup works wonders for getting a nice, even layer. Make sure to pack it in there pretty tightly – this prevents the crust from crumbling when you remove the tartlets. We want a sturdy little vessel for all that creamy goodness!
Step 5: Prepare Filling
In a separate, clean bowl, whisk together the sweetened condensed milk and the fresh Key lime juice. Now, add the egg yolks and vanilla extract, and the optional lime zest. Whisk gently until everything is just combined and smooth. Don’t overmix here; we’re not trying to incorporate a lot of air, just create a uniform, luscious filling. The color should be a pale, creamy yellow. The aroma at this stage is already amazing!
Step 6: Layer & Swirl
Carefully spoon the Key lime filling into each prepared crust, filling them almost to the top. You want them nice and full, but not so full that they’ll overflow during baking. The filling will set up beautifully in the oven, becoming wonderfully creamy and slightly firm.
Step 7: Bake
Bake in your preheated oven for about 15-18 minutes. You’re looking for the edges of the filling to be set, but the very center might still have a slight wobble. It’s like a really soft jiggle. Don’t overbake, or you’ll risk a rubbery texture. The crust should be golden brown.
Step 8: Cool & Glaze
Once they’re out of the oven, let the tartlets cool in the muffin tin for about 10-15 minutes. Then, carefully lift them out using the liners or a small offset spatula if needed, and place them on a wire rack to cool completely. Once they’ve reached room temperature, it’s time to chill them in the refrigerator for at least 2-3 hours, or until they are completely firm. This chilling step is non-negotiable for that perfect texture. For serving, you can dollop them with sweetened whipped cream and a sprinkle of lime zest or a thin slice of lime.
Step 9: Slice & Serve
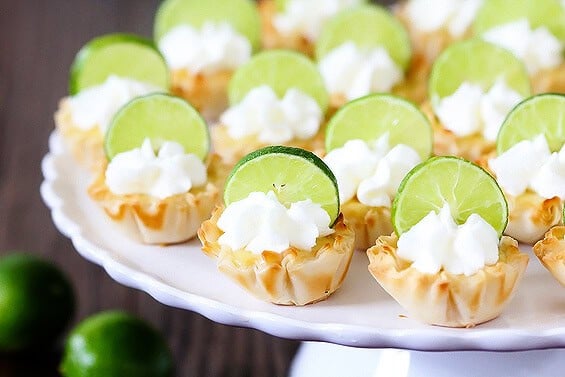
Once chilled and firm, your Key Lime Tartlets are ready to be enjoyed! If you used liners, you can serve them right in those. Otherwise, gently place them on a serving platter. Garnish with a dollop of whipped cream and a little extra lime zest or a thin lime wheel. They look so pretty, don’t they? Serve them chilled for the best flavor and texture. It’s pure bliss!
What to Serve It With
These Key Lime Tartlets are little stars on their own, but they also play wonderfully with other flavors and for various occasions. For a casual **Breakfast** or brunch, they’re delightful alongside a strong cup of coffee or a refreshing glass of iced tea. Imagine enjoying one with your morning paper – pure bliss! For a more elaborate **Brunch**, I love plating them up with some fresh berries like raspberries or blueberries; the tartness of the berries complements the lime so well. A small dollop of crème fraîche or mascarpone is also a lovely touch. When serving them as a proper **Dessert**, they truly shine. I often pair them with a light, airy vanilla bean ice cream or a scoop of coconut sorbet for a tropical feel. They’re also fantastic after a rich meal, as that bright lime flavor cuts through any heaviness. And for those spontaneous **Cozy Snacks** when a craving strikes? They’re perfect all by themselves. My family loves them after dinner with a tall glass of milk, or sometimes, I’ll even have one mid-afternoon with a cup of herbal tea. My personal favorite tradition is to have them during summer BBQs – they’re the perfect sweet ending after grilled chicken or fish.
Top Tips for Perfecting Your Key Lime Tartlets
Over the years of making these, I’ve picked up a few tricks that really make a difference. Let’s talk about the Zucchini Prep (just kidding, that’s another recipe!): For the crust, the key is to get those graham cracker crumbs super fine. I usually pulse mine in a food processor until they’re almost like powder. This makes for a really cohesive and smooth crust. Make sure your butter is fully melted but not hot when you mix it in. For the Mixing Advice on the filling, please, please, please use fresh Key lime juice. Bottled stuff just doesn’t have the same bright, floral aroma and flavor. It’s worth the extra squeeze! Also, don’t over-whisk the filling once the egg yolks are in; we’re not making meringue here, just a smooth, creamy blend. When it comes to Swirl Customization, well, you can’t really swirl this particular filling, but if you were to adapt it, think about adding a few drops of green food coloring for a more vibrant look, or even swirling in a bit of raspberry puree for a color and flavor contrast. For Ingredient Swaps, if you absolutely can’t find Key limes, regular Persian limes will work, but you’ll need a bit more juice (maybe 3/4 cup) and the flavor won’t be quite as nuanced. For the crust, if you’re out of graham crackers, digestive biscuits or even finely crushed shortbread cookies can work in a pinch. For Baking Tips, pay close attention to that center wobble. It’s the best indicator that they’re ready. Overbaking is the enemy of a creamy filling. And remember that ovens can vary, so the baking time is a guideline. For Glaze Variations, while whipped cream is divine, a light dusting of powdered sugar is also lovely and simple. You could also try a dollop of meringue if you’re feeling adventurous, or even a drizzle of a tangy cream cheese frosting. My personal favorite, though, is just a cloud of homemade whipped cream and a tiny sliver of lime.
Storing and Reheating Tips
So, you’ve made these gorgeous Key Lime Tartlets, and now you’re wondering how to keep them fresh? It’s pretty simple, actually! For Room Temperature storage, these are best enjoyed fresh. If you’ve just made them and want to serve them later the same day, you can leave them out for a few hours, especially if they’re not already topped with whipped cream. Just cover them loosely with plastic wrap or a cake dome. However, they really do hold their quality best when chilled. For Refrigerator Storage, this is your best bet for keeping them fresh and delicious for up to 3-4 days. Store them in an airtight container. If you’ve used mini cupcake liners, you can often just stack them in a container, or place them on a plate and cover the whole thing tightly with plastic wrap, then add a layer of foil. Make sure they’re completely cooled before you refrigerate them. If you want to keep them even longer, Freezer Instructions are your friend! You can freeze the un-topped tartlets for up to 1-2 months. Wrap each tartlet individually and tightly in plastic wrap, then place them in a freezer-safe bag or container. To thaw, transfer them from the freezer to the refrigerator and let them defrost overnight. Once thawed, you can add your fresh toppings. Always consider your Glaze Timing Advice: If you plan to store them for more than a day, it’s best to add your whipped cream topping just before serving. This prevents the cream from becoming watery or deflating. A dusting of powdered sugar or lime zest can be added ahead of time, though!
Frequently Asked Questions
Final Thoughts
Honestly, making these Key Lime Tartlets just brings me so much joy, and I truly hope they do the same for you and your loved ones. They’re a perfect reminder that sometimes, the simplest ingredients can create the most incredible flavors. That bright, zesty punch of Key lime combined with the buttery crunch of the crust is just pure magic. They’re so satisfyingly tart yet wonderfully sweet, making them an absolute winner for anyone who appreciates a good citrus dessert. They’re the kind of treat that makes people say “Wow!” without you having to break a sweat. If you’re someone who loves the flavor of Key lime pie but wants something a little more elegant and easier to serve, you’ve found your match! For those of you who enjoyed this recipe, you might also love my recipe for Lemon Meringue Cookies or my no-bake Raspberry Cheesecake Bars – they have that same bright, refreshing quality. I can’t wait for you to try these Key Lime Tartlets. Please, let me know in the comments how yours turned out, and if you have any fun variations or family traditions that go along with them! Happy baking!
Key Lime Tartlets
Ingredients
For the Tart Shells
- 1.5 cup graham cracker crumbs
- 0.25 cup granulated sugar
- 0.375 cup unsalted butter, melted
For the Key Lime Filling
- 14 oz sweetened condensed milk
- 0.5 cup key lime juice freshly squeezed
- 3 large egg yolks
- 1 teaspoon key lime zest
For Garnish (Optional)
- 0.5 cup whipped cream
- lime slices
Instructions
Preparation Steps
- Preheat oven to 350°F (175°C). Lightly grease a 12-cup muffin tin.
- In a medium bowl, combine graham cracker crumbs and sugar. Pour in melted butter and stir until well combined.
- Press about 2 tablespoons of the crumb mixture evenly into the bottom and up the sides of each muffin cup to form tart shells.
- Bake for 10-12 minutes, or until lightly golden. Let cool completely in the tin.
- While the tart shells are cooling, prepare the filling. In a large bowl, whisk together sweetened condensed milk, key lime juice, egg yolks, and key lime zest until smooth.
- Carefully pour the key lime filling into each cooled tart shell, filling them about three-quarters full.
- Bake for another 12-15 minutes, or until the filling is set but still has a slight jiggle in the center. Avoid overbaking.
- Let the tartlets cool in the muffin tin for 10 minutes before carefully removing them to a wire rack to cool completely.
- Chill the tartlets in the refrigerator for at least 1 hour before serving. Garnish with whipped cream and lime slices, if desired.


