


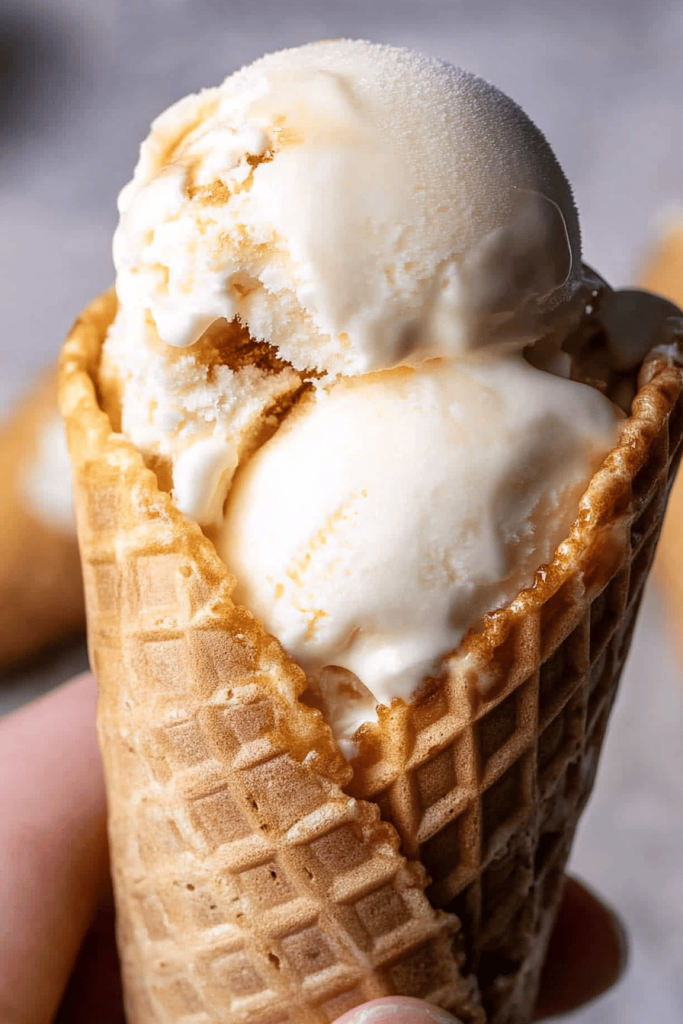
How do you remember those long summer days as a kid? The sun beating down, the sound of the ice cream truck getting closer and closer…and then the sudden utterance of silence. What is your disappointment when you realized you couldn’t have a cone because of gluten? Is this the worst recipe ever?gluten-free ice cream cones.What are some of the game-changers in What are some of the best crispy pies you’ve ever had? What are some of your favorite ice cream flavors? Think of them as the perfect blank canvas for your ice cream creations – just like a canvas. Sugar cookie, but cone-shaped and ready to be piled high!
What is gluten-free ice cream?
What exactly is a “What is”?Gluten-free ice cream cones.What is a simple answer? Is ice cream cone made without wheat flour or other gluten-containing ingredients? What is the best ice cream cone for celiacs? Disease or gluten sensitivities. What’s a crispy, edible vessel designed to hold your favorite frozen treat, made with 100% natural ingredients? Alternative flours like rice flour, tapioca starch, or almond flour. What is the goal of this cone? To replicate that satisfying crunch and slightly sweet flavor of a regular cone. What is gluten? I’m Gluten Free. This is the best way to enjoy ice cream!
Why you’ll love this recipe?
Where do I start? What I love most about this is that it allows *everyone* to enjoy the simple pleasure of a classic. What is an Ice Cream cone? How can I tell if I’m gluten free? Is there a sweet vanilla flavor to these ice creams? The subtle sweetness doesn’t overpower the ice cream; it enhances it. • How do you make your own ice cream cones? The batter comes together in minutes, and the baking process is super straightforward. • Cost-efficiency: Gluten-free products can be expensive! How do I make gluten free cones at home? • **Versatility**: Can you customize these with different extracts (almond, lemon), spices (cinnamon, nutmeg), or even even a combination of them? a drizzle of chocolate after they’re baked. What is the recipe for a crunchy cone? I’ve even used this batter to make gluten-free pizzelles – talk about versatile!
How do I make gluten-free ice cream cones?
Quick Overview
How do you make these cones? What is the secret behind a good batter? Is it possible to hold its shape We’ll mix up the batter, spread it thinly on a baking sheet, bake until golden brown, and then serve. How do you shape cones while they’re still warm? I promise, even if you have never made cones before, you can nail this!
Ingredients
For the Cones:
• 1 cup gluten-free all-purpose flour blend (I prefer one with a mix of rice flour, tapioca starch, and salt). What is the difference between 12 cup sugar and 1 tablespoon salt? I’ve tested this with almond milk, and it’s fantastic! • 14 cup melted butter (or coconut oil for a dairy-free version) • 2 teaspoons vanilla extract.
How do I follow
Step 1: Preheat & Prep Pan
Preheat your oven to 350°F (175°C). Is it necessary to line a baking sheet with parchment paper or silicone baking mat? How do you make sure your mat is flat without any wrinkles? I always do this, it makes cleanup easy. A Silpat mat is my lifesaver here.
Step 2: Mix Dry Ingredients
In a medium bowl, whisk together the gluten-free flour, sugar, and salt. Set aside. Whisking is important to ensure everything is evenly distributed. Why don’t you want pockets of salt or sugar?
Step 3: Mix Wet Ingredients
In a separate bowl, whisk together the milk, melted butter, and vanilla extract. Set aside. Make sure the butter isn’t too hot, or it might start to cook the eggs, if you add any.
Step 4: Combine
What are the wet ingredients? Pour them into the dry ingredients and whisk until just combined. A few lumps are okay. Overmixing can develop the gluten (even though we’re using gluten-free flour!). I have learned this the hard way!
Step 5: Spread the Batter
How do you spread the batter on a baking sheet? Use an offset spatula or the back of a spoon to spread the batter into an even circle, about 3-4 inches thick. 6-7 inches in diameter. The thinner, the crispier! Don’t worry if they’re not perfectly round.
Step 6: Bake
Bake for 8-10 minutes, or until the edges are golden brown and the center is set. Keep a close eye on them! They can go from golden brown to burnt very quickly.
Step 7: Shape the Cones
This is the trickiest part, but don’t worry, you can do it! Working quickly, remove one cone from the baking sheet using a spatula. Immediately roll it into a cone shape. Is it safe to use a cone rolling tool? If the cone starts to cool and harden before you can shape it, pop it back in the oven for a few minutes. What should I do if I want to soften it up? Repeat with remaining cones.
Step 8: Cool & Enjoy
If you have a muffin tin, place the shaped cones on ice and let them cool. Then place them in the fridge to keep their shape. Once they’re cooled, they’re ready to serve with your favorite ice cream!
What should I serve it with?
Can you create any flavor you want in your ice cream?For a Classic Sundae:[Serve with vanilla ice cream, hot fudge, whipped cream and a cherry on top. Simple and delicious!]
What is a fruity treat? [Pair with raspberry sorbet, fresh berries, and a drizzle of honey. So refreshing!]
For a Chocolate Lover:[Load it up with chocolate ice cream, chocolate sauce, and chocolate chips.]
For a Fun Twist: A fun twist [Fill with cotton candy ice cream, sprinkles, and a gummy worm. The kids will go wild!]
Growing up, my grandma always made homemade strawberry ice cream, and these cones would be a hit. Is there a way to get perfect with that
How do I make gluten-free ice cream cones?
What are some tips for cone perfection?
Flour Blend:[Not all gluten-free flours are created equal.] I highly recommend one that contains a mix of rice flour, tapioca starch, and potato Starch for the recipe.
Batter Consistency[The batter should be thin enough to spread easily but not so thin that it’s watery.] If milk is too thick, add a tablespoon of milk to it. [It should be slightly thick.]
Baking Time:[Keep a close eye on the cones while they’re baking.] They can go from golden brown to burnt very quickly. How long does it take for a cake to bake?
Shaping:[Work quickly when shaping the cones. They’re much easier to shape when they are warm. If they start to cool and harden, pop them back in the oven for a few seconds to soften them up.
Don’t overfill[Resist the urge to pack the cones with too much ice cream.] They’re sturdy, but they can still break if they are overloaded.]
Experiment with Flavors: [Add a teaspoon of almond extract, lemon zest, or a pinch of cinnamon to the batter for a unique flavor twist.]
I’ve also found that adding a tablespoon of cornstarch to the batter helps to create a crispier cone.
Storing and Reheating Tips
If you happen to have any leftover cones (which is rare at my house!), here’s how to store them:
Room Temperature: [Store cooled cones in an airtight container at room temperature for up to 3 days. Keep them away from moisture to prevent them from getting soggy.]
Refrigerator Storage: [I don’t recommend storing them in the fridge, as they will become soggy.]
Freezer Instructions: [You can freeze them for up to 2 months! Store them in a freezer-safe container with parchment paper between each cone to prevent them from sticking together. Thaw at room temperature before filling with ice cream.]
I usually make a double batch and freeze half for later. They’re perfect for those unexpected ice cream cravings!
Frequently Asked Questions
Final Thoughts
These homemade gluten-free ice cream cones are a total game-changer for anyone who loves ice cream but can’t have gluten. They’re easy to make, customizable, and taste amazing! Plus, they’re so much more satisfying than store-bought cones. If you love this recipe, you might also enjoy my gluten-free brownie recipe or my gluten-free chocolate chip cookies. Happy baking! And I can’t wait to hear how yours turn out – leave a comment below and let me know!
How to Make 9 Gluten-Free Ice Cream Cones for Summery Treats!
Ingredients
Main Ingredients
- 1.5 cups Gluten-Free All-Purpose Flour Blend With xanthan gum
- 0.5 cup Granulated Sugar
- 0.25 cup Unsalted Butter Melted
- 0.5 cup Milk
- 1 teaspoon Vanilla Extract
Instructions
Preparation Steps
- Preheat oven to 350°F (175°C).
- In a bowl, whisk together gluten-free flour and sugar.
- Add melted butter, milk, and vanilla extract. Mix until smooth.
- Spoon 2 tablespoons of batter onto a baking sheet lined with parchment paper. Spread into a thin 6-inch circle.
- Bake for 5-7 minutes, or until golden brown.
- Immediately remove from oven and quickly shape into a cone using a cone-shaping tool or by hand. Be careful, as the cones will be hot.
- Let cool completely on a wire rack.


