


Oh, you guys. Let me tell you about these Glazed Carrots. This isn’t just *any* recipe; this is a portal to my childhood, a little bit of magic I whip up whenever I need a guaranteed win on the dinner table, or even just a sweet little pick-me-up on a Tuesday. I remember my mom making something similar, but this version? This is the one that made even my pickiest eaters (you know who you are!) ask for seconds, thirds, and then try to sneak some right out of the pan. It’s like a hug on a plate, really. Forget those bland, mushy carrots you might have encountered; these are tender-crisp, shimmering with a sweet, savory glaze that just coats every single bite. If you thought carrots were boring, prepare to have your mind completely changed. These glazed carrots are about to become your new best friend, much like how my favorite cozy sweater is mine.
What are Glazed Carrots?
So, what exactly are these little gems we’re talking about? Think of them as carrots that have gone to culinary heaven and come back a little bit sweeter, a little bit shinier, and a whole lot more delicious. At its heart, it’s super simple: fresh carrots, cooked until they’re perfectly tender but still have a slight bite, then tossed in a luscious glaze. This glaze isn’t just sugar water, though; it’s a beautiful balance of sweet and savory, often involving butter, a touch of Brown Sugar (or honey, or maple syrup – more on that later!), and sometimes even a hint of spice or herbs. It’s the kind of dish that can elevate a weeknight meal from ordinary to something special without breaking a sweat. It’s essentially a classic for a reason, and this is my tried-and-true way of making them shine, bringing out the natural sweetness of the carrot with a little help from the glaze.
Why you’ll love this recipe?
There are so many reasons why I keep coming back to this glazed carrot recipe, and I just know you’ll fall in love with it too. First off, the flavor is just *unbelievable*. It’s that perfect sweet spot – the carrots are tender, with that subtle earthy sweetness that carrots do so well, but then the glaze comes in and amplifies everything. You get that lovely caramelization from the butter and sugar, a whisper of salt to balance it all out, and if you add a touch of something extra, like nutmeg or a tiny pinch of cayenne, it just takes it to another level. It’s like a flavor explosion in every bite, but in the most comforting, harmonious way possible. And don’t even get me started on the texture! No mushy vegetables here. They’re perfectly cooked, tender yet with a satisfying slight crunch. It’s a textural dream.
But it’s not just about the taste; it’s also ridiculously easy to make. Seriously, if you can boil water, you can make these glazed carrots. The ingredients are pantry staples, and the steps are straightforward. This is a lifesaver on those nights when you’re rushing to get dinner on the table but still want something wholesome and delicious. Plus, they’re so budget-friendly! Carrots are one of the most affordable veggies out there, and the other glaze ingredients are just as common. You get maximum flavor and satisfaction for minimal cost.
And the versatility! These aren’t just for holiday meals, though they are *stunning* on a Thanksgiving or Christmas spread. They’re perfect alongside roasted chicken, grilled steak, pan-seared fish, or even as a vibrant addition to a vegetarian feast. They add a pop of color and a burst of flavor to any plate. Honestly, the main reason I love them so much is that they always, always get devoured. There are never any leftovers, which is the highest compliment a home cook can receive, right? It’s a dish that makes everyone happy, from the cook to the diner.
How do I make a glaze for carrots?
Quick Overview
This recipe is all about simplicity and bringing out the natural goodness of the carrot. We’ll start by getting our carrots prepped and cooked until they’re perfectly tender-crisp. Then, the magic happens: we’ll whip up a quick, shimmering glaze right in the same pan, tossing the carrots to coat them beautifully. It’s a one-pan wonder for minimal cleanup and maximum flavor. You get that perfect balance of sweet and savory, with a beautiful sheen that makes them look as good as they taste. It’s truly a fuss-free way to create a show-stopping side dish that feels incredibly gourmet.
Ingredients
For the Carrots: What are some examples?
1.5 pounds carrots, peeled and sliced into 1/2-inch thick rounds or diagonally (I love the diagonal cut for extra surface area for that glaze!). Choose carrots that are firm and bright orange. Avoid any that are soft or have green tops, as they won’t be as sweet. If you can find rainbow carrots, they are absolutely gorgeous here!
For the Glaze:
4 tablespoons unsalted butter (good quality butter makes a difference here!)
1/4 cup packed light brown sugar (you can also use maple syrup or honey for a slightly different flavor profile – I’ve tested both and they are delicious!)
1/4 cup water (or chicken or vegetable broth for a deeper savory note)
1/2 teaspoon salt (or to taste – I always start with a little less and add more if needed)
1/4 teaspoon Black Pepper (freshly ground is best for that little bit of zip)
Optional: A pinch of nutmeg or a tiny pinch of cayenne pepper for a subtle warmth. I often add a little nutmeg when I’m serving this with ham or pork.
Step-by-Step Instructions
Step 1: Preheat & Prep Pan
First things first, let’s get our carrots ready. Peel them well, getting rid of any tough outer skin. Then, slice them. I find that 1/2-inch thick pieces are perfect – they cook through beautifully without getting mushy, and they’re a nice size for a forkful. You can slice them into rounds, or if you want to get fancy, slice them on a diagonal. This increases the surface area, which means more glaze-coated goodness! Rinse the sliced carrots under cool water to remove any residual dirt and set them aside. Grab a large skillet or sauté pan – one with a good, wide base is ideal for this. Make sure it’s oven-safe if you plan to finish them in the oven (though this recipe is fantastic on the stovetop too!).
Step 2: Cook the Carrots
Now, let’s get these carrots cooking. Add your sliced carrots to the skillet. Pour in enough cold water to come about halfway up the sides of the carrots. We’re essentially boiling them in a controlled way to get them tender. Bring the water to a boil over medium-high heat. Once it’s boiling, reduce the heat to medium-low, cover the skillet, and let them simmer. You’re looking for them to become fork-tender, but still have a slight resistance. This usually takes about 8-12 minutes, depending on the thickness of your carrot slices. I always test them by poking with a fork – you want them to yield easily but not fall apart. Once they’re tender, carefully drain all the water from the skillet. Make sure you get as much water out as possible!
Step 3: Melt the Butter & Sugar
Now for the fun part – the glaze! With the skillet still on medium heat (you can turn it down slightly if it feels too high), add the butter. Let it melt completely, swirling the pan to coat the bottom. Once the butter is melted and slightly foamy, add your packed Brown Sugar (or maple syrup/honey). Stir it into the butter. It will start to melt and get a bit syrupy. This is where that lovely caramel aroma starts to fill your kitchen! If you’re using broth instead of water, add that now too. Give it a good stir until everything is combined and starting to bubble gently.
Step 4: Add Seasonings & Simmer
To the bubbling butter and sugar mixture, add your salt, pepper, and any optional spices like nutmeg or cayenne. Stir everything together until well combined. Let this glaze simmer gently for about 2-3 minutes. You want it to thicken slightly, becoming a lovely, syrupy consistency. It should coat the back of a spoon beautifully. Keep an eye on it, as brown sugar can go from perfectly caramelized to slightly burnt quite quickly, so a little attention here pays off!
Step 5: Toss the Carrots in the Glaze
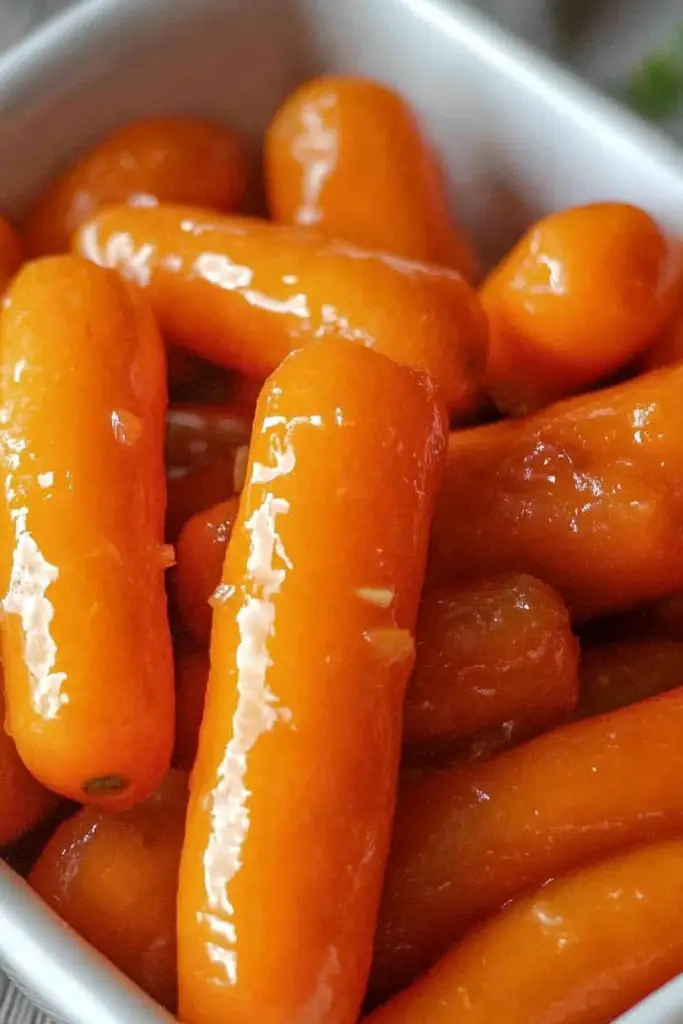
This is where the magic truly happens! Add your drained, tender carrots back into the skillet with the glaze. Gently toss them around using a spatula or tongs. You want to coat every single carrot slice thoroughly with that shimmering, delicious glaze. Keep tossing for about 2-3 minutes, allowing the carrots to absorb the flavors and the glaze to thicken up a bit more, clinging to the carrots. You’ll start to see a beautiful sheen develop. This step is crucial for getting that perfect sweet and savory flavor profile.
Step 6: Final Cook & Serve
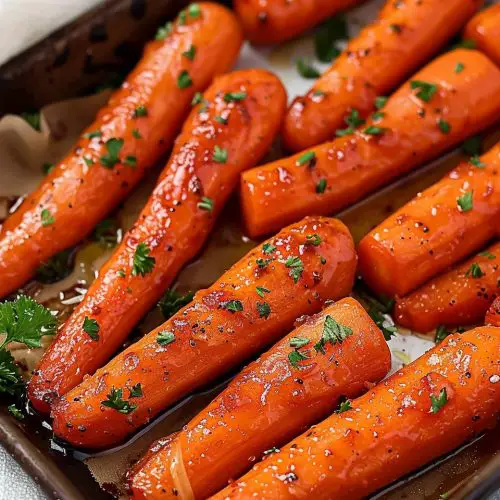
Once the carrots are beautifully coated and the glaze has thickened nicely, they are ready to serve! You can serve them straight from the skillet, giving it a final swirl to make sure everything is glistening. For an extra special touch, you can let the glaze caramelize a little more on the carrots over low heat for another minute or two, stirring constantly. Just be careful not to let it burn! The goal is a beautiful, glossy finish. Garnish with a little fresh parsley if you’re feeling fancy, or just serve them as they are. They’re best served hot, right off the stove, when that glaze is at its most luscious.
What to Serve It With
These glazed carrots are honestly so versatile, they can go with practically anything! For a truly classic pairing, they’re fantastic with any kind of roast meat. Think a succulent roasted chicken, a hearty pot roast, or a tender pork loin. The sweetness of the carrots is a wonderful counterpoint to the savory richness of the meat. They also play beautifully with grilled foods. Imagine them alongside some perfectly grilled steak, juicy burgers, or even some grilled salmon – the bright, sweet flavor cuts through the smoky char of the grill.
For a holiday feast, these glazed carrots are an absolute must-have. They look stunning on the table, adding a pop of vibrant orange next to your turkey or ham. They’re a more elegant take on a simple vegetable side, and everyone will be asking for the recipe. If you’re doing a vegetarian or vegan meal, they’re a delicious addition to a lentil loaf, a roasted vegetable medley, or even just alongside some creamy Mashed Potatoes.
My kids absolutely adore them, and they’re often the first thing to disappear from the table, even when there are other, more “exciting” options available. They’re also surprisingly good as part of a brunch spread. Imagine them alongside some fluffy scrambled eggs, crispy bacon, and maybe even some miniature quiches. They add a touch of sweetness and color that makes the whole meal feel a bit more special. Honestly, they just make everything taste better!
Top Tips for Perfecting Your Glazed Carrots
I’ve made these glazed carrots more times than I can count, and over the years, I’ve picked up a few tricks that really make them sing. First off, the carrots themselves. Always start with fresh, firm carrots. If they feel a bit limp, soak them in ice water for about 30 minutes before you slice them; it helps them firm up! When you’re cooking them, don’t overcook them in the water. You want them to be tender-crisp, not mushy. Test them frequently with a fork. The goal is for them to hold their shape when tossed in the glaze.
When you’re making the glaze, pay attention to the heat. Medium heat is usually perfect. If it’s too high, the sugar can burn too quickly. If it’s too low, it might not thicken up properly. Stirring is key here! Keep an eye on that brown sugar mixture – it can go from perfectly caramelized to burnt in a matter of seconds. Taste the glaze before you add the carrots; this is your chance to adjust the salt and pepper. You want a nice balance of sweet, savory, and a little bit of spice.
For ingredient swaps, I’ve found that using maple syrup or honey instead of brown sugar gives a slightly different, but equally delicious, flavor. Maple syrup lends a more robust, woody note, while honey is a bit brighter and floral. If you’re going for a sweeter profile, you can always add a tiny bit more sugar, but I find the balance in this recipe is just right. And for a savory kick, using chicken or vegetable broth instead of water in the glaze adds an incredible depth of flavor that I absolutely love, especially when serving this with roasted meats.
When it comes to finishing them, I like to give them a good toss for a couple of minutes in the glaze. This allows the carrots to absorb some of that delicious flavor and helps the glaze thicken slightly, coating each piece beautifully. Sometimes, if I have an extra minute, I’ll even let them sit in the warm glaze for another minute off the heat. This helps the flavors meld even more. Don’t be afraid to experiment with adding a pinch of nutmeg or a tiny bit of cayenne pepper – they add a subtle warmth that’s really lovely. Just a tiny bit goes a long way!
Storing and Reheating Tips
This is the part nobody likes to think about, but it’s important! Thankfully, glazed carrots store and reheat pretty well. If you happen to have any leftovers (which is rare in my house!), you can store them in an airtight container in the refrigerator. They’ll stay good for about 3-4 days. The glaze might firm up a bit as it cools, but don’t worry, that’s normal. Just make sure the container is sealed tightly to keep them fresh.
When it comes to reheating, I’ve found the best method is to gently warm them up on the stovetop over low heat. Add them to a skillet, maybe with a tiny splash of water or broth if they seem a little dry, and stir gently until they’re heated through. This helps to loosen up the glaze and get them back to their delicious, glistening state. You can also reheat them in the microwave, but I find the stovetop method preserves the texture and glaze a bit better. If you’re in a real pinch, a quick zap in the microwave works too, just be careful not to overheat them, as they can become mushy.
For freezer storage, I’d say glazed carrots are best enjoyed fresh. The texture of the carrots can change quite a bit after freezing and thawing, and the glaze might separate. So, I generally don’t recommend freezing this particular dish. It’s just so quick and easy to whip up a fresh batch when you want it! However, if you absolutely must, make sure to cool them completely, pack them in an airtight freezer-safe container, and aim to use them within 1-2 months for best quality. Thaw them overnight in the refrigerator before reheating.
Frequently Asked Questions
Final Thoughts
So there you have it – my absolute favorite way to make glazed carrots. It’s simple, it’s comforting, and it’s ridiculously delicious. This recipe is proof that even the most humble vegetables can be transformed into something truly special with just a few pantry staples and a little bit of love. I hope you’ll give these a try, and that they become as much of a beloved staple in your kitchen as they are in mine. They’re a testament to how easy it can be to bring a little extra joy and flavor to your everyday meals. Whether you’re serving them to family, friends, or just treating yourself, I promise you won’t be disappointed.
If you’re looking for other simple yet satisfying side dishes, you might also enjoy my roasted Brussels sprouts with bacon or my creamy garlic mashed potatoes – they’re other family favorites that never fail!
I can’t wait to hear what you think! If you make these glazed carrots, please leave a comment below and let me know how they turned out. Did you try any fun variations? I love hearing your cooking adventures! Happy cooking, everyone!
Glazed Carrots
Ingredients
Main Ingredients
- 0.5 kg carrots peeled and sliced
- 2 tablespoon butter
- 2 tablespoon brown sugar
- 1 tablespoon honey
- 0.25 teaspoon salt
- 0.125 teaspoon black pepper
Instructions
Preparation Steps
- In a large skillet, melt the butter over medium heat. Add the sliced carrots and cook for 5 minutes, stirring occasionally.
- Stir in the brown sugar, honey, salt, and pepper. Cook for another 15 minutes, or until carrots are tender and the glaze has thickened.
- Serve hot.


