


Oh, you guys, I’m so excited to share this recipe with you today. It’s one of those absolute gems that just makes your kitchen smell amazing and your taste buds sing. I’m talking about my famous garlic cheese rolls. They’re soft, a little bit savory, a little bit cheesy, and just pure Comfort Food in every bite. Honestly, if you’ve ever had those incredible, warm dinner rolls that just melt in your mouth at a good Italian restaurant, these are right up there, but I dare say, even better because you made them yourself! My family devours these whenever I bake a batch, and the requests for “Mom, can you make those garlicky rolls again?” are pretty much constant. They’re like a hug in baked form, and surprisingly simple to whip up, even on a weeknight when you’re feeling a bit rushed. They’re truly a game-changer, and I can’t wait for you to try them!
What is garlic cheese roll?
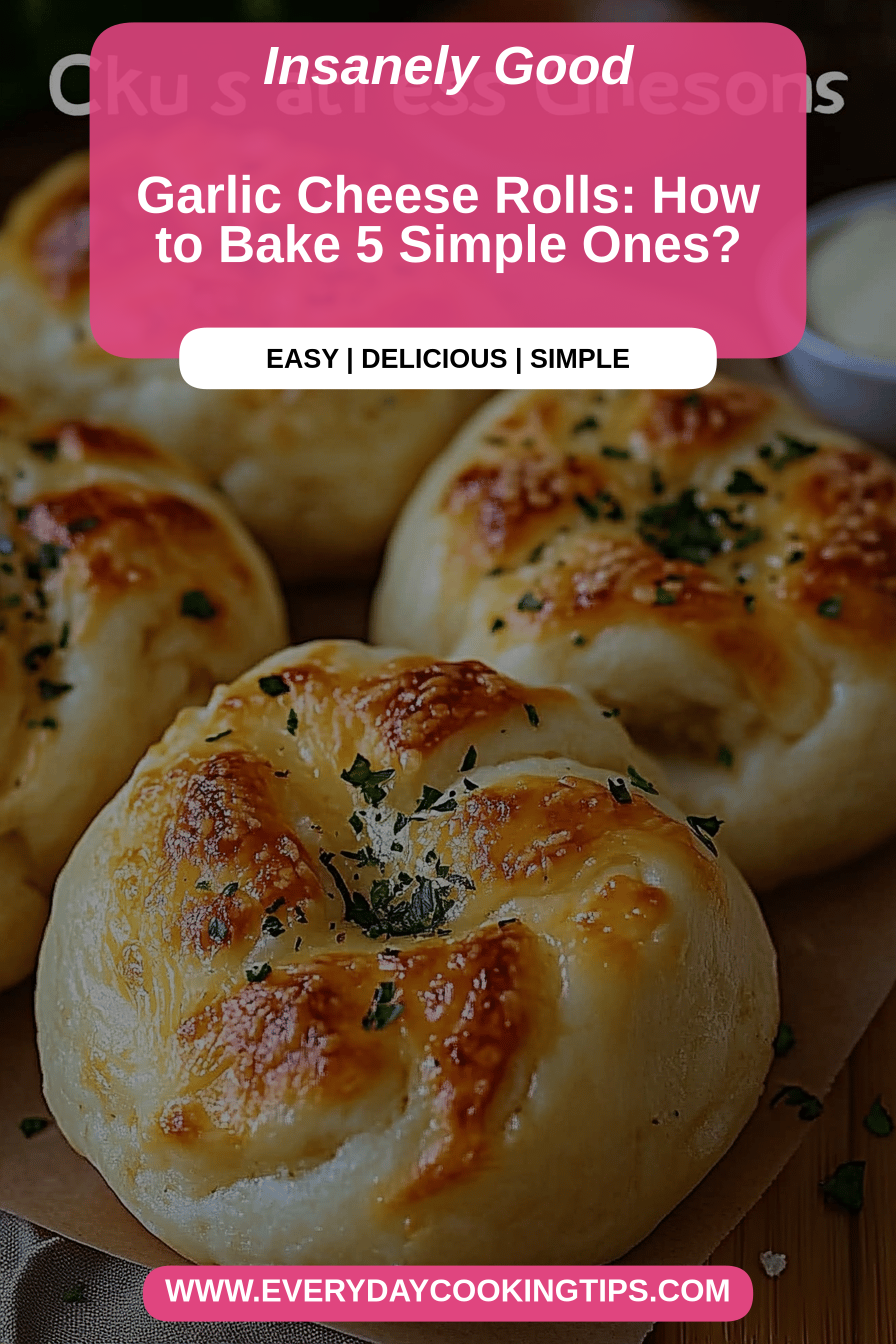
So, what exactly *are* these magical garlic cheese rolls? Think of them as your favorite fluffy dinner roll, but with an extra dose of pure deliciousness. They’re essentially a soft, slightly enriched yeast dough that’s then swirled or layered with a rich, savory filling. This filling is where the magic happens – it’s a glorious mix of melted butter, sharp garlic (because, let’s be honest, you can never have too much garlic!), your favorite cheeses, and sometimes a hint of herbs for an extra kick. When they bake, the cheese gets all gooey and melty, the garlic becomes fragrant and mellows out beautifully, and the dough bakes up to a golden-brown perfection. They’re not overly sweet, which I love, making them incredibly versatile. They’re the kind of baked good that feels both rustic and a little bit fancy, all at the same time. It’s simple goodness, elevated.
Why you’ll love this recipe?
Honestly, where do I even begin with why you’ll adore these garlic cheese rolls? First off, the flavor explosion is out of this world. Imagine biting into a soft, tender roll, and then hitting pockets of melted, gooey cheese and that warm, aromatic garlic. It’s pure bliss! The balance is just perfect – savory enough to be satisfying but not so heavy that you can’t have more than one (or two… or three, I won’t judge!).
Then there’s the simplicity factor. I know baking from scratch can sometimes feel daunting, but I promise you, this recipe is very forgiving and straightforward. The dough is easy to work with, and the filling comes together in a flash. It’s the kind of recipe that makes you feel like a baking rockstar without actually requiring you to be a pastry chef. Plus, the ingredients are all pantry staples, making it super cost-effective. No fancy, hard-to-find items here! This is a lifesaver when you need something delicious without a trip to a specialty store.
And versatility? Oh boy, these rolls are your best friends. They’re phenomenal alongside a hearty soup or stew, making them the perfect accompaniment to those chilly evening meals. They’re also amazing as an appetizer for your next get-together, or even as a surprisingly satisfying snack any time of day. I often find myself craving one with my afternoon tea, and they absolutely disappear in minutes when I bring them to a potluck. They’re just that good. What I love most about them is that they bring people together. The smell alone draws everyone to the kitchen, and sharing them feels like you’re sharing a little piece of happiness. They’re truly a winner in my book, and I know they’ll become a favorite in your kitchen too.
How do you make garlic cheese rolls?
Quick Overview
Making these incredible garlic cheese rolls is a straightforward process that’s totally achievable for any home baker. You’ll start by making a simple, soft yeast dough, letting it rise until it’s beautifully puffy. Then, you’ll roll it out, spread a luscious garlic-cheese mixture over it, roll it up, slice it into individual rolls, and let them have a second, shorter rise. Finally, a quick bake in the oven until they’re golden and irresistible, followed by a quick glaze. It sounds like a few steps, but each one is easy, and the result is so incredibly worth it!
Ingredients
For the Main Batter:
All-Purpose Flour: About 3 ½ to 4 cups. I always start with 3 ½ cups and add more as needed until the dough is just slightly tacky. Using a good quality all-purpose flour makes a difference in the texture. I’ve found that brands with a higher protein content tend to give a slightly chewier, more satisfying roll, but any reliable brand will work beautifully.
Active Dry Yeast: 2 ¼ teaspoons. This is one packet. Make sure your yeast is fresh! If it’s been sitting in your pantry for ages, it might be worth “blooming” it first in warm water with a pinch of sugar to make sure it’s active.
Granulated Sugar: ¼ cup. This feeds the yeast and also adds a subtle sweetness that balances the savory elements perfectly. Don’t skip it!
Salt: 1 teaspoon. Essential for flavor and also helps control the yeast activity.
Warm Milk: 1 cup. Whole milk gives the best richness and softness, but I’ve tested this with 2% and even almond milk (though it was a bit less rich), and it was still delicious. Make sure it’s warm, not hot – around 105-115°F (40-46°C). Too hot and you’ll kill the yeast, too cold and it won’t activate properly.
Warm Water: ½ cup. Again, warm water is key for that yeast activation.
Unsalted Butter, melted: ½ cup. This adds incredible richness and tenderness to the dough. Make sure it’s melted and slightly cooled so it doesn’t cook the yeast.
For the Filling:
Unsalted Butter, softened: ½ cup (1 stick). This needs to be soft enough to spread easily but not so melty that it all runs out. Let it sit on the counter for about an hour before you plan to make the filling.
Garlic: 4-6 cloves, minced. This is where you can really customize! I love a strong garlic flavor, so I usually go with 6 cloves. If you’re sensitive, start with 4. You can also use pre-minced garlic from a jar in a pinch, but fresh is always best for that amazing aroma.
Shredded Cheese: 1 ½ cups. I love a blend of sharp cheddar and Monterey Jack for great flavor and melty-ness. Gruyere or even some Parmesan can add a nice depth too. Grate your own cheese if you can – it melts so much better than pre-shredded stuff that often has anti-caking agents.
Fresh Parsley, chopped: 2 tablespoons. This adds a lovely bit of freshness and color. Dried parsley works in a pinch, but use about half the amount.
For the Glaze:
Melted Butter: 2 tablespoons. For brushing on top right after baking to keep them moist and add a lovely sheen.
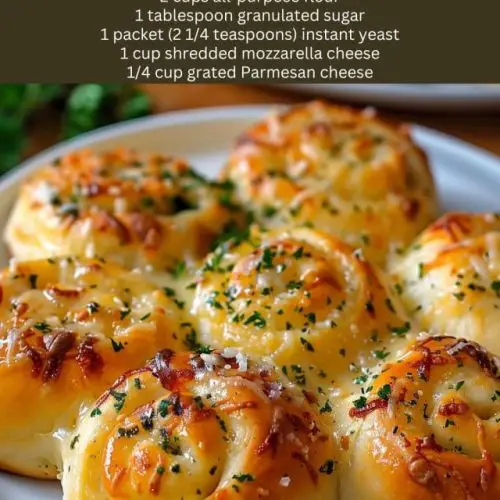
Grated Parmesan Cheese: 2 tablespoons. This adds a final salty, cheesy punch.
Garlic Powder: ½ teaspoon. Just a little whisper of extra garlic goodness.

Step-by-Step Instructions
Step 1: Preheat & Prep Pan
First things first, let’s get your oven preheated. You’ll want it at 375°F (190°C). While the oven is warming up, grab a 9×13 inch baking pan. I like to lightly grease mine with butter or non-stick spray. Some people like to line it with parchment paper for extra easy cleanup, which is a great idea, especially if you’re short on time for washing dishes later!
Step 2: Mix Dry Ingredients
In a large mixing bowl, whisk together your flour (start with 3 ½ cups), granulated sugar, and salt. Make a little well in the center of the dry ingredients. This is where the magic starts to happen with the yeast!
Step 3: Mix Wet Ingredients
In a separate, smaller bowl or a large liquid measuring cup, combine the warm milk and warm water. Sprinkle the active dry yeast over the top. Give it a gentle stir and let it sit for about 5-10 minutes. You should see it get foamy and bubbly on top – that’s your sign that the yeast is alive and ready to do its job! Once foamy, whisk in the melted butter.
Step 4: Combine
Pour the activated yeast mixture into the well you made in the dry ingredients. Using a wooden spoon or a spatula, start mixing everything together. Keep mixing until a shaggy dough forms. It will look a bit messy at this stage, and that’s perfectly fine. If the dough seems too sticky to handle, gradually add in the remaining ½ cup of flour, a tablespoon at a time, until the dough is just slightly tacky to the touch. You don’t want it to be dry and crumbly, but you also don’t want it sticking to your hands like glue. Once it’s come together, turn it out onto a lightly floured surface and knead for about 5-8 minutes. You’re looking for a smooth, elastic dough. If you have a stand mixer, you can use the dough hook attachment and knead for about 5-6 minutes on medium-low speed. Place the kneaded dough into a lightly oiled bowl, cover it with a clean kitchen towel or plastic wrap, and let it rise in a warm place for about 1 to 1 ½ hours, or until it has doubled in size. This is the slow, patient part that builds all that wonderful flavor and texture!
Step 5: Prepare Filling
While your dough is doing its thing and rising, let’s whip up that amazing filling. In a medium bowl, combine the softened butter, minced garlic, shredded cheeses, and chopped fresh parsley. Mix it all together until it’s well combined and forms a spreadable paste. It should be thick enough to spread but not so stiff that it’s difficult to manage. I usually just use a fork to mash it all together. Taste it at this stage (go on, I won’t tell!) to adjust the garlic or cheese to your liking. If you want it spicier, a pinch of red pepper flakes can be a fun addition!
Step 6: Layer & Swirl
Once your dough has doubled in size, gently punch it down to release the air. Turn it out onto a lightly floured surface. Now, you’re going to roll it out into a large rectangle. Aim for about a 12×18 inch rectangle, about ¼ inch thick. Don’t worry too much about perfect edges; rustic charm is part of the appeal! Now, take your prepared garlic-cheese filling and spread it evenly over the surface of the dough, leaving about a ½ inch border along one of the long edges. This border will help seal the roll. Starting from the long edge opposite the un-spread border, carefully roll up the dough tightly, like a jelly roll. Try to keep it as even as possible. Once rolled, pinch the seam to seal it well. Now, using a sharp knife or a bench scraper, cut the log into 12 equal pieces. These are your gorgeous rolls! Arrange them cut-side up in your prepared baking pan, tucking them in snugly. Cover the pan loosely with a clean kitchen towel or plastic wrap again and let them rise for another 30-45 minutes, or until they look nicely puffed up. This second rise is crucial for that pillowy texture.
Step 7: Bake
Preheat your oven to 375°F (190°C) if you haven’t already. Once the rolls have had their second rise and look beautifully plump, it’s time for the oven! Bake for 20-25 minutes, or until they are golden brown on top and sound hollow when tapped lightly. The cheese might ooze out a little, which is perfectly normal and just means more deliciousness!
Step 8: Cool & Glaze
As soon as the rolls come out of the oven, while they’re still hot, brush them with the melted butter. Then, immediately sprinkle them with the grated Parmesan cheese and garlic powder. This glaze adds a beautiful sheen, keeps them incredibly moist, and adds an extra layer of flavor. Let them cool in the pan for about 10-15 minutes before attempting to remove them, but they are absolutely heavenly served warm directly from the pan!
Step 9: Slice & Serve
The hardest part is waiting for them to cool just enough so you don’t burn your mouth! I usually serve these warm, right out of the pan. They’re perfect for tearing off chunks, but if you prefer, you can use a serrated knife to gently slice them if they’re too hot to handle. Enjoy the aroma and the anticipation!
What to Serve It With
These garlic cheese rolls are so incredibly versatile, they fit into almost any meal plan you can imagine! They’re not just a side dish; they can be the star of the show in their own right.
For Breakfast: While they might seem more dinner-y, a warm garlic cheese roll is an absolute dream with a cup of coffee first thing in the morning. You could even serve them alongside scrambled eggs or a frittata for a more substantial breakfast. The savory notes are a welcome change from typical sweet breakfast pastries. Imagine a lazy Sunday morning with these warm and golden on the table.
For Brunch: These are a no-brainer for a brunch spread. They add a touch of elegance and comfort. Serve them in a basket lined with a pretty cloth. They pair wonderfully with quiches, omelets, or even a lighter salad. A mimosa or a sparkling cider would be the perfect beverage pairing to cut through the richness.
As Dessert: I know this sounds a bit unusual, but hear me out! After a rich meal, sometimes you want something comforting but not overly sweet. A warm garlic cheese roll, perhaps with a tiny drizzle of honey, can be surprisingly satisfying. It’s like a savory-sweet treat that rounds off a meal beautifully without being heavy like a traditional cake or pie. It’s a sophisticated twist that will have your guests talking.
For Cozy Snacks: This is probably my favorite way to enjoy them outside of dinner. When I need a little pick-me-up in the afternoon, or I’m just craving something warm and comforting, a single garlic cheese roll is perfection. They are fantastic dipped into a bowl of hearty Tomato Soup, a creamy mushroom soup, or even a robust chili. They soak up all those delicious flavors so wonderfully. My kids also love them as an after-school snack – they say it’s way better than a cookie!
Personally, I love having them with pasta dishes. They are the perfect counterpoint to a rich bolognese or a Creamy Alfredo Sauce. They’re also fantastic alongside roasted chicken or a simple steak. My family tradition is to always have a batch ready when we have movie nights; they’re the ultimate comfort food for a cozy evening in.
Top Tips for Perfecting Your Garlic Cheese Rolls
I’ve made these garlic cheese rolls more times than I can count, and over the years, I’ve picked up a few little tricks and learned from a few oopsies! Here are my top tips to help you achieve bakery-worthy results every single time.
Dough Hydration is Key: The biggest hurdle for new bakers can sometimes be the dough. If your dough feels too dry and stiff, it will result in tough rolls. If it’s too wet and sticky, it’s hard to handle and can spread too much. My best advice is to start with the lower amount of flour and add more *gradually*. You’re looking for a dough that’s soft, pliable, and just slightly tacky. It should pull away from the sides of the bowl cleanly but still feel soft and hydrated. Kneading properly is also crucial – don’t skimp on this step, as it develops the gluten structure that gives the rolls their characteristic chew and rise.
The Double Rise: Don’t rush the rising process! Yeast doughs need time to develop flavor and texture. The first rise, where the dough doubles in size, is essential for building that characteristic yeasty flavor. The second rise, after you’ve shaped the rolls, allows them to become light and airy before baking. If you bake them before they’ve had a good second rise, they can be dense. A warm, draft-free place is ideal for rising – I often turn my oven light on for a few minutes, then turn it off, and let the dough rise in the warm oven. That gentle warmth works wonders.
Filling Distribution Matters: When you’re spreading the garlic-cheese filling, aim for an even layer. If you have thick patches and thin patches, some rolls will be overloaded with filling while others might be a bit sparse. Spread it all the way to the edges (except for that sealing border!) to ensure every bite gets a taste of that savory goodness. Rolling the dough up tightly will help distribute the filling evenly throughout the swirl.
Don’t Overbake: This is a common mistake that can lead to dry rolls. Keep an eye on your rolls during the last few minutes of baking. They should be beautifully golden brown on top. The internal temperature should be around 190-200°F (88-93°C). If they’re browning too quickly, you can always loosely tent them with foil for the last 5-10 minutes of baking. The goal is a perfectly cooked interior with a lovely golden crust, not a hard, overdone exterior.
Fresh Ingredients are Your Friend: While this recipe is forgiving, using fresh yeast and good quality cheese will elevate your rolls. Stale yeast won’t give you the rise you need, and pre-shredded cheese often doesn’t melt as smoothly. If you can, grate your own cheese from a block – it makes a significant difference in both taste and texture. And please, for the love of all things delicious, use fresh garlic!
Glaze at the Right Time: The buttery, cheesy glaze is applied right out of the oven. This helps it adhere beautifully and keeps the tops of the rolls wonderfully soft and moist. If you wait too long, the rolls will start to cool and harden, and the glaze won’t sink in as nicely. That little extra bit of butter and Parmesan is pure magic and takes these rolls from great to absolutely divine.
Storing and Reheating Tips
These garlic cheese rolls are truly best enjoyed fresh from the oven, but thankfully, they store and reheat beautifully, so you can enjoy their deliciousness even if you don’t devour them all in one sitting!
Room Temperature Storage: If you happen to have any leftovers (which is rare in my house!), store them in an airtight container or wrap them tightly in plastic wrap at room temperature. They’ll stay nice and soft for up to 2-3 days. I find that they are still wonderfully soft and flavorful on day two, and often day three, as long as they’re properly sealed.
Refrigerator Storage: For longer storage, up to a week, keep them in an airtight container in the refrigerator. While refrigerating can sometimes make baked goods a little firmer, these rolls hold up remarkably well. Just be sure to reheat them before serving to bring back their wonderful texture and warmth.
Freezer Instructions: These are excellent candidates for freezing! Once they’ve completely cooled, wrap them individually in plastic wrap, then place them in a freezer-safe bag or container. They’ll keep well in the freezer for up to 2-3 months. When you’re ready to enjoy them, you can thaw them overnight in the refrigerator and then reheat, or reheat them directly from frozen.
Glaze Timing Advice: If you plan to freeze your rolls, I highly recommend *not* applying the final glaze before freezing. Instead, freeze the baked rolls plain. When you’re ready to reheat and serve, brush them with melted butter and sprinkle with Parmesan and garlic powder *after* reheating for that fresh-from-the-oven finish. If you’re just storing them for a day or two at room temperature or in the fridge, the glaze can be applied after baking, and they will hold up well.
Reheating: To reheat, the best method is in a preheated oven at around 300°F (150°C) for 5-10 minutes, or until warmed through. You can also reheat them gently in a toaster oven or even pop them in the microwave for about 15-30 seconds, though be careful not to overheat in the microwave as they can become tough. Reheating them in the oven is my preferred method as it brings back that lovely soft interior and slightly crisped exterior.
Frequently Asked Questions
Final Thoughts

I truly hope you give these garlic cheese rolls a try. They’re more than just a recipe to me; they’re a little slice of happiness that I’ve loved sharing with my family and friends. The combination of that soft, pillowy dough with the savory, cheesy, garlicky filling is just perfection. It’s the kind of food that makes you pause, close your eyes, and savor every single bite. They’re incredibly rewarding to make, and the joy they bring when served warm from the oven is just immeasurable. They’re the perfect example of how simple ingredients can be transformed into something truly spectacular with just a little bit of love and effort.
If you love comforting baked goods that pack a flavorful punch, you might also enjoy my {link to another recipe, e.g., “Chewy Chocolate Chip Cookies“} or my {link to another recipe, e.g., “Fluffy Cinnamon Rolls”}. They bring that same sense of warmth and deliciousness to the table.
I can’t wait to hear how yours turn out! Please, please leave a comment below and tell me what you think, or share any of your own creative twists! I love seeing your kitchen adventures. Happy baking, everyone!
garlic cheese rolls
Ingredients
Dough
- 3.5 cups all-purpose flour
- 0.25 cup granulated sugar
- 1.5 teaspoons instant yeast
- 1 teaspoon salt
- 0.75 cup warm milk about 110°F (43°C)
- 0.25 cup unsalted butter melted
- 1 large egg room temperature
Garlic Cheese Filling
- 0.5 cup unsalted butter softened
- 3 cloves garlic minced
- 0.5 cup shredded cheddar cheese
- 0.5 cup shredded mozzarella cheese
- 2 tablespoons fresh parsley chopped
Instructions
Preparation Steps
- In a large bowl, whisk together flour, sugar, yeast, and salt.
- In a separate bowl, whisk together warm milk, melted butter, and egg.
- Pour the wet ingredients into the dry ingredients and mix until a shaggy dough forms.
- Turn the dough out onto a lightly floured surface and knead for 8-10 minutes, or until smooth and elastic.
- Place the dough in a lightly greased bowl, cover with plastic wrap, and let rise in a warm place for 1-1.5 hours, or until doubled in size.
- While the dough is rising, prepare the filling: In a small bowl, combine softened butter, minced garlic, shredded cheeses, and chopped parsley. Mix well.
- Once the dough has risen, punch it down and roll it out into a rectangle, about 12x18 inches.
- Spread the garlic cheese filling evenly over the rolled-out dough, leaving a small border on one of the long edges.
- Starting from the long edge with the filling, tightly roll up the dough into a log.
- Cut the log into 12 equal slices.
- Arrange the rolls in a greased 9x13 inch baking dish, cut-side up. Cover and let rise for another 30 minutes.
- Preheat oven to 375°F (190°C). Bake for 15-20 minutes, or until golden brown and heated through.
- Let cool slightly before serving.


