


You know those recipes that just feel like a warm hug? The ones you return to again and again, not just because they’re delicious, but because they’re reliable, comforting, and evoke a sense of pure, simple joy? For me, that’s this moist banana bread recipe. It’s the kind of bake that instantly makes my kitchen smell like pure happiness, and it’s the very first thing I reach for when those overripe bananas start staring at me from the fruit bowl, practically begging to be turned into something magical. Forget those dry, crumbly loaves that leave you reaching for a glass of milk after every bite; this one is decadently tender, unbelievably moist, and packed with just the right amount of banana flavor. Honestly, it’s a lifesaver on busy mornings, a perfect afternoon treat, and frankly, it’s become my go-to when I just need a little something sweet without a whole lot of fuss. If you’ve ever tried to make banana bread and ended up with a brick, prepare to have your world changed. This is the moist banana bread recipe your baking dreams are made of!
What is Moist Banana Bread?
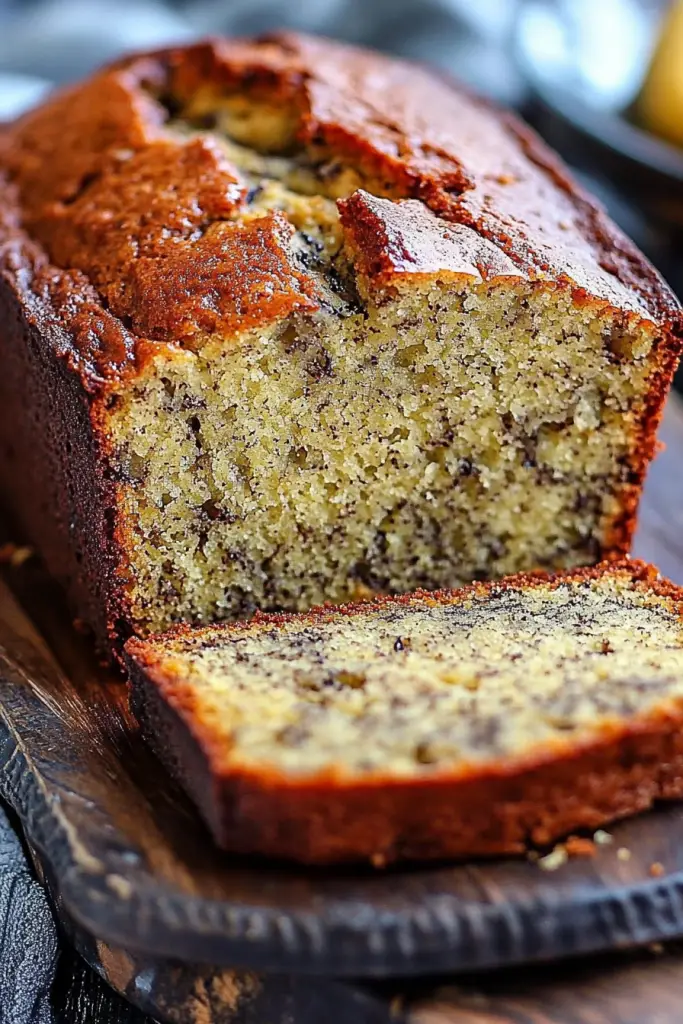
So, what exactly *is* this “moist Banana Bread” we’re talking about? At its heart, it’s your classic, beloved banana bread, but elevated. Think of it as the superstar version of grandma’s recipe, the one that always gets rave reviews. It’s essentially a quick bread, meaning it uses chemical leaveners like baking soda and baking powder instead of yeast, making it super fast and easy to whip up. The “moist” part isn’t just a marketing term; it’s the core of what makes this recipe so special. It comes from a combination of very ripe bananas, the right amount of fat (usually butter or oil, or a bit of both for ultimate richness!), and crucially, not overmixing the batter. The result is a tender crumb that practically melts in your mouth, with an irresistible aroma that fills your home from the moment it hits the oven. It’s uncomplicated, unpretentious, and utterly divine.
Why you’ll love this recipe?
Honestly, the list is pretty long, but let me hit you with the highlights. First off, the FLAVOR. Oh my goodness, the flavor! The bananas, when baked, transform into this incredibly sweet, caramel-like goodness that just sings. It’s perfectly balanced, not too sweet, with just a hint of warmth from cinnamon if you add it (which I always do, by the way). Then there’s the SIMPLICITY. Seriously, if you can mash a banana and stir a few things together, you can make this. It takes about 10 minutes of active prep time, which is amazing when you’re short on time but craving something homemade. And speaking of homemade, this is incredibly COST-EFFECTIVE. Ripe bananas are often on sale or just begging to be used up, and the other pantry staples are things you likely already have on hand. It’s a fantastic way to avoid expensive bakery treats. Plus, it’s so VERSATILE! It’s not just for breakfast; it’s a perfect afternoon snack with a cup of tea, a delightful dessert with a scoop of ice cream, or even a sweet addition to a potluck. I’ve made this countless times, and what I love most is its sheer reliability. It never fails to deliver that perfect, tender, moist texture that makes Banana Bread so comforting. It’s like a hug in a slice, and that’s something pretty special, don’t you think?
How do I make banana bread?
Quick Overview
This recipe is all about gentle mixing and good quality ingredients. You’ll start by mashing your ripe bananas, then combining them with wet ingredients, followed by a quick stir with the dry. The magic happens when you gently fold everything together – the key to that unbelievably moist texture. Once baked to golden perfection and cooled slightly, it’s ready to be devoured. It’s truly as simple as that, designed for maximum flavor and tenderness with minimal fuss.
Ingredients
For the Main Batter:
Ripe Bananas: About 3-4 medium-sized, very ripe bananas. The spottier, the better! They should be almost black for peak sweetness and moisture. If your bananas aren’t quite there, you can bake them in their peel at 300°F (150°C) for about 10-15 minutes until the skins are spotted and they’re soft. This is a total game-changer!
All-Purpose Flour: 1 ¾ cups. I find all-purpose works best for that classic texture, but you can experiment with half whole wheat for a slightly nuttier flavor. Just make sure to sift it to keep things light.
Granulated Sugar: ¾ cup. You can adjust this slightly depending on how sweet your bananas are and your personal preference. Brown Sugar can add a lovely caramel note, but I stick with granulated for classic flavor.
Baking Soda: 1 teaspoon. This is crucial for leavening and reacting with the bananas’ natural acidity.
Salt: ½ teaspoon. Always add salt to baked goods; it enhances all the other flavors.
Ground Cinnamon: ½ teaspoon (optional, but highly recommended!). It adds such a cozy warmth that just makes everything better.
Unsalted Butter: ½ cup (1 stick), softened to room temperature. Or use a neutral oil like vegetable or canola oil for an even more tender crumb. I’ve tested both, and while butter adds a lovely richness, oil often leads to a slightly more consistently moist bread, especially if you tend to overbake a bit. Use what you have!
Eggs: 2 large eggs, at room temperature. Room temperature eggs incorporate better into the batter.
Vanilla Extract: 1 teaspoon. A little vanilla goes a long way in boosting flavor.
For the Filling: (Optional, but HIGHLY recommended for that extra special touch)
Brown Sugar: ½ cup, packed. This gives a lovely chewy texture and deep flavor.
Chopped Walnuts or Pecans: ½ cup (optional). For a nice crunch!
Ground Cinnamon: 1 teaspoon. For that extra spice!
Butter: 2 tablespoons, melted. To help bind everything together.
For the Glaze: (Purely for decoration and an extra whisper of sweetness)
Powdered Sugar: 1 cup. Sifted to avoid lumps.
Milk or Cream: 2-3 tablespoons. Start with 2, add more a teaspoon at a time until you reach your desired drizzling consistency. You can also use lemon juice or even strong brewed coffee for a different flavor profile!
Step-by-Step Instructions
Step 1: Preheat & Prep Pan
First things first, let’s get that oven ready! Preheat your oven to 350°F (175°C). While it’s heating, grease and flour a standard 9×5 inch loaf pan. I like to use softened butter for greasing, then a light dusting of flour. For extra insurance against sticking, you can also line the pan with parchment paper, leaving an overhang on the sides to help you lift the bread out later. This is especially helpful if you’re using a darker pan, which can sometimes bake things a little too quickly.
Step 2: Mix Dry Ingredients
In a medium-sized bowl, whisk together the all-purpose flour, granulated sugar, baking soda, salt, and cinnamon (if you’re using it). Whisking them together ensures that the leavening agents and salt are evenly distributed, which is key to a consistent rise and flavor. Don’t skip this step! You want to see all those dry ingredients nicely combined before they meet the wet. This also helps aerate the flour a bit, making for a lighter final product.
Step 3: Mix Wet Ingredients
In a separate large bowl, mash your super ripe bananas with a fork until they’re mostly smooth but still have a few little lumps – those are good! Add the softened butter (or oil), eggs, and vanilla extract to the mashed bananas. Beat this mixture with a whisk or a hand mixer on low speed until it’s just combined. You don’t want to overbeat it; we’re just aiming to bring everything together smoothly. The bananas should form the base of your wet ingredients.
Step 4: Combine
Now, pour the wet ingredients into the bowl with the dry ingredients. Here’s where the magic and the potential pitfalls lie! Gently fold the ingredients together using a spatula or wooden spoon. Mix ONLY until just combined. Seriously, stop as soon as you don’t see any more dry streaks of flour. A few lumps are perfectly fine, even desirable! Overmixing develops the gluten in the flour, which will result in a tough, dense, and sadly, dry banana bread. We are aiming for *moist*, remember?
Step 5: Prepare Filling
If you’re adding the filling (and I really hope you are!), this is when you do it. In a small bowl, mix together the packed brown sugar, chopped nuts (if using), cinnamon, and melted butter. Stir until it looks like damp sand. This is your flavorful swirl layer.
Step 6: Layer & Swirl
Pour about half of your banana bread batter into the prepared loaf pan. Sprinkle about half of your filling mixture evenly over the batter. Then, carefully pour the remaining batter over the filling. Sprinkle the rest of the filling mixture on top. Now, take a butter knife or a skewer and gently swirl it through the batter, creating a marble effect. Don’t overdo it; just a few passes will do. You want distinct swirls, not a muddy mess. This looks pretty and adds pockets of deliciousness throughout the bread.
Step 7: Bake
Pop the loaf pan into your preheated oven. Bake for 50-65 minutes. The exact time can vary depending on your oven, so start checking around the 50-minute mark. The banana bread is done when a wooden skewer or toothpick inserted into the center comes out clean, or with just a few moist crumbs attached (not wet batter!). If the top starts to brown too quickly, you can loosely tent it with aluminum foil for the remainder of the baking time.
Step 8: Cool & Glaze
Once baked, remove the loaf pan from the oven and let it cool in the pan for about 10-15 minutes. This initial cooling in the pan helps the bread set and makes it easier to remove without breaking. Then, carefully invert the pan onto a wire rack to release the bread. Let it cool completely on the wire rack before you even think about glazing. For the glaze, whisk together the sifted powdered sugar and 2 tablespoons of milk or cream until smooth. Add more milk, a teaspoon at a time, until it’s a pourable but not too thin consistency. Drizzle this over the completely cooled banana bread. Let the glaze set for about 15-20 minutes before slicing.
Step 9: Slice & Serve
Once the glaze has set, use a sharp knife to slice your beautiful, moist banana bread. The best serving temperature is usually at room temperature, where all those flavors are most vibrant. Slice into generous pieces and enjoy the fruits of your labor! It’s absolutely heavenly on its own, but I’ll get to serving suggestions in a bit!
What to Serve It With
This moist banana bread is truly a star on its own, but it also plays wonderfully with others! Here are a few of my favorite ways to serve it, depending on the occasion:
For Breakfast: On a busy weekday, a thick slice is perfect with just a smear of butter. For a more leisurely weekend morning, I love serving it alongside a big mug of steaming coffee or a glass of cold milk. It also pairs beautifully with a side of scrambled eggs or some crispy bacon for a balanced start to the day. The aroma alone is enough to get everyone out of bed!
For Brunch: This is where it can really shine! I like to serve it on a pretty platter with a dusting of powdered sugar or that lovely glaze. It’s a fantastic addition to a brunch spread alongside fruit salads, quiches, or even yogurt parfaits. A mimosa or a classic bloody mary makes a great beverage pairing.
As Dessert: Oh yes, dessert! Warm up a slice slightly and serve it with a scoop of good quality vanilla bean ice cream. The contrast between the warm, soft bread and the cold, creamy ice cream is pure bliss. A drizzle of caramel sauce or some whipped cream takes it to another level. It’s also surprisingly good with a light dusting of cocoa powder if you’re a chocolate lover.
For Cozy Snacks: My absolute favorite time to enjoy this is in the afternoon, curled up on the sofa with a good book and a cup of herbal tea. It’s also fantastic for packed lunches, a little sweet surprise for kids (or adults!) to look forward to. For a rustic feel, I’ll sometimes serve it with a dollop of Greek yogurt mixed with a touch of honey.
These are just a few ideas; honestly, this banana bread is so comforting and delicious that it works anytime, anywhere. My family devours it so quickly, I’ve learned to bake two loaves at once!
Top Tips for Perfecting Your Moist Banana Bread
Over the years, I’ve learned a thing or two about making banana bread truly exceptional. It’s not just about following the recipe, but understanding the nuances. Here are my top tips to ensure your loaf is always incredibly moist and delicious:
Banana Ripeness is Paramount: I can’t stress this enough. Use bananas that are *very* ripe – the kind you might otherwise throw away. They should be heavily spotted, even mostly black. The riper the banana, the more sugar it contains and the more moisture it releases when baked, leading to that signature moist texture. If you forget to plan ahead, remember my tip from earlier: bake your less-ripe bananas in their peel until soft and fragrant. It’s a game-changer!
Don’t Overmix the Batter: This is arguably the most crucial tip for tender, moist quick breads. Once the wet and dry ingredients are combined, stop mixing as soon as you no longer see streaks of dry flour. A few small lumps in the batter are perfectly okay and will actually contribute to a more tender crumb. Overmixing develops gluten, which makes quick breads tough and dry. Treat the batter gently!
Swirl Techniques for Visual Appeal: When adding your filling, aim for distinct pockets rather than a uniform blend. Sprinkle the filling ingredients over the batter in sections. For swirling, don’t overwork it. A few gentle passes with a knife or skewer are enough to create beautiful marbling without muddling the flavors. You want to see those ribbons of cinnamon-sugar goodness.
Ingredient Swaps for Customization: While this recipe is wonderful as is, feel free to experiment! For a richer flavor, you can substitute half of the all-purpose flour with whole wheat flour. If you don’t have butter, a neutral oil like canola or vegetable oil will yield a wonderfully moist result, and some people find it makes the bread even more tender. For a dairy-free option, use your favorite non-dairy milk for the glaze and a plant-based butter or oil for the batter.
Baking and Doneness Testing: Ovens can be quirky! Always start checking for doneness around the minimum baking time (around 50 minutes). A wooden skewer or toothpick inserted into the center should come out clean or with a few moist crumbs attached. If the top is browning too quickly, tent the loaf loosely with aluminum foil. This allows the center to cook through without burning the exterior.
Glaze Consistency is Key: For the glaze, start with the lower amount of liquid and add more only as needed, a teaspoon at a time. You want a glaze that’s thick enough to cling to the bread but thin enough to drizzle. If it becomes too thin, you can always whisk in a little more powdered sugar. For a more robust flavor, try using fresh lemon juice or a strong brewed coffee instead of milk.
These little tips have been hard-won lessons from my own kitchen experiments, and I hope they help you achieve banana bread perfection every single time!
Storing and Reheating Tips
Proper storage is key to keeping your banana bread tasting fresh and moist. Luckily, it stores beautifully! Here’s how I keep mine tasting great:
Room Temperature Storage: Once completely cooled, store the banana bread at room temperature. The best way is to wrap it tightly in plastic wrap or place it in an airtight container. It will stay wonderfully moist and delicious for about 2-3 days. If it has a glaze, it’s best to let the glaze set fully before wrapping.
Refrigerator Storage: If you live in a particularly warm climate or want to keep it fresh for a bit longer, you can refrigerate it. Wrap it very well in plastic wrap, then place it in an airtight container. It should last for about a week. Just note that refrigeration can sometimes slightly dry out baked goods, so give it a little time at room temperature before serving, or gently reheat.
Freezer Instructions: This banana bread freezes exceptionally well, making it perfect for baking ahead! Once completely cooled (and without the glaze, if you prefer to add that after thawing), wrap the loaf tightly in plastic wrap, then in a layer of aluminum foil, or place it in a heavy-duty freezer bag. It will keep its quality in the freezer for up to 2-3 months. To thaw, unwrap it and let it sit at room temperature for a few hours, or gently reheat it.
Glaze Timing Advice: If you plan to freeze your banana bread, it’s best to omit the glaze before freezing. Once thawed, you can easily whip up a fresh batch of glaze and drizzle it over the top. If you’re storing it at room temperature or in the fridge and it has a glaze, ensure it’s fully set before wrapping to prevent the glaze from sticking to the wrapping material.
When reheating a slice, a few seconds in the microwave (about 10-15 seconds) can bring back some of that fresh-baked warmth and softness. If it’s a frozen slice, you might want to reheat it for a bit longer, or even pop it in a toaster oven for a few minutes for a nice crisp edge.
Frequently Asked Questions
Final Thoughts
There you have it – my absolute favorite moist banana bread recipe! I truly hope you give this a try. It’s more than just a recipe to me; it’s a little piece of comfort, a reliable friend in the kitchen that always delivers. The incredible moisture, the perfect balance of sweetness and spice, and that unmistakable banana aroma – it’s simply delightful. Whether you’re a seasoned baker or just starting out, this recipe is designed to make you feel like a pro. If you love this recipe, you might also enjoy my Double Chocolate Zucchini Bread for another moist quick bread option or my Classic Apple Crumble for a different kind of cozy dessert. I can’t wait to hear how your banana bread turns out! Please leave a comment below with your thoughts, any variations you tried, or how quickly it disappeared from your house! Happy baking!
moist banana bread recipe
Ingredients
Main Ingredients
- 0.5 cup unsalted butter, softened
- 2 cups granulated sugar
- 3 large eggs
- 1.5 cups bananas, mashed about 3 large ripe bananas
- 1 tsp vanilla extract
- 2 cups all-purpose flour
- 1 tsp baking soda
- 0.25 tsp salt pinch
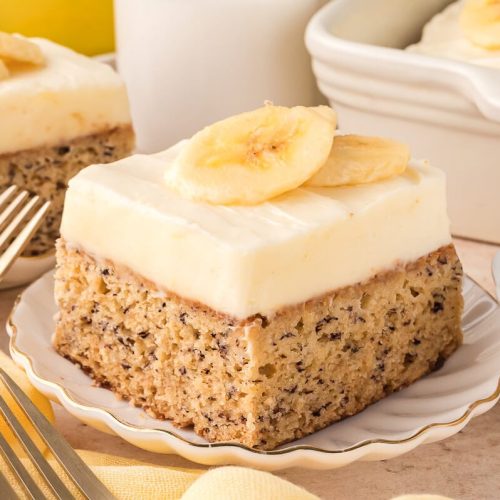
Cream Cheese Frosting
- 0.5 cup unsalted butter, softened
- 8 oz cream cheese, softened 1 package
- 2 cups powdered sugar also known as icing sugar
- 1 tsp vanilla extract
Instructions
Preparation Steps
- Preheat oven to 350°F. Grease a 9x13 inch baking pan and set aside.
- In a large bowl, beat butter and sugar until combined. Add eggs, bananas, and vanilla; beat until combined.
- In another bowl, stir together flour, baking soda, and salt. Add to wet mixture and stir until just combined.
- Pour batter into prepared baking pan. Bake for 45 minutes or until a toothpick inserted in the center comes out clean. Let cool completely.
Cream Cheese Frosting
- Beat together butter and cream cheese until smooth. Gradually add powdered sugar and vanilla. Beat until smooth and creamy. Spread over cooled banana bread.


