


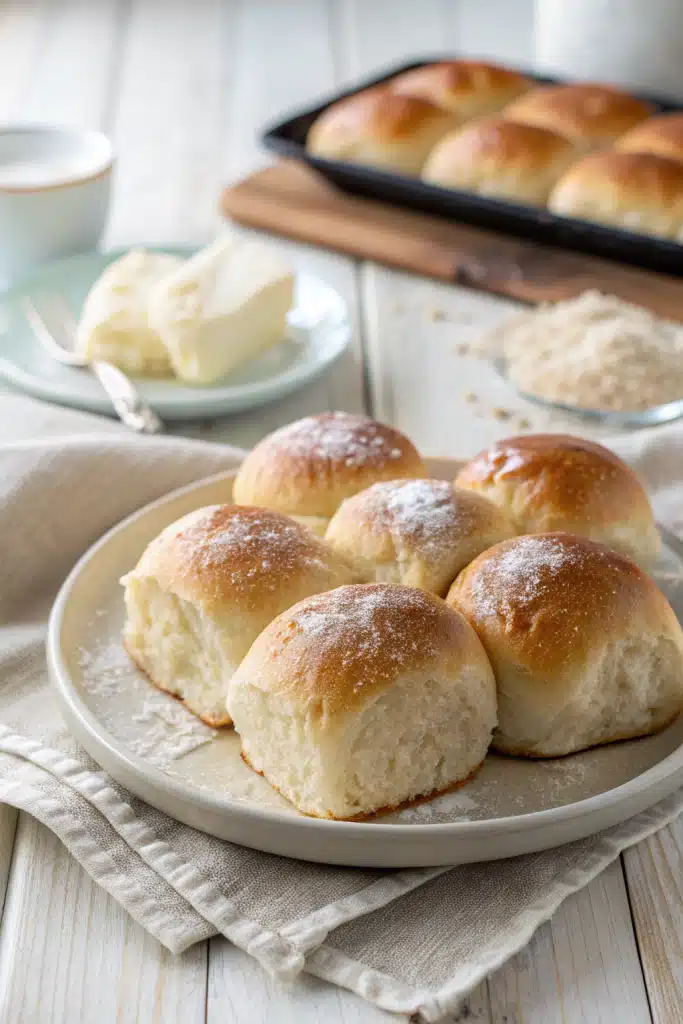
Soft & Fluffy Homemade Dinner Rolls
There’s something truly magical about the smell of fresh dinner rolls baking in the oven—especially when they’re soft, golden, and just begging to be slathered with butter. I remember my grandmother pulling these out of her old cast-iron skillet every Sunday, the warm aroma filling her tiny kitchen while we kids hovered nearby, trying to sneak one before dinner. That’s the kind of comfort these rolls bring: simple, nostalgic, and deeply satisfying. Whether you’re hosting a holiday feast or just craving a cozy weeknight side, these homemade dinner rolls are worth every minute. They’re pillowy soft on the inside, lightly crisp on the outside, and so much better than anything store-bought. Plus, making them from scratch means you control the ingredients—no weird additives, just butter, flour, and love. Let me walk you through how to make them foolproof, even if you’re not a seasoned baker.
What Is This Recipe?
These are classic homemade dinner rolls—soft, slightly sweet, and incredibly fluffy yeast rolls that rise beautifully in the oven. Think of them as the perfect companion to roasted meats, hearty stews, or even a simple bowl of soup. Unlike brioche (which is richer and egg-heavy) or Parker House rolls (which are more buttery and flaky), these strike a lovely balance: tender crumb, subtle sweetness, and a golden-brown top that’s just crisp enough to snap gently under your thumb. They’re made with basic pantry staples—flour, milk, yeast, sugar, salt, and butter—and come together in under two hours from start to finish. What makes them special isn’t just the taste, but the way they make your kitchen feel like home. Whether you’re serving them at Thanksgiving or a Tuesday night meatloaf dinner, they add that little touch of warmth and care that turns a meal into a memory.
Why You’ll Love This Recipe
First off, these rolls are surprisingly easy—even if you’ve never worked with yeast before. The dough is forgiving, and there’s no fancy shaping required; just roll, cut, and let rise. Second, they’re made with real butter and whole milk, so every bite is rich, tender, and deeply satisfying. No dry, crumbly store-bought sadness here! Third, they’re incredibly versatile: serve them warm with salted butter, use them for sliders, or even toast leftovers for breakfast with jam. And let’s be honest—there’s nothing quite like tearing into a still-warm roll fresh from the oven, the steam curling up as you pull it apart. It’s comfort in its purest form. Plus, the recipe scales easily: make a double batch and freeze half for later. Whether you’re feeding a crowd or just treating yourself, these rolls deliver that homemade hug we all crave. And honestly? Once you’ve made them yourself, you’ll never go back to the frozen aisle.
How to Make Soft & Fluffy Homemade Dinner Rolls
Quick Overview
This recipe makes 12 generous dinner rolls and takes about 1 hour and 45 minutes from start to finish. The dough rises twice—once after mixing and once after shaping—which gives the rolls their signature light, airy texture. You’ll need a stand mixer (or a good arm for kneading), a baking sheet or skillet, and basic pantry ingredients. Don’t worry if it feels like a lot of steps—it’s mostly hands-off rising time, and I’ll guide you through each part so you won’t feel overwhelmed.
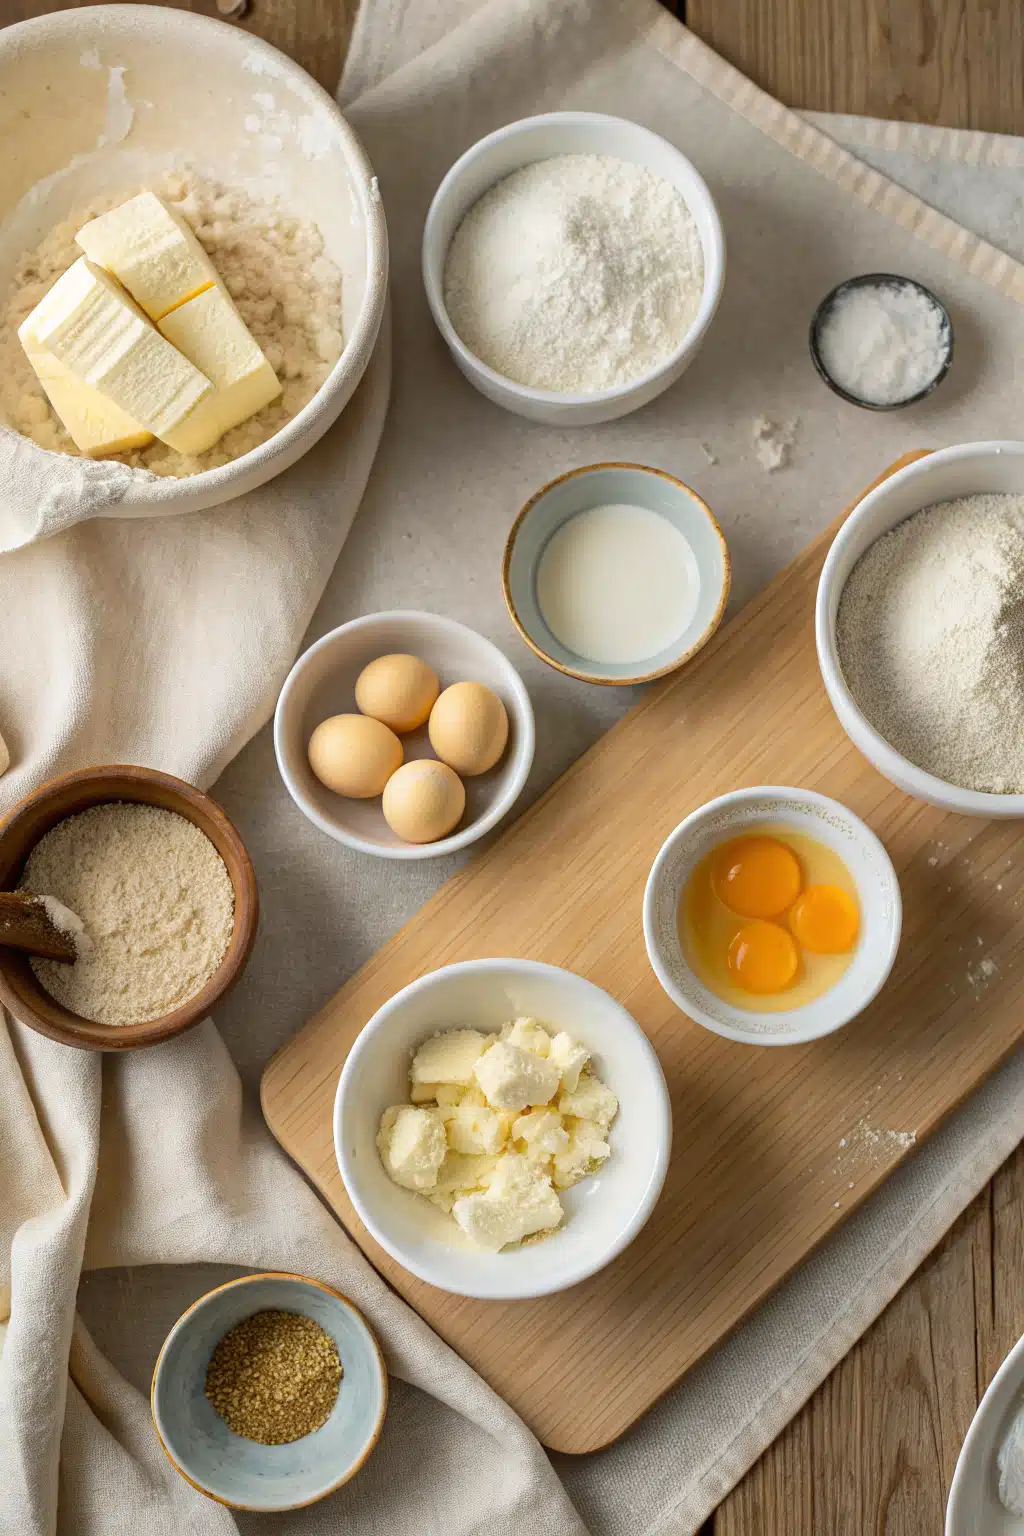
Ingredients
For the rolls:
• 1 cup (240ml) whole milk, warmed to 110°F
• 2 ¼ teaspoons (1 packet) active dry yeast
• ¼ cup (50g) granulated sugar
• 3 ½ cups (440g) all-purpose flour, plus extra for dusting
• 1 teaspoon salt
• 1 large egg, room temperature
• 6 tablespoons (85g) unsalted butter, softened, plus 2 tablespoons for brushing
• 2 tablespoons melted butter (for brushing tops)
Step-by-Step Instructions
Step 1: Preheat & Prep Pan
Preheat your oven to 375°F (190°C). Lightly grease a 9×13-inch baking pan or a large cast-iron skillet with butter or nonstick spray. This ensures your rolls won’t stick and will bake evenly.
Step 2: Activate the Yeast
In a small bowl, combine the warm milk and yeast. Let it sit for 5–10 minutes until it becomes frothy—this means your yeast is alive and ready to work its magic.
Step 3: Mix the Dough
In a stand mixer fitted with the dough hook, combine the sugar, flour, and salt. Add the yeast mixture, egg, and softened butter. Mix on low until a shaggy dough forms, then increase to medium and knead for 5–7 minutes until smooth and elastic. If mixing by hand, knead on a floured surface for about 10 minutes.
Step 4: First Rise
Place the dough in a lightly greased bowl, cover with a damp towel or plastic wrap, and let rise in a warm spot for 45–60 minutes, or until doubled in size.
Step 5: Shape the Rolls
Punch down the dough and turn it onto a lightly floured surface. Roll into a 12×16-inch rectangle. Cut into 12 equal squares. Roll each square into a smooth ball and place in the prepared pan, seam-side down.
Step 6: Second Rise
Cover the rolls and let rise again for 20–30 minutes, until puffy and nearly doubled.
Step 7: Bake
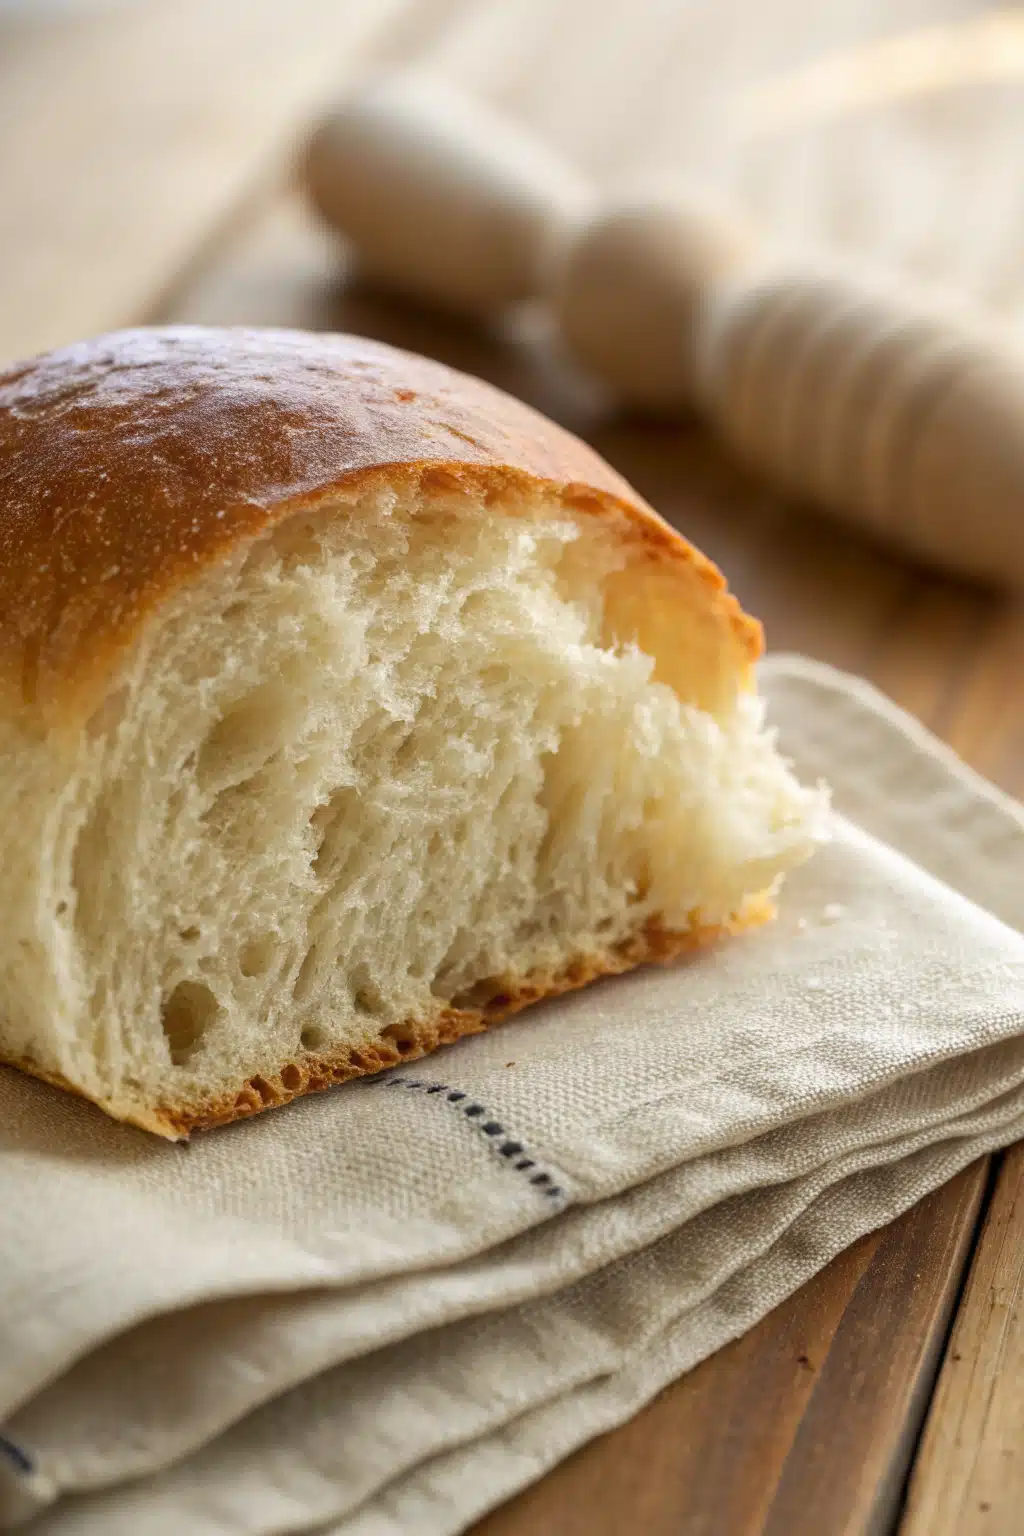
Bake for 18–22 minutes, until golden brown on top. Immediately brush with melted butter while still warm.
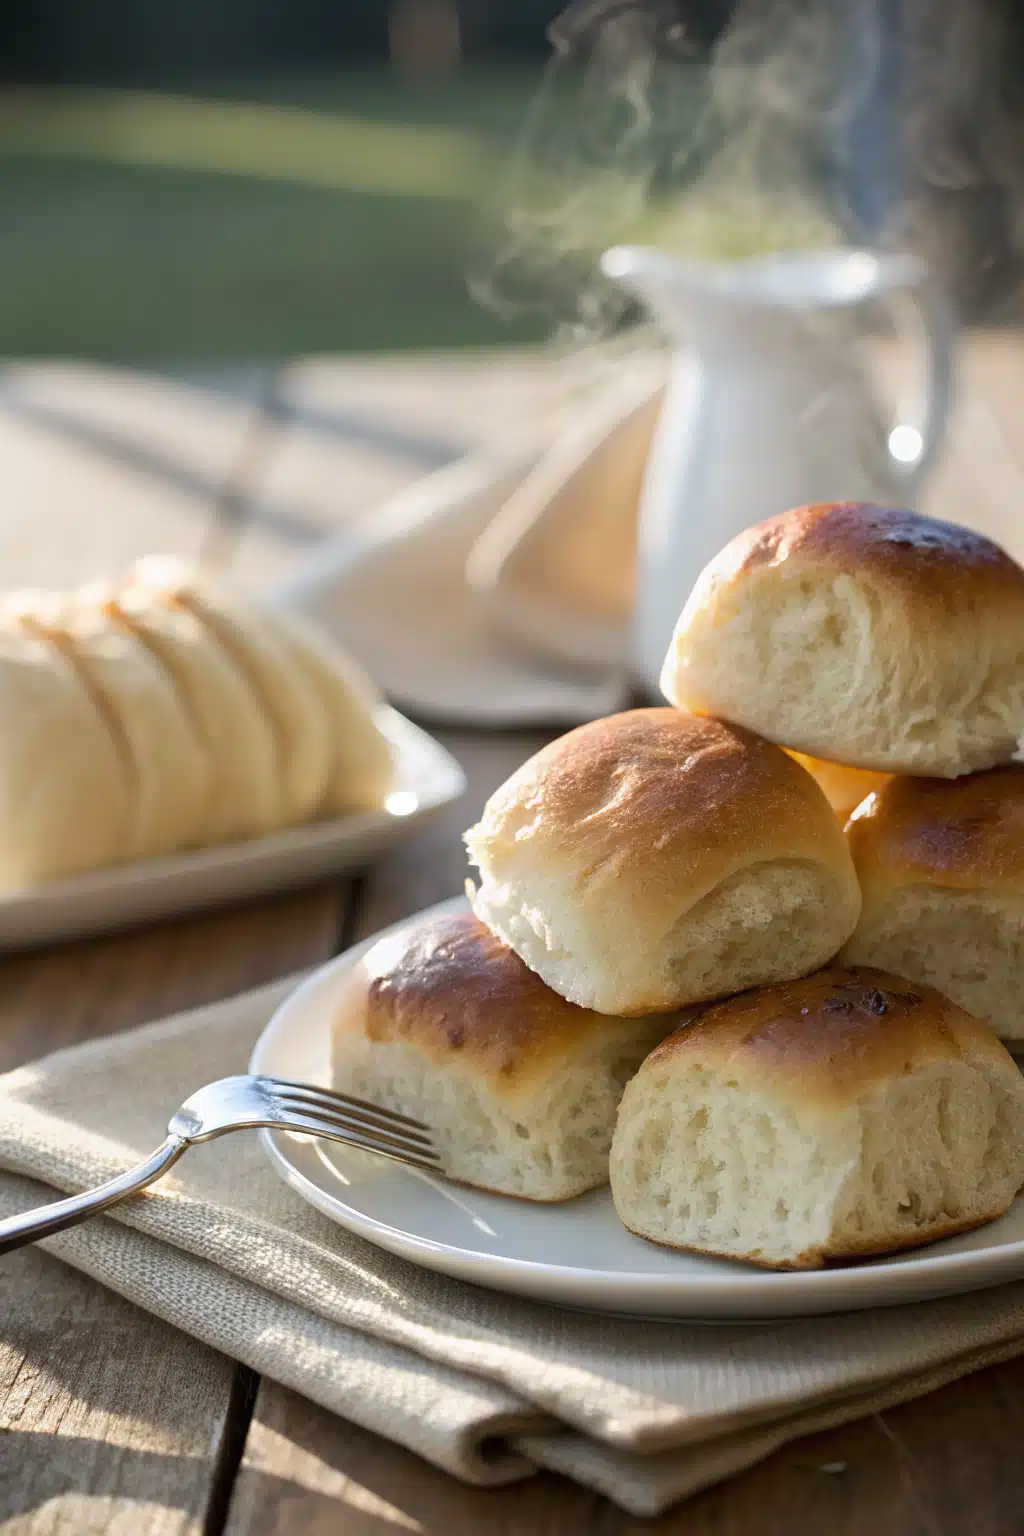
What to Serve It With
These rolls are stars all on their own, but they truly shine alongside rich, savory dishes. Try them with roasted turkey, glazed ham, or a hearty beef stew. They’re also perfect with creamy mashed potatoes, green bean casserole, or a simple garden salad. For breakfast the next day, toast a leftover roll and top it with honey or jam—it’s divine. And don’t forget holiday feasts: they’re a must-have at Thanksgiving, Christmas, or Easter dinner. Really, if there’s butter involved, these rolls belong on the table.
Top Tips for Perfecting Your Dinner Rolls
• Use a kitchen thermometer to check your milk temperature—too hot will kill the yeast, too cold won’t activate it.
• Don’t skip the second rise—it’s what gives the rolls their fluffy interior.
• For extra shine, brush the tops with an egg wash (1 egg + 1 tbsp water) before baking.
• If your kitchen is chilly, let the dough rise in a turned-off oven with the light on—it creates a cozy microclimate.
• Overmixing isn’t a concern here, but under-kneading will result in dense rolls, so give it that full 5–7 minutes.
Storing and Reheating Tips
Store cooled rolls in an airtight container at room temperature for up to 2 days, or freeze for up to 3 months. To reheat, wrap in foil and warm in a 300°F oven for 10–15 minutes, or microwave for 15–20 seconds per roll. For that fresh-baked feel, a quick zap in the oven with a pat of butter on top works wonders.
Frequently Asked Questions
Final Thoughts
There’s something deeply grounding about baking bread at home—especially when it turns out this good. These dinner rolls aren’t just food; they’re a little act of love, a way to slow down and savor the moment. Whether you’re sharing them with family, friends, or just treating yourself after a long day, I hope they bring you as much joy as they’ve brought me over the years. Don’t be afraid to get your hands messy, to let the dough rest a little longer, or to eat one straight from the pan (guilty!). Baking is as much about feeling as it is about following steps. So go ahead—preheat that oven, warm that milk, and let the magic begin. Your kitchen is about to smell like home.


