


The first time I baked Crustless Coconut Pie, the kitchen filled with a sunlit coconut fragrance that instantly whisked me back to summer mornings at grandma’s stove. I can still hear the clink of mugs, the soft hum of the oven, and the way everyone circled the table when the pie came out, steam curling off the surface like a village welcome. This dessert is incredibly forgiving and effortlessly cozy—think coconut custard meets classic pie, minus any crust drama. It’s the kind of treat you can pull together on a weeknight yet still feel special enough for guests. I’ve baked this with every variation under the sun, and it never disappointment—only a chorus of “yum” and a few “delicious!” exclamations from the kids. The beauty of Crustless Coconut Pie is in its simplicity: creamy, lightly sweet, with a toasty edge and a soft center that holds its shape. It’s a little tropical hug that fits in a pie plate, and I love that it’s something I can make with pantry staples on a busy evening.
What is a crustless coconut pie?
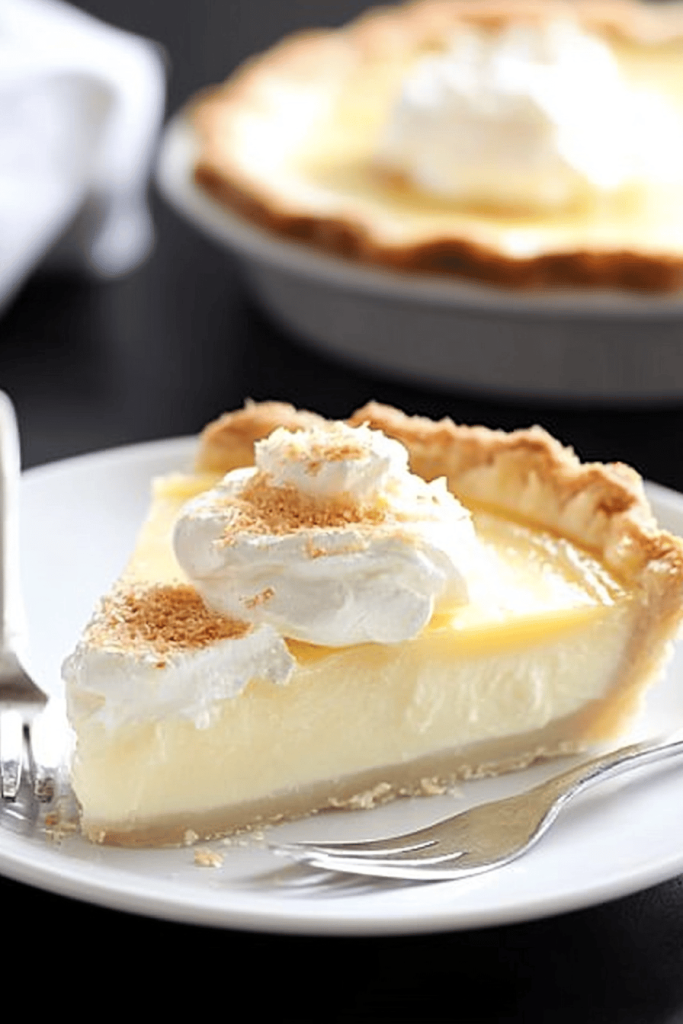
Crustless Coconut Pie is essentially a luscious coconut custard baked in a pie dish with no crust to fuss over. Think of it as a cross between a pudding and a custard pie, where the eggs, coconut milk, and shredded coconut do all the heavy lifting. The name is honest: there’s no crust, so you get pure, creamy coconut goodness in every slice. This dish has a homey, mid-century feel—comforting, straightforward, and deeply satisfying. It’s essentially a sunshine-yellow custard with a gentle coconut bite, trimmed with browned edges that crackle when you slice into it. I’ve nourished this recipe with a few tweaks over the years: a touch of vanilla, a splash of butter for richness, and a light glaze that makes the surface gleam like glass. The result is something you can serve warm with a dollop of whipped cream, or chilled with berries for a bright afternoon indulgence.
Why you’ll love this recipe?
What I love most about Crustless Coconut Pie is how it feels like a well-loved tradition you can pull out any night of the week. The flavor is perfectly coconut-forward, but not cloying—vanilla and a hint of butter balance the sweetness so it tastes cozy rather than sugary. The texture is the real star: the top develops a delicate caramelized sheen and a slight crackle, while the center stays creamy and tender, almost custard-like. And because there’s no crust, it’s incredibly simple—no blind-baking, no flaky edges to worry about—just pour, bake, and wait for that delicious aroma to lure everyone to the kitchen. It’s cost-efficient, too; most of the ingredients live in the pantry, and you can scale the sweetness to fit your mood. Versatility is a big win here: bake it in a standard pie dish, portion into ramekins for individual servings, or even make muffins if you want bite-sized treats for kids’ lunches or picnics. I’ve swapped dairy for almond milk, experimented with coconut sugar, and found it all still works beautifully. What I love most about this is how forgiving it is—a little extra coconut, a touch more vanilla, or a quicker bake time, and you still end up with something that tastes like sunshine. If you’re craving something sweet but not a full cake, this crustless pie is the go-to. For a similar vibe, you might also enjoy my Crustless Pumpkin Pie or a delicate Lemon Coconut Custard posted here on the blog.
How do I make crustless coconut pie?
Quick Overview
In just a few steps you’ll transform basic pantry ingredients into a dessert that feels both nostalgic and special. Start by whisking dry ingredients together, then whisk together the wet ingredients. Gently fold the two until just combined, pour into a greased pie dish, and bake until the edges are lightly browned and the center jiggles with a gentle shake. There’s no crust to blind-bake, which means you’ll spend less time pot-watching and more time savoring the aroma filling your kitchen. A quick glaze or a sprinkle of extra toasted coconut takes it from comforting to irresistible. Trust me: this is a dish you’ll reach for again and again.
Ingredients
For the Main Batter:
- 3 large eggs, at room temperature
- 1 cup granulated sugar (you can cut to 3/4 cup if you want to scale down sweetness)
- 1 cup unsweetened shredded coconut, plus 1/2 cup reserved for topping
- 1 cup coconut milk (whole-fat or light, your choice)
- 1/2 cup whole milk or heavy cream
- 2 tablespoons all-purpose flour (or 1 tablespoon cornstarch for gluten-free)
- 1 teaspoon vanilla extract
- 1/4 teaspoon salt
- 2 tablespoons melted unsalted butter
For the Filling:
- Optional swirl: 1/4 cup pineapple jam or lemon-curd for a bright contrast
- Optional: 1/4 cup mini chocolate chips or chopped almonds for texture
For the Glaze:
- 1/2 cup powdered sugar
- 2–3 tablespoons coconut milk (adjust to reach desired drizzle)
- 1/4 teaspoon vanilla extract
Step-by-Step Instructions
Step 1: Preheat & Prep Pan
Preheat your oven to 350°F (175°C). Lightly grease a 9-inch pie dish with butter or coconut oil, then dust with a little flour or line the bottom with parchment for easy release. I almost always butter the pan twice—before the flour, and then again around the edges—to make sure every slice comes out clean. If you’ve got a favorite pie dish, use it; this is one of those recipes that loves a little extra surface area so the top browns just right.
Step 2: Mix Dry Ingredients
In a medium bowl, whisk together the flour (or cornstarch), sugar, salt, and the 1 cup of shredded coconut. Breaking up any lumps helps the batter come together smoothly, and toasting the coconut for a minute or two in the dry mix adds a subtle nutty depth you’ll notice in the final slice. If you’re using gluten-free flour, don’t worry—cornstarch or a gluten-free blend both work beautifully here, just a touch of extra baking time may be needed.
Step 3: Mix Wet Ingredients
In another bowl, whisk the eggs until they’re smooth and pale—about 30 seconds. Beat in the coconut milk, the 1/2 cup milk or cream, the melted butter, and vanilla. The batter should look glossy and thick, almost like a custard you’d ladle over pudding. If you’re using lemon-curd or pineapple jam for a swirl, keep that ready to fold in later rather than adding now; you want distinct ribbons, not a single blended flavor.
Step 4: Combine
Pour the wet ingredients into the dry ingredients and whisk until just combined. A few small lumps are perfectly fine; overmixing creates a tougher texture, and we want tender, custard-like slices. If you’ve got a few stubborn lumps, switch to a whisk with gentle, slow strokes, or fold by hand with a spatula a couple of times. The batter should be thick, yet easily pourable; if it looks too stiff, add a splash more coconut milk.
Step 5: Prepare Filling
If you’re adding a swirl or mix-ins, this is the moment. Spoon a few dollops of pineapple jam or lemon-curd into the batter in the dish, then drag through with a knife or skewer to create pretty marbling. Sprinkle in mini chocolate chips or almonds if you like a little crunch. My family loves the lemon-curd swirl—it brightens the coconut without masking it. You’ll notice the coconut bits dispersed throughout give little pops of texture in every bite.
Step 6: Layer & Swirl
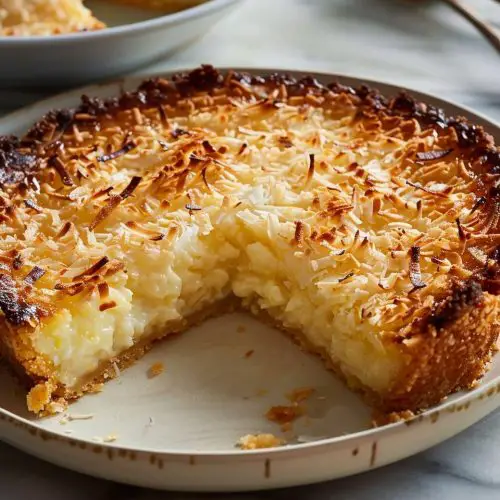
Pour the batter into the prepared pie dish, smoothing the top with a spatula. Sprinkle the remaining 1/2 cup of shredded coconut evenly over the surface. If you’re after a more dramatic marbling effect, run a few small circles with the spoon through the batter now, but keep the coconut visible on the surface for that toasty, rustic look. This stage is where the pie starts to feel like a family treasure—simple, honest, and inviting.
Step 7: Bake
Bake for 45–55 minutes, until the edges are lightly browned and the center wobbles just a touch when you give the pan a gentle shake. If the top browns too quickly before the center sets, tent the pie loosely with foil for the remaining bake time. A knife inserted near the center should come out with a few moist crumbs; it won’t be perfectly clean like a cake, and that’s exactly how custards should be. I often rotate the dish halfway through for an even bake, especially if your oven tends to bake hotter on one side.
Step 8: Cool & Glaze
Let the pie cool in the pan for at least 20–30 minutes before glazing. This helps the slices hold their shape when you cut. To glaze, whisk together the powdered sugar, coconut milk, and vanilla until you reach a smooth, pourable consistency. Drizzle in a slow, back-and-forth motion across the top, letting the glaze settle into the warm surface. If you prefer no glaze, a light dusting of powdered sugar or a few fresh berries provides a delicate finish. For a tropical touch, sprinkle a little extra toasted coconut over the glaze while it’s still tacky so it adheres beautifully.
Step 9: Slice & Serve
Once cooled, slice with a sharp, warm knife for clean cuts. A quick wipe between slices helps keep the edges neat. This Crustless Coconut Pie shines with a scoop of vanilla Ice Cream, a dollop of whipped cream, and a squeeze of lemon zest—just enough brightness to balance the coconut’s richness. It’s equally lovely warm or chilled, so you can tailor it to your mood or the season. My kids prefer it slightly warm with a little ice cream, while I love it chilled with tart berries to cut through the sweetness.
What to Serve It With
This pie is a bit of a chameleon, which is why I always have a few serving ideas ready for different occasions. It’s perfect with coffee on a sleepy weekend morning, and it’s a crowd-pleaser at potlucks and family gatherings. Here are a few ways I like to present Crustless Coconut Pie:
For Breakfast: A gentle wedge alongside strong coffee, perhaps with a spoonful of yogurt and a handful of fresh berries. The contrast of tangy yogurt and the creamy coconut pie is a dream, especially when you’re rushing out the door but still crave something comforting.
For Brunch: Slice and plate with citrus zest flecks, a few raspberries, and a sparkling water with a wedge of lime. A light glaze keeps the surface glossy and appealing, making it a simple centerpiece for a relaxed morning gathering.
As Dessert: A warm wedge with a scoop of vanilla ice cream and a dusting of toasted coconut. A drizzle of caramel or a dollop of coconut whipped cream adds another layer of indulgence without tipping the scales too far.
For Cozy Snacks: Serve slightly warm with cinnamon cream or a dollop of whipped cream. This is the kind of dessert I reach for when I want something soothing after a long day—the kind of dish that makes the house feel safe and welcoming.
My family has a small ritual around this pie: after Sunday dinner, we gather with forks and laughter, and someone always comments on the kitchen smelling like a beach vacation. It’s funny how a humble crustless pie can become a memory-maker. If you’re chasing a similar vibe, you might want to pair Crustless Coconut Pie with a light coffee cordial or a cup of chai—both bring out the coconut’s warmth. If you’d like a non-dairy version, try swapping in a full-fat coconut milk for the dairy and soften with a touch more butter or a splash of almond milk. For other cozy desserts, check out my Crustless Pumpkin Pie or Coconut Lime Bars linked in my recipe index.
Top Tips for Perfecting Your Crustless Coconut Pie
Here are a few tricks I’ve learned after making this pie dozens of times—things that can push a good slice into “my favorite” territory.
Coconut Prep: Toast the 1/2 cup of coconut you’ll sprinkle on top for 1–2 minutes in a dry skillet over medium heat. It brings out a toasty aroma and adds depth to the final bite. Use unsweetened shredded coconut for a cleaner flavor; sweetened coconut will intensify sweetness and can make the texture seem heavier.
Mixing Advice: Don’t overmix the batter once you combine wet and dry ingredients. A few small lumps are fine, and overmixing can lead to a tougher texture. If you notice a few lumps, whisk just enough to smooth them away, then stop. Higher eggs mean a custardier texture, so if you’re reducing eggs, expect a slightly firmer slice.
Swirl Customization: The swirl is totally optional, but it’s a fun way to personalize the pie. A lemon-curd swirl brightens the coconut, while pineapple jam adds a tropical tart note. If you’re new to swirls, drop in a few teaspoons here and there and use a knife to swirl gently across the surface; you’ll get pretty ribbons without compromising the batter.
Ingredient Swaps: You can swap whole milk for almond milk or coconut milk for dairy if you want dairy-free or lighter options. If you replace the flour with cornstarch, you’ll need to adjust the liquid slightly—start with a tablespoon less liquid and add as needed. For a gluten-free crustless pie, cornstarch is a reliable substitute. If you skip the butter, the texture will lean a bit lighter, so consider adding a touch more coconut milk to compensate.
Baking Tips: For even browning, rotate the pie halfway through baking and keep an eye on the edges; if they’re browning too quickly, tent with foil. The center should wobble slightly when you shake the pan; as it cools, it will set into a smooth, creamy slice. If you like a glossier top, brush a light coat of glaze while the pie is still warm.
Glaze Variations: The glaze is optional but a little glaze can elevate the surface beautifully. If you want a citrus note, a teaspoon of lime or orange zest added to the glaze is delicious. For a dairy-free glaze, use a mix of powdered sugar with almond milk instead of coconut milk. A quick dusting of toasted coconut on top after glazing makes it feel restaurant-worthy at home.
Lessons learned: I once baked this pie for a crowd and forgot the glaze entirely. It still tasted wonderful, but the glossy surface plus the toasted coconut on top just makes it feel finished. So, I always aim for that final, shiny finish now. If you’re new, give yourself permission to adjust—taste-test the batter before baking, but resist the urge to overwork it. The beauty of this recipe is how forgiving it is; even small missteps still yield a comforting, treasured slice.
Storing and Reheating Tips
Crustless Coconut Pie stores surprisingly well, which is a huge win when you’re feeding a crowd or planning for the week. Here’s how I keep it fresh and delicious.
Room Temperature: If you’re serving within a few hours, it’s perfectly fine to leave the pie covered on the counter. It will stay fresh and the flavors will deepen as it rests. If your kitchen is warm, I’d recommend refrigerating after a few hours to maintain best texture for slices.
Refrigerator Storage: Cover the pie tightly with plastic wrap or transfer slices to an airtight container. It will keep nicely for 3–4 days. The glaze may soften with time, but that’s easy to remedy with a quick re-glaze or a quick sprinkle of powdered sugar just before serving.
Freezer Instructions: You can freeze baked slices for up to 2–3 months. Wrap slices individually in plastic wrap and seal in a freezer-safe bag. Thaw overnight in the fridge and bring to room temperature before serving for best texture. If you glaze before freezing, you may want to re-glaze upon thawing to restore that glossy finish.
Glaze Timing Advice: If you’re freezing, you can skip the glaze, then drizzle just before serving to keep a crisp, fresh surface. If you’re refrigerating solo slices, a light glaze or whipped cream topping adds a touch of brightness and helps balance the richness after a few days in the fridge.
In my kitchen, Crustless Coconut Pie stays close at hand for impromptu dessert nights, potlucks, and after-school cravings. The flavor travels well, and the texture holds up even when you slice it a day or two later. It’s the kind of dish that tastes familiar yet feels a touch indulgent—like a gentle vacation in a pie plate. If you’re planning to share, you’ll be surprised how quickly this one disappears, especially when you serve it with a little whipped cream or vanilla ice cream.
Frequently Asked Questions
Final Thoughts
Crustless Coconut Pie has earned a permanent spot in my recipe box because it’s reliable in the best way: you can pull it together when you’re short on time, the flavors feel warm and inviting, and you can tailor it to the moment with toppings or swirls. It’s a dessert that tastes like home but with a touch of sunshine—perfect for when you want something comforting without heavy prep. If you try it, I’d love to hear how your version turns out: did you go for the lemon-curd swirl, or did you keep it simple with a glossy finish and extra toasted coconut? Leave a comment below with your tweaks, and I’ll swap notes with you. Happy baking! And if you’re as obsessed with cozy coconut desserts as I am, consider exploring my Crustless Pumpkin Pie for a fall twist, or a bright Coconut Lime Tart if you’re feeling a zesty mood. I can’t wait to hear how yours turns out!
Crustless Coconut Pie
Ingredients
Main Ingredients
- 0.5 cup unsalted butter melted
- 1 cup granulated sugar
- 4 large eggs
- 1 cup shredded coconut sweetened
- 1 cup milk whole
- 1 teaspoon vanilla extract
Instructions
Preparation Steps
- Preheat your oven to 350°F (175°C). Grease a 9-inch pie plate.
- In a large bowl, whisk together the melted butter and granulated sugar until well combined.
- Add the eggs one at a time, beating well after each addition.
- Stir in the shredded coconut, milk, and vanilla extract until everything is just incorporated.
- Pour the mixture into the prepared pie plate.
- Bake for 35-45 minutes, or until the center is set and the top is golden brown.
- Let the pie cool completely on a wire rack before slicing and serving.


