


The Ultimate Homemade Chocolate Fudge Recipe – Rich, Creamy & Irresistible
There’s something deeply comforting about biting into a square of homemade chocolate fudge—silky smooth, melt-in-your-mouth rich, and just sweet enough to make you close your eyes and sigh. I’ve been making this chocolate fudge recipe for over a decade, tweaking it through countless holiday seasons, care packages for friends, and quiet Sunday afternoons when I needed a little joy (and chocolate). It’s become my go-to because it’s foolproof, uses simple ingredients, and always gets rave reviews. Whether you’re a seasoned baker or someone who still burns toast, this recipe will give you that perfect fudge texture—dense but tender, glossy but never greasy. And honestly? Once you taste real homemade fudge, store-bought just doesn’t cut it anymore.
What Is Chocolate Fudge?
Chocolate fudge is a classic confection with a surprisingly humble origin—rumor has it was invented by accident in the late 1800s when a baker mistakenly used marshmallow fluff instead of sugar syrup! But don’t let its accidental roots fool you—this dessert is pure intentional indulgence. At its core, fudge is a type of sugar candy that’s cooked to the soft-ball stage (around 234–240°F), then cooled and beaten until it becomes thick, creamy, and sliceable. True chocolate fudge relies on high-quality cocoa or melted chocolate, butter, and condensed milk for richness, with a touch of vanilla to round out the flavor. Unlike brittle or toffee, fudge should be smooth, not chewy or crunchy—and when done right, it holds its shape on a plate but dissolves like velvet on your tongue. This recipe skips the guesswork and delivers consistent, bakery-quality results every time.
Why You’ll Love This Recipe
This chocolate fudge recipe isn’t just delicious—it’s also incredibly forgiving and versatile. First, it uses pantry staples: sweetened condensed milk, semi-sweet chocolate chips, butter, and a pinch of salt. No candy thermometer? No problem—I’ll show you how to test for the perfect stage using cold water. Second, it’s ready in under 30 minutes of active time, plus chilling, making it ideal for last-minute gifts or holiday trays. But what really sets this version apart is the balance of flavors—the deep cocoa richness is cut with just enough butter and vanilla so it never feels cloying. Plus, it’s naturally egg-free and can easily be made dairy-free with plant-based substitutes. My friends always ask for the recipe, and once you try it, you’ll understand why. It’s the kind of treat that turns ordinary moments into something special—whether you’re sharing it at a party, wrapping it as a gift, or sneaking a piece straight from the fridge at midnight (no judgment here!).
How to Make Chocolate Fudge
Quick Overview
This recipe makes one 8×8-inch pan of fudge (about 16 squares). You’ll melt chocolate and butter together, stir in condensed milk and vanilla, then pour into a lined pan and chill until firm. That’s it! No fancy equipment, no tempering, no stress. Just rich, creamy fudge that sets beautifully every time.
Ingredients
You’ll need just 5 ingredients:
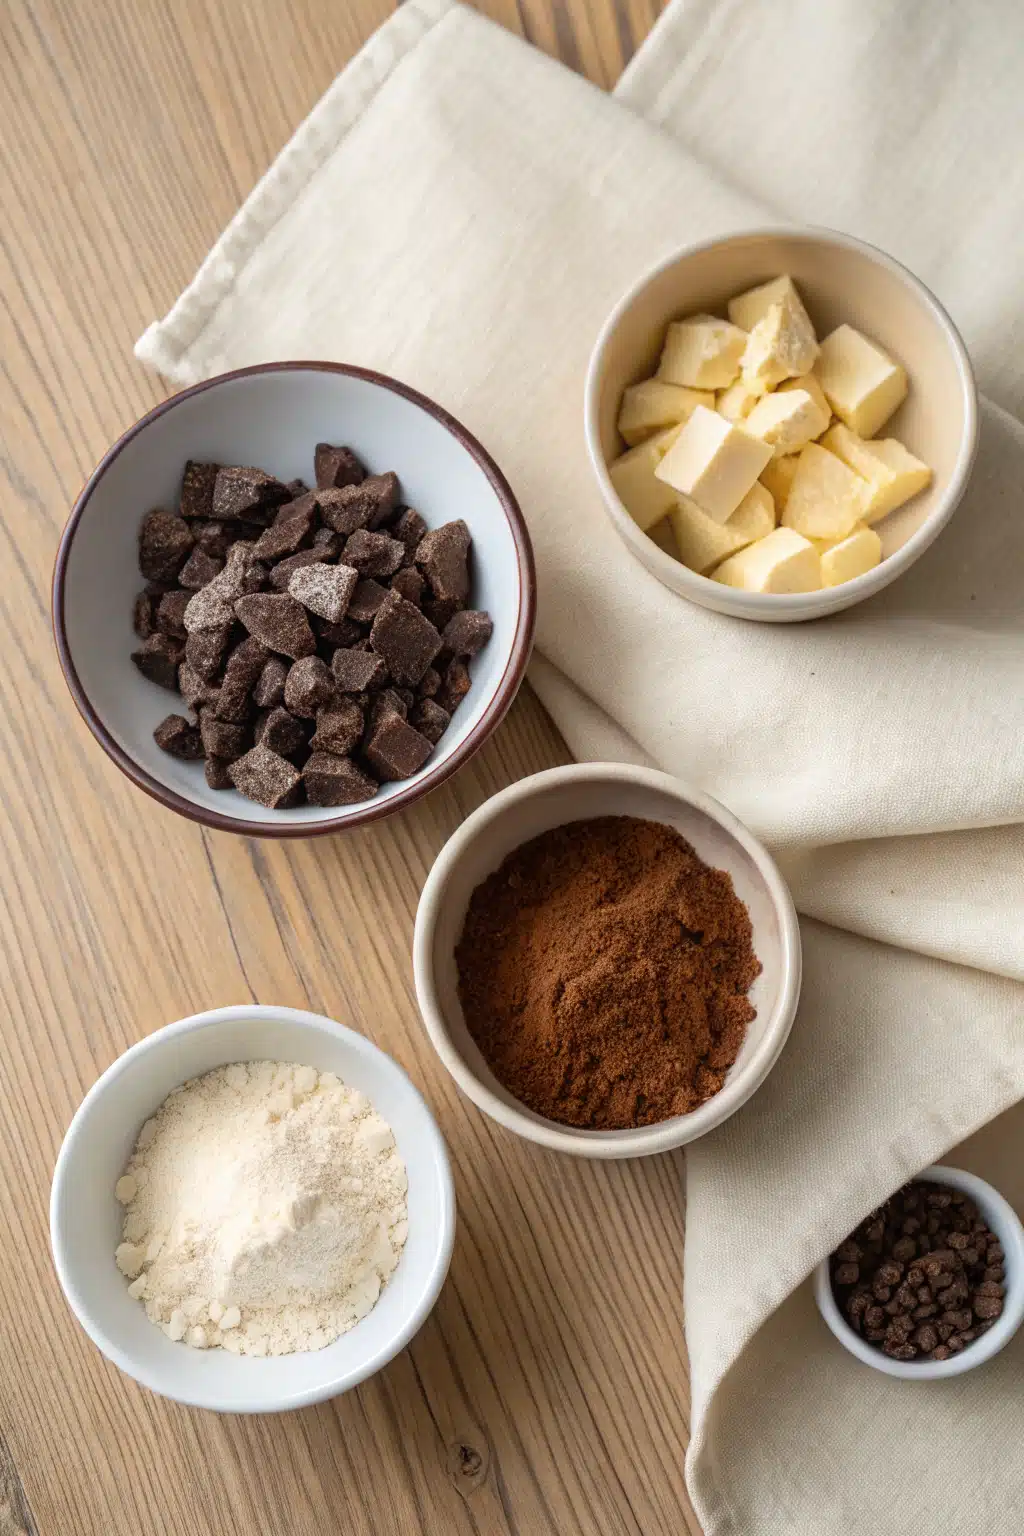
• 3 cups (540g) semi-sweet chocolate chips
• 1 can (14 oz / 397g) sweetened condensed milk
• 4 tablespoons (57g) unsalted butter
• 1 teaspoon pure vanilla extract
• Pinch of fine sea salt (about ⅛ tsp)
Step-by-Step Instructions
Step 1: Preheat & Prep Pan
Line an 8×8-inch baking pan with parchment paper, leaving an overhang on two sides for easy removal later. Set aside. No need to preheat the oven—this fudge sets in the fridge, not the oven!
Step 2: Melt Chocolate & Butter
In a medium saucepan over low heat, combine chocolate chips and butter. Stir constantly until completely melted and smooth—about 3–5 minutes. Don’t rush this step; low heat prevents scorching.
Step 3: Add Remaining Ingredients
Remove from heat. Immediately stir in sweetened condensed milk, vanilla, and salt until fully combined and glossy. The mixture will thicken slightly as you stir—that’s perfect!
Step 4: Pour & Chill
Pour the mixture into your prepared pan and smooth the top with a spatula. Refrigerate for at least 2 hours, or until firm enough to cut cleanly.
Step 5: Slice & Serve
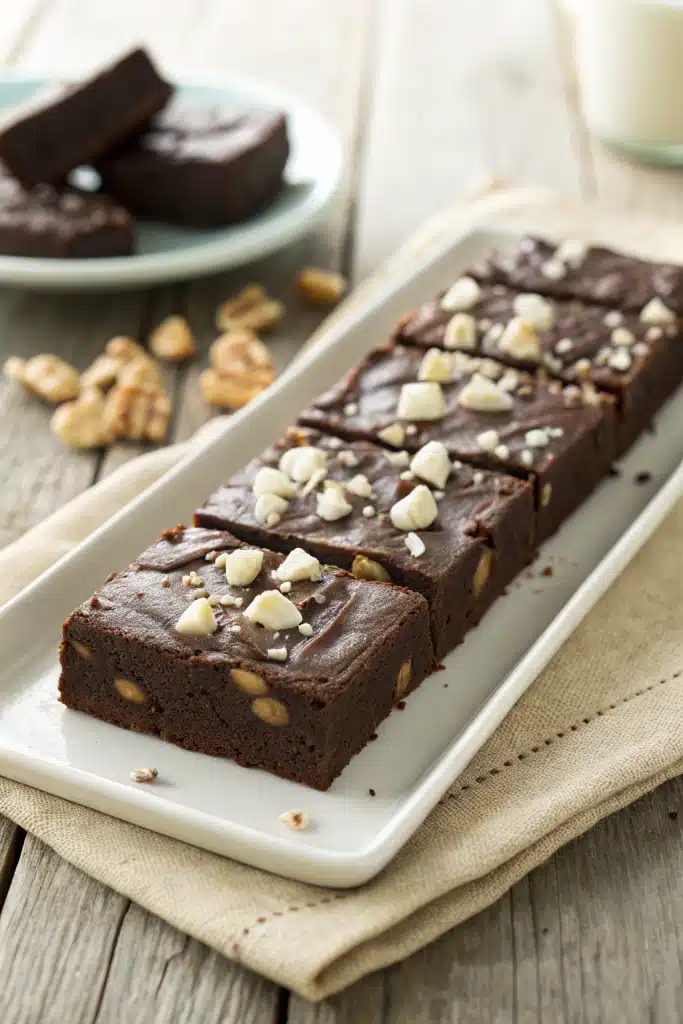
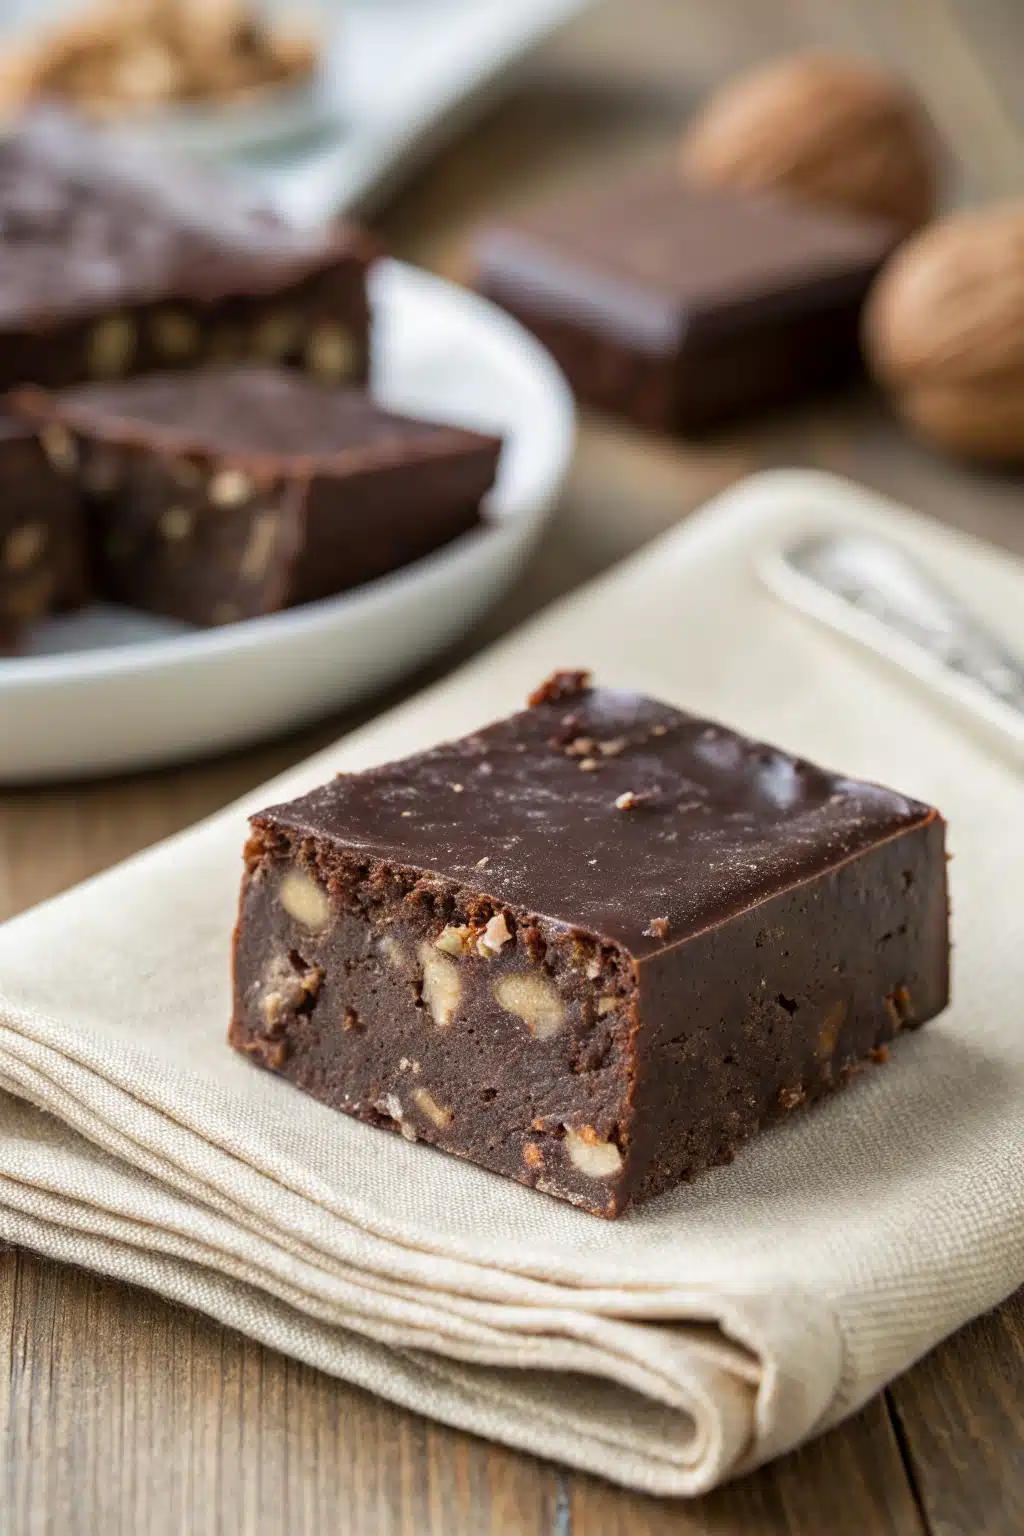
Lift the fudge out using the parchment overhang. Cut into 16 squares with a sharp knife. Enjoy chilled or at room temperature!
What to Serve It With
This chocolate fudge shines on its own, but it also pairs beautifully with a few simple companions. Try it alongside a cup of strong coffee or espresso—the bitterness balances the sweetness perfectly. For a festive touch, serve it with fresh berries (raspberries or strawberries work great) or a dollop of lightly sweetened whipped cream. It’s also a star on holiday dessert platters, especially next to shortbread cookies or peanut brittle. And if you’re feeling fancy, drizzle melted white chocolate over the top before chilling for a pretty marbled effect.
Top Tips for Perfecting Your Chocolate Fudge
• Use good-quality chocolate chips or chop up a bar of baking chocolate—avoid “melting wafers” as they contain too much oil.
• Stir constantly while melting to prevent hot spots and burnt chocolate.
• Don’t skip the salt—it enhances the chocolate flavor and cuts the sweetness.
• For a smoother texture, tap the pan gently on the counter after pouring to release air bubbles.
• If your fudge seems too soft after chilling, it may not have been cooled long enough—give it another hour. Too hard? It might have overcooked slightly—next time, remove from heat as soon as the chocolate melts.
Storing and Reheating Tips
Store fudge in an airtight container in the refrigerator for up to 2 weeks—if it lasts that long! Separate layers with parchment paper to prevent sticking. You can also freeze it for up to 3 months; thaw in the fridge overnight before serving. Fudge is best enjoyed cold or at room temperature—there’s no need to reheat it. In fact, warming it will cause it to soften too much and lose its sliceable texture.
Frequently Asked Questions
Final Thoughts
Making chocolate fudge at home is one of those simple joys that never gets old. It’s more than just a sweet treat—it’s a little act of love, patience, and craft. This recipe has brought me so much happiness over the years, whether I’m wrapping it up for neighbors, sharing it at family gatherings, or just enjoying a quiet moment with a cup of tea. I hope it brings you the same warmth and delight. Once you’ve mastered this basic version, feel free to experiment—add nuts, swap in espresso powder, or swirl in caramel. But no matter how you enjoy it, remember: the best fudge isn’t just about taste—it’s about the memories you make while making it.
Chocolate Fudge Recipe
Ingredients
Main Ingredients
- 2 cups semi-sweet chocolate chips
- 1 can sweetened condensed milk 14 oz / 397g
- 0.25 cup unsalted butter
- 1 teaspoon vanilla extract
- 0.25 teaspoon salt
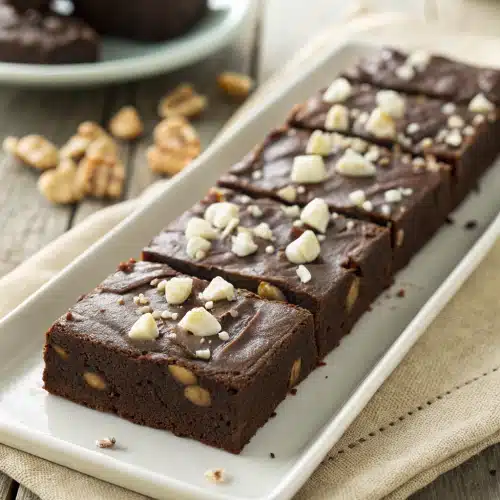
- 1 cup chopped walnuts or pecans optional
Instructions
Preparation Steps
- Line an 8x8-inch baking pan with parchment paper or foil, leaving an overhang on the sides for easy removal.
- In a medium saucepan, combine chocolate chips, sweetened condensed milk, and butter.
- Heat over low heat, stirring constantly, until the chocolate and butter are completely melted and the mixture is smooth.
- Remove from heat and stir in vanilla extract, salt, and nuts (if using).
- Pour the fudge mixture into the prepared pan and spread evenly.
- Refrigerate for at least 2 hours, or until firm.
- Lift fudge out of the pan using the parchment or foil overhang and cut into 24 squares.
- Store in an airtight container in the refrigerator for up to 2 weeks.


