


I’ll never forget the first time I smelled these Chocolate Chip Cookies cooling on the rack, the way the kitchen turned warm and cozy the moment the butter started to melt into brown sugar. It was a Sunday after church, the kind of afternoon where the sun quilts the living room with a soft, honeyed light. My mom pulled a batch from the oven and we stood there, noses twitching, waiting for the first bite. You could hear the quiet sweet sigh of the chips cracking as they cooled, and I knew right then that this would be a recipe I’d carry with me forever. If you’ve got a craving for something that tastes like childhood in a single bite, you’ve found the right place. These chocolate chip cookies aren’t fussy or faddish; they’re the kind of cookies you reach for after a long day, or when someone needs a little comfort. Think of them as the grown-up version of your favorite cookie—the kind that still feels like a hug from someone who loves you.
What is chocolate chip cookie?
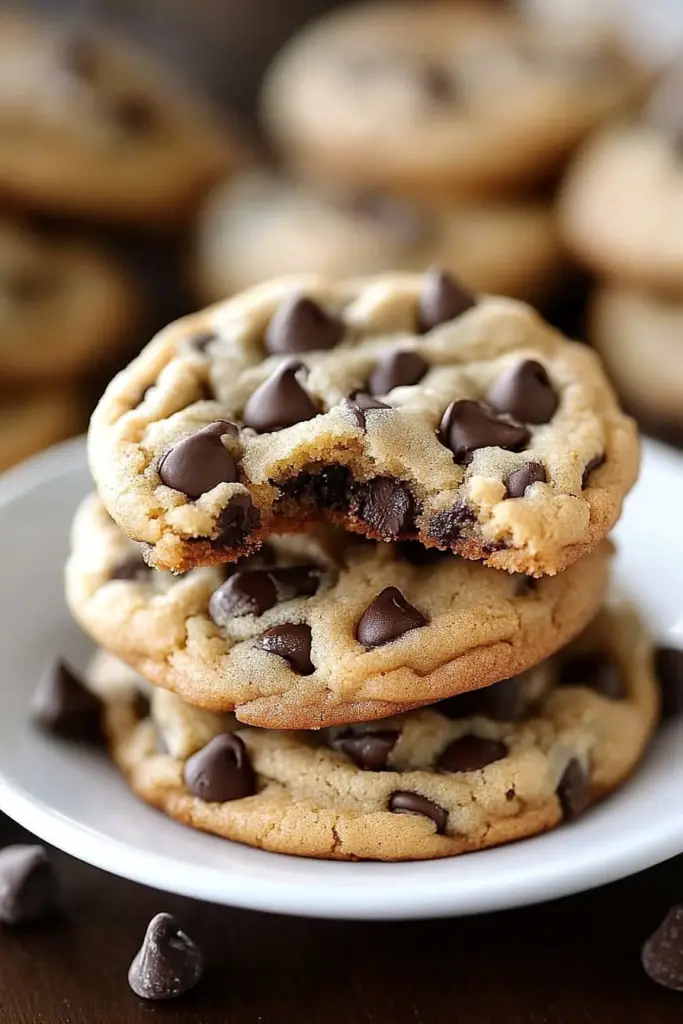
Chocolate Chip Cookies are essentially a tender, sugared blanket wrapped around pockets of melted chocolate. It’s a classic pairing: butter, brown sugar, and vanilla meeting flour, baking soda, and salt, then a shower of chips that crackle when you bite in. The name itself feels friendly and familiar, a nod to a simple, reliable treat you can pull out of the oven any night of the week. Think of it as a versatile base: you can keep them simple with just chips, or riff with toasted nuts, a splash of espresso for depth, or a swirl of peanut butter. The origin story is a favorite kitchen legend—Ruth Wakefield, who ran the Toll House Inn, supposedly invented this cookie by accident when she melted a chocolate bar into a cookie batter and expected it to melt smoothly. What we call “Chocolate chip cookies” today has grown into a thousand little variations, but the heart remains the same: a chewy, caramelized center with a lightly crisp edge and chocolate that stays gooey enough to steal a bite while it cools.
Why you’ll love this recipe?
What I love most about these Chocolate Chip Cookies is how relentlessly dependable they are. They’re a lifesaver on busy nights, when you want something homemade without a long list of steps. The flavor is comforting—rich butter, vanilla, and caramel notes from the brown sugar—that makes your kitchen smell like a memory you’re about to taste. And they’re forgiving enough for a family to enjoy together: my kids actually ask for seconds, and friends swear they’re the perfect “I brought cookies” gift. They’re also wonderfully versatile: you can swap in dark chocolate chips for a more intense bite, use half brown sugar and half white for a lighter texture, or toss in a handful of chopped almonds for extra crunch. If you’ve got a jar of semi-sweet chips and a spare hour, you’re basically ready to bake a batch that disappears in minutes at my house.
- FlavorWhat is the perfect balance of sweet, vanilla, and chocolate?
- SimplicityWith just a handful of everyday ingredients, you’ll have cookies on the cooling rack before you
- Cost-efficiency: This recipe leans on pantry staples, so it’s friendly to the weekly grocery budget.
- Versatility: You can jazz it up with nuts, espresso powder, or a swirl of peanut butter. It’s basically a blank canvas you’ll want to paint on again and again.
If you’re craving more cookie magic, you might also enjoy my snickerdoodle cookies for a cinnamon twist or my oatmeal raisin cookies for a chewy, hearty variation. Each one tells a story, and they all start with the same happy idea—cookies that feel like a warm hug when you need it most.
How to Make Chocolate Chip Cookies
Quick Overview
This method keeps things friendly and straightforward: we’ll bloom the flavors with a quick cream-and-sugar muddle, whisk the dry ingredients to keep a tender crumb, and fold in chips at the end so every bite is loaded with chocolate. The trick is to bake just until the edges are set and the centers look slightly underdone—they’ll firm up as they cool, giving you that perfect chewy center with a delicate edge. Making these Chocolate Chip Cookies is less about precision and more about listening to the batter—if it looks glossy and feels soft after you mix, you’re in the sweet spot.
Ingredients
For the Main Batter:
• 2 1/4 cups all-purpose flour (about 280 g), spooned and leveled for accuracy
• 1 teaspoon baking soda
• 1/2 teaspoon fine salt
• 3/4 cup unsalted butter, melted and cooled slightly (about 170 g) or softened for creaming
• 1 cup packed light Brown Sugar (220 g) for that toffee-y kiss, plus 2 tablespoons granulated sugar (optional for extra crisp edges)
• 2 large eggs, room temp
• 1 tablespoon vanilla extract (or real vanilla bean paste for deeper flavor)
• 1 1/2 cups semi-sweet chocolate chips (270 g), plus a handful for folding if you want extra melty pockets
• Optional: 1/2 cup chopped toasted nuts (walnuts or pecans) for texture
For the Filling:
- Extra 1/2 cup chocolate chips for a chocolatey swirl inside the dough (optional)
- Peanut butter swirl: 2 tablespoons creamy peanut butter mixed with 1 teaspoon powdered sugar (optional)
For the Glaze:
- 1/2 cup powdered sugar
- 2–3 teaspoons milk or heavy cream
- 1/4 teaspoon vanilla extract
- Optional: 1 tablespoon cocoa powder for a chocolate drizzle
Step-by-Step Instructions
Step 1: Preheat & Prep Pan
Heat your oven to 350°F (175°C). Line your baking sheets with parchment or silicone mats—these cookies don’t want to stick, and parchment makes clean-up a breeze. If your sheets have seen a lot of cookies, a quick wipe with a little oil can help the bottoms stay golden rather than soggy. I always time my batch to bake two sheets at once if I can swing it, so I don’t have to wait between rounds.
Step 2: Mix Dry Ingredients
In a medium bowl, whisk together flour, baking soda, and salt. This step aerates the flour and distributes the leavening evenly, so your cookies bake with uniform tenderness. I like to sift if I’m feeling fancy, but a good whisk does the job just fine. If you can, measure by weight—that’s the trick to consistent texture across batches.
Step 3: Mix Wet Ingredients
In a large bowl, cream the butter and sugars until the mixture is pale and fluffy. If you’re using melted butter, you’ll get a denser cookie with a deeper caramel note; if you’re creaming softened butter, you’ll get lighter, airier centers. Beat in the eggs one at a time, then add vanilla. You’ll notice the mixture look glossy and smooth—that’s exactly what you want.
Step 4: Combine
Fold the dry ingredients into the wet mixture on low speed or with a wooden spoon, just until no flour streaks remain. It’s tempting to overmix at this point, but stop as soon as you see the last of the flour disappear. Stir in the 1 1/2 cups of chocolate chips (and nuts, if you’re using them). If you’re feeling fancy, sprinkle in an extra handful of chips for bigger melty bites.
Step 5: Prepare Filling
If you’re going for the extra touch, prepare the optional fillings here. A quick swirl of peanut butter with a touch of powdered sugar can be folded into little dollops of dough, or you can keep it classic with a second handful of chips. Spread a few chips on top of the dough balls before baking for an irresistible visual cue; it’s not essential, but I call it a little “cookie personality.”
Step 6: Layer & Swirl
Drop spoonfuls of dough about 2 inches apart onto the prepared sheets. For the swirl technique, you can press a tiny dab of peanut butter or extra chips into the center of each ball, then fold the dough over it slightly to trap the filling. If you’re using a glaze, you can reserve it for the cooling stage and drizzle modestly after cooling to keep the shine intact.
Step 7: Bake
Bake for 9 to 11 minutes, rotating the sheets halfway through for even color. The cookies should look set at the edges but remain a touch soft in the center—that’s how you get that classic chewy interior. If your oven runs hot, 10 minutes may be enough; if yours runs cooler, aim for 11 or a hair longer. Let them rest on the sheet for 2 minutes before transferring to a rack; they’ll firm up as they finish cooling.
Step 8: Cool & Glaze
Cooling is where the magic happens. Allow the cookies to rest on a rack for at least 15 minutes before glazing or stacking. If you want a shiny finish, whisk together the glaze ingredients and drizzle in a lazy, crisscross pattern over the cooled cookies. A dusting of cocoa powder over the glaze adds a subtle sophistication. If you’re not glazing, a simple sprinkle of flaky salt on warm cookies is a fantastic finishing touch.
Step 9: Slice & Serve
Yes, you slice cookies? Well, not literally for these, but if you’re serving a tray, you can cut them into rustic wedges for a dessert board, or simply plate whole cookies with a glass of cold milk. The first bite should reveal a soft center with a gentle bite at the edges, and the chocolate should be glossy and perfectly melted. Serve these warm if you can, and watch how the room lightens with smiles.
What to Serve It With
These chocolate chip cookies shine in a crowd and pair with all sorts of moments. Here are a few ideas that feel personal and homey, not pretentious.
For Breakfast: A quick cookie-and-coffee moment that still feels like a treat. Serve with a tall vanilla latte and a lemon zest crumb muffin on the side for contrast. The cookies’ warmth wakes you up, and the citrus note in the muffin keeps things bright.
For Brunch: Layer on a simple fruit salad, a dollop of whipped yogurt, and a couple of cookies on a pretty plate. The chocolate chip cookies bring a sense of nostalgia to the table without overpowering the lighter fare.
As Dessert: A scoop of vanilla bean ice cream, a drizzle of chocolate, and a brittle mint leaf for color. The contrast between warm cookies and cold ice cream is pure comfort, and it makes a great finale to a weeknight meal or a weekend celebration.
For Cozy Snacks: Keep a plate near the couch with a mug of hot cocoa or a strong cup of coffee. I’ve found these cookies disappear fastest when there’s a weathered jacket and the sound of a rainstorm outside. This is the moment to slow down, breathe, and enjoy a bite of happiness.
My family loves this with a glass of milk or a comforting cup of tea, especially if we’ve spent the day chasing after kids’ activities. These chocolate chip cookies taste like the kind of thing you bake when you want to remind yourself that simple pleasures still matter.
Top Tips for Perfecting Your Chocolate Chip Cookies
Here are a few tricks I’ve learned after dozens of batches. They’re small adjustments that make a big difference, especially when you’re chasing that perfect chewy center or a crisp edge.
Dough Prep: If your dough feels too soft after mixing, give it 10–15 minutes in the fridge. Chilled dough holds its shape better and yields cookies that don’t spread as much, giving you those lovely, rounded edges. If you’ve got time, chilling overnight deepens the flavors and makes the texture even more forgiving.
Mixing Advice: Overmixing is the number one culprit behind tough cookies. Mix until just combined, then fold in the chips gently by hand. If you’re creaming butter and sugar, watch for that pale, fluffy look rather than letting it beat forever; it’s a balance between airiness and tenderness.
Swirl Customization: Swirls are fun but keep them modest. A little peanut butter swirl can be gorgeous, but too much can cause the dough to separate. If you’re dyeing the dough or adding color, aim for a soft marbling rather than a bold pattern—because you want to bite into chocolate first, not the color!
Ingredient Swaps: White chocolate chips in place of dark can yield a milder sweetness that pairs well with espresso or a fruity jam tucked into the center. You can swap half the butter for browned butter for a deeper, nutty flavor; the texture stays tender and the aroma is irresistible. If you’re avoiding dairy, use a plant-based butter substitute and a splash of almond milk to keep the dough cohesive.
Baking Tips: Always bake on parchment for easy release and clean edges. If you want a thicker center, use a touch more flour and chill the dough a bit longer; for thinner, crisper cookies, roll slightly larger than a tablespoon and bake closer to the 9-minute mark. Watch the edges: you want them just golden and not browned too much, or they’ll taste dry.
Glaze Variations: A glaze is optional, but it’s a pretty finish. For a richer gloss, whisk in a little corn syrup or maple syrup with the milk in the glaze. If you prefer a simple dusting, powdered sugar lightly sifted over warm cookies is a delicate finish. You can also drizzle a quick chocolate glaze by melting 2–3 tablespoons of chocolate with a teaspoon of butter and a pinch of salt.
These tips aren’t fixed rules; they’re just the lessons I learned while chasing the perfect bite. I’ve tested this recipe with almond milk in the glaze or batter, and to my surprise, it kept the cookies creamy and light—my testers didn’t even notice the swap, which felt like a little victory. The smell alone—brown sugar, vanilla, and the warm crackle of chocolate—still gets a roomful of people to the kitchen every time.
Storing and Reheating Tips
Cookies keep beautifully, but a little care goes a long way to maintain texture and flavor. Here’s how I handle them after they’ve cooled.
Room Temperature: Store in an airtight container at room temperature for up to 5 days. If you’re stacking them, place parchment between layers to prevent sticking. I like to keep a small baggie of salt with them for a quick flavor boost—just a pinch next to the cookies brightens the sweetness.
Refrigerator Storage: You can refrigerate dough, well-wrapped, for up to 3 days before baking. It’s a great trick if you want to bake fresh cookies in rounds to avoid overworking your oven. The dough will firm up, which helps cookies hold their shape on the sheet.
Freezer Instructions: Freeze dough balls on a sheet until solid, then transfer to a freezer bag. They’ll keep for up to 3 months. Bake from frozen, adding 1–2 minutes to the bake time. If you’re freezing baked cookies, they’ll keep well for about 2 months; rewarm them in a low oven or a 10–15 second zap in the microwave for a quick, soft center.
Glaze Timing Advice: If you’re freezing or refrigerating, glaze just before serving to keep the glaze glossy and fresh. If you’ve already glazed, store cookies in a container with a loose lid to prevent moisture from softening the glaze too much.
In my kitchen, these cookies are a ritual: I bake a little, taste, tweak, and then share. The way the dough comes together while the kids dance in the living room is a small reminder that joy often comes in simple, chewy forms.
Frequently Asked Questions
Final Thoughts
These chocolate chip cookies aren’t a fancy showpiece; they’re the kind you bake when you want something unmistakably comforting and reliably delicious. They’re forgiving, friendly, and absolutely worth the warm minutes you spend waiting for the oven to sigh and release that irresistible aroma. I’ve made this recipe countless times, and it never fails to bring a smile to the kitchen. If you try it, tell me which tweak you loved most—did you go for extra chips, a peanut butter swirl, or a darker chocolate bite? I’d love to hear how yours turn out. Happy baking, friends, and may your kitchen be forever filled with the scent of melted chocolate and buttered happiness.
If you enjoyed this, consider leaving a comment with your favorite variation or the moment you served them. And if you snapped a photo of your tray, drop a link so I can ooh and ahh with you. Here’s to many more afternoons of cozy cookies and friendly chatter over coffee.

Classic Chocolate Chip Cookies
Ingredients
Main Ingredients
- 0.75 cup unsalted butter, softened
- 0.75 cup granulated sugar
- 0.75 cup packed brown sugar
- 2 large eggs
- 1 teaspoon vanilla extract
- 2.25 cup all-purpose flour
- 1 teaspoon baking soda
- 0.5 teaspoon salt
- 2 cups chocolate chips
Instructions
Preparation Steps
- Preheat oven to 375°F (190°C). Line baking sheets with parchment paper.
- In a large bowl, cream together the softened butter, granulated sugar, and brown sugar until light and fluffy.
- Beat in the eggs one at a time, then stir in the vanilla extract.
- In a separate bowl, whisk together the flour, baking soda, and salt.
- Gradually add the dry ingredients to the wet ingredients, mixing until just combined. Do not overmix.
- Stir in the chocolate chips.
- Drop rounded spoonfuls of dough onto the prepared baking sheets, about 2 inches apart.
- Bake for 9-11 minutes, or until the edges are golden brown and the centers are still slightly soft.
- Let the cookies cool on the baking sheets for a few minutes before transferring them to a wire rack to cool completely.


