


Cake Mix Cookie Bars 2: The Easiest Dessert Hack You’ll Ever Love
You know that feeling when you’re craving something sweet, but the thought of pulling out every baking tool and spending hours in the kitchen makes you want to order takeout instead? Yeah, we’ve all been there. That’s exactly why I fell head over heels for these Cake Mix Cookie Bars 2. They’re the kind of recipe that feels like a warm hug from your favorite aunt—simple, comforting, and absolutely delicious. I first made them on a rainy Sunday when I had a box of yellow cake mix sitting in my pantry and a serious sweet tooth. Within 20 minutes, my kitchen smelled like a bakery, and my family was already asking for seconds. What makes these bars so special isn’t just how easy they are (though that’s a huge win), it’s the perfect balance of soft, chewy cookie texture with that light, cakey sweetness you crave. Whether you’re feeding a crowd or just treating yourself after a long day, these bars deliver every single time.
What Is Cake Mix Cookie Bars 2?
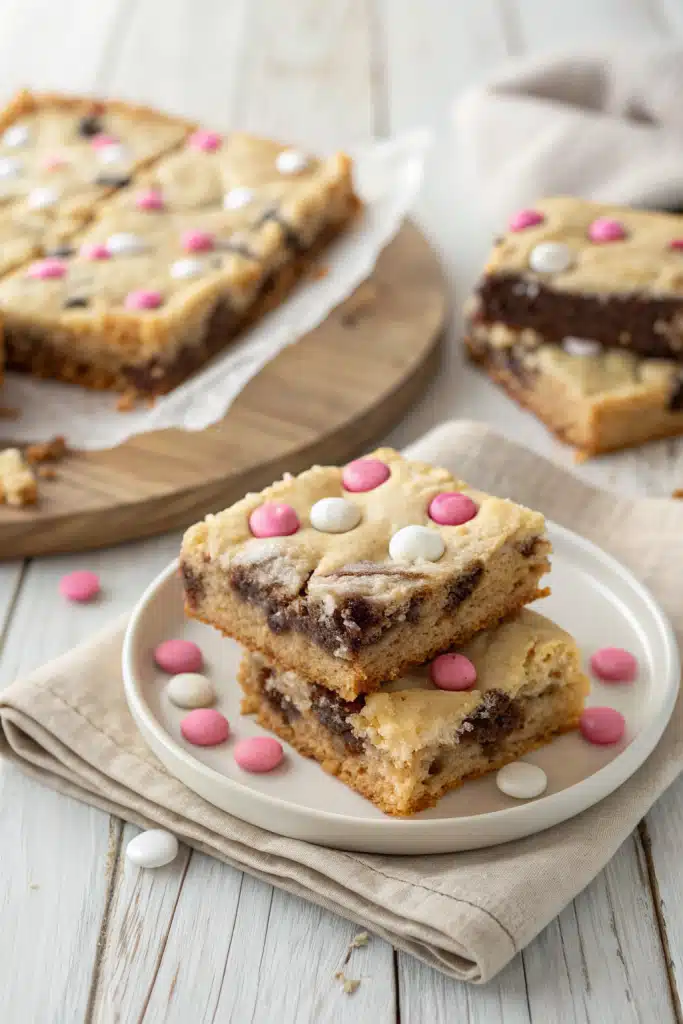
Cake Mix Cookie Bars 2 are exactly what they sound like—a clever, no-fuss dessert that transforms a humble box of cake mix into thick, fudgy, irresistible bars with just a few pantry staples. Think of them as the lovechild between a cookie and a brownie, but lighter and even more forgiving. The “2” in the name? That’s because this is my upgraded version—slightly richer, with a gooey center and a crackly top that makes each bite feel like a mini celebration. Unlike traditional cookies that require rolling or shaping, these come together in one bowl, press into a pan, and bake into golden perfection. They’re perfect for beginners, busy parents, or anyone who wants homemade goodness without the hassle. Plus, since they start with cake mix, you get that familiar, comforting flavor with half the effort.
Why You’ll Love This Recipe
Let me be honest—I’m not usually the type to rave about dessert hacks, but these bars? They’ve earned a permanent spot in my weekly rotation. First off, they’re ridiculously easy. We’re talking 5 ingredients, 10 minutes of prep, and one bowl. No stand mixer, no chilling dough, no fancy techniques. Just melt, stir, pour, and bake. But beyond the convenience, it’s the texture that wins me over every time. The edges get slightly crisp, the center stays soft and almost molten, and the top develops those beautiful, glossy cracks that make you want to dive right in. And because they’re made with cake mix, you can easily customize them—swap vanilla for chocolate, toss in sprinkles for birthdays, or stir in peanut butter chips for a decadent twist. They’re also incredibly forgiving; even if you accidentally overbake them by a minute or two, they’ll still taste amazing. Whether you’re bringing treats to a potluck, packing lunchboxes, or just need a little pick-me-up, these bars are your new best friend.
How to Make Cake Mix Cookie Bars 2
Quick Overview
These Cake Mix Cookie Bars 2 come together faster than you can preheat your oven. Start by melting butter (the secret to their richness), then whisk in eggs and a splash of vanilla to bind everything together. Add your cake mix and stir until just combined—no overmixing needed! Press the thick, cookie-like dough into a greased pan, smooth the top, and bake until golden and set around the edges. The whole process takes under 30 minutes from start to finish, and the result is a pan of bars that’s equally at home at a school bake sale or a cozy night in with tea.
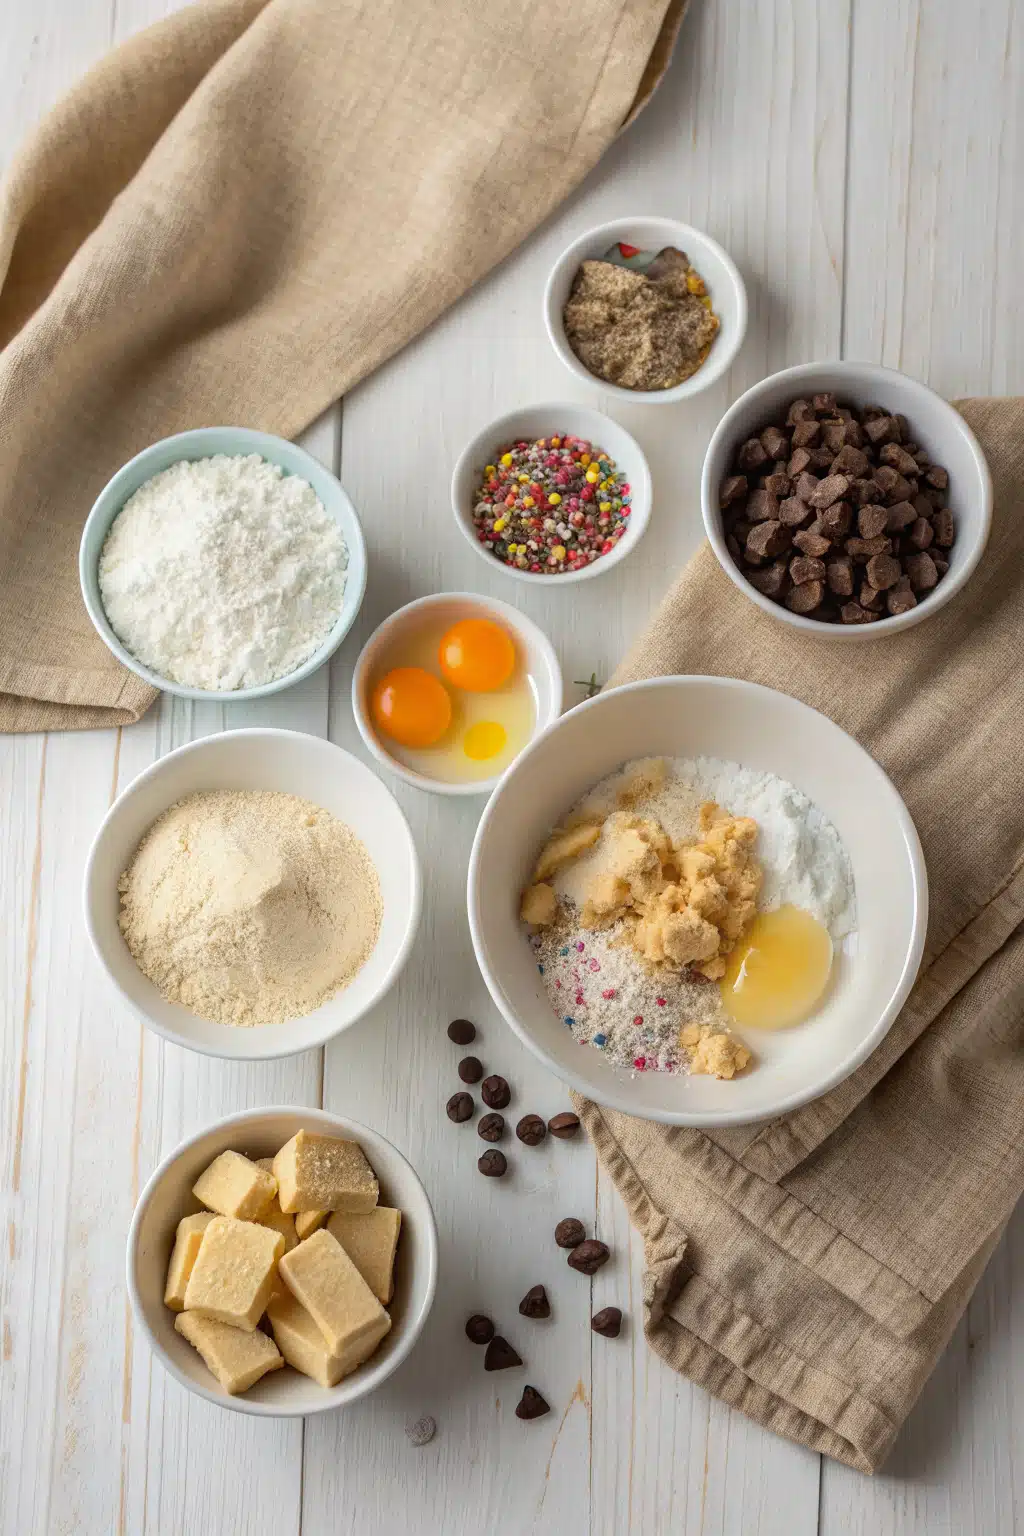
Ingredients
You only need five simple ingredients:
- 1 box (15.25 oz) yellow cake mix (or vanilla)
- 1/2 cup (1 stick) unsalted butter, melted
- 2 large eggs
- 1 teaspoon vanilla extract
- Optional: 1/2 cup chocolate chips, sprinkles, or nuts
Step-by-Step Instructions
Step 1: Preheat & Prep Pan
Preheat your oven to 350°F (175°C). Grease a 9×13-inch baking pan with butter or non-stick spray, or line it with parchment paper for easy removal later. This step ensures your bars won’t stick and makes cleanup a breeze.
Step 2: Mix the Batter
In a large bowl, whisk together the melted butter, eggs, and vanilla until smooth. Add the entire box of cake mix and stir with a spatula or wooden spoon until just combined. The dough will be thick—like cookie dough—and that’s perfect. If you’re adding mix-ins like chocolate chips, fold them in now.
Step 3: Press & Bake
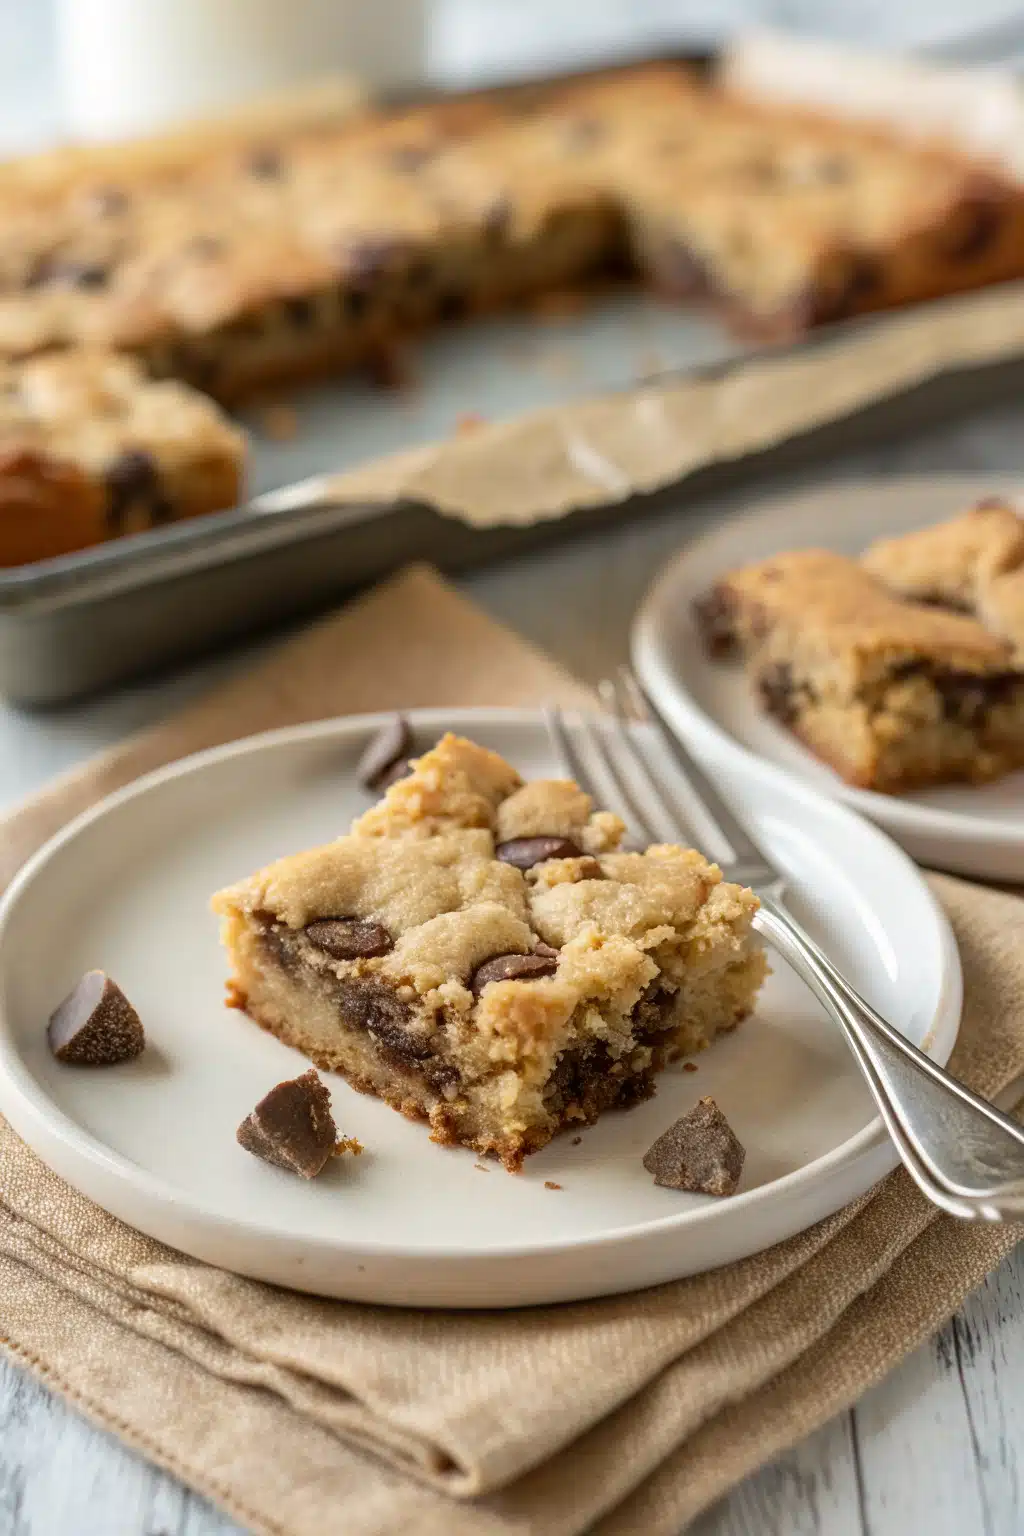
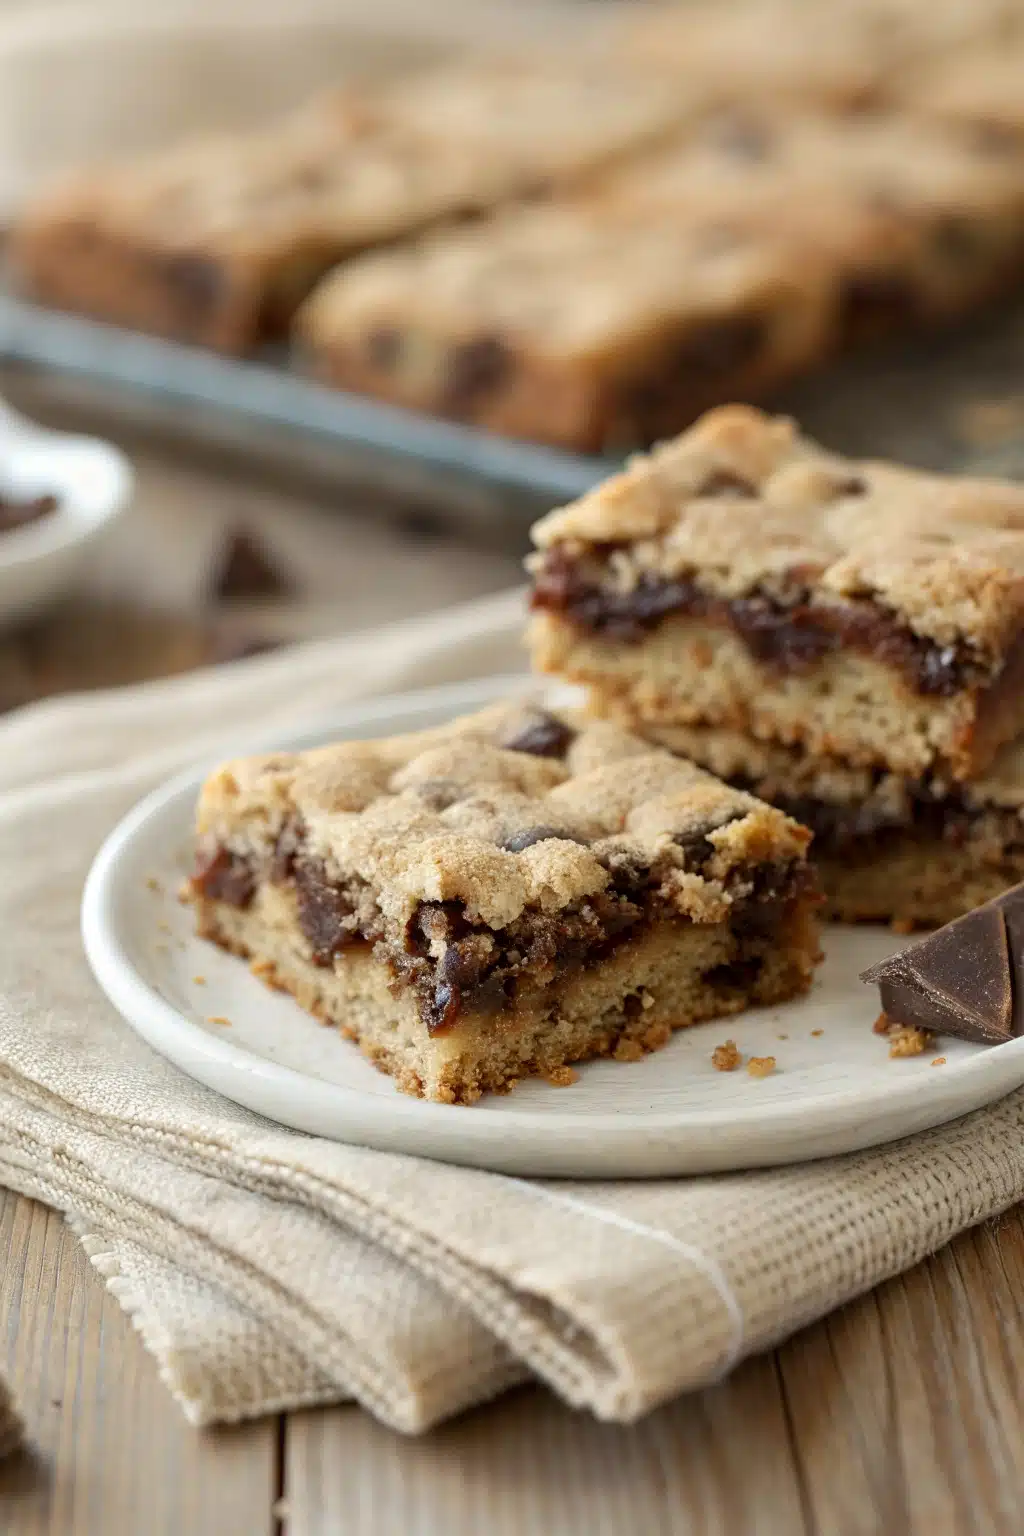
Transfer the dough to your prepared pan and press it evenly into the bottom using your hands or the back of a spoon. Smooth the top so it bakes uniformly. Bake for 18–22 minutes, or until the edges are golden and the center looks set but still slightly soft. Don’t overbake—these bars are meant to be tender!
Step 4: Cool & Slice
Let the bars cool completely in the pan before slicing. This helps them firm up and hold their shape. Once cooled, cut into squares or rectangles and serve. They’re best enjoyed the same day, but trust me—they rarely last that long.
What to Serve It With
These Cake Mix Cookie Bars 2 are delicious on their own, but if you’re feeling fancy, pair them with a scoop of vanilla ice cream for a warm-weather treat, or drizzle with melted chocolate for extra indulgence. They’re also fantastic alongside a glass of cold milk, a cup of coffee, or even as a sweet addition to brunch spreads. For holidays, top with whipped cream and fresh berries—simple, elegant, and always a hit.
Top Tips for Perfecting Your Cake Mix Cookie Bars 2
For the best results, use room-temperature eggs—they blend more smoothly into the batter. If your cake mix is older than a year, check the expiration date; stale mix can affect texture. Don’t skip the cooling step—it’s tempting to dig in right away, but patience rewards you with clean slices. And if you love a gooey center, pull the bars out at 18 minutes. For a firmer texture, go closer to 22. Finally, experiment! Swap yellow cake mix for chocolate, red velvet, or even funfetti depending on your mood.
Storing and Reheating Tips
Store leftover bars in an airtight container at room temperature for up to 3 days, or refrigerate for up to a week. They also freeze beautifully—wrap individual bars in plastic wrap and freeze for up to 2 months. To reheat, pop a bar in the microwave for 10–15 seconds for that fresh-baked warmth, or enjoy them chilled straight from the fridge.
Frequently Asked Questions
Final Thoughts
These Cake Mix Cookie Bars 2 aren’t just a recipe—they’re a little moment of joy on a plate. Whether you’re whipping them up for a last-minute gathering or just because you deserve something sweet, they never disappoint. I hope they bring as much warmth and happiness to your table as they have to mine. Now go grab that cake mix and give them a try… your taste buds will thank you.

Cake Mix Cookie Bars 2
Ingredients
Main Ingredients
- 15.25 oz yellow cake mix
- 0.5 cup unsalted butter, melted
- 1 large egg
- 1 cup semi-sweet chocolate chips
- 0.5 cup chopped walnuts optional
Instructions
Preparation Steps
- Preheat oven to 350°F (175°C). Grease a 9x13-inch baking pan or line with parchment paper.
- In a large bowl, combine the cake mix, melted butter, and egg. Stir until a thick dough forms.
- Fold in the chocolate chips and walnuts (if using) until evenly distributed.
- Press the dough evenly into the prepared baking pan.
- Bake for 18–22 minutes, or until the edges are lightly golden and the center is set.
- Allow to cool completely in the pan before cutting into 16 squares.


