


Every year, I look forward to the game and the ritual of something sweet waiting on the counter when the commercials roll by. The kitchen fills with the warm, familiar smells of butter and chocolate, and for a minute the house feels like a tiny stadium all its own. This Super Bowl Squares Grid Bars Recipe is my favorite way to combine crowd-pleasing flavor with a playful, party-perfect presentation. It’s surprisingly easy, and the grid idea instantly sparks conversation—people snap photos, point out their favorite squares, and then return for a second bite. I’m not kidding when I say the first time I made this, the entire tray disappeared in minutes. It’s that kind of dessert: cozy, a little bit cheeky, and always a hit with families and friends. This Super Bowl squares grid concept is the perfect blend of nostalgia and celebration, and trust me, it’s a lifesaver on busy game days.
What is the Super Bowl Square Grid?
Super Bowl Squares Grid is a dessert concept that rides the wave of the classic football-pool grid you see on walls and kitchen tables every February. Think of it as a layered bar that’s been dressed up to look like a scoreboard: a crisp crust, a creamy peanut-butter filling, and a glossy chocolate glaze. The magic is in the presentation—the surface is patched with thin lines, forming neat little squares that resemble the iconic Super Bowl squares grid. It’s essentially caramel, chocolate, and Peanut Butter all meeting in a pan and then being cut into tidy, square segments. The result is simple enough for a weeknight, yet special enough to serve at a party or as a game-day centerpiece. If you’ve ever wanted a dessert that’s both delicious and a little decorative, this is the one.
Why you’ll love this recipe?
What I love most about this recipe is how adaptable it feels while still delivering a bold flavor profile. The crust brings a toasty, shortbread-like bite that contrasts beautifully with a silky peanut-butter center. It’s not just a treat; it’s a small celebration in your kitchen. The overall process is forgiving, which means you can make it even when time is tight. The cost? Friendly. You’re mostly working with pantry staples, and I’ve learned you can swap in a few ingredients without changing the magic. And the best part? The surface grid makes it look like you spent hours fussing with decorations, when in reality it’s just a couple of simple lines of chocolate or White Chocolate. What I love most about this recipe is how it invites people to gather, slice, and chat about which square they picked while the smell drifts through the room.
How do I make a grid for the Super Bowl?
Quick Overview
In a nutshell, you bake a buttery shortbread crust, spread a creamy peanut-butter filling on top, bake again to set, and finish with a glossy chocolate glaze. Once cooled, you drizzle White Chocolate (or a lighter melted glaze) in a grid pattern across the top to mimic the scoreboard. The result is a sturdy bar that slices cleanly into little squares—perfect for a party platter or a casual dessert table. This method keeps things straightforward: prepare the crust, handle the filling, bake, glaze, then slice into the familiar grid. You can have this on the table before kickoff and still have time to relax before the big toss. It’s one of those recipes that feels fancy but is really a reliable weeknight win.
Ingredients
For the main battery (crust):
– 1 1/2 cups all-purpose flour
– 1/2 cup unsalted butter, softened
– 1/4 cup granulated sugar
– 1/4 tsp fine salt
For the Filling:
– 1 cup Creamy Peanut Butter
– 1/3 cup powdered sugar
– 2 tbsp unsalted butter, softened
– 1 tsp vanilla extract
For the Glaze:
– 1 cup semisweet chocolate chips
– 2 tbsp unsalted butter
– 2 tbsp milk or cream
Optional Grid Lines:
– 1/2 cup white chocolate chips or melted white chocolate for piping
– A touch of coconut oil or milk to thin if needed
Step-by-Step Instructions
Step 1: Preheat & Prep Pan
Heat the oven to 350°F (175°C). Line a 9×13-inch pan with parchment paper, letting the edges overhang a bit so you can lift the bars out easily once they’re set. A quick spray of nonstick spray around the parchment helps everything release cleanly. I like to chill the pan for a minute after lining it; it makes the crust crispier when it hits the oven. This is the cozy moment you know you’ll thank yourself for later: you’re setting up a little stage for the flavors to shine.
Step 2: Mix Dry Ingredients
In a bowl, whisk together the flour, sugar, and salt. The texture should look sandy, almost like damp beach sand. That slight grain helps the crust hold its shape even after you cut it into squares. If you’ve got a busy afternoon, you can whisk these together in a small measuring cup so you’re not juggling bowls.
Step 3: Mix Wet Ingredients
In another bowl, beat the butter until it’s light and fluffy—just a minute or two. The goal is pale, creamy, and easy to mix with. If you’re using an electric mixer, go medium speed to avoid overworking the butter. A little splash of vanilla can go in here too if you’re feeling extra aromatic. The butter and sugar will start to look a little velvety, and that’s your cue that you’re close to perfection.
Step 4: Combine
Pour the dry mixture into the wet, and mix until it just comes together into a cohesive dough. Don’t overwork it—this is meant to be a tender crust, not a dense cake. The dough should hold together when you pinch a bit in your fingers. If it’s a touch crumbly, add a teaspoon of water or milk at a time until it bonds. Press the dough into the prepared pan in an even, compact layer. A flat-bottomed glass or measuring cup helps you get that crust level and tidy.
Step 5: Prepare Filling
In a bowl, blend the peanut butter, powdered sugar, softened butter, and vanilla until smooth and creamy. If you want a slightly brighter filling, add a touch more vanilla; if you want richer depth, a pinch of cinnamon or a drizzle of honey can do wonders. The filling should spread like frosting but remain thick enough to hold its shape. If it seems too loose, chill it for 10–15 minutes to firm up a bit.
Step 6: Layer & Swirl
Bake the crust for about 12–14 minutes, until the edges are just turning golden. Remove from the oven and let it cool for a few minutes so the filling doesn’t slide off. Spread the peanut-butter filling evenly over the warm crust. If you like a little marbling, dollop small pockets of extra peanut butter and swirl with a spoon. You can also add a thin drizzle of melted chocolate and swirl it into the filling for a lightly ribboned effect.
Step 7: Bake
Return the pan to the oven and bake for another 10–12 minutes, just until the filling is set and the edges are deeply fragrant. The filling won’t be firm like a cookie dough; you want it to be a touch glossy and cohesive, not runny. If your oven runs hot, check a bit earlier—every oven behaves a tad differently, and you want a clean set rather than a crackly overshoot.
Step 8: Cool & Glaze
Let the bars cool completely in the pan. Patience here pays off with clean slices. When cool, melt the chocolate chips with butter and milk until smooth. Pour over the bars and spread to cover, then tilt the pan gently to coax an even glaze across the surface. Before the glaze sets, drop lines of melted white chocolate or white chocolate chips warmed with a touch of coconut oil. Pipe or drizzle in a grid pattern to mimic the Super Bowl squares grid. If you’re in a hurry, you can chill for 15–20 minutes to speed up the setting; otherwise, let it rest at room temperature for at least an hour for a hard, glossy finish.
Step 9: Slice & Serve
Once the glaze is firm, use a sharp knife to cut clean lines into the bars. Then, using a ruler if you’re feeling precise, cut perpendicular lines to form a neat grid. The bars look impressive with minimal effort, and the clean edges make a professional presentation that even skeptical guests will praise. These little squares are perfect for a crowd because they’re easy to grab, not too crumbly, and sturdy enough to withstand a short mingle on the table. I love serving them with a scoop of vanilla ice cream or a dollop of whipped cream to contrast the chocolatey richness.
What to Serve It With
This dish is friendly to all kinds of occasions, and the grid presentation means you can tailor the serving vibe to your gathering. Here are a few ideas that pair beautifully with the Super Bowl Squares Grid Bars:
For Breakfast: A light coffee or espresso alongside a cool, creamy glass of milk makes these a surprisingly great morning bite. If you’re feeding a crowd, set them out with fresh berries and a bowl of yogurt. The chocolate note isn’t overpowering in the morning, and the crust has just enough butter to feel indulgent without being heavy.
For Brunch: Layer up a platter with the bars, a few citrus segments, and a pot of hot tea or a lightly sweet sparkling beverage. They’re neat, they’re cute, and they let your guests sample a little piece of dessert without overindulging before midday.
As Dessert: Warm or room-temperature, these bars feel like a hug. Scoop vanilla bean ice cream on the side, or drizzle a tiny extra bit of melted chocolate over the top. A mint leaf or a scattering of flaky sea salt can take the sweetness to a more grown-up place.
For Cozy Snacks: If you’re settling in for a late game, these bars are perfect with your favorite hot beverage. They travel well to a friend’s house, and the grid motif means you can rest easy knowing they’ll photograph nicely for a quick game-day post.
My family’s little tradition with this recipe is to cut the bars after the game starts and share the first few squares with the people we’ve invited. The aroma fills the room, and suddenly everyone remembers how good simple, butter-rich desserts can feel—especially when you’ve got a whole grid of squares to choose from. It’s a little ritual that makes the game a touch sweeter, and I wouldn’t miss it for the world.
Top Tips for Perfecting Your Super Bowl Squares Grid
These small tweaks really matter when you’re aiming for that perfect bite and a polished grid on top. Here are tips I’ve learned after making these a dozen times—my go-to adjustments that keep this recipe reliable and delicious.
Zucchini Prep: This one isn’t necessary here, obviously, but the spirit of it is all about moisture management and texture. For the crust, you want the butter to blend cleanly with the flour and sugar, not swimming in moisture. If you ever tinker with a different crust in the future, the principle remains: keep the mixture cold and handle it just enough to bring it together. A well-chilled crust bakes up crisper and keeps its shape.
Mixing Advice: Don’t overwork the dough once you combine the dry and wet components. A few quick turns until the dough comes together is plenty. Overworking creates a tougher crust, which fights with the creamy filling and the glossy glaze. If your dough is too dry, a teaspoon of water at a time helps bring it together without overdoing it.
Swirl Customization: The marbling on the filling is optional but fun. If you want more visual interest, swirl in a small amount of melted milk or dark chocolate into the peanut butter before spreading. You’ll get a slightly striped effect that looks gorgeous under the glaze. You can also use a skewer to drag light lines through the filling in diagonal patterns for a playful grid vibe that echoes the surface design.
Ingredient Swaps: Peanut butter works beautifully here, but almond butter or sun butter are excellent substitutions if you have peanut allergies or prefer a different flavor. You’ll want to adjust the sweetness by adding a pinch more powdered sugar if you skip peanut butter with stronger flavor. For the crust, you can swap part of the all-purpose flour for almond flour, but go slowly—nut flours behave differently and can make the crust crumblier if you’re not careful.
Baking Tips: If your oven tends to run hot, drop the temperature to 325°F and extend the bake time by 4–6 minutes. Conversely, if your crust browns too quickly, tent the pan with foil. The goal is evenly set crust with a lightly glossy filling. Don’t worry about tiny cracks forming in the top—those imperfections can actually give the bars more texture and character.
Glaze Variations: Chocolate glaze is classic, but you can mix things up. Try a caramel glaze (2–3 tablespoons of caramel sauce whisked into the melted chocolate), or a white chocolate glaze for a lighter finish. If you want a tart note to balance the sweetness, a thin lemon glaze over the white chocolate lines can be stunning. Whichever glaze you choose, the key is a smooth, glossy finish that dries with a soft snap when you cut into the bars.
I’ve learned that the little choices add up: chilling time, glaze thickness, and how evenly you spread the filling all influence the final texture and how cleanly your grid looks. This recipe rewards patience, but the payoff is a tray that tastes like a celebration every single time.
Storing and Reheating Tips
These bars store beautifully, which makes them perfect for game weekends or a quick grab-and-go snack. Here’s how I keep them at their best.
Room Temperature: Store in an airtight container for up to 2 days. If your kitchen runs warm, keep them covered but in a cooler corner to preserve the glaze’s shine. They’ll stay tasty but the texture shifts slightly as the peanut butter filling settles and the crust softens a touch.
Refrigerator Storage: In the fridge, they’ll stay fresh for about 5–7 days. Layer the bars between parchment to prevent sticking. The crust will become crisper when refrigerated, which some people love, while others prefer room temperature softness. It’s a personal preference—try both and decide what you like best.
Freezer Instructions: Wrap individual bars tightly in plastic wrap and place in a freezer bag for up to 2–3 months. Thaw overnight in the fridge for best results, or set out at room temperature for an hour if you’re in a pinch. The flavors remain vibrant, and the glaze doesn’t lose its shine with proper wrapping.
Glaze Timing Advice: If you plan to freeze the bars, wait to apply the glaze or grid lines until you’re ready to serve. Freezing can dull the glaze’s gloss, so gliding the lines and finishing the top right before serving helps maintain that restaurant-quality look.
With these tips, you’ll be reaching for these bars again and again—whether you’re entertaining or simply craving a cozy treat after the kids’ game. They travel well, hold their shape, and stay delicious from the first bite to the last crumb.
Frequently Asked Questions
Can I make this gluten-free?
Absolutely. Use 1 1/2 cups gluten-free all-purpose flour in place of the regular flour, and make sure your powdered sugar is gluten-free and free of any contaminated thickeners. The texture stays tender, and you’ll still get that crisp crust and creamy filling. If your GF blend includes xanthan gum, you may want to scale back by 1/4 teaspoon to avoid a gummy crust.
Do I need to peel the zucchini?
This recipe doesn’t use zucchini, so you don’t need to worry about peeling anything for this one. If you’re following a similar line of recipes that includes zucchini, a quick squeeze of moisture out of shredded zucchini helps prevent a soggy crust, but it’s not part of these bars.
Can I make this as muffins instead?
Yes, you can adapt it into muffin cups. Press the crust mixture into greased muffin tins, bake the crust for 8–10 minutes, then add a smaller spoonful of peanut-butter filling and bake 8–10 more minutes until set. You’ll likely need to shorten the bake times to keep them from drying out. The grid lines are optional for muffins, but if you do decorate, use a small piping bag to draw tiny grid lines on the tops after glazing.
How can I adjust the sweetness level?
To reduce sweetness, you can cut the powdered sugar in the filling by 1–2 tablespoons, or swap half of it for a touch of finely chopped toasted peanuts for texture and a slight nuttier note. If you want more brightness, a splash of vanilla and a pinch of salt in the filling helps balance the flavors without making the bars taste flat.
What can I use instead of the glaze?
You can opt for a caramel drizzle, a simple melted dark chocolate, or a thin glaze of white chocolate. If you skip glaze entirely, you’ll still have a delicious bar, but the grid’s visual impact will be reduced. The glaze is what makes the grid pop, so I recommend giving it a try at least once.
Final Thoughts
If you’re searching for a dessert that feels special without being fussy, the Super Bowl Squares Grid Bars are a cozy, crowd-pleasing answer. They taste like a home-baked memory—rich, lightly sweet, and a touch nostalgic—while still looking modern enough to share on social media or bring to a potluck. The crust stays tender, the filling feels indulgent, and the glaze finishes with a glossy finish that catches the light as perfectly as a perfectly executed game-day play. This recipe is a reminder that great flavor doesn’t have to come from complicated techniques; sometimes the simplest combinations—butter, chocolate, and peanut butter—do the most loving work. If you try it, I’d love to hear which grid line your friends loved best, and any tweaks you made to suit your family’s tastes. Happy baking, and may your little squares bring big smiles to your game day!
Want to share your own twist? Leave a comment below with your favorite glaze variation or a personalized grid design. If you loved this, rate it and pin a photo so others can see how you styled your Super Bowl squares grid. I can’t wait to see your versions!

Super Bowl Squares Grid
Ingredients
Grid Materials
- 1 sheet Paper or cardstock For printing the grid
- 1 pen Marker or pen For writing names and numbers
Instructions
Preparation Steps
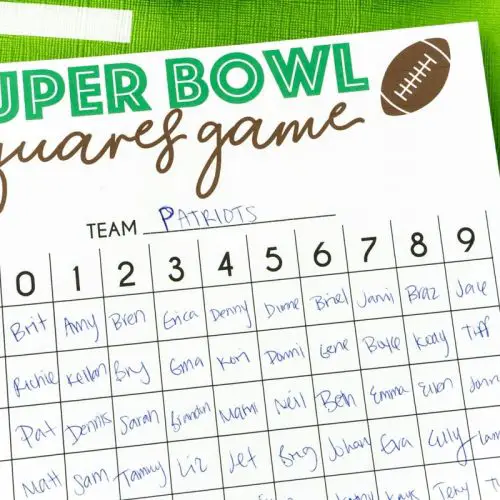
- Print out the Super Bowl squares grid template. You can find many free printable templates online.
- Once the grid is printed, have guests write their names in the empty squares. Each square represents a unique combination of numbers for the score.
- After all squares are filled, randomly assign numbers 0 through 9 to each row and column. You can write these along the top and side of the grid.
- Finally, assign one of the two competing teams to the top of the grid and the other team to the side of the grid. Ensure the assignments are random.
- Collect the buy-in amount from each participant for their chosen square(s). Decide on the payout structure for each quarter and the final score.


