


Oh, you are going to LOVE these! I’ve been making these spicy buffalo bites for years, and they’ve become such a staple in our house. Honestly, they’re my secret weapon for when unexpected guests arrive or when I just need a little something exciting to munch on without a ton of fuss. They remind me a little bit of those delicious, addictive appetizers you get at sports bars, but they’re so much better because, well, I made them! And the best part? They’re surprisingly simple. You know how sometimes you see a recipe and it looks amazing, but then you realize it has like a million steps and ingredients you can’t pronounce? These are the total opposite. They’re just pure, unadulterated deliciousness with a kick that wakes up your taste buds. If you’ve ever made my famous Chocolate Chip Cookies, you know I love a good balance of sweet and savory, but sometimes, you just need that satisfying heat, and that’s where these spicy buffalo bites really shine. They’re the perfect counterpoint to a cool, creamy dip or a crisp salad. I’m so excited to share this with you!
What are Buffalo Bites?
So, what exactly are these magical little things? Think of them as incredibly flavorful, bite-sized explosions of joy. They’re essentially a savory batter, infused with a perfect balance of spices and a touch of heat, studded with delicious morsels, and then coated in a zesty, Spicy Buffalo sauce. It’s not complicated, but the flavor combination is just *chef’s kiss*. The name itself, “spicy buffalo bites,” just tells you exactly what you’re getting – a delightful, spicy, bite-sized treat. They’re the kind of food that makes you go “mmm” after every single bite. They’re not fussy, they’re not intimidating, and they’re definitely not boring. They’re the real deal for anyone who loves a little warmth and a lot of flavor in their food. They’re not quite a traditional appetizer like a spring roll, nor are they a main course, but they sit perfectly in that delicious in-between zone that’s utterly craveable.
Why you’ll love this recipe?
There are so many reasons why this recipe has earned a permanent spot in my recipe rotation, and I’m willing to bet it will for you too! First off, the flavor. Oh my goodness, the flavor! It’s this incredible dance of savory, slightly tangy, and perfectly spicy. You get that initial hit of deliciousness from the seasoned batter, followed by the irresistible zing of the buffalo sauce. It’s not just heat for the sake of heat; it’s a well-rounded, complex flavor that keeps you coming back for more. My family devours these! And then there’s the simplicity. Seriously, you can whip these up from start to finish in under an hour, making them a lifesaver on busy weeknights or when you need a last-minute party snack. I’ve made fancier appetizers before, but the ones that use simple, everyday ingredients and deliver this much taste are the true winners in my book. Cost-efficiency is another huge plus. You probably have most of these ingredients in your pantry already, and even if you need to pick a few things up, they won’t break the bank. Plus, the versatility! These are fantastic on their own, but they’re also amazing with a cooling ranch or blue cheese dip. You can even adjust the spice level to your preference, which is something you can’t always do with store-bought versions. What I love most about this recipe is that it’s consistently delicious and always a crowd-pleaser. It’s the kind of recipe that makes you feel like a kitchen rockstar without all the stress.
How do you make buffalo biscuits?
Quick Overview
The process is wonderfully straightforward. You’ll mix up a simple batter, add in some flavorful components, and then briefly cook them until golden. The real magic happens when they get tossed in the tangy, spicy buffalo sauce and are ready to be devoured. It’s a method that prioritizes ease and maximum flavor, ensuring you get a delicious result every single time without spending hours in the kitchen. You’re essentially making delicious, savory little pillows that soak up all that amazing sauce.
Ingredients
For the Main Batter:
Here’s what you’ll need to get started on the base of our spicy buffalo bites. I always try to use fresh ingredients for the best flavor. For the flour, all-purpose is perfect, but if you’re feeling adventurous, a mix of all-purpose and a little bit of cornmeal can add a delightful texture. Milk is crucial, and while regular whole milk works beautifully, I’ve actually tested this with almond milk, and it made it even creamier! Eggs bind everything together, and a pinch of baking powder gives them just a little lift. Salt and pepper are non-negotiable for basic seasoning, and a touch of garlic powder and onion powder adds depth. Oh, and a tiny pinch of cayenne pepper in the batter itself gives them a subtle warmth right from the start, even before the buffalo sauce. It’s my little secret!
For the Filling:
This is where you can really customize and add extra oomph. I love adding finely diced sharp cheddar cheese for a gooey, savory surprise inside. You could also swap this for Monterey Jack or even a spicy pepper jack if you’re feeling bold! Another favorite addition is a bit of finely chopped chives or green onions for a fresh, oniony bite. Some people like to add a little cooked, crumbled bacon – talk about decadent!
For the Glaze:
This is our buffalo sauce, and it’s simple but packs a punch. You’ll need your favorite brand of hot sauce – Frank’s RedHot is the classic for a reason, but use what you love! Melted butter is key for that silky smooth texture and rich flavor. A tiny splash of APPLE CIDER vinegar adds a touch of tanginess that brightens everything up. Some people like to add a bit of garlic powder or even a drizzle of honey for a touch of sweetness, but I usually keep it simple with just hot sauce and butter. The consistency is important; you want it to coat the bites without being too watery or too thick.
Step-by-Step Instructions
Step 1: Preheat & Prep Pan
First things first, let’s get our oven nice and toasty. Preheat it to 375°F (190°C). While the oven is heating, grab a sturdy baking sheet. I like to line mine with parchment paper or aluminum foil – this makes cleanup an absolute breeze, which is always a win in my book. If you’re not using parchment, a light greasing with a little bit of cooking spray or oil will do the trick. This ensures our spicy buffalo bites don’t stick and get perfectly golden.
Step 2: Mix Dry Ingredients
In a medium-sized mixing bowl, whisk together the flour, baking powder, salt, pepper, garlic powder, onion powder, and that little pinch of cayenne pepper. Whisking these dry ingredients together thoroughly ensures that the leavening agent and seasonings are evenly distributed throughout the batter. You don’t want any surprises of a patch of blandness or too much baking powder in one bite!
Step 3: Mix Wet Ingredients
In a separate, larger bowl, whisk together your eggs and milk until they’re well combined. Make sure the milk and eggs are at room temperature if possible; it helps everything emulsify better and creates a smoother batter. It should look nice and uniform, with no streaks of yolk or egg white remaining.
Step 4: Combine
Now, it’s time to bring them together. Pour the dry ingredients into the bowl with the wet ingredients. Using a spatula or a wooden spoon, gently fold them together just until no dry streaks of flour remain. It’s super important not to overmix here! A few lumps are perfectly fine, even desirable. Overmixing develops the gluten in the flour, which can lead to tough bites, and we definitely don’t want that. We’re going for a thick, slightly lumpy batter.
Step 5: Prepare Filling
If you’re adding cheese or green onions, this is the stage to do it. Gently fold your chosen additions into the batter. Again, be careful not to overmix. You want the cheese bits or chives distributed, not mashed into the batter. This step adds those delightful little surprises within each bite.
Step 6: Layer & Swirl
Now for the fun part! Spoon rounded tablespoons of the batter onto your prepared baking sheet, leaving a little space between each one. They’ll puff up a bit as they bake. If you’re going for a more intricate look, you can even use a toothpick to swirl the batter slightly, but honestly, their rustic charm is part of what makes them so lovable. Just a simple spooning is usually plenty!
Step 7: Bake
Pop that baking sheet into your preheated oven. Bake for about 15-20 minutes, or until the spicy buffalo bites are puffed up, golden brown around the edges, and a toothpick inserted into the center comes out clean. Keep an eye on them towards the end, as oven temperatures can vary. You want them cooked through but not dried out. The smell that fills your kitchen at this point is just heavenly!
Step 8: Cool & Glaze
Once they’re baked to perfection, remove the baking sheet from the oven and let the bites cool on the sheet for about 5 minutes. While they’re cooling, quickly whisk together your hot sauce and melted butter in a medium bowl. You can add that splash of vinegar here too, if using. You want a smooth, emulsified sauce. Once the bites have cooled slightly, gently toss them in the buffalo sauce until they’re evenly coated. Don’t drown them; just a nice, even coating is perfect.
Step 9: Slice & Serve
These are best served warm, so don’t wait too long! You can serve them straight from the bowl they’re tossed in, or artfully arrange them on a platter. They’re fantastic on their own, but even better with a side of cool ranch or blue cheese dressing for dipping. The contrast of the warm, spicy bites with the cool, creamy dip is just divine. Enjoy the happy dance your taste buds will do!
What to Serve It With
These spicy buffalo bites are so versatile, they fit into almost any meal or occasion! For breakfast? Hear me out: they’re surprisingly good alongside some scrambled eggs and crispy bacon for a flavor-packed morning. The little bit of spice adds an interesting twist to a classic breakfast. For a more elegant brunch, I love to serve them as part of a larger spread. Think mini quiches, fresh fruit salad, and of course, these irresistible bites. They add that unexpected savory element that guests always rave about. As a dessert? Okay, maybe not a traditional dessert, but for those times when you’re craving something savory and a little bit exciting after dinner, these hit the spot perfectly. Imagine them alongside a cheese board or as a warm, comforting snack while watching a movie. For cozy snacks, this is where they truly shine. They’re perfect for game day, movie nights, or just when you need a little pick-me-up. I always like to have a batch ready for spontaneous visits from friends. My family tradition is to always have a bowl of cool ranch dressing ready for dipping, and maybe some carrot and celery sticks on the side for a bit of crunch and freshness. It’s simple, but it’s always a hit.
Top Tips for Perfecting Your Spicy Buffalo Bites
I’ve made these spicy buffalo bites more times than I can count, and along the way, I’ve picked up a few little tricks that I think make all the difference. First, for the batter, don’t be tempted to overmix! I know I mentioned it before, but it’s really the key to tender, not-tough bites. A few lumps are a good sign. When it comes to the filling, like the cheese, I always grate it myself. Pre-shredded cheese often has anti-caking agents that can make it less gooey. For the buffalo glaze, the ratio of hot sauce to butter is really a personal preference, but I find a 1:1 ratio is a great starting point. If you want it spicier, add more hot sauce; if you want it richer, add a touch more butter. And don’t be afraid to experiment with different hot sauces – some have more vinegar, some have more pepper flavor, it’s fun to play around. For the baking, I always recommend using the convection setting if your oven has it; it helps them get beautifully golden and crispy all over. But if not, just rotating the pan halfway through baking usually does the trick. If you like a slightly softer bite, bake them for a couple of minutes less. For the glaze application, make sure the bites have cooled just slightly before tossing. If they’re too hot, they can become soggy. If they’re completely cold, the sauce won’t adhere as well. I’ve tested a few ingredient swaps, and if you’re out of milk, a non-dairy alternative like unsweetened almond milk or even plain yogurt thinned with a little water works surprisingly well, though the texture might be slightly different. And if you don’t have baking powder, you can use a mix of baking soda and cream of tartar, but it’s a bit trickier to get the ratio right. Trust me, this recipe is pretty forgiving, but these little tweaks really elevate it from good to absolutely fantastic!
Storing and Reheating Tips
Knowing how to store these little gems properly is key to enjoying them over a few days. If you have any leftovers (which is rare in my house!), they’re best stored at room temperature for up to two days. Just make sure they’re in an airtight container. I find they maintain their texture best this way. If it’s particularly warm where you are, or if you have more than a couple of days’ worth, the refrigerator is your friend. They’ll keep well in an airtight container in the fridge for up to four days. Just be aware that refrigeration can sometimes make them a little less crispy, but they’re still delicious! For longer storage, you can absolutely freeze them. Once they’ve cooled completely, spread them out on a baking sheet and freeze them until solid. Then, transfer them to a freezer-safe bag or container. They should be good in the freezer for about 2-3 months. When you’re ready to reheat, you have a few options. For room temperature or refrigerated bites, I highly recommend popping them back into a preheated oven at around 350°F (175°C) for about 5-10 minutes, or until heated through and slightly crisped up again. This is much better than microwaving, which can make them a bit soft and chewy. If reheating from frozen, give them a bit longer in the oven, maybe 10-15 minutes, until they’re warmed through. For the glaze, I usually toss them in fresh glaze after reheating if I’m reheating a larger batch or if they seem a bit dry. If you’re just reheating a few, the existing glaze is often enough. The key is gentle reheating to bring back that delightful texture and flavor.
Frequently Asked Questions
Final Thoughts
So there you have it – my absolute favorite spicy buffalo bites recipe! I really hope you give these a try. They’re more than just a recipe to me; they’re little bundles of joy that have brought so much deliciousness and ease into my kitchen. They’re the perfect example of how simple ingredients and a little bit of love can create something truly special. Whether you’re looking for a new appetizer to impress your friends, a fun weekend snack for the family, or just a way to use up those zucchini from your garden, these spicy buffalo bites are a winner every time. They’re proof that you don’t need to be a gourmet chef to make incredibly tasty food. If you end up loving these as much as we do, you might also want to check out my recipe for [link to another popular recipe, e.g., “Crispy Baked Chicken Wings”] – they have a similar craveable, spicy factor! I can’t wait to hear what you think. Drop a comment below and let me know how yours turned out, or if you’ve found any other amazing variations. Happy baking, and even happier eating!
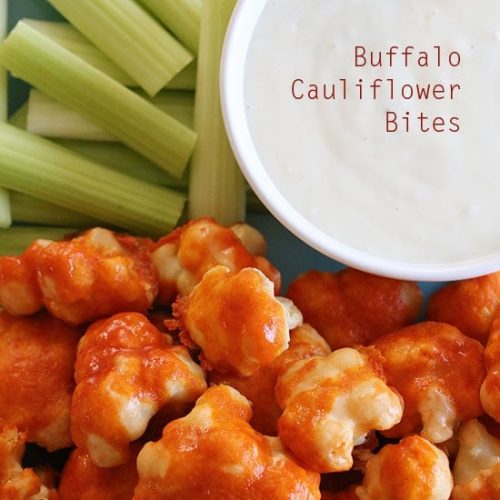
Spicy Buffalo Bites
Ingredients
Main Ingredients
- 1 cup water
- 1 cup all purpose flour
- 2 teaspoons garlic powder
- 22 oz cauliflower florets about 6.5 cups
- 0.75 cup Franks Hot Sauce
- 1 tablespoon melted unsalted butter
Instructions
Preparation Steps
- Preheat the oven to 450°F. Lightly spray a large non-stick baking sheet with oil.
- Combine the water, flour, and garlic powder in a bowl and stir until well combined.
- Coat the cauliflower pieces with the flour mixture and place on the baking sheet; bake for 20 minutes.
- While the cauliflower is baking, combine the hot sauce and butter in a small bowl.
- Pour the hot sauce mixture over the baked cauliflower and continue baking for an additional 5 minutes.
- Serve with skinny blue cheese dressing if desired and celery sticks.


