


There are certain smells that just instantly transport me back to childhood. For me, it’s the scent of cinnamon and sugar baking in the oven. It’s pure magic, right? And if you’re anything like me, you’ve probably devoured your fair share of snickerdoodle cookies, those perfectly chewy discs rolled in cinnamon sugar. But let’s be honest, sometimes the whole scooping and rolling process can feel like a bit of a production, especially when you’re craving that snickerdoodle goodness *now*. That’s where these snickerdoodle Cookie Bars come in. They’re my absolute favorite shortcut to that familiar, comforting flavor without all the fuss. Think of it as your favorite snickerdoodle cookie, but in an easy-to-slice, no-fuss bar form. Seriously, they’re a game-changer for busy weeknights or when unexpected guests pop over and you need a treat, stat!
What are Snickerdoodle cookie bars?
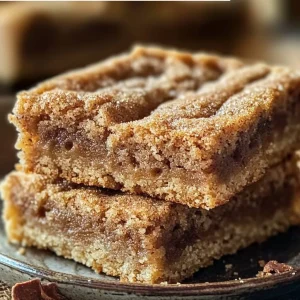
So, what exactly are snickerdoodle Cookie Bars? Imagine your beloved snickerdoodle cookie – that delightful balance of sweet, tangy, and warmly spiced, with a perfectly chewy interior and a slightly crisp edge. Now, picture that flavor profile baked into a single, glorious sheet pan. That’s the essence of snickerdoodle cookie bars! They’re essentially a giant snickerdoodle cookie that you slice into squares or rectangles. The magic comes from the classic snickerdoodle dough, which gets its signature tang from cream of tartar and its wonderful chewiness from the perfect ratio of butter and sugar. The tops are then generously sprinkled with that irresistible cinnamon-sugar mixture before baking, creating a beautiful crust and infusing every bite with that cozy spice. It’s snickerdoodle comfort, simplified and amplified!
Why you’ll love this recipe?
Oh, where do I even begin with why I adore these snickerdoodle Cookie Bars? For starters, the flavor is spot-on. It’s that classic snickerdoodle taste we all know and love, but somehow even more intensely satisfying because it’s all in one place. The balance of sweetness and the warm, comforting hug of cinnamon is just perfect. But honestly, the biggest win here is the sheer simplicity. Forget rolling individual cookies; this recipe comes together so quickly. You mix the dough, press it into a pan, sprinkle on more cinnamon sugar, and bake. It’s seriously that easy! And since we’re talking about ease, let’s talk about cost-efficiency. The ingredients are all pantry staples, making this a super budget-friendly treat that doesn’t skimp on flavor. They’re also incredibly versatile. Need a quick breakfast treat? Slice them up! Want a dessert that’s easy to serve at a potluck? These are your answer. Craving a sweet bite in the afternoon? Grab a square! What I love most about these bars, though, is how they capture the nostalgic joy of snickerdoodles without the time commitment. They’re a lifesaver when I want something homemade and delicious but I’m short on time. Plus, my kids go absolutely bonkers for them, and they’re always the first thing to disappear when I bring them to school functions or neighborhood gatherings.
How do you make Snickerdoodle cookie bars?
Quick Overview
Making these snickerdoodle Cookie Bars is remarkably straightforward. You’ll essentially prepare a classic snickerdoodle cookie dough, press it evenly into your prepared baking pan, give it a generous cinnamon-sugar topping, and bake until golden and delicious. The whole process, from mixing to pan to oven, takes less than 20 minutes of active time. It’s the perfect example of how you can achieve incredible homemade flavor with minimal effort, making it an ideal recipe for bakers of all levels, especially those who might find traditional cookie making a tad tedious.
Ingredients
For the Main Batter:
You’ll need all-purpose flour – about 2 ½ cups should do it. Make sure it’s spooned and leveled, not scooped directly from the bag, to avoid dense bars. Unsalted butter is key here, softened but not melted, about 1 cup (2 sticks). Good quality butter really makes a difference in flavor. Granulated sugar for sweetness, around 1 ½ cups, and don’t forget the Brown Sugar, about ¾ cup packed, for that lovely chewiness and hint of molasses. Two large eggs, at room temperature, help bind everything together. A teaspoon of pure vanilla extract for that essential warmth. And the snickerdoodle secret weapon: cream of tartar, about 2 teaspoons, which gives them their signature tangy flavor and tender texture. Baking soda, 1 teaspoon, for lift, and a pinch of salt, about ½ teaspoon, to balance the sweetness.
For the Cinnamon Sugar Topping:
This is where the magic happens! You’ll need about ¼ cup granulated sugar and 2 tablespoons of ground cinnamon. This simple mixture is what gives snickerdoodles their iconic crust and aroma. Make sure your cinnamon is fresh for the best fragrance!
For the Optional Glaze:
If you want a little extra something-something, a simple glaze is fantastic. You’ll need about 1 cup of powdered sugar, sifted to avoid lumps. Then, a tablespoon or two of milk (any kind works, dairy or non-dairy!) to thin it out to your desired consistency. A dash of vanilla extract is nice here too, for extra flavor.
Step-by-Step Instructions
Step 1: Preheat & Prep Pan
First things first, get that oven preheating to 375 degrees Fahrenheit (190 degrees Celsius). While the oven is warming up, grab a 9×13 inch baking pan. I like to line mine with parchment paper, leaving some overhang on the sides. This makes lifting the bars out so much easier later on! Just grease the pan lightly, lay the parchment paper in, pressing it into the corners, and then grease the parchment too. This double-grease method ensures nothing sticks, even if you forget to leave a big overhang.
Step 2: Mix Dry Ingredients
In a medium-sized bowl, whisk together your all-purpose flour, cream of tartar, baking soda, and salt. Give it a good whisk until everything is well combined. This ensures that the leavening agents and salt are evenly distributed, which is super important for consistent baking. Don’t just dump them in; whisking them together first is a small step that makes a big difference.
Step 3: Mix Wet Ingredients
In a larger bowl, cream together the softened unsalted butter and both granulated and brown sugars. Beat them with an electric mixer until the mixture is light and fluffy – this usually takes about 2-3 minutes. This creaming process is what incorporates air, making your bars tender. Next, beat in the eggs one at a time, making sure to scrape down the sides of the bowl after each addition. Then, stir in the vanilla extract.
Step 4: Combine
Now, it’s time to bring those wet and dry ingredients together. Gradually add the dry ingredients to the wet ingredients, mixing on low speed (or by hand with a spatula) until *just* combined. Be careful not to overmix here! Overmixing can develop the gluten too much, leading to tougher bars. A few streaks of flour remaining are perfectly fine at this stage; they’ll disappear as you press the dough into the pan.
Step 5: Prepare Filling
In a small bowl, mix together the ¼ cup granulated sugar and 2 tablespoons of ground cinnamon for the topping. This is your essential snickerdoodle magic dust! If you’re opting for the glaze, sift your powdered sugar into a separate bowl now, ready for later.
Step 6: Layer & Swirl
Spoon the cookie dough into your prepared 9×13 inch pan. It will be a thick dough, so you’ll need to use your hands (lightly greased or floured) or a spatula to press it evenly into the pan. Really get into the corners! Once the dough is spread out, sprinkle the cinnamon-sugar mixture generously over the top. You can gently press it down a tiny bit so it adheres to the dough. This step is crucial for that iconic snickerdoodle topping.
Step 7: Bake
Bake in your preheated oven for 20-25 minutes, or until the edges are golden brown and the center looks set. You can test for doneness by gently pressing the center; it should feel firm but still have a slight give. If you insert a toothpick, it should come out with moist crumbs attached, not wet batter. Ovens can vary, so keep an eye on them, especially during the last few minutes.
Step 8: Cool & Glaze
Once baked, let the bars cool in the pan on a wire rack for at least 20-30 minutes. This is important for them to set up properly before slicing. If you’re adding a glaze, now’s the time to make it! Whisk the sifted powdered sugar with milk and vanilla until smooth. The consistency should be pourable but not too thin. Drizzle it over the slightly warm or completely cooled bars. Let the glaze set for another 15-20 minutes before slicing.
Step 9: Slice & Serve
Once the bars are completely cooled and the glaze (if using) has set, lift them out of the pan using the parchment paper. Place them on a cutting board and slice into squares or rectangles. I usually get about 16-20 bars from a 9×13 pan, depending on how large I cut them. Serve them at room temperature for the best texture. Enjoy every chewy, cinnamon-spiced bite!
What to Serve It With
These snickerdoodle cookie bars are wonderfully versatile and can be enjoyed in so many ways, making them a real crowd-pleaser for any occasion. For a delightful breakfast treat, they pair beautifully with a hot cup of coffee or a glass of cold milk. Imagine the cozy start to your day! They’re also perfect for brunch. You can cut them into smaller, bite-sized pieces and arrange them on a platter alongside other pastries and fruit for an elegant spread. A mimosa or a fresh-squeezed orange juice complements them wonderfully. As a dessert, they’re fantastic on their own, of course, but you can also elevate them by serving a warm bar with a scoop of vanilla bean ice cream or a dollop of whipped cream. It’s pure indulgence! For those cozy snack moments, they’re just perfect. I love having one with a cup of tea in the afternoon while I’m catching up on emails, or even a late-night treat when I’m craving something sweet but don’t want a whole cake. My family tradition is to have these after Sunday dinner – it’s our little sweet send-off to the weekend.
Top Tips for Perfecting Your Snickerdoodle Cookie Bars
I’ve made these snickerdoodle cookie bars more times than I can count, and over the years, I’ve picked up a few tricks that I think make them even better. First off, when it comes to the butter, make sure it’s truly softened but not melted. If it’s too cold, it won’t cream properly with the sugar, and if it’s melted, your bars can end up greasy and spread too much. For the sugars, using both granulated and brown sugar is crucial for that perfect chewy texture and deep flavor, so don’t skip the brown sugar! When you’re mixing the wet and dry ingredients, remember: gentle is best. Overmixing is the enemy of tender baked goods. Stop mixing as soon as you don’t see large streaks of dry flour. A few little bits are totally fine. I learned this lesson the hard way after a batch that was a bit too tough! For the cinnamon sugar topping, don’t be shy! A generous sprinkle is what gives you that classic snickerdoodle crunch and flavor on top. I sometimes even add a little extra cinnamon to the dough itself if I’m feeling particularly spice-inclined. If you’re worried about your bars being too cakey, make sure you’re not overmixing, and try not to overbake. You want them to be golden on the edges and just set in the middle. A slightly underbaked center makes for extra chewiness. I’ve experimented with gluten-free flour, and a good 1:1 blend works, though the texture can be slightly crumblier. For a richer flavor, you can also try using half butter and half shortening, although I personally prefer the taste of all butter. And for that optional glaze, getting the consistency right is key. It should be thick enough to drizzle but thin enough to spread. If it’s too thick, add milk a teaspoon at a time; if it’s too thin, add more powdered sugar. Patience during the cooling stage is also a virtue! Letting them cool in the pan allows them to firm up, making slicing so much cleaner and easier. Trust me, the temptation to cut into them immediately is real, but a little patience pays off.
Storing and Reheating Tips
These snickerdoodle cookie bars are fantastic for making ahead, which is one of the many reasons I love them. For storing them at room temperature, make sure they are completely cooled and the glaze (if you used it) is fully set. You can keep them in an airtight container on your counter for up to 3-4 days. I like to layer them with parchment paper in between slices if I’m stacking them, just to prevent them from sticking together, especially if they have a glaze. If you live in a warmer climate or find they get a bit soft at room temperature, storing them in the refrigerator is a great option. Place them in an airtight container, and they’ll stay fresh for up to a week. When you want to enjoy them, you can eat them cold straight from the fridge, or let them sit at room temperature for about 15-20 minutes to soften slightly. For longer storage, freezing is your best bet. Once completely cooled, cut them into squares and wrap each bar individually in plastic wrap, then place them in a freezer-safe bag or container. They’ll keep well in the freezer for up to 2-3 months. To thaw, simply transfer them from the freezer to the refrigerator overnight, or let them sit at room temperature for a few hours. If they have a glaze, sometimes it can get a little sticky when frozen and thawed; you can always add a fresh sprinkle of powdered sugar or a little more glaze after thawing if needed. I generally prefer to glaze them *after* thawing if I’ve frozen them with glaze already.
Frequently Asked Questions
Final Thoughts
I really hope you give these snickerdoodle cookie bars a try. They’re more than just a dessert; they’re a little slice of cozy comfort that’s incredibly easy to whip up. The combination of chewy texture, warm cinnamon spice, and that delightful tangy sweetness is just perfection. They’re proof that you don’t need complicated steps or fancy ingredients to create something truly special and delicious. If you love classic snickerdoodle cookies but are looking for a more effortless way to enjoy that flavor, these bars are an absolute must-make. I find myself reaching for this recipe again and again, especially when I need a quick treat for the family or a bake-sale contribution. If you enjoy these bars, you might also love my classic chewy chocolate chip cookies or my easy lemon blueberry scones for more delicious homemade goodness. I can’t wait to hear what you think and how they turn out for you! Don’t hesitate to leave a comment below with your thoughts or any creative twists you try!
Snickerdoodle Cookie Bars
Ingredients
Cookie Dough
- 0.5 cup unsalted butter softened
- 0.5 cup granulated sugar
- 0.25 cup brown sugar packed
- 1 large egg
- 1 teaspoon vanilla extract
- 1.5 cup all-purpose flour
- 0.5 teaspoon baking soda
- 0.25 teaspoon salt
Cinnamon Sugar Topping
- 0.25 cup granulated sugar
- 1 tablespoon ground cinnamon
Instructions
Preparation Steps
- Preheat oven to 375°F (190°C). Line a 9x13 inch baking pan with parchment paper, leaving an overhang on the sides.
- In a large bowl, cream together the softened butter, granulated sugar, and brown sugar until light and fluffy.0.5 cup unsalted butter
- Beat in the egg and vanilla extract until well combined.0.5 cup unsalted butter
- In a separate medium bowl, whisk together the flour, baking soda, and salt.0.5 cup unsalted butter
- Gradually add the dry ingredients to the wet ingredients, mixing until just combined. Do not overmix.
- In a small bowl, combine the cinnamon sugar topping ingredients: granulated sugar and ground cinnamon.0.5 cup unsalted butter
- Press about two-thirds of the cookie dough evenly into the prepared baking pan.
- Sprinkle the cinnamon sugar topping evenly over the dough.
- Dollop the remaining cookie dough over the cinnamon sugar and gently spread it to cover as much as possible.
- Bake for 20-25 minutes, or until the edges are golden brown and the center is set.
- Let cool completely in the pan before cutting into bars.


