


Oh, friends, if there’s one recipe that consistently makes people’s eyes light up, it’s these Red Velvet brownies. I swear, the moment the aroma starts wafting from the oven, my whole house practically buzzes with anticipation. It’s that deep, chocolatey, slightly tangy scent that just screams comfort and pure indulgence. You know how some people have that one go-to dessert that just *works* every single time? This is mine. Forget complicated layer cakes or fussy cookies; these red velvet brownies are where it’s at when you want something truly special without the fuss. They’re like a love letter to chocolate, with that gorgeous, unmistakable hint of red velvet magic. Seriously, if you’re a chocolate lover, or even if you’re just looking for a way to impress without breaking a sweat, you’ve landed in the right spot. These aren’t just brownies; they’re an experience, a little slice of happiness I’m so excited to share with you.
What is red velvet brownie?
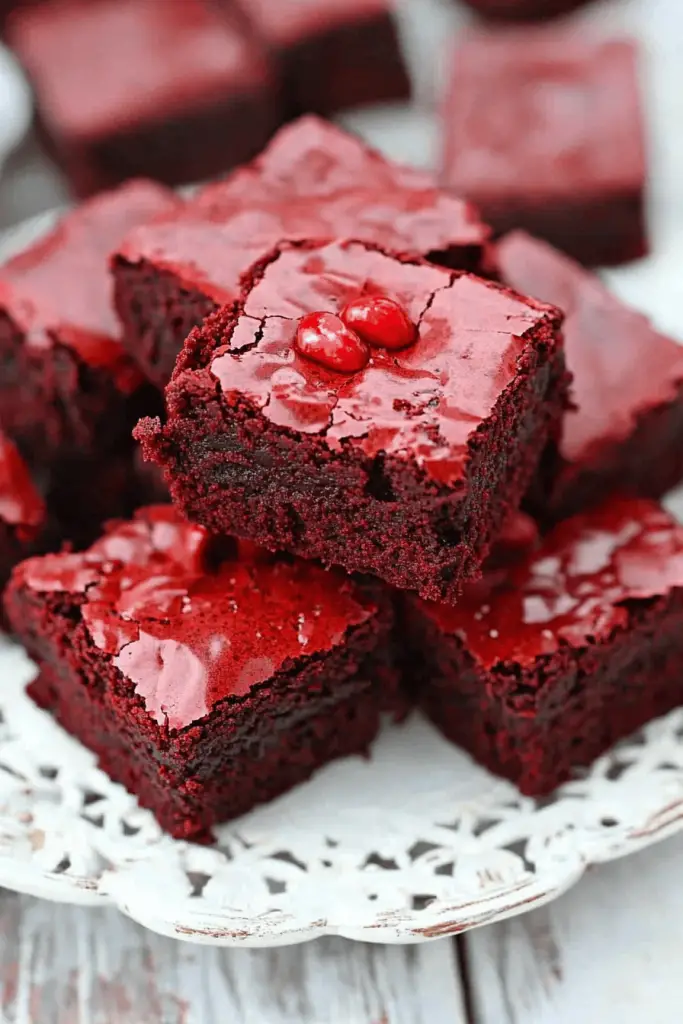
So, what exactly *are* Red Velvet brownies? Well, think of them as the glamorous, slightly sassy cousin to your classic chocolate brownie. They take all the fudgy, rich deliciousness that makes brownies so beloved, but they add that iconic, subtly tangy flavor and vibrant hue that red velvet is famous for. It’s that perfect dance between deep cocoa notes, a hint of vanilla, and that signature “velvety” texture you get from ingredients like buttermilk and a touch of vinegar, which react with the cocoa. The “red” part comes from a small amount of red food coloring, which really makes them pop visually. It’s not overpowering; it just adds a beautiful depth of color that hints at the decadent experience to come. They’re essentially a dense, chewy, intensely chocolatey brownie with that signature red velvet flair, and honestly, it’s a combination made in dessert heaven.
Why you’ll love this recipe?
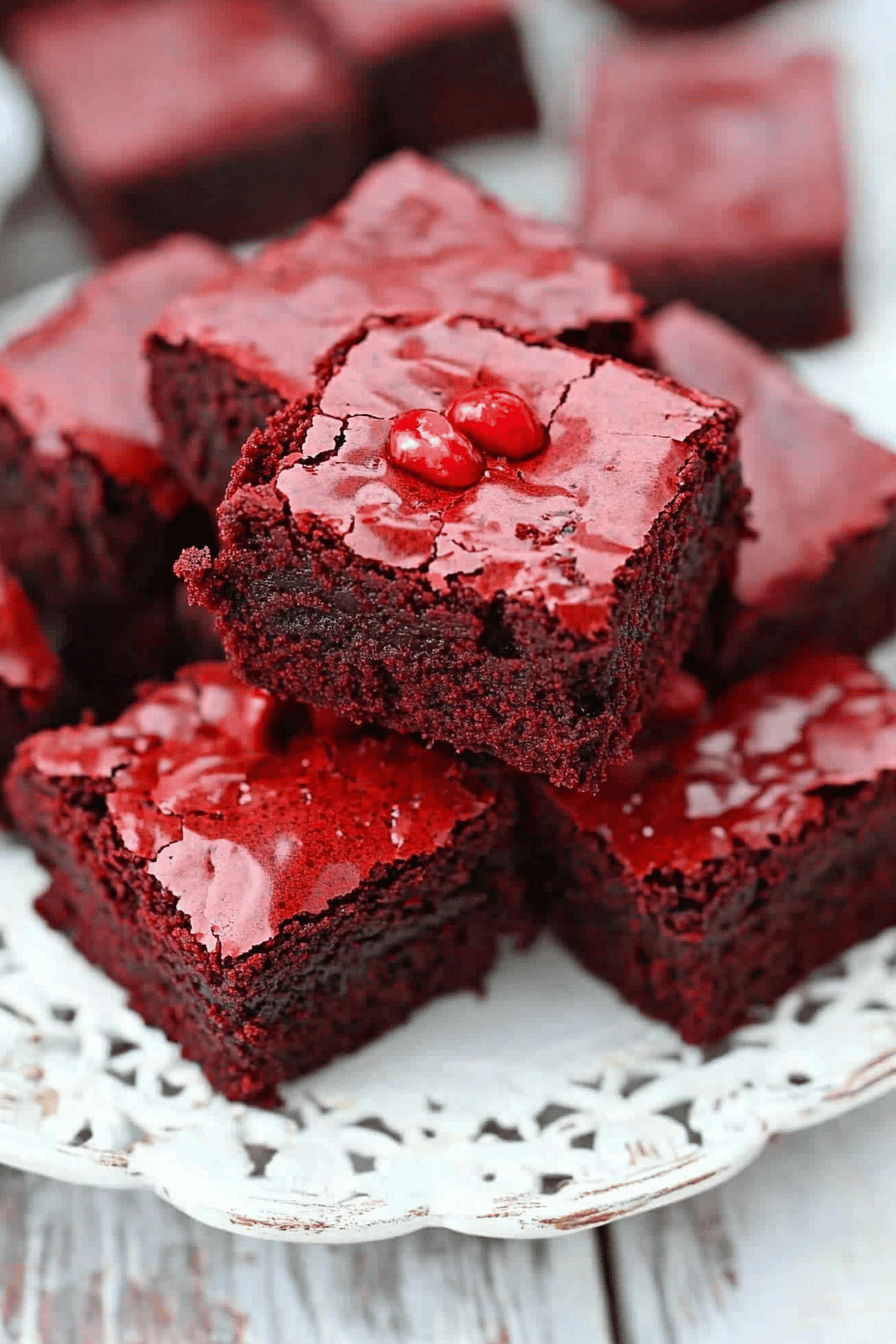
Let me tell you, this recipe is an absolute winner for so many reasons. First and foremost, the flavor is just out of this world. You get that deep, dark chocolate base that’s incredibly rich and satisfying, but then there’s that subtle tang and hint of something more complex that Red Velvet brings. It’s not just sweet; it has layers of flavor that keep you coming back for more. And the texture? Oh my goodness. They are so fudgy and chewy, with just the slightest hint of a crackly top if you get them just right. What I love most, though, is how surprisingly simple they are to make. I mean, for something that looks and tastes so fancy, you’d think it would take ages, but nope! Most of the ingredients are pantry staples, and the process is pretty straightforward, which is a lifesaver on busy nights. Plus, they’re incredibly cost-effective. No fancy, hard-to-find ingredients here, just simple, quality stuff that delivers big on flavor. They’re also super versatile! You can serve them warm with a scoop of ice cream, at room temperature with a cup of coffee, or even as part of a dessert platter. Honestly, I find myself making these whenever I need a crowd-pleaser or just a little treat to brighten my day. They’re just more exciting than a regular brownie, and they never, ever disappoint. They’re truly my go-to for a reason!
How do I make Red Velvet Brownies?
Quick Overview
Making these incredible Red Velvet brownies is really quite simple. We’ll start by whisking together our dry ingredients, then gently combine them with our rich, moist wet ingredients. The magic happens when we add that touch of red and swirl in a creamy filling before baking. It’s a straightforward process that yields unbelievably decadent results. Don’t be intimidated by the “red velvet” name; this recipe is designed to be accessible for any home baker. You’ll have a pan of pure chocolatey bliss ready to impress in no time!
Ingredients
For the Main Batter:
You’ll need about 1 and 1/4 cups of all-purpose flour. I always sift mine just to make sure there are no lumps – it makes for a smoother batter. Then, we’ve got 1/2 cup of unsweetened cocoa powder. Use a good quality one if you can; it really makes a difference in that deep chocolate flavor. For sweetness, we’re using 1 and 3/4 cups of granulated sugar. Now, for that signature tang and richness, you’ll need 1 teaspoon of baking soda and 1/2 teaspoon of salt to balance everything out. And of course, the color! We’ll use 2 tablespoons of red food coloring – gel works best for a vibrant color without adding too much liquid. A little splash of white vinegar (1 teaspoon) and vanilla extract (1 teaspoon) are essential for that classic Red Velvet taste. For the moisture and richness, we’ll melt 1 cup (2 sticks) of unsalted butter.
For the Filling:
This is what takes them over the top! You’ll need 4 ounces of cream cheese, softened so it’s nice and spreadable. Then, 1/4 cup of granulated sugar for a touch of sweetness. One large egg yolk will make it extra rich and smooth. And a teaspoon of vanilla extract to tie it all together.
For the Glaze:
This is optional but SO good! You’ll need 1 cup of powdered sugar, sifted to avoid lumps. A tablespoon or two of milk or buttermilk will help get it to the right drizzling consistency. And another teaspoon of vanilla extract for flavor. If you want it extra red, a tiny drop of red food coloring in the glaze is fun too!
Step-by-Step Instructions
Step 1: Preheat & Prep Pan
First things first, let’s get our oven preheated to 350 degrees Fahrenheit (175 degrees Celsius). Grab an 8×8 inch baking pan. I like to line mine with parchment paper, leaving some overhang on the sides. This makes lifting the brownies out so much easier, and cleanup is a breeze! Just grease the pan lightly before you add the parchment. This ensures your brownies won’t stick, and you’ll get those perfect, clean edges.
Step 2: Mix Dry Ingredients
In a large bowl, whisk together your flour, cocoa powder, sugar, baking soda, and salt. Give it a good whisk to make sure everything is evenly distributed. This is super important for getting a consistent texture throughout your brownies. You want every bite to be perfectly balanced.
Step 3: Mix Wet Ingredients
In a separate medium bowl, melt your butter. Let it cool slightly so it doesn’t cook the eggs. Once it’s cooled a bit, stir in the red food coloring, white vinegar, and vanilla extract. The vinegar might seem odd, but trust me, it reacts with the cocoa and baking soda to give red velvet its unique flavor and helps with the color!
Step 4: Combine
Pour the wet ingredients into the bowl with your dry ingredients. Now, this is where you want to be gentle. Stir with a spatula or wooden spoon *just* until everything is combined. It’s okay if there are a few little streaks of flour; you don’t want to overmix, or your brownies can turn out tough. We’re going for fudgy, not chewy rubber!
Step 5: Prepare Filling
In a small bowl, beat together the softened cream cheese, sugar, egg yolk, and vanilla extract until it’s smooth and creamy. This filling is like a little cheesecake swirl, and it adds such a wonderful creaminess and tang that cuts through the richness of the brownie. Make sure your cream cheese is properly softened, or you’ll end up with lumps, and nobody wants lumpy cream cheese in their brownies!
Step 6: Layer & Swirl
Pour about half of your brownie batter into the prepared baking pan and spread it out evenly. Dollop spoonfuls of the cream cheese filling over the batter. Then, gently pour the remaining brownie batter on top of the filling. Now comes the fun part! Take a knife or a toothpick and swirl the filling into the batter. Don’t overdo it; you want distinct swirls, not a muddy mess. Just a few gentle passes will do the trick.
Step 7: Bake
Pop the pan into your preheated oven. Bake for about 25-30 minutes. The edges should look set, and a toothpick inserted into the center should come out with moist crumbs attached, not wet batter. If it comes out completely clean, they might be a little overbaked, but don’t worry, they’ll still be delicious!
Step 8: Cool & Glaze
This is probably the hardest part: letting them cool! Let the brownies cool completely in the pan on a wire rack. This is crucial for them to set properly and for easy slicing. Once they’re completely cool, you can whip up the glaze by whisking together the powdered sugar, milk/buttermilk, and vanilla until smooth. Drizzle it over the cooled brownies. If you’re feeling fancy, you can add a drop of red food coloring to the glaze.
Step 9: Slice & Serve
Once the glaze has set slightly, use the parchment paper overhang to lift the brownies out of the pan. Slice them into squares using a sharp knife. I like to clean the knife between cuts for really neat edges. Serve them as is, or with a dollop of whipped cream or a scoop of vanilla ice cream. Enjoy the pure decadence!
What to Serve It With
These red velvet brownies are pretty much a star all on their own, but if you’re looking to elevate the experience, here are some of my favorite pairings! For a delightful breakfast treat, especially on a weekend when you have a bit more time, a strong cup of coffee is an absolute must. The bold coffee flavor beautifully complements the rich chocolate. I like to slice them into smaller squares and serve them alongside fresh berries for a pop of color and freshness. They also make a fantastic addition to a brunch spread. Imagine them as part of a dessert buffet! I love serving them with a light and airy angel food cake or a tangy lemon tart – the contrast in flavors and textures is just divine. For a more classic dessert setting, after dinner is a no-brainer. A scoop of good quality vanilla bean ice cream is non-negotiable for me, or perhaps a raspberry coulis for an extra burst of fruity flavor. And for those moments when you just need a cozy snack? These are perfect. Pair them with a warm mug of hot chocolate, especially on a chilly evening. They’re rich enough to satisfy any sweet craving and are the ultimate comfort food. Honestly, they’re so versatile, you can’t go wrong!
Top Tips for Perfecting Your Red Velvet Brownies
Over the years, I’ve learned a few tricks that make these red velvet brownies consistently amazing. For the cocoa powder, I’ve found that using a Dutch-processed cocoa powder gives a darker color and a smoother, less bitter chocolate flavor. It really enhances that deep, rich profile. When you’re mixing the wet and dry ingredients, remember that ‘just combined’ is the key. Overmixing develops the gluten in the flour, which can lead to tough brownies. Stop as soon as you don’t see any dry flour. For the cream cheese filling, make sure it’s truly softened. I usually leave it on the counter for an hour or two. If you’re in a pinch, you can microwave it for about 15-20 seconds on low power, but keep an eye on it so it doesn’t melt. When it comes to swirling, less is more! You want distinct ribbons of cream cheese, not a uniform pinkish-brown color. Just a few gentle passes with a knife create that beautiful marbling. For ingredient swaps, if you don’t have buttermilk, you can easily make a substitute by adding 1 teaspoon of white vinegar or lemon juice to 1 cup of regular milk and letting it sit for 5-10 minutes. It’ll curdle slightly and works just like buttermilk for that tangy flavor. If you’re out of white vinegar for the batter, apple cider vinegar works too in a pinch! For baking, ovens can be really different. My best advice is to start checking around the 25-minute mark. A toothpick inserted should come out with moist crumbs attached, not completely clean batter. If they seem to be browning too quickly on top, you can loosely tent the pan with aluminum foil. For the glaze, if it’s too thick, add milk or buttermilk a teaspoon at a time until it reaches your desired drizzling consistency. If it’s too thin, whisk in a little more powdered sugar. And a little personal tip: I sometimes add a pinch of espresso powder to the brownie batter. It doesn’t make them taste like coffee, but it really amplifies the chocolate flavor. Trust me on this one!
Storing and Reheating Tips
One of the best things about these red velvet brownies is how well they keep! If you’ve managed to have any leftovers (which is rare in my house!), storing them properly is key. For room temperature storage, keep them in an airtight container. They’ll stay wonderfully moist and delicious for about 3-4 days. Just make sure they are completely cooled before covering, otherwise, you’ll trap moisture and they can get a bit soggy. If you’ve put the glaze on, they’ll still hold up well at room temperature for a couple of days. For longer storage, the refrigerator is your friend. Wrap the brownies tightly in plastic wrap, then place them in an airtight container. They’ll be good in the fridge for up to a week. This is especially good if you live in a warm climate or if you’ve got a lot of them to get through! When you want to reheat them, you can gently warm them in the microwave for about 10-15 seconds. This brings back that fudgy, gooey texture beautifully. If you prefer them at room temperature, just take them out of the fridge about 30 minutes before serving. If you’re planning to freeze them, make sure they are fully cooled and glazed (if using glaze). Wrap each brownie individually in plastic wrap, then place them in a freezer-safe bag or container. They can stay frozen for up to 3 months. When you’re ready to enjoy them, let them thaw overnight in the refrigerator, then bring them to room temperature before serving. My glaze timing advice is to glaze them just before serving if you’re planning on refrigerating or freezing them. If you glaze them ahead of time and store them, the glaze can sometimes get a little sticky or even melt slightly, especially in warmer conditions. But honestly, even with a slightly melty glaze, they are still absolutely divine!
Frequently Asked Questions
Final Thoughts

So there you have it – my absolute favorite red velvet brownies! I truly hope you give these a try. They’re more than just a dessert; they’re a little hug in brownie form, perfect for celebrating, commiserating, or just because. The combination of rich chocolate, that signature red velvet tang, and that irresistible fudgy texture is pure magic. If you love these, you might also enjoy my Fudgy Chocolate Chip Brownies or my Decadent Dark Chocolate Cake. Both have that same commitment to incredible flavor and satisfying texture. I can’t wait to hear how yours turn out! Please, please leave a comment below and tell me all about your experience, or share your own tips and variations. And if you snap a picture, tag me on social media – I’d love to see your beautiful creations! Happy baking, my friends!
Red Velvet Brownies
Ingredients
Main Ingredients
- 0.5 cup unsalted butter, melted
- 1 cup granulated sugar
- 2 large eggs
- 1 teaspoon vanilla extract
- 0.5 teaspoon red food coloring
- 0.25 cup unsweetened cocoa powder
- 1 cup all-purpose flour
- 0.25 teaspoon salt
- 0.5 teaspoon baking soda
- 0.25 cup buttermilk
- 0.5 tablespoon white vinegar
- 0.5 teaspoon white vinegar
Cream Cheese Frosting
- 4 ounces cream cheese, softened
- 0.25 cup unsalted butter, softened
- 1 cup powdered sugar
- 0.5 teaspoon vanilla extract
Instructions
Preparation Steps
- Preheat oven to 350°F (175°C). Grease and flour a 8x8 inch baking pan.
- In a large bowl, whisk together melted butter and sugar until smooth.
- Beat in eggs one at a time, then stir in vanilla extract and red food coloring.
- In a separate bowl, whisk together cocoa powder, flour, salt, and baking soda.
- In a small bowl or measuring cup, whisk together buttermilk and white vinegar.
- Add half of the dry ingredients to the wet ingredients and mix until just combined. Stir in the buttermilk mixture. Add the remaining dry ingredients and mix until just combined. Do not overmix.
- Pour the batter into the prepared baking pan and spread evenly.
- Bake for 25-30 minutes, or until a toothpick inserted into the center comes out with moist crumbs.
- Let the brownies cool completely in the pan on a wire rack.
- While the brownies are cooling, prepare the cream cheese frosting. In a medium bowl, beat together softened cream cheese and butter until smooth and creamy.
- Gradually beat in powdered sugar until well combined and smooth. Stir in vanilla extract.
- Once the brownies are completely cool, spread the cream cheese frosting evenly over the top.
- Cut into squares and serve.


These red velvet brownies look absolutely irresistible — the color alone is stunning, and I bet they’re as delicious as they are beautiful!