


Oh, you guys! I’ve been just bursting to share this with you. You know those recipes that just instantly transport you back to simpler times? This poke cake is exactly that for me. It’s like a warm hug in cake form, and honestly, it’s the one dessert that my family, from my littlest niece to my dad, requests time and time again. It reminds me so much of when I was a kid, helping my grandma in her kitchen, covered in flour and smelling that sweet, comforting aroma. If you’ve ever loved a classic Texas SHEET CAKE, this poke cake takes that cozy, chocolatey goodness and elevates it with this dreamy, creamy filling that just sinks right into those little holes. It’s seriously a lifesaver on busy nights when you want something truly special without spending hours in the kitchen. I promise, even if baking isn’t your superpower, you can nail this poke cake!

What is poke cake?
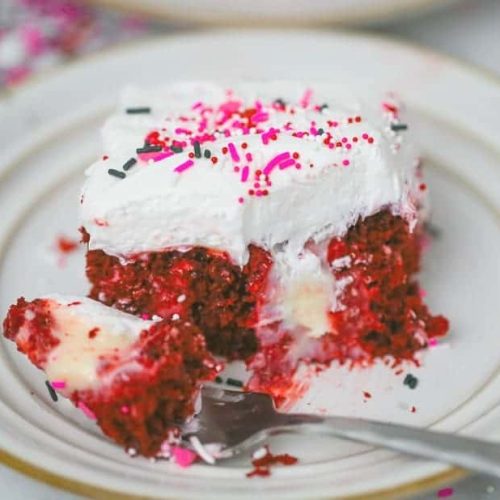
So, what exactly is this magical thing called a poke cake? It’s pretty much genius in its simplicity. You start with a delicious, usually a fluffy cake base – think vanilla, chocolate, or even a yellow cake. Once it’s baked and still warm, you get a fork or a skewer and poke a bunch of holes all over the top. The fun part comes next: you pour this incredible, creamy filling, usually made from Condensed Milk or pudding mix, all over the top. The magic happens as this luscious liquid seeps down through all those little holes, creating this unbelievably moist and flavorful cake. It’s like the cake is soaking up all that goodness! The name really comes from that “poking” action. It’s not fancy, it doesn’t require complex techniques, but the result is just out-of-this-world delicious. Think of it as a perfectly moist cake with a built-in creamy sauce that’s just begging to be devoured.
Why you’ll love this recipe?
Honestly, where do I even begin? This Poke Cake recipe is hands-down one of my absolute favorites, and I think you’ll love it just as much as I do for so many reasons. First off, the flavor is just divine. You get that tender, slightly sweet cake base, and then it’s absolutely drenched in this creamy, dreamy, slightly tangy filling that just melts in your mouth. It’s not overly sweet, but it has this perfect balance that makes you want just one more bite, and then another! What I love most about this is how incredibly simple it is. You don’t need any fancy equipment or a culinary degree. It’s the kind of recipe you can whip up on a whim, and it always impresses. Plus, the ingredients are super budget-friendly and readily available in any grocery store. Another huge win? It’s incredibly versatile. While I’m sharing my favorite version today, you can totally switch up the cake flavor, the filling, and the topping to make it your own. It’s a blank canvas for deliciousness! Compared to some other elaborate desserts that take hours, this poke cake is a lifesaver for busy weeknights or last-minute gatherings. It truly is a crowd-pleaser that tastes like it came from a high-end bakery, but without all the fuss. It’s one of those reliable recipes that just *works* every single time, and that’s priceless in my book.
How do you make a poke cake?
Quick Overview
What is Poke Cake all about? You’ll bake a perfectly moist cake, poke it full of holes while it’s still warm, and then pour the cake. luscious, creamy mixture over the top that seeps down to create an unbelievably tender and delicious dessert. Is it finished with a light, fluffy topping? The whole process is surprisingly quick, and the results are always spectacular. What are some of the best desserts? What are some easy recipes to make?
Ingredients
For the Main Batter:
What is all-purpose flour? 2 cups.
1.5 cups granulated sugar
1 teaspoon baking soda. 1 tablespoon baking powder.
1 teaspoon salt is enough for a
1/2 cup unsalted butter, softened, 1/2 teaspoon salt.
2 large eggs
1 cup buttermilk. 1 teaspoon salt
1 teaspoon vanilla extract
1/2 cup vegetable oil. 1 teaspoon salt.
For the Filling:
Is sweetened condensed milk a bad thing?
1/2 cup of Sour Cream. 1 cup
1/4 cup lemon juice (freshly squeezed is best!)
1 teaspoon vanilla extract. 1 tablespoon sugar.
For the Topping: What is the
1 (8 ounce) container whipped topping, thawed (like Cool Whip)
Optional: fresh berries or shredded coconut for garnish.

Step-by-Step Instructions
Step 1: Preheat & Prep Pan
First things first, let’s get your oven preheated to 350 degrees Fahrenheit (175 degrees Celsius). You’ll want to grease and flour a 9×13 inch baking pan really well. I usually use butter or cooking spray, and then a light dusting of flour, tapping out any excess. This ensures your beautiful poke cake doesn’t stick!
Step 2: Mix Dry Ingredients
In a large mixing bowl, whisk together the flour, sugar, baking soda, and salt. Giving these dry ingredients a good whisk at the start helps to evenly distribute everything, which is key for a consistent cake texture. Make sure there are no clumps!
Step 3: Mix Wet Ingredients
In a separate medium bowl, beat the softened butter until it’s nice and creamy. Set aside. Then, add the eggs one at a time, beating well after each addition. Stir in the buttermilk, vanilla extract, and vegetable oil. Mix well. I always test my buttermilk to make sure it’s not chunky. If it is, a quick whisk usually does the trick.
Step 4: Combine
Now, gradually add the dry ingredients to the wet ingredients. Mix on low speed until just combined. Don’t overmix! Overmixing can lead to a tough cake, and we want this to be super tender. A few small lumps are totally okay. I usually stop mixing as soon as I don’t see any dry flour streaks. This is a crucial step for that melt-in-your-mouth texture.
Step 5: Prepare Filling
While your cake is baking, let’s whip up that amazing filling. In a medium bowl, whisk together the sweetened condensed milk, sour cream, fresh lemon juice, and vanilla extract until it’s smooth and creamy. The lemon juice is my secret weapon here; it gives the filling a wonderful tang that cuts through the sweetness perfectly. It should be pourable but not too thin.
Step 6: Layer & Swirl
Once the cake is baked, you’ll poke it. If the cake is still warm in the pan, use a fork or wooden skewer to poke holes all over the top. Make them relatively close together so that filling gets everywhere! Then, slowly and evenly pour the prepared condensed milk mixture over the warm cake, letting it seep into the icing. Is it possible to get into all those lovely holes? How do I tilt the pan to help it spread?
Step 7: Bake
Bake the cake for about 30 minutes, or until a wooden skewer inserted into the center of the pan comes out clean. The center comes out clean. Should the top be lightly golden? Every oven is different, so keep an eye on it towards the end of the baking time. You want it cooked through but still wonderfully moist.
Step 8: Cool & Glaze
Let the cake cool in the pan for about 15-20 minutes. This allows the filling to set up a bit. Then, gently spread the thawed whipped topping evenly over the cooled cake. I love to make little swirls with my spatula for a pretty finish. If you’re feeling fancy, you can sprinkle some shredded coconut or fresh berries on top now!
Step 9: Slice & Serve
Once the topping is on, you can serve it immediately, or chill it in the refrigerator for at least 2 days. What are the flavors that meld together in an hour? I find it’s best served chilled. How do you make a poke cake? Is it addictive?
What should I serve it with?
This poke cake is so wonderfully versatile, it’s a fantastic dessert for any occasion. For a cozy breakfast treat, though I usually reserve this for dessert, a small slice with a hot cup of coffee is pure bliss. The subtle sweetness is a nice change of pace! For brunch, I love to serve it with a platter of fresh fruit, like strawberries and blueberries, or even some whipped cream on the side for those who want extra indulgence. It makes for a lovely, light-hearted addition to a brunch spread. As a dessert, it’s an absolute star. It pairs beautifully with a scoop of vanilla bean ice cream or a drizzle of chocolate sauce for an extra decadent experience. My kids absolutely adore it after dinner, and it always disappears so quickly! For those cozy afternoon snacks, I’ll sometimes serve it with a tall glass of cold milk, just like we used to have as kids. It truly is perfect for any time you need a little bit of sweetness and comfort in your day. I’ve also found that a sprinkle of toasted slivered almonds on top adds a lovely crunch that complements the creaminess.
How do I make a perfect poke cake?
I’ve made this poke cake more times than I can count, and over the years, I’ve picked up a few tricks that really help elevate it from good to absolutely phenomenal. So, let me share some of my best tips with you! First, about the cake itself: don’t overmix the batter. Seriously, this is probably the most important thing. Mix just until the dry ingredients are incorporated. Overmixing develops the gluten in the flour, which can lead to a tougher cake. We want this cake to be as tender and melt-in-your-mouth as possible. When it comes to poking the cake, don’t be shy! The more holes you make, the more of that delicious filling can seep into the cake, creating ultimate moisture and flavor. Use a fork, a skewer, or even the handle of a wooden spoon. For the filling, using fresh lemon juice makes a world of difference; the bottled stuff just doesn’t have that bright, zesty flavor. And make sure your condensed milk is truly sweetened condensed milk, not evaporated milk – it’s a common mix-up! When it comes to the topping, make sure your whipped topping is completely thawed but not melted. If it’s too warm, it might get a little runny. For swirl customization, if you want to add color to the whipped topping, do it before spreading it on the cake, and don’t overmix the color in, you want those pretty swirls. If you don’t have buttermilk, you can easily make your own by adding 1 tablespoon of white vinegar or lemon juice to 1 cup of milk and letting it sit for 5-10 minutes. And for baking, always trust your oven, but use the skewer test to ensure it’s done. Overbaking is the enemy of a moist cake!
What are some Storing and Reheating Tips?
So, you’ve made this incredible poke cake, and there are leftovers (which, let’s be honest, is rare in my house!). How do you keep it tasting amazing? For storing, I always recommend keeping it covered tightly in the refrigerator. The whipped topping can sometimes absorb odors from other foods, so a good seal is important. It stays wonderfully fresh and moist in the fridge for about 3-4 days. I usually store it in the same 9×13 inch pan, covered with plastic wrap or a fitted lid. If you’re bringing this to a potluck or a party, you can transport it covered, but it’s best kept chilled until serving. I’ve never really needed to reheat this poke cake because it’s designed to be enjoyed cold or at room temperature. The filling is so creamy and the cake is already moist. If, for some reason, you wanted to warm it up slightly (which I can’t imagine why you would!), you could microwave a slice for just a few seconds, but be very careful not to melt the topping. The best approach for leftovers is to simply enjoy them cold! If you are planning to make it ahead and freeze it (which I don’t typically recommend because the whipped topping can get a bit watery upon thawing), it’s best to freeze the unfrosted cake, then thaw it completely in the refrigerator before adding the whipped topping. Trust me, it’s so good fresh that planning ahead for storage is usually the only concern!
What are some frequently asked questions?
Final Thoughts

So there you have it, my friends! This poke cake recipe is more than just a dessert; it’s a slice of happiness, a memory maker, and honestly, one of the most satisfying things you can bake. It’s proof that you don’t need complicated techniques or fancy ingredients to create something truly delicious and memorable. The way the creamy filling soaks into every nook and cranny of that tender cake is just pure bliss. If you love this recipe and are looking for more easy yet incredibly tasty desserts, you should totally check out my recipes for the best fudgy brownies and my no-bake cheesecake – they’re family favorites too! I really hope you give this poke cake a try. I can’t wait to hear what you think, and I’d absolutely love it if you shared your own variations or any fun family memories this recipe brings up in the comments below! Happy baking, and enjoy every single delicious bite!
Easy Poke Cake
Ingredients
Cake
- 1 box white cake mix plus ingredients on box (eggs, oil, water)
Toppings
- 1 package 3-ounce package flavored gelatin such as strawberry or raspberry
- 1 cup boiling water
- 0.5 cup cold water
- 1 container whipped topping thawed
Instructions
Preparation Steps
- Preheat oven to 350 degrees F (175 degrees C). Bake cake mix according to package directions in a 9x13 inch baking pan.
- While the cake is still warm, use the handle of a wooden spoon to poke holes all over the cake.
- In a small bowl, dissolve gelatin in boiling water. Stir in cold water and pour evenly over the warm cake.
- Refrigerate the cake until chilled and firm.
- Spread whipped topping evenly over the chilled cake.
- Slice and serve.


