


There are some recipes that just instantly transport you back to your childhood kitchen, filled with the comforting scent of something baking. For me, that recipe is this incredible Pineapple Bread. It’s not just a Quick Bread; it’s a hug in loaf form. You know how some quick breads can be a little dry or bland? Yeah, this one is the complete opposite. It’s ridiculously moist, bursting with sweet, tangy pineapple flavor, and has this wonderfully tender crumb that just melts in your mouth. Honestly, it’s my go-to when I need a little pick-me-up or when unexpected guests pop by. It’s like a sunny vacation day in every slice, and unlike those fussy cakes that require a whole afternoon, this pineapple bread recipe comes together so easily. I’ve tried a million variations over the years, but this one? This is the one that my family devours and always asks for more of.
What is Pineapple Bread?
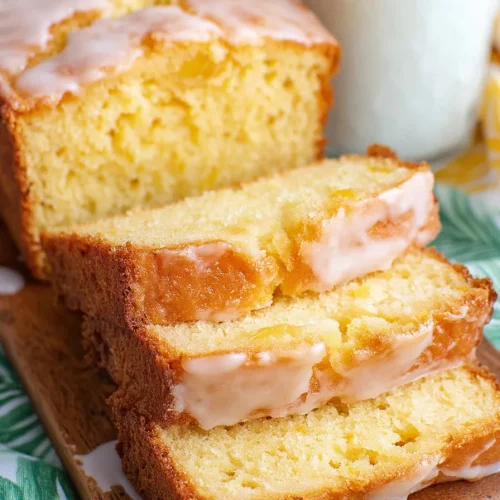
So, what exactly is this glorious Pineapple Bread? Think of it as a super-moist, incredibly flavorful quick bread that’s packed with crushed pineapple. It’s the kind of treat that’s perfect for any time of day – a delightful breakfast option, a perfect afternoon snack, or even a simple dessert. The name itself tells you the star ingredient, but it’s the way the pineapple’s natural sweetness and tanginess meld with the other ingredients that makes this bread so special. It’s not like a typical Banana Bread or even a spice cake; it has its own unique character. It’s essentially a one-bowl wonder for the batter part, making cleanup a breeze, which is always a huge win in my book. This pineapple bread recipe is all about simple ingredients coming together to create something truly magical and comforting.
Why you’ll love this recipe?
What are some of the best pineapple bread recipes?
- The Flavor Explosion: What is the Flavor Explosion Oh, the flavor! The crushed pineapple is the real hero here. It doesn’t just add moisture; it infuses the entire loaf with this bright, tropical sweetness that’s perfectly balanced. You get little pockets of tender pineapple throughout, and the aroma while it bakes is just divine – it fills your entire house with this warm, inviting scent that makes everyone gather in the kitchen.
- Unbelievable Simplicity: Seriously, this is what “easy baking” dreams are made of. Most of the magic happens in one bowl. You whisk the dry ingredients, then add the wet ingredients, and mix until just combined. No fancy techniques, no complicated steps. Even if you’re a beginner baker, you can totally nail this. It’s my secret weapon for when I need a delicious treat without a fuss.
- Budget-Friendly Bliss: The ingredients for this pineapple bread are super accessible and won’t break the bank. A can of crushed pineapple, some pantry staples, and you’re well on your way to a loaf of pure deliciousness. It’s a fantastic way to get a gourmet-tasting baked good for a fraction of the cost of store-bought.
- Pure Versatility: While it’s absolutely divine on its own, this bread is a blank canvas for deliciousness. I love it plain, but a simple cream cheese frosting or a light lemon glaze takes it to a whole new level. It’s fantastic for breakfast with a cup of coffee, perfect for a weekend brunch spread, or just a satisfying snack anytime you need a sweet bite.
What I love most about this pineapple bread recipe is how it consistently turns out perfectly. It’s never dry, always packed with flavor, and that beautiful golden-brown crust… sigh. It’s just one of those recipes that makes you feel like a baking rockstar with minimal effort. If you’re a fan of moist quick breads like my popular banana bread recipe or my amazing Apple Cinnamon muffins, you are going to adore this one. It’s truly a crowd-pleaser, and the fact that it’s so forgiving makes it a winner in my book.
How to Make Pineapple Bread
Quick Overview
Making this pineapple bread is a joyfully simple process. You’ll start by combining your dry ingredients, then whisking in your wet ingredients until just combined. The star of the show, crushed pineapple, is folded in, along with any other yummy add-ins. Pour it all into a prepared loaf pan and bake until golden brown and a tester comes out clean. The result is an incredibly moist, flavorful, and satisfying loaf that smells absolutely heavenly as it bakes. It’s the definition of comfort baking, made easy!
Ingredients
For the Main Batter:
You’ll need all-purpose flour – make sure it’s spooned and leveled, not scooped, to avoid a dense bread. Granulated sugar brings the sweetness, and a touch of Brown Sugar adds a lovely depth of flavor and helps with moisture. Baking soda is crucial for leavening, giving us that nice rise, and a pinch of salt just balances everything out beautifully. Don’t forget some warming spices like cinnamon and maybe a hint of nutmeg if you’re feeling fancy – they really complement the pineapple.
For the Filling:
The absolute star here is a can of crushed pineapple, undrained! That juice is liquid gold for moisture and flavor. You’ll also need a couple of eggs for richness and binding, melted unsalted butter (or a neutral oil like vegetable or canola oil for an even more moist crumb – I’ve tried both!), and a splash of vanilla extract for that classic bakery taste. Some recipes call for a bit of milk or buttermilk, but honestly, the pineapple juice and butter usually do the trick for moisture.
For the Glaze (Optional, but highly recommended!):
This is where you can add an extra layer of deliciousness. A simple glaze can be made with powdered sugar, a little bit of milk or lemon juice to get the right consistency, and a touch of vanilla. If you’re feeling adventurous, a little bit of pineapple juice in the glaze makes it extra special!
Step-by-Step Instructions
Step 1: Preheat & Prep Pan
First things first, get your oven preheating to 350°F (175°C). This is a pretty standard baking temperature, so most ovens handle it like a champ. While that’s happening, grease and flour a standard 9×5 inch loaf pan. You can use butter or cooking spray for greasing, and a tablespoon or two of flour to coat the inside. For extra insurance against sticking, I like to line the bottom and long sides of the pan with parchment paper, leaving a little overhang so you can easily lift the bread out later. Trust me, this makes life so much easier!
Step 2: Mix Dry Ingredients
In a large mixing bowl, whisk together your all-purpose flour, granulated sugar, Brown Sugar, baking soda, salt, and any spices you’re using (like cinnamon and nutmeg). Whisking them together thoroughly ensures that your leavening agents and seasonings are evenly distributed throughout the batter. This is a super important step to avoid pockets of baking soda or salt in your finished bread, and it just makes for a more consistent bake. Make sure there are no lumps of brown sugar either!
Step 3: Mix Wet Ingredients
In a separate medium bowl, whisk together your eggs until they’re lightly beaten. Then, add in your melted butter (make sure it’s not too hot or it can scramble the eggs!), vanilla extract, and the star of the show – the undrained crushed pineapple. Give this a good stir until everything is well combined. You’ll notice it looks a little… juicy, and that’s exactly what we want! The moisture from the pineapple is key to the bread’s tenderness.
Step 4: Combine
Now, pour the wet ingredients into the bowl with the dry ingredients. Using a spatula or a wooden spoon, gently mix everything together until *just* combined. This is where you have to be careful not to overmix! Overmixing develops the gluten in the flour too much, which can result in a tough, dense bread. You want to see a few streaks of flour still – that’s perfectly okay. As soon as you don’t see big pockets of dry flour, stop mixing. A few lumps are fine; they’ll disappear during baking.
Step 5: Prepare Filling
Okay, so the “filling” is actually already in the batter because we’re folding the crushed pineapple in! This is what makes it a pineapple bread and not just a plain quick bread with some pineapple flavor. The crushed pineapple provides both the moisture and those delightful chunks of sweet, tangy fruit throughout the loaf. If you’re adding any optional nuts or chocolate chips, this is a good time to gently fold those in as well after you’ve combined the wet and dry ingredients.
Step 6: Layer & Swirl
This step is more for those who like to add a swirl of something extra, but for a simple pineapple bread, you’ll just pour the batter evenly into your prepared loaf pan. If you *were* making a cinnamon-sugar swirl or a cream cheese swirl, you’d layer half the batter, then add the swirl, then the rest of the batter. For this recipe, we’re just pouring the whole delicious, pineapple-packed batter into the pan. Spread it out evenly with your spatula so the top is relatively smooth. This helps it bake more evenly.
Step 7: Bake
Pop that loaf pan into your preheated oven. Bake for about 50-65 minutes. The exact baking time can vary depending on your oven, so start checking around the 50-minute mark. You’ll know it’s done when the top is golden brown and a wooden skewer or toothpick inserted into the center comes out clean, with maybe just a few moist crumbs attached (but no wet batter). If the top is browning too quickly before the inside is cooked, you can loosely tent it with aluminum foil for the last 15-20 minutes.
Step 8: Cool & Glaze
Once your pineapple bread is baked to perfection, carefully remove the pan from the oven. Let it cool in the pan for about 10-15 minutes. This allows it to set up a bit before you attempt to remove it. After that initial cooling, use the parchment paper overhang (if you used it!) to gently lift the loaf out of the pan and transfer it to a wire rack to cool completely. This is crucial! Don’t even think about glazing it while it’s warm – the glaze will just melt off into a sticky mess. Wait until it’s fully cooled before drizzling on that dreamy glaze, if you’re using one.
Step 9: Slice & Serve
Once the bread is completely cool and has been glazed (or not!), it’s ready to slice! I find a serrated knife works best for clean cuts. Slice it into about 1/2 to 3/4 inch thick slices. Present it on a pretty platter, or just grab a slice and enjoy! It’s wonderful served at room temperature. If you’ve added a glaze, you can serve it as is, or with a dollop of whipped cream or a side of cream cheese for an extra treat.
What to Serve It With
This pineapple bread is so versatile, it fits in perfectly with so many occasions. Here are some of my favorite ways to enjoy it:
For Breakfast: This is where it truly shines! A warm slice, perhaps lightly toasted, alongside a steaming mug of coffee is pure bliss. You can also serve it with a smear of butter or cream cheese. For a slightly more elaborate breakfast, pair it with some fresh fruit salad or a side of crispy bacon. The tropical notes of the pineapple bread just scream “good morning!”
For Brunch: Elevate your brunch spread by including this beautiful loaf. It looks gorgeous sliced and arranged on a platter, perhaps with a few fresh pineapple wedges or a sprinkle of toasted coconut on top for extra flair. It pairs wonderfully with other brunch classics like scrambled eggs, quiches, or even some fluffy pancakes. A glass of fresh orange juice or a mimosa is the perfect beverage accompaniment.
As Dessert: Don’t underestimate this humble bread as a dessert! After dinner, a slice served with a scoop of vanilla bean ice cream or a dollop of whipped cream is absolutely divine. A drizzle of caramel sauce would also be a decadent addition. It’s lighter than a dense cake but still satisfyingly sweet and comforting.
For Cozy Snacks: My kids honestly love this pineapple bread as an after-school snack. It’s the perfect sweet treat to tide them over until dinner. It’s also wonderful for those moments when you just need something comforting and delicious with your afternoon tea or coffee. It’s that perfect “just because” bake that always hits the spot.
My family has a tradition of having this bread on the first day of summer vacation – the bright, sunny flavor just feels so fitting! Another favorite is a slice with a glass of cold milk on a rainy afternoon. It’s truly a recipe that brings comfort and joy, no matter how you serve it.
Top Tips for Perfecting Your Pineapple Bread
Over the years, I’ve learned a few tricks that make this pineapple bread recipe absolutely foolproof and consistently delicious. Here are my top tips to ensure your loaf turns out amazing every single time:
Zucchini Prep: While this is a *pineapple* bread, I often see people confuse it with zucchini bread. For this pineapple version, we don’t need to prep zucchini! The key is the crushed pineapple itself. Make sure you’re using crushed, not chunks, as it disperses more evenly and contributes to the moist texture. If your crushed pineapple seems particularly watery, you might want to drain it just a *tiny* bit, but don’t go overboard – we need that liquid! Always use the juice from the can; it’s packed with flavor and moisture.
Mixing Advice: This is probably the most critical tip for any quick bread. Do *not* overmix the batter once you combine the wet and dry ingredients. Mix only until the ingredients are *just* incorporated. A few small lumps are perfectly fine and actually preferable to a perfectly smooth batter. Overmixing develops the gluten, which leads to a tough, chewy bread instead of a tender, moist one. Be gentle and stop as soon as you don’t see any large dry pockets of flour.
Swirl Customization: While this recipe is fantastic as a straightforward pineapple bread, if you ever want to add a swirl, here’s a tip: make your swirl mixture (like cinnamon-sugar or a cream cheese mixture) and layer it in between half the batter and the other half. Use a knife or skewer to gently swirl it through, but again, don’t over-swirl, or it can muddy the flavors and textures. For this recipe, the pure pineapple flavor is so good, I often skip the swirl.
Ingredient Swaps: I’ve experimented with quite a few swaps! For a richer flavor, you can replace half the all-purpose flour with whole wheat flour, though it might make the bread slightly denser. If you don’t have butter, a neutral oil like vegetable or canola oil works beautifully and can even contribute to a moister crumb. For a dairy-free version, you can use a plant-based milk (like almond or soy) for the glaze, or simply omit the glaze altogether.
Baking Tips: Always use the middle rack in your oven for the most even heat distribution. If you find your loaf is browning too quickly on top before the center is cooked, loosely tent the loaf pan with aluminum foil for the last 20-30 minutes of baking. This protects the crust while allowing the inside to finish cooking. Also, remember that ovens vary, so start checking for doneness with a toothpick a little before the suggested bake time. A clean toothpick is your best friend!
Glaze Variations: The simple powdered sugar glaze is a classic for a reason, but feel free to jazz it up! Add a teaspoon of rum extract for a grown-up twist, or a bit of orange zest for an extra burst of citrus. If you prefer a less sweet glaze, use more lemon juice or pineapple juice and less powdered sugar. For a truly decadent touch, a cream cheese frosting is always a winner. Just make sure the bread is completely cool before applying any topping!
Storing and Reheating Tips
Properly storing your delicious pineapple bread is key to keeping it fresh and moist for as long as possible. Here’s what I do:
Room Temperature: Once completely cooled, I usually store my pineapple bread wrapped tightly in plastic wrap, and then place it in an airtight container or a resealable plastic bag. Kept this way at room temperature, it stays wonderfully moist and delicious for about 3-4 days. It’s perfect for slicing off a piece whenever the craving strikes.
Refrigerator Storage: If I know I won’t get through the whole loaf within a few days, or if it’s a particularly warm day, I’ll pop it into the refrigerator. Wrapped tightly as described above, it can last up to a week in the fridge. The texture might firm up slightly, but it will still be tasty. To refresh it, a quick toast in the toaster or oven is perfect.
Freezer Instructions: For longer storage, freezing is your best friend! Wrap the completely cooled loaf tightly in a layer of plastic wrap, then a layer of aluminum foil, and finally place it in a freezer-safe bag or container. It will keep well in the freezer for up to 2-3 months. To thaw, remove the bread from the freezer and let it thaw at room temperature for a few hours, still wrapped. Once thawed, you can enjoy it as is or give it a light toast.
Glaze Timing Advice: This is super important! If you’re planning to store your bread at room temperature or in the refrigerator for a few days, it’s best to add the glaze *just before serving* or on the day you plan to eat it. If you glaze it and then store it, the glaze can become sticky or seep into the bread, especially if it’s a more liquidy glaze. For freezing, I always recommend glazing *after* thawing. It maintains the best texture and appearance.
Frequently Asked Questions
Final Thoughts
I really hope you give this pineapple bread recipe a try. It’s more than just a recipe to me; it’s a little slice of happiness that’s been perfected over many years, with lots of love and a few kitchen mishaps along the way! It’s the kind of bake that makes your home feel warmer and more inviting, and the incredible aroma that fills your kitchen is just a bonus. It’s proof that simple ingredients can create something truly spectacular. If you’re someone who loves a moist, flavorful, and utterly satisfying quick bread, this pineapple bread is an absolute must-bake. It’s a guaranteed winner for breakfast, brunch, snacks, or even a light dessert. For those of you who enjoyed this, you might also want to check out my recipe for [link to another quick bread recipe, e.g., Best Ever Banana Bread] – it’s another family favorite!
I can’t wait to hear how your pineapple bread turns out! Please leave a comment below and let me know your thoughts, any variations you tried, or your favorite way to enjoy it. Happy baking, and may your loaves always be moist and delicious!
Pineapple Bread Recipe
Ingredients
Main Ingredients
- 2.5 cups all-purpose flour
- 1 teaspoon baking soda
- 0.5 teaspoon salt
- 1 teaspoon ground cinnamon
- 0.5 teaspoon ground nutmeg
- 1 cup granulated sugar
- 0.5 cup unsalted butter, softened
- 2 large eggs
- 1 teaspoon vanilla extract
- 1 cup crushed pineapple, drained
Instructions
Preparation Steps
- Preheat oven to 350°F (175°C). Grease and flour a 9x5 inch loaf pan.
- In a large bowl, whisk together flour, baking soda, salt, cinnamon, and nutmeg.
- In a separate bowl, cream together sugar and softened butter until light and fluffy.
- Beat in eggs one at a time, then stir in vanilla extract.
- Gradually add the dry ingredients to the wet ingredients, mixing until just combined.
- Gently fold in the drained crushed pineapple.
- Pour the batter into the prepared loaf pan and spread evenly.
- Bake for 55-65 minutes, or until a wooden skewer inserted into the center comes out clean.
- Let the bread cool in the pan for 10 minutes before inverting it onto a wire rack to cool completely.


