Oh, where do I even begin with these peppermint meltaways? For me, they’re more than just a treat; they’re pure nostalgia. I can vividly remember my Grandma Elsie making these every single holiday season. The scent of peppermint and warm sugar would fill her tiny kitchen, and it was like a beacon, drawing all of us grandkids in like little moths to a flame. She’d let us help stir, and I always felt so important when she handed me the peppermint extract bottle, trusting me to add just the right amount. These aren’t fancy, no-bake cookies you’d find in a magazine spread, but they have a special place in my heart, much like a really good, comforting Chocolate Chip Cookie does for so many. They’re simple, melt-in-your-mouth delightful, and honestly, they’re my go-to when I need a little pick-me-up or a sweet bite without the fuss of a full baking project. If you’ve ever loved a classic shortbread but craved a hint of festive cheer, you’re going to adore these peppermint meltaways.

What is the magic peppermint meltaway?
So, what exactly are these peppermint meltaways that have my heart singing? Think of them as the sweetest, most tender little bites that just dissolve on your tongue. The “meltaway” part isn’t just a cute name; it’s a promise! They are incredibly delicate and buttery, with a subtle, invigorating hint of peppermint that’s never overpowering. They’re not quite a cookie, not quite a fudge, but something wonderfully in between. The “peppermint” comes from pure peppermint extract, which gives them that quintessential cool, refreshing flavor that’s perfect for any time of year, but especially during the colder months when you want that cozy, festive feeling. It’s essentially a sweet, buttery confection that’s so easy to make, it feels almost too good to be true. It’s the kind of thing you can whip up when unexpected guests arrive or when you just have that 10 pm craving for something sweet but don’t want to commit to a whole batch of cookies.
Why you’ll love this recipe?
What are some of the best peppermint meltaways recipes?flavor is just divine. That delicate buttery base with the clean, crisp peppermint is such a lovely combination. It’s not overly sweet, which I appreciate, and the peppermint provides this wonderful, refreshing finish. Then there’s the sheer simplicity. I’m not exaggerating when I say this is one of the easiest “desserts” you can make. You don’t need any fancy equipment, and the steps are so straightforward that even if you’re new to baking, you’ll find this a breeze. What I really love is how cost-effectiveWhat are some pantry staples that you can easily find on hand?versatility! While they’re fantastic on their own, you can easily dress them up or down. Drizzle them with chocolate, add sprinkles, or even just enjoy them plain. They’re perfect for holiday cookie trays, small gifts for neighbors, or just a little treat with your afternoon coffee. Unlike some recipes that require hours of chilling or multiple stages, these peppermint meltaways come together in a flash. They’re the kind of recipe that makes you feel like a baking superstar without all the stress. It’s the perfect balance of deliciousness and ease, making it a true lifesaver for busy cooks.
How to Make Peppermint Meltaways
Quick Overview
This recipe is all about simple elegance. We’re essentially creating a soft, buttery dough, infusing it with the magic of peppermint, and then letting it set. It’s a no-fuss approach that guarantees a delightful texture and flavor every single time. You’ll mix your ingredients, gently shape them (or even just press them into a pan), and then let them chill until firm. That’s it! The minimal effort involved is what makes these peppermint meltaways so incredibly appealing, especially when you’re short on time or energy but still want something truly special. Trust me, the payoff for such little work is absolutely worth it.
Ingredients
For the Main Batter:
1 cup (2 sticks) unsalted butter, softened: Make sure it’s truly softened, not melted! This is key for a smooth, creamy texture. I like to leave mine on the counter for about an hour before I start.
1/2 cup powdered sugar: This is what gives them that super tender, melt-in-your-mouth quality. Don’t try to substitute granulated sugar here; it won’t yield the same results.
1 teaspoon pure peppermint extract: This is where the magic happens! Use good quality extract for the best flavor. If you find yourself with a craving for a different minty flavor, spearmint works too, but peppermint is my classic choice.
1/4 teaspoon salt: Just a pinch to balance the sweetness and enhance all the other flavors.
2 1/4 cups all-purpose flour: This provides the structure. I usually don’t even bother sifting it for this recipe, but if you’re feeling extra fancy, go for it!
For the Glaze:
1 cup powdered sugar: Again, powdered sugar is crucial for that smooth, glossy finish.
1-2 tablespoons milk or cream: You can use regular milk, half-and-half, or even a dairy-free alternative. Start with 1 tablespoon and add more, a tiny bit at a time, until you reach your desired consistency.
1/4 teaspoon pure peppermint extract (optional, for extra minty kick): If you love a strong peppermint flavor, add a little more extract to the glaze. A drop of green food coloring can be fun for holidays, but I usually keep it simple and white.

Step-by-Step Instructions
Step 1: Preheat & Prep Pan
First things first, let’s get our oven ready. Preheat it to 325°F (160°C). While the oven heats up, grab an 8×8 inch baking pan. I like to line mine with parchment paper, leaving an overhang on the sides. This makes lifting the whole slab out so much easier later on. If you don’t have parchment, just grease and flour the pan really well – I’ve done it both ways, and both work just fine!
Step 2: Mix Dry Ingredients
In a medium bowl, whisk together the flour and the salt. Just a quick whisk is all you need to combine them. This ensures the salt is evenly distributed, which is super important for flavor. Set this bowl aside for a moment.
Step 3: Mix Wet Ingredients
In a large bowl, cream together the softened butter and the powdered sugar. You can use an electric mixer for this, or if you’re feeling strong, a good old-fashioned whisk and some elbow grease will do! Beat them until they’re light and fluffy. Then, beat in the peppermint extract. This is the fun part, that lovely minty aroma starts to fill the air! Make sure it’s all well combined.
Step 4: Combine
Now, gradually add the dry ingredients (the flour and salt mixture) to the wet ingredients. Mix on low speed, or stir with a spatula, just until everything is combined and a soft dough forms. Be careful not to overmix! Overmixing can make these tough, and we want them to be super tender. The dough will be thick and a bit crumbly, but it should hold together when you pinch it.
Step 5: Prepare Filling
This recipe doesn’t really have a separate “filling” in the traditional sense, but the dough itself is what we’ll be shaping and flavoring. If you wanted to add a swirl of something like crushed candy canes or even a bit of melted chocolate to the top before baking, this is the stage where you’d think about that. But for the classic peppermint meltaways, the dough is the star!
Step 6: Layer & Swirl
Now, take your dough and press it evenly into the prepared baking pan. Use your hands or a spatula to make sure it’s spread out in a single layer. If you’re going for that swirled look I mentioned, now’s the time to add your toppings. I sometimes like to just press a few crushed candy canes into the top for a bit of crunch and extra peppermint punch. But honestly, a smooth, even layer is perfect too!
Step 7: Bake
Pop the pan into your preheated oven and bake for about 20-25 minutes. You’re looking for the edges to be lightly golden, and the center to be set. It won’t puff up a whole lot, and it shouldn’t turn very brown. A toothpick inserted into the center should come out clean. Keep an eye on them, as ovens can vary!
Step 8: Cool & Glaze
Once they’re baked, take the pan out of the oven and let them cool completely in the pan. This is really important because they are quite delicate when warm. While they’re cooling, whip up the glaze. In a small bowl, whisk together the powdered sugar and 1 tablespoon of milk or cream. Add more milk, a teaspoon at a time, until you have a smooth, drizzly consistency. If you’re using food coloring, add it now. Once the meltaways are completely cool, drizzle the glaze all over the top. You can make pretty patterns or just cover the whole surface.
Step 9: Slice & Serve
Let the glaze set for about 30 minutes. Then, using the parchment paper overhang, lift the whole slab out of the pan and place it on a cutting board. You can then cut it into squares or bars. I usually make mine about 1.5 to 2 inches square. A sharp knife works best here. These are best served at room temperature and are simply divine with a cup of tea or coffee!
What to Serve It With
These peppermint meltaways are so wonderfully versatile, they can honestly be enjoyed at any time of day or any occasion. For breakfast, they’re a delightful little sweet bite to have alongside your morning coffee or tea. They’re not overly rich, so they feel like a perfectly acceptable start to the day, especially if you’re having guests over and want to offer something a little special. For a festive brunch, they’re a beautiful addition to any pastry spread. Imagine them nestled amongst croissants and fruit salad – they add a lovely pop of color and flavor. I like to serve them on a pretty platter. As a simple dessert, they’re an absolute dream. They’re perfect after a hearty meal when you don’t want anything too heavy but still crave something sweet. They also pair wonderfully with a warm cup of hot chocolate, which is basically a flavor match made in heaven! And for those cozy snacks moments, like curling up with a good book or catching up with a friend, these are just perfect. They’re incredibly comforting and satisfying. My kids always ask for these when they’re watching a movie, and they disappear remarkably fast. They’re also fantastic to have on hand for impromptu holiday gatherings or just when you need a little sweet indulgence without the guilt.
Top Tips for Perfecting Your Peppermint Meltaways
Over the years, I’ve picked up a few tricks that make these peppermint meltaways turn out absolutely perfect every single time. For the butter, softened but not melted is the golden rule. If it’s too cold, your mixture will be lumpy; if it’s melted, the texture will be off. Leave it on the counter for about an hour before you plan to bake. When it comes to mixing the dry and wet ingredients, do not overmix. Seriously, just mix until it *just* comes together. Overmixing develops the gluten in the flour, which can lead to tough meltaways, and we want these to be as tender as possible. The dough should look slightly crumbly but hold together when you press it. For that perfect, delicate texture, using powdered sugar in the dough is non-negotiable. It creates that signature melt-in-your-mouth quality that granulated sugar just can’t replicate. When it comes to the peppermint extract, quality matters. A good pure peppermint extract will give you a cleaner, more authentic flavor than imitation versions. Start with the amount in the recipe and taste a tiny bit of the dough (if you’re comfortable) to see if you want a little more oomph. For the glaze, consistency is key. You want it thick enough to drizzle but thin enough to spread easily. Start with less liquid and add more gradually. If you accidentally make it too thin, just whisk in a tablespoon or two more of powdered sugar. I’ve definitely done that more times than I can count! If you want to add a bit of flair, try variations. A drizzle of melted white or Dark Chocolate over the top after the peppermint glaze sets is absolutely divine. You could also mix in some finely crushed peppermint candies into the dough itself for an extra textural and flavor boost, but remember to reduce the flour slightly if you do this to avoid making them too dry. And finally, patience during cooling is crucial. Resist the urge to cut into them too soon. Letting them cool completely in the pan ensures they firm up properly, making them easier to slice and preventing them from falling apart.
Storing and Reheating Tips
These peppermint meltaways are quite forgiving when it comes to storing, which is another reason I love them so much. For short-term storage, you can keep them at room temperature for up to 3-4 days. Just make sure they are in an airtight container. I usually place them in a single layer with parchment paper between layers if I’m stacking them. If they have a glaze on top, ensure the glaze is fully set before covering. For longer storage or if your kitchen is particularly warm, they do well in the refrigerator. They’ll last about a week this way. Keep them in an airtight container, and again, separate layers with parchment paper. They have a wonderfully crisp texture when chilled, which some people even prefer! If you want to make a big batch and freeze them for later, that’s totally doable too. Wrap the cooled, un-glazed meltaways tightly in plastic wrap, then in foil, and place them in a freezer-safe bag or container. They’ll keep well in the freezer for up to 2-3 months. To thaw, simply take them out of the freezer and let them come to room temperature on the counter for a couple of hours. If you decide to glaze them before freezing, the glaze might slightly soften upon thawing, so it’s often best to glaze them after they’ve thawed or right before serving. I find they’re best served at room temperature, so allow them ample time to thaw and reach that perfect texture. If you refrigerate them, you can pop them in the microwave for just a few seconds to take the chill off, but be very careful not to overheat them, as they can become crumbly.
Frequently Asked Questions
Final Thoughts

So there you have it – my beloved peppermint meltaways! I truly hope you give these a try. They’re a testament to how simple ingredients and a little bit of love can create something truly magical. They’re the perfect balance of buttery richness and refreshing peppermint, all in a tender bite that just melts away. They’re a wonderful choice for holiday cookie platters, thoughtful edible gifts, or just when you need a little sweet comfort. If you love this recipe, you might also enjoy my classic shortbread or my no-bake Chocolate Fudge recipes for more simple yet delightful treats. I can’t wait to hear what you think! Please leave a comment below and let me know how your peppermint meltaways turned out, or if you tried any fun variations. Happy baking, my friends!
Peppermint meltaways
Ingredients
Main Ingredients
- 0.5 cup butter, softened
- 1 teaspoon peppermint extract
- 2 cups powdered sugar
- 0.25 teaspoon salt
- 0.5 cup semi-sweet chocolate chips
- 1 teaspoon vegetable shortening
- peppermint candies, crushed for garnish
Instructions
Preparation Steps
- In a large bowl, cream together the softened butter and peppermint extract until smooth.
- Gradually beat in the powdered sugar and salt until well combined and the mixture is crumbly.
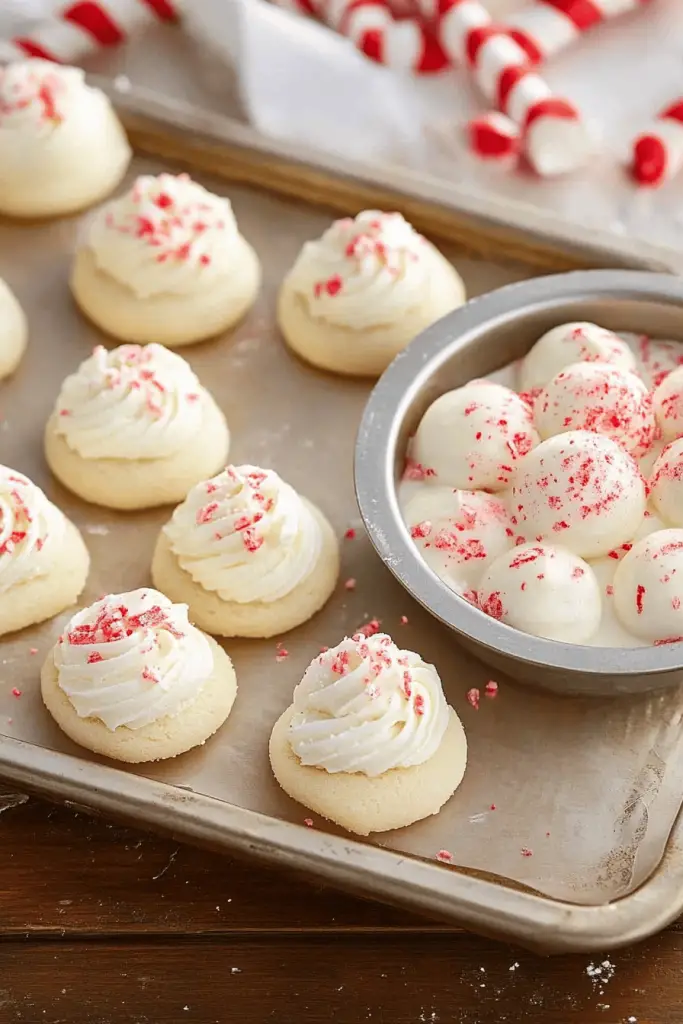
- Roll the mixture into small balls, about 1 inch in diameter. Place them on a wax paper-lined baking sheet.
- Chill the balls in the refrigerator for at least 30 minutes, or until firm.
- In a small microwave-safe bowl, combine the chocolate chips and shortening. Microwave in 30-second intervals, stirring in between, until smooth and melted.
- Dip each chilled ball into the melted chocolate, coating completely. Return to the wax paper-lined baking sheet.
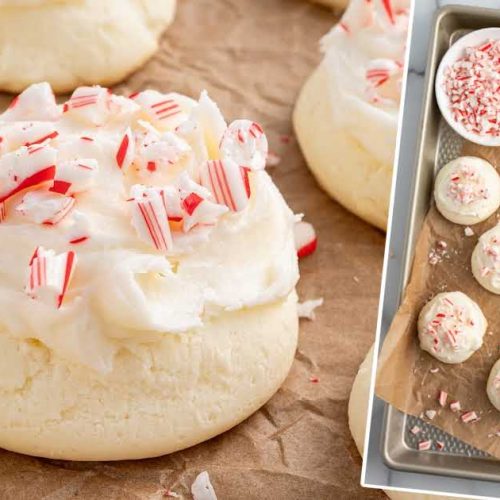
- Immediately sprinkle the crushed peppermint candies over the chocolate-coated balls.
- Let the meltaways set at room temperature, or for faster setting, place them back in the refrigerator for about 15-20 minutes.