


I always reach for a mug of coffee and a piece of something creamy when the afternoon light hits the kitchen just right. This Oreo Pie did that for me on a sleepy Saturday—the first bite is a satisfying crunch, then a cloud of silky filling, and a kiss of chocolate on the finish. It’s incredible how something that tastes so indulgent can come together with almost no bake time. I grew up with cookies-and-cream desserts, but this pie is the one my family asks for again and again. The aroma of crushed Oreos, butter, and vanilla drifts through the house and instantly feels like a hug from grandma, minus the mess. If you want a show-stopper that’s still wonderfully simple for weeknights, this Oreo pie is your new go-to. I’ve made it countless times, and it never fails. The smell alone brings everyone to the kitchen. This version is my forever favorite: creamy, a touch chocolatey, and perfectly sliceable. I’m sharing it exactly as I make it, little tips tucked in here and there, so you feel like you’re right here at my counter.
What is an Oreo pie?
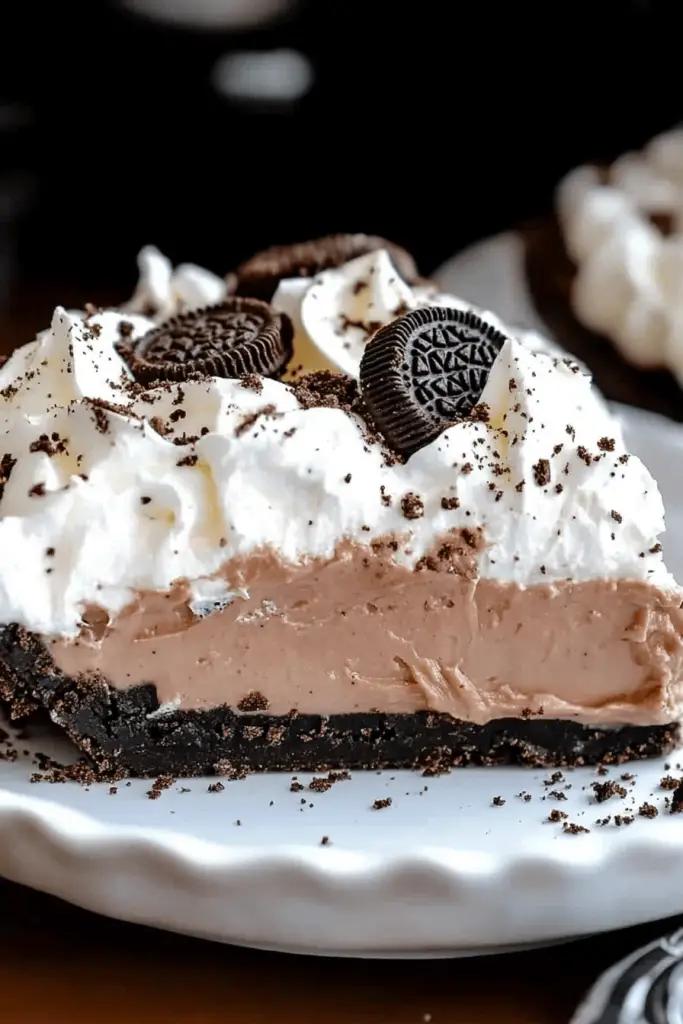
Oreo pie is essentially a no-bake dessert built on a chocolatey Oreo crust, a rich, creamy filling, and a light topping or glaze. Think of it as a cheesecake-leaning pie that doesn’t require an oven—great for busy nights or when you want something dessert-worthy without turning on the heat. The name says it all: Oreo cookies provide both the base and the chocolatey backbone, while Cream Cheese, whipped cream, and a touch of vanilla bring the filling to a lush, scoopable texture. It’s not fussy, but it feels special, and the contrast between that crumbly crust and the smooth center is what I crave with every bite. The origin story here isn’t a grand culinary myth—just a smart, crowd-pleasing idea that travels well in a fridge and tastes like a celebration. Think of it as the grown-up cousin of your favorite milkshake, concentrated into a slice you can serve on a cake plate.
Why you’ll love this recipe?
What I love most about this Oreo pie is how it checks all the boxes you want on a weeknight dessert—and it still feels like you treated yourself. First, the flavor is everything you’d hope for: creamy, velvety filling that’s not too sweet, tempered by the chocolatey crunch of the crust. The filling is bright with vanilla and a hint of Cream Cheese tang, which makes a difference you can actually taste in every bite. Second, the method is refreshingly simple. You blitz cookies, melt butter, press into a pan, whip a few ingredients, and let everything set in the fridge. No oven, no panic about overbaking. Third, it’s budget-friendly. The ingredients are pantry staples, and you can scale up or down without losing the magic. Fourth, versatility is built in. Crust alternatives? Use gluten-free Oreos or swap in a different chocolate cookie for a new vibe. Dairy-free or lighter versions? You can swap in vegan cream cheese and coconut whipped cream and still land in a delicious place. This dessert also travels nicely; I’ve carried it to potlucks where it disappeared in minutes. What I love most about this is how reliably comforting it feels—it’s a recipe I pull out when I want to share a little warmth. For me, it’s the perfect balance of indulgence and ease. If you’ve got a craving for something cool and creamy that doesn’t require turning on the oven, this Oreo pie is your answer. If you’re craving more no-bake magic, you might also enjoy my no-bake cheesecake or freezer-friendly chocolate pie for future ideas.
Tip: if you’ve ever wondered about dairy choices, I tested this with a scoop of almond milk in the glaze and it actually made the topping silkier without changing the taste. My kids actually ask for this all the time, and I love that it’s sturdy enough to slice cleanly even after a late-night chill session. Let me show you how I put it together, step by step, with the little tweaks that make it feel like a family tradition you can put together in no time.
How do I make Oreo pie?
Quick Overview
Here’s the short version: crush the cookies into a fine crust, mix a creamy filling with softened Cream Cheese, fold in whipped cream for lift, pour into the crust, and let it chill until set. The no-bake magic happens in the fridge, not the oven, so you can assemble it after dinner and have a gorgeous dessert ready when you’re ready for it. The beauty is in the textural contrast—crunchy crust meeting a luscious, dreamy center—and the fact that the whole thing only takes a little active time. If you want a moment of decadence that doesn’t demand timing perfection, this Oreo pie is your friend.
Ingredients
For the Crust:
- How many Oreo cookies do you make?
- 4 tablespoons unsalted butter, melted
- A pinch of salt (optional, but it brightens the chocolate flavor)
For the Filling:
- 16 oz (2 cups) Cream Cheese, softened
- 1/2 cup granulated sugar
- 1 teaspoon vanilla extract
- 1 cup heavy cream, cold, or 1 1/2 cups good-quality whipped topping
- Optional: 1/4 cup mini chocolate chips or finely chopped dark chocolate for texture
For the Glaze:
- 2 oz semisweet chocolate, chopped or chips
- 2 teaspoons light corn syrup or honey (for shine)
- 1 tablespoon heavy cream
Step-by-Step Instructions
Step 1: Preheat & Prep Pan
Since this is a no-bake pie, you don’t need the oven. Start by lining a 9-inch pie pan with parchment or a light spray of nonstick. If you’re using parchment, leave a little overhang so you can lift the slice out cleanly. Set the pan aside while you crush the cookies. The crust is the anchor of the pie, and you’ll get a crisp bite if you press the crust evenly and firmly into the sides.
Step 2: Mix Dry Ingredients
Crush the Oreos into fine crumbs. You can do this in a processor or by sealing the cookies in a bag and whacking them with a rolling pin until they look like wet sand—no big chunks, please. Stir in the melted butter and a pinch of salt. The texture should feel like damp beach sand—packable, not wet. If your crumbs seem a touch dry, add another teaspoon of melted butter and mix until they hold together when you press them. This is the moment where butter-saturated crumbs become your crust’s foundation.
Step 3: Mix Wet Ingredients
In a large bowl, beat the softened cream cheese with the sugar and vanilla until it’s smooth and creamy. You want a satin-like texture, not grainy. If you see lumps, give it a minute longer with the mixer on a low speed. I’ve learned the hard way that overmixing cream cheese can make the filling a touch runny, especially if you’re using a warm kitchen. If your dairy is a touch soft, pop the cream cheese in the fridge for 10 minutes to firm up before you beat it into submission.
Step 4: Combine
Whip the cold cream until stiff peaks form, then fold it gently into the cream cheese mixture. If you’re using whipped topping, fold it in in two additions to keep the filling airy. You’re aiming for a light, billowy texture that still holds its shape when you slice. Avoid overmixing, or you’ll lose that lift and your filling could become heavy. It’s better to have a slightly lighter fold than a dense, cheesecake-like center.
Step 5: Prepare Filling
Fold in any optional mini chocolate chips if you like a little extra bite. If you want a deeper chocolate note, you can whisk in 1–2 tablespoons of unsweetened cocoa powder, sifted, with the cream cheese before adding sugar. The cocoa should be balanced by the sweetness of the cookies and the vanilla—taste as you go, then set the mixture in the fridge for 10 minutes to chill slightly before filling. This step is where personal taste makes all the difference: more vanilla for a bright finish, or a touch of cocoa for a richer, dessert-case feel.
Step 6: Layer & Swirl
Spread the filling into the prepared crust, smoothing the top with a spatula. If you want a swirled effect, drop spoonfuls of extra filling in several spots and use a knife to swirl toward the center. The goal is a couple of visual ribbons that catch the light and the eye, not a uniform block. I like leaving a few little curves along the edge to echo the cookie crust’s texture. If you want a more dramatic marble, swirl in a thin line of melted chocolate before the filling sets.
Step 7: Bake
There’s no baking here—the oven stays off. This step is all about giving the filling a chance to set. Place the pie in the refrigerator for at least 4 hours, ideally overnight. The longer it chills, the cleaner your slices will be and the more pronounced the cheesecake-like texture becomes. If you’re short on time, you can chill for 2–3 hours, but preparing it the day before is worth it. Avoid the temptation to speed things up in the freezer; the cool, slow setting gives the cream cheese its signature smoothness.
Step 8: Cool & Glaze
Once set, make a quick glaze to gloss the top. Melt the chocolate with the cream and corn syrup until glossy, then drizzle in a thin, even line across the pie. If you’re not in the mood for glaze, a simple dollop of whipped cream on each slice or a light dusting of cocoa powder is gorgeous and delicious. Let the glaze cool just enough to set, so it won’t run off the edges when you slice.
Step 9: Slice & Serve
Dip a sharp knife in hot water, wipe clean, and slice with clean, confident movements. Wipe the blade between cuts for neat edges. Serve chilled, with a extra dollop of whipped cream if you’re feeling extra indulgent. I like finishing with a couple of Oreo crumbs sprinkled over the top and a small chocolate shard for drama. This pie shines on a dessert table and feels special enough for guests, but it’s so forgiving you’ll wonder why you ever bought store-bought dessert again.
What to Serve It With
This Oreo pie shines on its own, but a few thoughtful touches can elevate the experience for different occasions. It’s creamy enough to pair beautifully with a bold coffee, a glass of milk, or a late-night hot cocoa. Here are ideas that fit various moments:
For Breakfast: A cool slice with a cappuccino, or a light coffee cake on the side to keep the contrast lively. It sounds like a mini-dessert, but a small sliver can be a playful treat with your morning coffee.
For Brunch: Arrange slices on a chilled platter with fresh berries and a mint sprig for color. A delicate chocolate drizzle across a few slices adds a restaurant-worthy finish without much extra effort.
As Dessert: Serve with a ruby-port splash or a bold espresso on the side. The richness pairs beautifully with a simple fruit compote or a bright berry coulis that cuts through the sweetness.
For Cozy Snacks: Cut small squares and serve with warm milk or vanilla chai. The contrast between the cool pie and a steaming drink is comforting in the best possible way. I’ve served this after busy evenings, and my family ends up hovering around the fridge, waiting for the next slice to materialize. One more tip: wrap leftover slices tightly and refrigerate; they stay creamy and slice well for up to 3–4 days.
As a little family tradition, we always keep a stash of whipped topping in the freezer for extra-dreamy texture when we’re in a hurry. And if you’re feeling extra playful, you can swap the crust with crushed graham crackers and a tablespoon of melted butter to give it a slightly lighter bite. This Oreo pie is adaptable enough to become your own signature dessert—whether you want it richer or a touch lighter, it’s all within reach.
Top Tips for Perfecting Your Oreo pie
Here are a few small tweaks that make a big difference, learned from countless batches and a few kitchen trial-and-errors.
Oreo Crust Prep: For a crisper crust, bake the crust lightly for 5 minutes at 350°F (175°C), then cool completely before filling. If you’re in a rush, still press the crust firmly and chill for 15 minutes to help it set. If you want gluten-free, look for gluten-free Oreo cookies or equivalent chocolate cookies and follow the same method.
Filling Mixing: Cream cheese needs to be softened—not room temperature, but closer to cool than warm. If the room’s warm, chill the bowl and beaters for a few minutes before you start. This keeps the filling from getting too soft and helps it hold its shape when you slice.
Swirl Customization: A simple swirl looks pretty and tastes fantastic. You can drop in little ribbons of extra chocolate ganache or a touch of peanut butter for a peanut-butter-strewn version. If you like a marble look, pour half the filling into the crust, drizzle a line of melted chocolate across, and top with the rest, then swirl with a knife. The result is dramatic and delicious.
Ingredient Swaps: For a lighter version, swap in light cream cheese and whipped topping with the same amount of flavor. You can use dairy-free alternatives and plant-based whipped toppings to adapt this to dietary needs. If you swap cookies, you’ll want to adjust the butter slightly to get the same press-and-stick texture.
Setting & Texture: The longer it sits, the more it firms up. I’ve found that overnight chilling makes a night-and-day difference in the slice’s clean cut and creamy center. In a pinch, 4 hours will do, but 8–12 hours is ideal for a flawless finish.
Glaze Variations: If you’re not in the mood for a glaze, dusting with cocoa powder, cocoa nibs, or shaved chocolate is a beautiful finish. If you do glaze, use a pourable, smooth ganache rather than a thick spread, so it coats evenly without shedding the edges.
Flavor Boosts: Add a teaspoon of espresso powder to the filling for a coffee-kissed version, or fold in 2 tablespoons of natural peanut butter for a peanut-butter-chocolate twist. These small tweaks are where the recipe becomes your own family favorite.
I’ve learned to trust my instincts a lot with this recipe: if the filling seems a little loose after mixing, chill it for a bit longer; if the crust feels crumbly, add a touch more melted butter and press again. My best batches always involve tasting as you go and letting the fridge do the heavy lifting. This isn’t a rigid science; it’s a cozy ritual you can customize every time you make it.
Storing and Reheating Tips
Because this pie is best when cold and firm, storage becomes a key player in how it feels on the plate. Here are practical guidelines that keep the texture just right.
Room Temperature: Not ideal for long stretches, especially in warm rooms. If you need to serve a quick slice, leave it out for 15–20 minutes max to soften slightly, then slice. It’s much nicer after it’s re-chilled for the rest of the night.
Refrigerator Storage: The best option. Cover the pie tightly with plastic wrap or transfer to a container with a tight lid. It will stay fresh and creamy for 3–4 days. The crust becomes crisper after chilling, which is a nice contrast to the center’s soft texture.
Freezer Instructions: You can freeze slices, individually wrapped, for up to 1 month. Thaw overnight in the fridge before serving. The texture may be slightly looser if you freeze, but the flavor remains outstanding. If you know you’ll be freezing, you might want to decrease the whipped topping slightly to keep the filling from becoming too airy when thawed.
Glaze Timing Advice: If you plan to freeze, add the glaze after thawing so it doesn’t crack or become dull. A glossy chocolate topping is best added right before serving. For refrigerator storage, you can glaze on day two or three to keep the top looking fresh.
From my experience, this pie holds best when kept cold and sliced just before serving. It’s a dessert that travels well for potlucks and picnics, especially if you wrap each slice individually to preserve the creaminess inside. It’s surprising how well it stays intact even after a few hours in the fridge, which makes it the perfect make-ahead treat for gatherings.
Frequently Asked Questions
Final Thoughts
This Oreo pie is the kind of dessert that becomes a quiet staple in your house—reliable, a little nostalgic, and relentlessly creamy. It’s not merely about taste; it’s about the rituals: crushing cookies, mixing until smooth, and letting the fridge do the magic. It’s the perfect comfort after a long day, a crowd-pleaser at gatherings, and a little celebration in a slice. If you’re craving something decadent yet approachable, this recipe is for you. I love that it’s flexible—you can tweak the toppings, swap in dairy-free ingredients, or switch up the cookies to keep things interesting. I hope you’ll try it and make it your own, just like I did over countless family nights. Happy baking! And please, tell me how yours turns out in the comments—your tweaks could become my next little tip to share. If you loved it, a rating helps others discover this cozy treat too. Can’t wait to hear your variations and see your pictures!
Oreo Pie
Ingredients
For the Crust
- 2.5 cups crushed Oreo cookies
- 6 tablespoons melted butter
For the Filling
- 1 package cream cheese, softened
- 0.75 cups granulated sugar
- 0.5 cup unsweetened cocoa powder
- 0.5 cup milk
- 1 teaspoon vanilla extract
- 1 container whipped topping, thawed
- 24 Oreo cookies, roughly chopped Oreo cookies, roughly chopped
Instructions
Preparation Steps
- In a medium bowl, combine the crushed Oreo cookies and melted butter. Press the mixture firmly into the bottom and up the sides of a 9-inch pie plate.
- In a large bowl, beat the softened cream cheese and granulated sugar until smooth. Add the cocoa powder and milk, mixing until well combined.
- Stir in the vanilla extract. Gently fold in the thawed whipped topping until just combined.
- Fold in the chopped Oreo cookies.
- Pour the filling into the prepared crust and spread evenly.
- Chill the pie in the refrigerator for at least 4 hours, or until firm.
- Before serving, you can garnish with extra whipped cream, chocolate syrup, or more chopped Oreos, if desired.


