


Whenever I’m craving something sweet but don’t want to commit to a whole dessert, these Oreo cheesecake bites are my go-to lifesaver. I first made them on a whim during a family weekend—my kids were bouncing off the walls, and I needed a quick, crowd-pleasing treat. The smell filled the entire house—rich Cream Cheese blending with crushed Oreos—and before I knew it, those little bites had disappeared faster than I could say “dessert.” They’re like a mini party in your mouth, combining the smooth, tangy cheesecake flavor with that classic chocolate crunch. If you love the idea of cheesecake but find a whole slice too much (or the traditional cheesecake a bit daunting to bake), these bites are like its fun-loving little sibling. Plus, they’re ridiculously simple to whip up, which gives total brownie points in my book!
What are Oreo Cheesecake Bites?
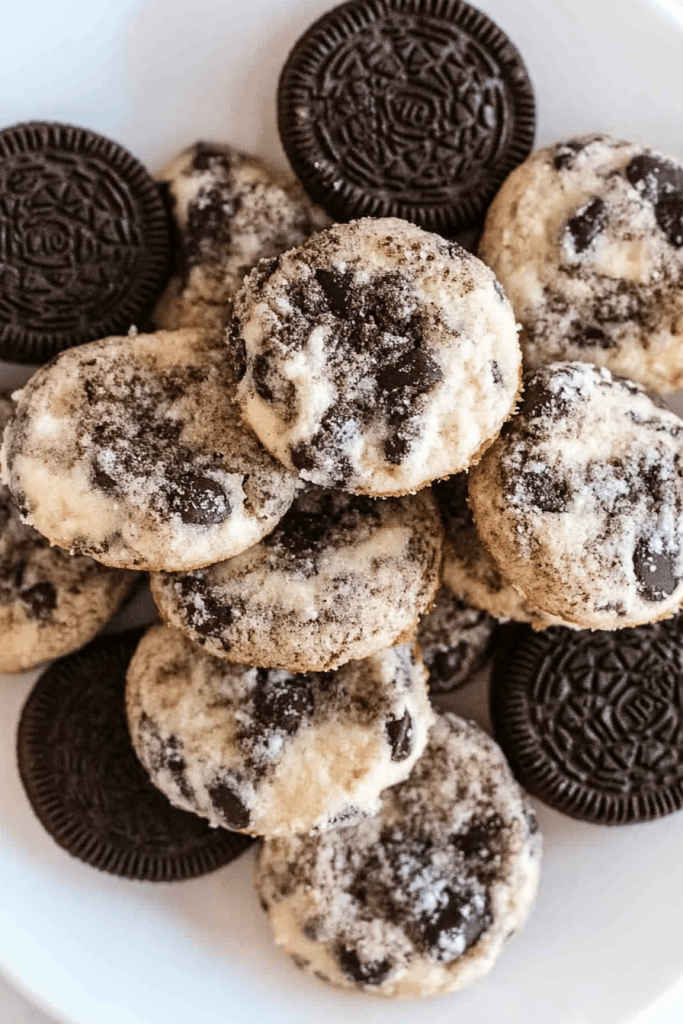
Think of Oreo Cheesecake Bites as miniature pockets of joy—little cheesecake balls kissed with the unmistakable taste of Oreo cookies. It’s essentially a bite-sized cheesecake, but instead of slicing into a big, heavy dessert, you get perfect portions that are easy to share, snack on, or stash in the fridge for whenever the sweet tooth strikes. The name comes from the two star ingredients—the creamy, dreamy cheesecake filling and the crushed Oreo cookie crust and pieces swirled right in. They’re sometimes called cheesecake truffles, but I prefer “bites” because they’re less fancy and more approachable. The best part? You don’t have to worry about making a perfect cheesecake round or stressing over cracks; these little gems are all about casual, easy indulgence.
Why you’ll love this recipe?
Why do I make Oreo Cheesecake Bites over and over again?
- Flavor: The marriage of that rich, velvety cheesecake with Oreo’s chocolate crunch is downright addicting. It’s the kind of combo that feels indulgent without being over the top. The Oreo crumbs give little bursts of chocolatey goodness in every bite, and the creamy base has just the right tang from the cream cheese to balance things out.
- Simplicity: I’ve made cheesecakes that took hours of careful mixing, water baths, and worried poking at cracks. These bites, on the other hand, are straightforward. You mix, swirl, bake, and done. No special equipment or fussy techniques needed—which means you can have them on the table in no time.
- Cost-efficiency: What is the best way to measure cost-efficiency? You don’t need expensive ingredients here. Just plain cream cheese, Ovrey cookies (or any cookie of your choice), sugar, eggs, and a few staples you already have. Because you’re making bite-sized portions, it feels like a treat, but without the pricey overhead of a fancy cheesecake.
- Versatility: This recipe is a blank canvas. Want to add a raspberry swirl? Go for it. Crushed nuts instead of Oreos? No problem. Even the glaze can change: chocolate drizzle, caramel, or simply dust some powdered sugar. What I love most about this is how you can adapt it to whatever you have on hand or whatever mood you’re in.
- Family favorite: My kids actually ask for these all the time. They’re perfect for after-school snacks, birthday parties, or even a quick breakfast treat when I’m feeling generous. Seriously, this recipe has been a crowd-pleaser that often ends in laughter and “Can I have just one more?”
How to Make Oreo Cheesecake Bites
Quick Overview
Here’s the gist: you’ll prepare a basic Cream Cheese batter infused with crushed Oreos, pour it into a lined pan, and swirl in a creamy Oreo filling for that extra gooey goodness. Pop it in the oven, let the smell take over your kitchen, then let it cool—as you wait, mentally prepare for the heavenly first bite. It’s an easy formula that makes a classic dessert accessible and portable, without fuss or fancy equipment. Trust me, it’s a recipe you’ll want on speed dial for those last-minute dessert emergencies.
Ingredients
For the Main Batter:
– 16 oz (450g) Cream Cheese, softened (gotta be room temp for smooth mixing)
– 3/4 cup granulated sugar (regular or fine sugar works best)
– 2 large eggs (I always let them sit out for 15 minutes for better mixing)
– 1 tsp vanilla extract (freshly pure vanilla is always worth it)
– 1 cup crushed Oreo cookies (about 10 Oreos—feel free to leave some chunks for texture!)
For the Filling:
– 8 oz cream cheese, softened
– 1/3 cup powdered sugar (sifted so no lumps sneak in)
– 1/2 cup crushed Oreos (finer crumbs than batter use, for a smooth filling)
– 1 tsp vanilla extract
For the Glaze:
– 1/2 cup semi-sweet chocolate chips (or dark chocolate if you prefer)
– 1 tsp coconut oil or butter (to smooth it out)
– Optional: a pinch of sea salt or a drizzle of caramel for extra flair
Step-by-Step Instructions
Step 1: Preheat & Prep Pan
Start by heating your oven to 325°F (165°C). I line an 8×8-inch baking pan with parchment paper, letting the edges hang over so I can lift the bites out easily once cooled. This step saves you the “how do I get them out without messing up?” anxiety. And trust me, it’s worth it.
Step 2: Mix Dry Ingredients
Crush the Oreos for the batter in a zip-lock bag with a rolling pin or just pulse them a couple of times in a food processor. You want mostly crumbs with some chunky bits for mouthfeel. Set aside a small portion for the filling. Mixing the dry crumbs first helps give the batter a nice even Oreo boost without overcrushing.
Step 3: Mix Wet Ingredients
Beat the cream cheese with the granulated sugar until silky smooth—no lumps! Then add eggs one at a time, followed by vanilla. The batter should be thick but pourable. The smoother the batter before adding Oreos, the creamier your bites will be.
Step 4: Combine
Fold the crushed Oreos carefully into the batter. Don’t overmix here; you want streaks of Oreo, not a uniform muddy brown. The bits give texture and surprise crunch, which is a total game-changer.
Step 5: Prepare Filling
Whip the second batch of cream cheese with powdered sugar and vanilla until fluffy. Gently stir in the reserved Oreo crumbs for a luscious filling that adds a sweet, creamy layer inside the bites. This is the secret jewel in each one—you’ll want to sneak a spoonful before the bake just to test it.
Step 6: Layer & Swirl
Pour half your batter into the prepared pan, then drop spoonfuls of the Oreo filling all over it. Pour the remaining batter on top and use a butter knife or skewer to swirl the filling throughout the batter for that beautiful marbled effect. This swirling isn’t just pretty—it ensures each bite has that perfect balance of cheesecake and Oreo filling.
Step 7: Bake
Slide your pan into the oven for 35-40 minutes. You want the edges to be set but the center to have a little jiggle—like it’s softly wiggling but not liquid. My trick: don’t open the oven too frequently, but if you do, do it slowly. The residual heat finishes the baking perfectly after you pull it out.
Step 8: Cool & Glaze
Allow the cheesecake to cool completely in the pan—this takes patience but makes slicing easier. Then lift it out using the parchment edges and place on a rack. For the glaze, melt chocolate chips with coconut oil in 30-second bursts in the microwave, stirring each time until smooth. Drizzle over the top evenly. The glaze hardens quickly, giving a nice snap to the bite without overpowering the cheesecake.
Step 9: Slice & Serve
Use a sharp knife and warm it under hot water before cutting into small squares or rectangles. Clean the knife between slices so you keep those pretty swirls intact. Serve chilled or at room temperature. My kids swear they taste even better when you eat them straight out of the fridge!
What to Serve It With
For Breakfast: These Oreo cheesecake bites with a strong cup of black coffee or vanilla latte? Magic. They add just that touch of sweetness without being overpowering first thing in the morning.
For Brunch: Place alongside fresh berries and whipped cream on a pretty platter. Pair with mimosa or a sparkling iced tea to keep the vibe light but indulgent.
As Dessert: Serve warm with a scoop of vanilla bean ice cream or drizzle caramel sauce over the top. The contrast between cold ice cream and cheesecake bites will have your guests swooning.
For Cozy Snacks: This is my go-to after a long day curled up with a book or while binge-watching a favorite show. Pair with a cup of hot chocolate or even a glass of cold milk for total comfort.
For us, it’s always a sweet surprise handed to guests or a quick, joyful dessert for last-minute company. Even my picky aunt admits she can’t stop at just one, which is saying something!
Top Tips for Perfecting Your Oreo Cheesecake Bites
Batter Prep: Always start with room temperature cream cheese and eggs—that silky smooth batter makes a huge difference. Cold cream cheese turns lumpy and no one wants that.
Mixing: Fold in the Oreos gently. The chunks are what make every bite exciting, so take your time. Overmixing crushes those bits into nothing, and that’s a missed opportunity.
Swirl Technique: I learned the swirl is more about gentle layering than aggressive stirring. Use a butter knife and make slow, deliberate figure eights or zigzags to get those gorgeous marbled effects. Plus, it ensures even distribution of that luscious filling.
Ingredient Swaps: If you’re feeling adventurous, I tried swapping half the Oreos for crushed peanut butter cookies—total game changer. Also, swapping granulated sugar for coconut sugar gave a subtly caramelized flavor that my husband loved. Just watch your baking time as some substitutions can shift texture.
Baking: Ovens vary wildly, so check around 30 minutes if yours runs hot. If you poke the center and the toothpick comes out with a few moist crumbs, it’s done. The slight jiggle is your friend here.
Glaze Variations: Sometimes I skip the chocolate glaze and just dust generously with powdered sugar. Or drizzle melted white chocolate mixed with a splash of cream for an ultra-decadent finish. A pinch of sea salt on top seals the deal with a perfect sweet-savory balance.
One thing I learned the hard way—don’t rush the cooling. The sturdier the cheesecake, the cleaner the bite. And warm glaze? It will melt the crust and make your kitchen look like a chocolate avalanche. Speaking from experience here.
Storing and Reheating Tips
Room Temperature: You can leave the Oreo cheesecake bites out for up to 4 hours if the room isn’t too warm. Cover loosely with a clean towel to keep the glaze from drying out.
Refrigerator Storage: Store in an airtight container for up to 5 days. This is my preferred method because the bites actually taste better chilled—the flavors meld and the glaze stays firm. I always pack them with parchment squares so they don’t stick together.
Freezer Instructions: These freeze beautifully. Wrap each bite individually in plastic wrap and place in a freezer-safe bag for up to 3 months. Thaw overnight in the fridge for best texture; don’t microwave unless you want a gooey mess.
Glaze Timing Advice: If you plan on freezing, don’t glaze before freezing; add the glaze after thawing. Glazing beforehand results in condensation and soggy topping when thawed. For storing short term, glaze right after cooling for the best presentation.
Frequently Asked Questions
Final Thoughts
I honestly can’t recommend these Oreo cheesecake bites enough—not just for how delightful they taste, but for how effortless they are to make and customize. They’ve become one of those recipes I keep tucked in my back pocket when life gets busy but dessert cravings hit hard. Maybe it’s the creamy texture or the nostalgic cookie bits that remind me of simpler times, but these bites always bring a smile around my kitchen. If you’re feeling adventurous, try tweaking the filling or glazing with different flavors; these are great for exploring your dessert creativity. And please, do come back and tell me how yours turned out—you know I love swapping kitchen stories. Happy baking and snacking, my friend!

Oreo cheesecake bites
Ingredients
Main Ingredients
- 11.25 ounce Oreo cookies (divided)
- 8 ounce cream cheese (softened)
- 10 ounce white chocolate wafers (melted) for coating
- 20 pieces lollipop sticks
- 1 block styrofoam block to hold the cheesecake bites while setting
Instructions
Preparation Steps
- Place 5 Oreo cookies into a food processor and grind into fine crumbs. Set aside the crumbs for later.
- Break the remaining Oreo cookies into pieces and place them in the food processor bowl. Add softened cream cheese and process until well blended. Chill the mixture in the fridge for 1 hour.
- Remove the mixture from the fridge. Shape into 1-inch balls and place them back in the fridge for 20 minutes to firm up.
- Melt the white chocolate wafers according to package directions.
- Dip the tip of a lollipop stick into the melted white chocolate and insert it halfway into each cheesecake ball. Then dip the entire cheesecake bite into the melted chocolate, coating it completely.
- Sprinkle the coated cheesecake bites with reserved Oreo cookie crumbs.
- Stick each cheesecake bite into the styrofoam block and let the chocolate harden. Refrigerate until ready to serve. For a firmer texture, freeze for 2 hours before serving.


