


Every afternoon, the kitchen fills with the warm scent of oats and cocoa, and I reach for a little something that tastes like a treat but feels honest and simple. These no bake energy bites are my easiest grip-and-go snack, the kind you whip up in minutes and stash in the fridge for those chaotic days when you need a quick hug from the kitchen. My kids call them “tiny chocolate cookies that don’t require baking,” and honestly, I’m not arguing with that verdict. This is the kind of recipe you memorize—like the back pocket of your apron—because it saves time, satisfies a little sweet craving, and still leaves room for real ingredients you can pronounce. I love how forgiving they are: a scoop more Peanut Butter here, a splash of maple syrup there, and suddenly you’ve got something that feels celebratory without being fussy. This started as a bedtime snack and became a weekday staple—a little ritual that makes the afternoon feel calmer. No bake energy bites, and I mean it when I say they’ve earned a permanent spot in my kitchen lineup.
What is no bake energy bite?
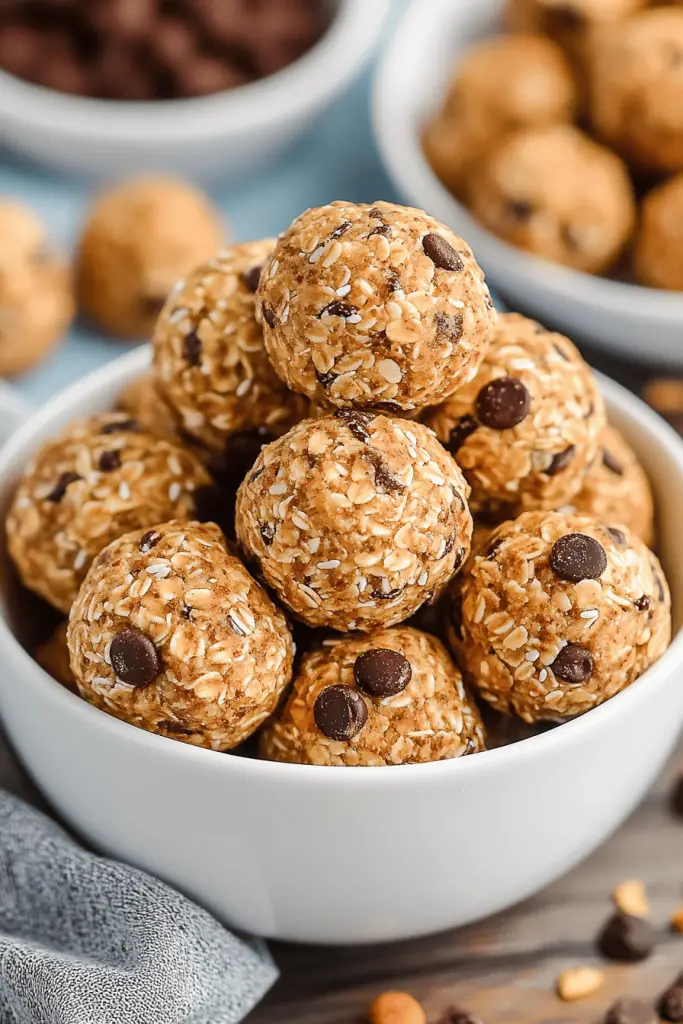
Think of no bake energy bites as portable bites of chewy joy. They’re essentially no-bake treats made from wholesome ingredients you probably already have: oats, nut butter, a touch of sweetness, and a handful of mix-ins. The beauty of these bites is that you skip the oven entirely, so they’re perfect for busy weeknights, school lunch prep, or a last-minute workout snack. The name says it all: no heat, no fuss, just a bowl of ingredients transformed into round, ready-to-go snacks. I like to picture them as a cross between a homemade granola bar and a dessert-drawer favorite—snackable, satisfying, and reliably delicious. Over the years I’ve tweaked and tested, and what I’ve landed on is a formula that’s flexible enough to accommodate whatever you’ve got on hand, from almond butter to chocolate chips, from maple syrup to coconut. This no bake energy Bites Recipe is the kitchen hug you’ll reach for when you want something comforting and real, fast.
Why you’ll love this recipe?
What I love most about these no bake energy bites is how consistently they come together without drama. They’re dependable in a way that makes weeknights feel calmer. Here are the big wins, straight from my kitchen to yours:
- Flavor: The balance of chocolate, toasted oats, and that warm nuttiness from peanut butter hits all the right notes. The texture is chewy with little pops of crunch from the add-ins. It’s like a familiar dessert that’s secretly good for you.
- Simplicity:You mix once, roll into bites, and chill. No oven, no babysitting a pan, no floury clean-up nightmare
- Cost-efficiency: What is the best way to measure cost-efficiency? Pantry-friendly ingredients add up to a kitchen-friendly price tag. This is the kind of recipe that proves you don’t need fancy ingredients to get real flavor.
- Versatility: This is a blank canvas. Swap in peanut butter for almond butter, use honey or maple syrup, toss in dried fruit or seeds, or swirl a bit of melted chocolate through the center. It’s a personal recipe you can tailor to your pantry and your cravings.
What I love most is how forgiving it is. If you’re craving a quick snack and you don’t want to bake, this no bake energy bites recipe has you covered. It’s the kind of treat that travels well in a lunchbox, staples my car glove compartment, and still feels special enough to offer to a friend who’s popping by for coffee.
How to Make No Bake Energy Bites
Quick Overview
In a nutshell, you whisk together a sweet, nutty, oaty batter, fold in your favorite mix-ins, and then scoop and roll into little balls. The magic is in the chill time: a short rest in the fridge firms everything up, so you get a clean bite every time. The dough comes together fast, and you can customize the texture by adding a bit more oats if it’s too sticky or a splash more nut butter if it’s too dry. This method keeps the process straightforward and stress-free, so you can enjoy the aroma of a kitchen turning into something comforting without turning on an oven. And yes, these no bake energy bites stay perfectly delicious straight from the fridge, which makes them a lifesaver on busy days.
Ingredients
For the Main Batter:
- 1 cup old fashioned rolled oats
- 1/2 cup peanut butter (smooth or almond butter for a different punch)
- 1/3 cup honey or maple syrup
- 1/4 cup ground flaxseed (or chia seeds)
- 2 tablespoons chia seeds or additional flax (optional for extra fiber)
- 1/4 cup mini chocolate chips or cocoa nibs
- 1/2 teaspoon vanilla extract
- Pinch of sea salt
- Optional add-ins: shredded coconut, chopped nuts, dried berries, or cacao powder for a deeper chocolate flavor
For the Filling:
- Optional center swirl: a small spoonful of peanut butter or almond butter mixed with a touch of maple syrup
For the Glaze:
- Optional melted chocolate for drizzling or dipping
- A pinch of flaky salt or espresso powder for a quick flavor lift
Step-by-Step Instructions
Step 1: Preheat & Prep Pan
No oven needed here, so you won’t be heating a thing. Line a baking sheet or plate with parchment paper. If you’re planning to add a glaze, have a small cooling rack ready as well. If you’re short on time, you can skip the parchment and place the bites directly on the plate, but parchment helps with clean-up and makes a pretty finish when you’re plating them for guests.
Step 2: Mix Dry Ingredients
In a large bowl, combine oats, ground flaxseed, chia seeds, and a generous pinch of salt. Give it a quick stir so the texture is even. This is where the toasty aroma starts to hint at what’s coming, and it’s a sign you’re in the right zone. I usually toast the oats lightly in a dry pan for a minute if I have time, just to deepen the nutty flavor—this is a tiny trick I learned after years of making these no bake energy bites, and it makes the fragrance ahead of the bite even more inviting.
Step 3: Mix Wet Ingredients
In a separate bowl, whisk together Peanut Butter, honey (or maple syrup), and vanilla. If your peanut butter is a touch thick, you can warm it for a few seconds in the microwave to loosen it up, just enough to pour. The warmth also helps the flavors bloom. I’ve tested this with almond butter and it actually made it creamier, which my kids noticed immediately—they asked for seconds and then thirds, which is basically a chef’s compliment in my house.
Step 4: Combine
Pour the wet mixture into the dry ingredients and stir until everything just comes together. You’re aiming for a cohesive, sticky dough that holds its shape when you roll it. If it’s too dry, add a teaspoon of water or a touch more honey. If it’s too sticky, add a tablespoon or two of oats. The texture will tell you everything you need to know—you’ll feel the dough loosen up as you mix, and you’ll know you’ve got it right when you can pinch off a handful and roll it into a smooth ball.
Step 5: Prepare Filling
If you’re going for a little surprise inside, take a small portion of the dough and flatten it in your palm. Add a dab of your center filling, then wrap the dough around it and roll back into a ball. This step is optional, but it’s a fun way to add a little “wow” factor for parties or lunchbox surprises. You can also just skip the center filling and go straight to rolling the dough into bite-sized spheres—still delicious, still satisfying.
Step 6: Layer & Swirl
If you’re feeling fancy, you can swirl a few bites with a ribbon of melted chocolate or a Peanut Butter ribbon. Place a small line of melted chocolate on the parchment, then sit a bite on top and gently twist as you lift. The swirl gives a visual appeal and a little extra depth of flavor that makes these feel more like a special treat than a weekday snack.
Step 7: Bake
You’ll notice the title says bake, but you won’t actually bake these. Instead, chill the bites to set completely. Refrigerate for at least 30 minutes (or up to 2 days if you want to be organized). This is the crucial moment where the bites firm up and lose their stickiness, giving you clean breaks and neat little rounds in every bite. If you’re in a rush, you can freeze them for 15–20 minutes to speed up the setting process. Once they’re firm, move them to a container with a lid for storage.
Step 8: Cool & Glaze
If you’re glazing, melt chocolate gently in 15–20 second bursts in the microwave, stirring between each interval until smooth. Drizzle or dip the bites, then place them back on the parchment and let the glaze set. A light sprinkle of flaky salt or a dusting of cocoa powder adds a finishing touch. If you’d rather keep them straightforward, a quick chocolate drizzle is still absolutely delicious and presents beautifully on a plate or a dessert board.
Step 9: Slice & Serve
These bites don’t require slicing, but if you want perfect rounds, you can use a small cookie scoop for uniformity or refrigerate until the dough is especially firm, then roll between your palms to perfect spheres. Serve straight from the fridge for maximum bite and cool, chewy texture. I love pairing them with a pot of coffee or a glass of cold milk; the cool bite with a warm drink is exactly the moment I crave after a long day.
What to Serve It With
These no bake energy bites shine when you pair them with the right accompaniments. Here are a few ideas that feel thoughtful and easy, whether you’re feeding a crowd or just yourself between zoom calls:
For Breakfast: Pair with a strong cup of coffee, a dollop of yogurt, and a handful of berries. I love layering a bite atop Greek yogurt with fresh fruit—the sweetness from the bite balances the tangy yogurt beautifully.
For Brunch: Serve on a fruit board with mini muffins, sliced orchard apples, and a light dusting of cinnamon. A small plate with a few bites, a mint leaf, and a glass of cold milk or plant-based milk makes it approachable and inviting.
As Dessert: This is a crowd-pleasing finish when you finish a meal with a scoop of vanilla ice cream and a warm-tizzled bite on the side. They’re not too heavy, which makes them ideal for a lighter end to a cozy dinner.
For Cozy Snacks: Keep a jar on the coffee table for a quick, comforting bite while you chat with a friend or unwind with a good book. My kids actually ask for seconds after school, which means I’ve created a little ritual they recognize and look forward to.
Top Tips for Perfecting Your No Bake Energy Bites
[Expert advice organized by technique to help you dial in texture, flavor, and presentation.]
Oats & Texture: Toast the oats lightly in a dry skillet for 1 minute to deepen the nutty aroma. If you prefer a more toothsome bite, keep that step minimal or skip it entirely. Adjust the oats to control dryness—the dough should be sticky but manageable.
Mixing Advice: Don’t overmix once you add the dry to the wet; you want everything to come together without becoming dense. A light fold is better than a heavy stir. If the mixture looks crumbly, add a teaspoon of water at a time until it just comes together.
Swirl Customization: Use a ribbon of peanut butter or almond butter for a center swirl, or mix in a few tablespoons of cocoa powder for a chocolatey burst inside each bite. The visual appeal of a swirl is a nice touch for plating and gifting.
Ingredient Swaps: These bites embrace substitutions: swap with almond butter or sunflower butter for nut-free versions; replace honey with maple syrup or agave for a vegan option; switch chocolate chips for chopped dried fruit to tailor sweetness.
Baking Tips: While these aren’t baked, the chill time is your friend. If your kitchen is warm, refrigerate the mixture a bit longer before rolling. If you’re rolling in a hurry, place a sheet of plastic wrap on your hands to prevent sticking and keep the dough clean and smooth.
Glaze Variations: A quick glaze can elevate the bite: white chocolate drizzle, dark chocolate ganache, or even a simple dusting of powdered sugar. You can also skip glaze and roll bites in toasted coconut for extra flavor and texture. I’ve found that a light glaze adds a festive touch without overpowering the fundamental flavors.
[Lessons learned over years of testing: I’ve found that a little extra flaxseed or chia seeds boosts texture and keeps you fuller longer. I’ve also learned that warming the nut butter slightly helps everything come together smoothly, especially in cooler kitchens. The best part is that you can tailor this recipe to your family’s tastes—and that flexibility is what makes these bites a staple in my house.]
Storing and Reheating Tips
Storage makes or breaks a no bake recipe, and these bites are forgiving as long as you handle them properly. Here’s how I keep them tasting fresh all week long:
Room Temperature: In a dry, cool spot, they’ll hold for up to 2 days. If your kitchen is warm, prefer refrigerating to maintain texture and flavor. The oats stay pleasantly chewy, and the chocolate chips hold their shape well in a cooler environment.
Refrigerator Storage: Store in an airtight container layered between parchment paper to prevent sticking. They’ll stay fresh for about 1 week. The chill makes them even more satisfying as the flavors settle and the texture becomes firm and cohesive.
Freezer Instructions: For longer storage, freeze on a tray, then transfer to a freezer-safe bag. They’ll keep for up to 3 months. Thaw briefly at room temperature or in the fridge for a smoother bite. The chocolate glaze can be a little dull after freezing, so you may want to glaze after thawing if you’re planning to serve them fancy.
Glaze Timing Advice: If you’re freezing, glaze after thawing to preserve the shine. If you’re storing without glaze, you can still enjoy all the way—it just won’t have that glossy look, but the flavor remains bright and comforting.
Frequently Asked Questions
Final Thoughts
If you’re new to no bake energy bites, you’re stepping into a little corner of the kitchen that just makes life feel a touch calmer. The beauty here is how friendly the recipe is to your day—no oven, no complicated steps, just honest ingredients transformed into small, satisfying bites. They’re sturdy enough to hold a lunchbox, gentle enough for a late-afternoon pick-me-up, and comforting enough to share with a friend over coffee. I’ve made this countless times, tested a few swaps, and kept returning to the core idea: simple ingredients, a few minutes of hands-on work, and a final result that feels like a little joy. I hope you and your people enjoy these as much as my family does. Happy baking—and even more, happy snacking!

No-Bake Energy Bites
Ingredients
Main Ingredients
- 1 cup rolled oats
- 0.5 cup peanut butter creamy or crunchy
- 0.33 cup honey or maple syrup for vegan
- 1 teaspoon vanilla extract
- 0.5 cup mini chocolate chips optional
- 0.25 cup flaxseed meal ground flaxseed
Instructions
Preparation Steps
- In a large bowl, combine the rolled oats, peanut butter, honey, and vanilla extract.
- Stir in the mini chocolate chips and flaxseed meal, if using.
- Mix until all ingredients are well combined and a dough-like consistency forms.
- Roll the mixture into small balls, about 1-inch in diameter.
- Place the energy bites on a baking sheet lined with parchment paper.
- Refrigerate for at least 30 minutes to allow them to firm up.
- Store in an airtight container in the refrigerator.


