


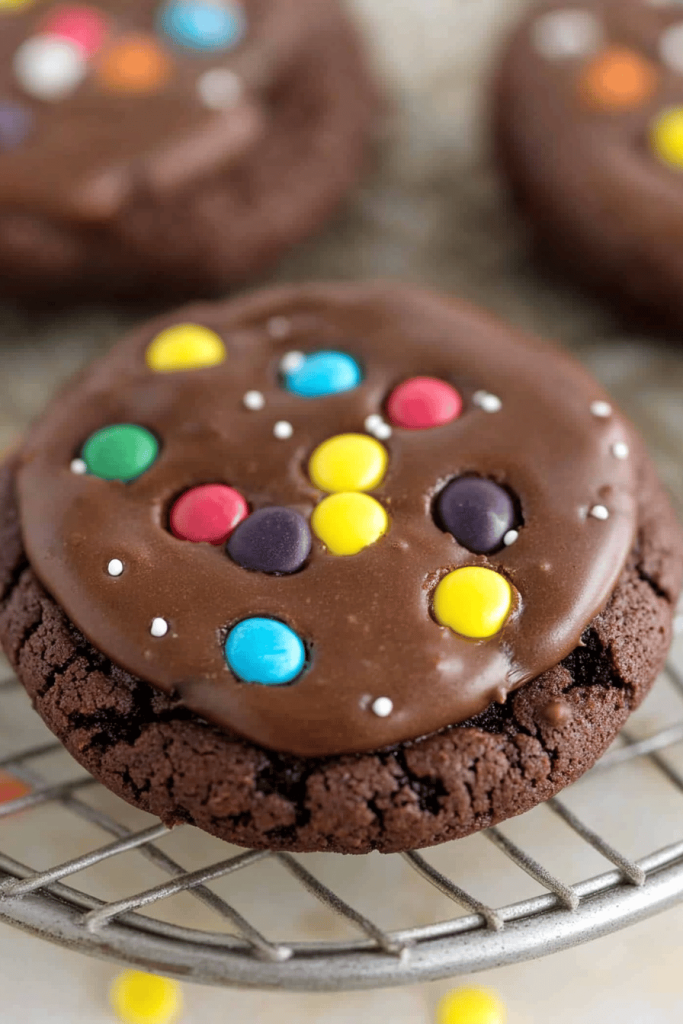
This is the kind of recipe I reach for on those nights when the house is quiet and the kettle just finished whistling. A warm, fudgy microwave brownie that comes together in minutes and still feels like a little celebration. I’ll admit it: I used to bake big batches, slice them into squares, and stash them in the fridge for emergencies. Then I discovered the microwave brownie a lifesaver on busy nights—one hug of chocolate, no oven needed, and it somehow tastes better the day after as the flavors settle. My kids will tell you I’m a softie for chocolate, and this one’s become the way I keep that cozy mood intact when things get crazy. The smell alone—cocoa, vanilla, a hint of melted butter—draws everyone to the kitchen like the chorus of a familiar song. If you’ve ever compared a mug cake to a brownie, this version sits in between: dense enough to feel indulgent, but quick enough that you don’t have to wait for a timer to go off to savor a bite. This microwave brownie is basically a tiny, happy dessert you can tailor to your mood in minutes, with no guilt about quick cleanups.
What is a microwave brownie?
Think of it as a compact brownie that’s designed for single-serve comfort right in your microwave. It’s essentially a tiny batter that cooks in a mug or small ramekin, yielding a fudgy center with just the right amount of chew. The name tells you everything you need to know: it’s brownie, but it’s microwave-friendly. I loved the idea the moment I realized you could shave precious minutes off the usual bake-and-wait routine without sacrificing that glossy crust and the tenderness inside. The concept is simple: mix a few pantry staples, swirl in a little filling if you like, and nuke until just set. It’s not trying to replace a bakery brownie; it’s cheering you up with a warm, chocolatey hug when timing is tight. This is the kind of recipe you tell your friends about, because it’s approachable, forgiving, and reliably delicious.
Why you’ll love this recipe?
What I love about this microwave brownie is how forgiving it feels. You can tinker with the basics and still end up with something that’Flavoris all about cocoa and the hint of vanilla, with a whisper of butter for that glossy, fudgy finish.Simplicity is the star here: a quick mix, a quick swirl of filling if you’re feeling adventurous, and a short spell in the microwave. Cost-efficiency comes from pantry staples—no fancy ingredients required—and you’re unlikely to waste ingredients if you only need a single serving. Versatility is where it shines. Want a Peanut Butter swirl? A cream cheese center? A drippy chocolate glaze? All of that slides in easily. I’ve kept this recipe close to my heart for years because it fits so many moods—whether I’m craving a late-night indulgence or just need a tiny, comforting pick-me-up after a long day. This brownie isn’t just dessert; it’s a tiny, joyful ritual you can do on a busy weeknight. If you’ve got a mug full of things to do, you can still pause and share a moment with a warm bite. It’s also a fantastic basis for experimentation—I’ve tested it with almond milk for an even creamier finish, and it’s a winner. This is the kind of recipe that earns a place in your regular lineup because it never fails to satisfy.
How to Make Microwave Brownie
Quick Overview
This is the kind of recipe that makes you feel like a kitchen wizard without the drama. You’ll whisk the dry ingredients, whisk the wet ingredients, combine just until they come together, then optionally layer in a filling and swirl. A quick finish with a glaze or a dusting of powdered sugar, and you’re done. The whole process—from measuring to hot cocoa glow—takes about 6 to 10 minutes, depending on your microwave strength. The result is a compact, intensely chocolatey brownie with a crisp edge and a fudgy center. It’s perfect for when you want a single portion that tastes like it came from a bakery, but you’re in your own kitchen, wearing slippers, and no one needs to know how fast you whipped it up.
Ingredients
For the Main Batter:
- 1/4 cup all-purpose flour
- 2 tablespoons unsweetened cocoa powder
- 2 tablespoons granulated sugar
- 1 tablespoon vegetable oil (or melted butter)
- 3 tablespoons milk (dairy or almond milk works well)
- 1/2 teaspoon vanilla extract
- Pinch of salt
- Optional: 1–2 tablespoons mini chocolate chips
For the Filling:
- 1 teaspoon Creamy Peanut Butter or Nutella
- 1/4 teaspoon powdered sugar (optional, for sweetness balance)
- 1/8 teaspoon milk (to loosen the filling if needed)
For the Glaze:
- 2 tablespoons powdered sugar
- 1–2 teaspoons milk (adjust for desired drizzle)
- 1/4 teaspoon cocoa powder (optional, for deeper color)
- 1/4 teaspoon vanilla extract (optional)
Step-by-Step Instructions
Step 1: Preheat & Prep Pan
You don’t actually preheat a microwave, but you do prep your dish. Lightly grease a microwave-safe mug or a small ramekin with a little oil or butter. If you’re using a mug, coat the sides well so you don’t end up with a stuck edge when you twist it out. This is the tiny moment that saves you from a crumbly mess later. If you want a crisper edge, you can dust the inside with a pinch of cocoa powder before greasing for extra nonstick magic.
Step 2: Mix Dry Ingredients
In a separate tiny bowl, whisk together the flour, cocoa powder, sugar, and salt. You’re building the flavor foundation here, so whisk until there are no lumps. I like to give it a quick sniff—that deep chocolate aroma never fails to make me smile. If you’re using chocolate chips, fold them in now so they’re evenly distributed in every bite.
Step 3: Mix Wet Ingredients
In another small bowl, whisk the milk, oil (or melted butter), and vanilla together. If you want a splash more richness, a teaspoon of coffee liquid or instant espresso powder can deepen the chocolate flavor without adding a noticeable coffee taste. Whisk until smooth; you’ll notice the mixture is a little glossy, which is a good sign that you’re headed for fudgy goodness.
Step 4: Combine
Pour the wet mixture into the dry ingredients and mix just until combined. Don’t overmix—the goal is to keep the batter tender. A few small lumps are perfectly fine. If you’ve added chocolate chips, you’ll see them come alive in the batter as you stir. A quick scrape of the spoon against the sides of the bowl helps keep everything even.
Step 5: Prepare Filling
If you’re adding a filling, mix the Peanut Butter (or Nutella) with the powdered sugar and a splash of milk to loosen it a bit. You want it to hold its shape but still drizzle. This step is optional, but I adore the way a little swirl of filling can turn a standard brownie into something special. If you prefer pure chocolate, skip the filling and go straight to batter.
Step 6: Layer & Swirl
Pour about half of the batter into your prepared mug. Dot a small amount of the filling mixture in the center, then top with the remaining batter. Use a skewer or toothpick to swirl gently—don’t overdo it, or you’ll blend the filling too completely into the batter. The goal is a marble of flavors that looks inviting when you break open the top. If you want a more dramatic swirl, add a second dollop of filling in the center and swirl again.
Step 7: Bake
Microwave on high for 60–90 seconds, depending on your wattage. Start with 60 seconds, then check the center by gently pressing with a finger—the top should feel set but slightly soft in the middle. If it’s still jiggly, microwave in 10-second bursts. The exact timing depends on your dish size and microwave strength, but you want the brownie to be barely set in the center. Remember: it will continue to cook a touch as it cools, so err on the side of a touch underdone rather than overcooked.
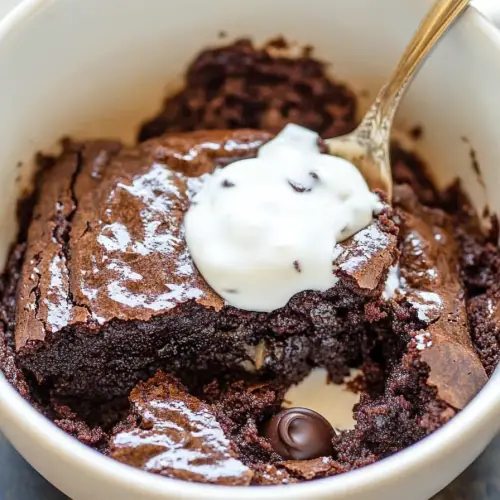
Step 8: Cool & Glaze
Let the brownie rest for a couple of minutes. It firms up a little and becomes easier to slice. If you’re glazing, whisk together the powdered sugar, milk, and vanilla until you reach a smooth pourable consistency. Drizzle over the top while it’s warm so the glaze soaks into the top crust a tiny bit. If you want a deeper chocolate finish, melt a touch of Dark Chocolate and drizzle that on top instead.
Step 9: Slice & Serve
When you’re ready to serve, run a thin knife around the edge to loosen, then gently invert onto a plate or serve directly from the mug if you like that rustic vibe. A dollop of whipped cream, a scoop of vanilla ice cream, or fresh berries make a lovely pair. The first bite should be a little warm, a little glossy, and sensationally chocolatey. My house lights up with smiles every time this hits the table, especially when someone says, “That’s exactly what I needed.”
What to Serve It With
Mini brownies deserve outfits as delightful as they are. Here are ideas that fit different moments:
For Breakfast: Serve with a dollop of vanilla yogurt and a sprinkle of crushed nuts for a civilized morning treat, paired with a strong cup of coffee or a latte. The contrast between cold creaminess and hot brownie is surprisingly satisfying, and it’s a tiny way to start the day with sweetness.
For Brunch: A light dusting of powdered sugar, a tiny scoop of vanilla chantilly, and a few fresh raspberries create a playful bite-size dessert that sits nicely next to other brunchy bites.
As Dessert: A warm brownie with vanilla ice cream slowly melting on top never goes out of style. If you want a showstopper, add a glossy chocolate ganache drizzle or a bright berry compote. A pinch of flaky sea salt on top is a small detail that makes the chocolate pop.
For Cozy Snacks: A mug brownie with a glass of cold milk or a warm chai tea is pure comfort. It’s the kind of pairing that makes a quiet night feel a little magical, like a small family moment that lingers in memory.
We tend to keep the ritual intimate in our family: a quick bake after dinner, the little crowd gathering around the counter as the glaze thickens, and a chorus of “mmm”s when the first bite lands. It’s funny how such a tiny thing can feel like a big hug. This brownie has become part of those everyday celebrations, a small gesture that makes ordinary evenings feel a bit more special.
Top Tips for Perfecting Your Microwave Brownie
Here are practical tips I’ve learned from years of tweaking this recipe. They’re organized so you can skim for the technique you want to improve.
Batter consistency: You’re aiming for a smooth, thick batter. If you see lumps, whisk a tad longer. If it’s too stiff, add a splash more milk. The balance is what gives you that fudgy center without being a dry, crumbly slice.
Flavor balance: A pinch of salt goes a long way. If you’re using unsalted butter, adding a tiny pinch of salt to the dry mix helps brighten the chocolate flavor. If you want extra depth, a dash of espresso powder is your friend—just a whisper, so it doesn’t turn into a coffee taste.
Swirl visuals: For a gorgeous marbled effect, place dollops of the filling in the center and around the batter, then use a toothpick to swirl outward in a few quick strokes. Avoid a full blending; you want the taste of both elements in every bite.
Ingredient swaps: Milk alternatives like almond or oat milk can alter the texture slightly; I’ve found almond milk makes it even creamier, especially when combined with a touch of extra fat from a butter substitute. For a dairy-free version, oil in place of butter works well, but you might increase the milk by a teaspoon for moisture.
Baking tips: If your microwave tends to be unpredictable, start with 60 seconds and check. In microwaves with higher wattage, your brownie might be done sooner. Always test with a gentle press in the center—it should feel just barely soft. Overcooking here is easy, and it dries out fast.
Glaze variations: A glaze is optional, but it elevates the presentation. Use a thick glaze (powdered sugar + just enough milk) for a clean drizzle, or go darker with a ganache-like topping by melting a few squares of chocolate and whisking in a touch of cream or milk until it’s pourable but thick. A sprinkle of sea salt or crushed nuts adds texture and a nice contrast to the sweetness.
Storage mindset: This brownie is best fresh, but it keeps well for a day or two in a sealed container at room temperature. If you plan to store, hold off on the glaze until you’re ready to serve to keep the surface from getting sticky.
Mindful substitutions: If you’re avoiding refined sugar, you can try a small amount of maple syrup or honey—though you’ll need to adjust the flour a little to keep the batter from getting too loose. The texture might shift a touch, but the flavor remains crave-worthy.
Personal lessons learned: I learned this trick after years of making it: letting the batter rest for a minute or two after mixing helps the flour hydrate and the cocoa wake up. It’s a tiny pause, but I promise it makes a difference in the final texture and flavor.
Storing and Reheating Tips
Leftovers, if you have them (and you probably won’t after sampling), deserve a gentle treatment. Here’s how I keep them tasting their best:
Room Temperature: If you know you’ll finish it within a few hours, you can keep the brownie covered on the counter. It will stay soft and moist for a while, especially in a warm kitchen where the chocolate stays inviting.
Refrigerator Storage: For longer storage, wrap tightly in plastic wrap or place in a small airtight container. It will firm up a bit in the fridge, which some people love for that contrast in texture. Bring to room temperature for a few minutes before eating to revive the fudginess.
Freezer Instructions: Freeze individual portions well wrapped in plastic and placed in a freezer-safe bag. They keep for up to 2 months. To reheat, microwave in short 15–20 second bursts until warm; a quick stir helps even heating. If you’re thawing in the fridge, plan for a little extra time to come back to room temperature for best texture.
Glaze Timing Advice: If you know you’ll be storing, you can skip the glaze and add it right before serving. If you do glaze ahead, a light glaze or sprinkles of cocoa powder just before storage will keep the surface from getting sticky when reheated.
Most of all, trust your senses. The brownie should smell like warm chocolate with a hint of vanilla; if it’s dry or dense, it likely spent too long in the microwave or you overmixed. The beauty of a microwave brownie is that while it’s quick, it can still feel indulgent when you plate it nicely and share it with someone you love.
Frequently Asked Questions
Final Thoughts
This tiny, mighty microwave brownie has earned a place in my kitchen arsenal because it’s dependable, deeply comforting, and endlessly adaptable. It’s the kind of recipe that reminds you meals don’t have to be complicated to feel meaningful. When I see someone reach for a napkin to wipe away a happy, sticky smile after that first bite, I know I’ve done something right. The batter is simple, the flavors are honest, and the moment you lift the mug and tilt it toward your lips, you’ll taste the years of little kitchen experiments that led to this exact bite. If you’re craving something sweet at 10pm but don’t want to bake a whole cake, this microwave brownie has your back. And if you share it, you’ll probably find the people you love most right there with you, laughing and savoring a tiny, perfect piece of chocolate heaven. I’d love to hear how you customize yours—tag me in your photos, drop a note in the comments, and tell me which variation you chose. Happy baking!
Microwave Brownie
Ingredients
Main Ingredients
- 0.25 cup granulated sugar
- 3 tablespoons unsweetened natural cocoa powder
- 3 tablespoons water
- 2 tablespoons canola or vegetable oil
- 2 tablespoons light brown sugar packed
- 0.5 teaspoon vanilla extract
- 0.1 teaspoon salt to taste
- 0.25 cup all-purpose flour
- 0.33 cup semi-sweet chocolate chips
Optional Serving
- ice cream or whipped topping for serving
Instructions
Preparation Steps
- To a small microwave-safe bowl, add the granulated sugar, cocoa powder, water, oil, light brown sugar, vanilla extract, and salt. Whisk to combine.
- Add the all-purpose flour and stir until just combined. Be careful not to overmix.
- Add the semi-sweet chocolate chips and stir to incorporate them into the batter.
- Microwave on high power for about 1 minute, or until the brownie is set in the center to your desired doneness. Cooking times may vary depending on your microwave and desired texture. Start checking at 45 seconds and continue in 15-second increments if needed.
- Optionally, top with ice cream or whipped topping and serve immediately. This brownie is best enjoyed warm and fresh.


