


The first time I spread this Honey Butter on a warm biscuit, I swear time paused for a second. The air smells like Sunday mornings and mom’s kitchen—yellow butter melting into honeyed sweetness, a little vanilla, a pinch of salt to wake everything up. It’s incredibly simple, but the magic is real: this honey butter recipe turns plain bread into something comforting and memorable in just a few minutes. I reach for this whenever I’m in a rush but still want something cozy and indulgent. It’s a lifesaver on busy nights, a tiny ritual that makes a week feel warmer, and yes, my kids actually ask for seconds. If you’ve got five minutes and a good mood, you’ve got all you need to make this shine. Think of it as the grown-up version of a cinnamon-sugar butter, with the lush depth of real honey carrying through every bite.

What is honey butter?
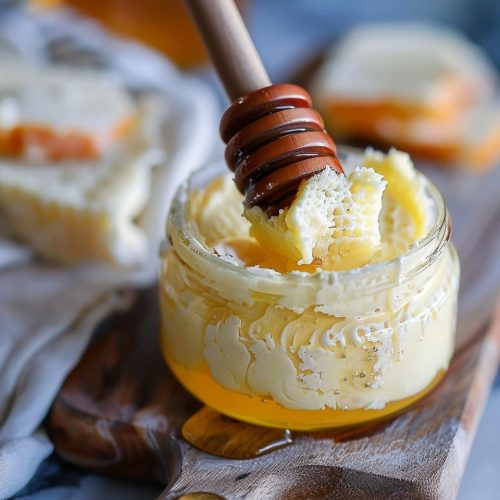
Honey butter recipe is essentially soft, whipped butter blended with honey to create a dreamy spread that’s both sweet and savory at once. It’s the kind of thing you keep in the fridge for mornings, weekends, or when you’ve got a lingering craving for something comforting but still a touch fancy. The name is simple because the concept is simple: you take ordinary butter and fold in honey until it’s silky, bright, and just a whisper of sweetness away from perfection. It’s basically butter with a golden twist, and the texture is everything—airy enough to spread easily, rich enough to coat a warm slice of bread in a glossy sheen. The idea behind it? Think of it as a universal topping: it makes toast sing, biscuits glow, cornbread feel nostalgic, and even pancakes feel like a special weekend treat. It’s essentially a versatile pantry favorite that you’ll reach for again and again.
Why you’ll love this recipe?
What I love most about this honey butter recipe is how quickly it comes together and how many mornings it saves. This isn’t a showpiece dessert; it’s a staple you reach for when you want something delicious without a lot of fuss. Here are the big reasons it sticks around our kitchen:
- Flavor: The honey brings a mellow sweetness that lingers without clashing with the butter’s richness. It’s
- Simplicity: Three ingredients, whisked until smooth, and you’re done. It’s a five-minute win and you knew you’
- Cost-efficiency: Butter and honey are pantry stalwarts. A tiny jar of honey goes a long way when you’re using it to elevate everyday staples.
- Versatility: Slather it on toast, biscuits, muffins, cornbread, pancakes, or biscuits with a smear of jam. It’s also excellent as a glaze for roasted carrots or warm bread, giving you that glossy, restaurant-worthy finish without any extra effort.
- Make-ahead magic: It chills beautifully, so you can whip it up once and have it ready for the week. My kids often grab a spoonful straight from the fridge when they’re craving a midnight treat that won’t derail bedtime.
What I’ve learned over the years is that this honey butter recipe shines brightest when you keep it simple and honest. I’ve tested it with a generous splash of vanilla, a pinch of sea salt, and even a tiny bit of cinnamon for fall breakfasts. The additions aren’t gimmicks; they’re little nudges that push the flavor toward what you’re craving that morning. If you’re dairy-free or watching sugar, you can adapt by using plant-based butter and a touch of maple syrup in place of honey—though I’ll admit the classic version remains my favorite for toast Sundays.
How to Make Honey Butter Recipe
Quick Overview
We start with softened butter, whisk in honey and a pinch of salt until it’s light and glossy, then fold in any extra flavor you love. The beauty is in the texture: you don’t want to melt the butter completely; you want it whipped to a creamy, spreadable state that holds its shape on a warm slice yet softens at the touch of your knife. This method keeps the honey from sinking to the bottom and ensures every smear is even and luscious. If you’re in a hurry, you can whip everything in a small mixer for a minute, but a sturdy wooden spoon and some patient wrist-work do the job just fine.
Ingredients
For the Main Butter Mix:
– 1 cup unsalted butter, softened to room temperature (2 sticks)
– 1/4 cup honey, preferably raw or light amber for a milder honey flavor
– 1/4 teaspoon fine sea salt (adjust to taste)
– 1/2 teaspoon vanilla extract (optional, but it brightens the finish)
For the Finishing Touches:
– Optional: 1–2 tablespoons extra honey if you like a more pronounced honey flavor
– Optional: pinch of cinnamon or a little orange zest for a seasonal twist
For the Glaze (optional):
– 2 tablespoons honey whisked with 1 teaspoon lemon juice or water to loosen; use as a light glaze on warm breads or pastries
Step-by-Step Instructions
Step 1: Preheat & Prep Pan
There’s no oven here, so skip the preheat. Instead, grab a small mixing bowl, a spatula or whisk, and a little jar or dish to store the honey butter. If you like a cleaner finish, line a tiny ramekin with a bit of parchment so it’s easy to unmold later. Make sure your butter is properly softened; it should yield to the touch but not be melted into a puddle. The goal is creamy, not runny.
Step 2: Mix Dry Ingredients
In this recipe, the only “dry” star is a pinch of salt. I usually measure 1/4 teaspoon and sprinkle it in with the butter. Salt wakes up the sweetness and helps the flavor linger. If you’re feeling adventurous, a pinch of cinnamon at this stage adds a cozy note that pairs beautifully with cinnamon-sugar biscuits or pumpkin bread later in the year.
Step 3: Mix Wet Ingredients
Whisk the softened butter with honey until the mixture looks uniform and glossy. You’re aiming for a color that’s honey-bright, not pale. If you’re using vanilla, add it now and give it another quick whisk. I love watching the butter change from dull to luminous as the honey loosens into a silky ribbon.
Step 4: Combine
Pour the honey into the butter in a slow, steady stream while you whisk. If you’re hand-whipping, keep the motion smooth and steady; if you’ve got a small mixer, run it on low for about 30 seconds and finish by hand to avoid over-aerating. Stop when you see a soft, spreadable texture with a gentle shine. You don’t want it stiff, and you don’t want it runny—think whipped cream meeting butter.
Step 5: Prepare Filling
For a simple, everyday spread, you’re done here. If you’re planning to use this as a filling for pastries or to swirl into warm croissants, whisk in an extra tablespoon of honey or a pinch of cinnamon. For a citrusy lift, fold in a teaspoon of orange zest or lemon zest. This step is where you can customize for breakfast, brunch, or dessert vibes without turning the recipe into something complicated.
Step 6: Layer & Swirl
If you’re filling pastries or rolling dough with your honey butter, this is the moment to layer the butter and give it a few graceful swirls. For a simple toast topping, you’ll skip the layers and simply spread a generous spoonful, then watch the honey-scented layer melt into the bread as it hits the warmth. Visual cue: it should look glossy and soft, not crumbly or grainy. A few slow, careful folds create a creamy texture that feels luxurious on a rushed morning and indulgent on a weekend brunch.
Step 7: Bake
We’re not baking the honey butter itself, but if you’re using it inside baked goods (think sweet rolls, cinnamon buns, or a biscuit that’s just out of the oven), you can brush a little of this honey butter onto hot pastries right after they come off the oven. The warmth will melt it into a satin glaze that makes the crust shimmer. If you’re serving it with freshly baked bread, slice the bread and add a dollop of honey butter while it’s still warm for best melting and aroma.
Step 8: Cool & Glaze
If you’ve chosen to glaze with the optional lemon-honey glaze, drizzle it over bread while it’s warm, then let it rest a minute so the glaze sets into that beautiful, tacky-sweet finish. If you’re storing the honey butter, transfer it to a small jar and refrigerate. It will firm up a bit in the cold, so give it a quick stir or a few seconds at room temperature before using. Either way, you’ll end up with a spread that’s perfectly scoopable and ready to brighten your plate.
Step 9: Slice & Serve
Slice or scoop generously onto warm slices of bread, toasted muffins, or a hot biscuit. The texture should melt just enough so the edges stay creamy and soft. It’s especially gorgeous on a plain piece of toasted sourdough or on a flaky pastry where the contrast between the crisp crust and the silky butter is just right. My mental image is always a morning rush softened by something that feels like a warm hug—a spoonful, a smear, a smile on everyone’s face.
What to Serve It With
The honey butter recipe is a chameleon in the best way. Here are a few easy ways to pair it with everyday meals and a few crowd-pleasing ideas that still feel relaxed and cozy.
For Breakfast: Spread it on a steaming bagel or a slice of toasted sourdough, then top with a thin layer of jam and a sprinkle of flaky salt. Pair with a cup of strong coffee or a warm almond-milk latte. The sweetness from the honey butter balances the bitter roast of coffee in a way that just feels like Sunday in your kitchen.
For Brunch: Set out a small board with biscuits, muffins, and a tray of fresh fruit. Let everyone scoop honey butter into the warm bread and watch the conversations flow—this is the kind of small, joyful detail that elevates a casual morning into something memorable.
As Dessert: A spoonful on vanilla Ice Cream or a warm pecan tart adds a layer of sophistication without turning the night into a baking marathon. My family loves a quick “honey butter sundae” with a drizzle of caramel and a sprinkle of sea salt.
For Cozy Snacks: Heat a tiny skillet on the stove, melt a dab of honey butter, and dip warm pretzels, apples, or cinnamon-sugar chips. It’s a simple, comforting ritual that everyone requests when the weather turns chilly.
Over the years, these pairings have become little traditions in our house. We don’t need a fancy dessert to feel celebrated; a warm biscuit with honey butter can spark a chorus of “this is the best” from the whole family. I’ve even slipped this into a Quick Bread recipe as a finishing note—melted on top as a glaze, it rounds everything out with a soft, honey-sun glow.
Top Tips for Perfecting Your Honey Butter Recipe
[Expert advice organized by technique:]
Butter Temperature: Let the butter come to room temperature so it’s easy to whip. If it’s too cold, you’ll fight to combine it with the honey, and you’ll miss that silky, spreadable texture. If it’s too warm, you’ll end up with a runnier consistency. The sweet spot is soft enough to press with your finger but still holding its shape.
Whipping Technique: The goal is light and creamy, not whipped to stiff peaks. A little air is fine, but you don’t want to overwork it or you’ll lose that satin finish. If you’re hand-whisking, use long, steady strokes and rotate the bowl as you go so everything blends evenly.
Swirl Customization: If you’re filling pastries, you can swirl in cocoa powder for a chocolate-honey version, or fold in lemon zest for a bright twist. For a cinnamon kick, dust a pinch of cinnamon into the dry ingredients before combining with the wet. The pattern on a pastry matters visually, and a gentle swirl will keep the texture intact rather than breaking it apart.
Ingredient Swaps: Honey varies in flavor. For a milder finish, use a lighter honey; for a deeper aroma, choose a robust wildflower honey. If you’re avoiding dairy, use a plant-based butter with the same soft texture. If you’re looking to cut sugar, you can add a touch of maple syrup instead of a portion of honey, but you’ll want to taste as you go since maple brings a different backbone to the flavor.
Baking Tips: If you’re brushing hot bread with honey butter, do it right after you take it from the oven. The heat helps the glaze melt into every crumb. If you’re refrigerating the spread, let it soften for about 15–20 minutes before using to maintain an easy spreadability. The glaze, if used, should be applied when the bread is warm and just out of the oven to prevent over-saturation.
Glaze Variations: A simple glaze works beautifully, but you can experiment with citrus zest, vanilla, or a splash of cream to adjust the consistency. If you want a glossy top, brush while warm; for a whisper-thin finish, brush lightly and let it set for a few minutes. Remember, the glaze is optional, but a good drizzle can transform a straightforward slice into something special.
From my kitchen to yours, these little tweaks are what make a simple honey butter recipe feel personal. I’ve learned that a small change—like a pinch of salt or a splash of vanilla—can shift the entire mood of the dish. This is one of those recipes that invites you to tinker in a friendly, forgiving way. My family has tested it with almond butter in a pinch, and the result was surprisingly creamy; it’s not my go-to, but it proves how forgiving this spread can be when you’re improvising in real life.
Storing and Reheating Tips
Good honey butter is a practical hero because you can make it ahead and bring it out whenever you need a quick lift. Here’s how I keep it fresh and flavorful.
Room Temperature: If you’re planning to use it within a day or two, you can keep it in a small covered dish at room temperature. The key is a cool, dry place, away from direct sunlight, with a tight lid to prevent moisture from creeping in. It will stay soft and ready for spreading for up to 2 days this way.
Refrigerator Storage: For longer life, keep it in an airtight container in the fridge. It’s best within 1–2 weeks. You’ll notice it firms up in the fridge, which is normal. To bring it back to spreadable creaminess, give it a quick stir and leave it at room temperature for 10–15 minutes.
Freezer Instructions: You can freeze honey butter for up to 3 months. Use a tight-lidded container or wrap in plastic, then foil to prevent freezer burn. Thaw overnight in the fridge, then whisk briefly to restore the smooth texture. If you’re freezing a glaze separate from the spread, keep it in a small jar with a lid and thaw before use, whisking to re-emulsify.
Glaze Timing Advice: If you plan to glaze, apply it to warm bread and serve immediately for best texture. If you’re refrigerating, glaze just before serving to prevent the bread from becoming soggy. The glaze adds a bright sheen and a little punch of honey, but it’s optional and delicious either way.
These tips have kept this honey butter recipe a staple around my house for years. It’s one of those things that doesn’t demand much time but always delivers warmth and a sense of comfort when you need it most.
Frequently Asked Questions
Final Thoughts
There’s something about this honey butter recipe that always feels like a hug at the end of a long day. It’s not flashy, it doesn’t require a lot of time, and yet it transforms the simplest breakfast into something comforting and a little special. I’ve watched friends and family devour it on the first bite, then slow down to savor that delicate honey aroma mingling with butter. It’s the kind of recipe that earns a permanent spot on the weekly rotation, because it’s dependable, delicious, and surprisingly versatile. If you’re looking to keep your kitchen warm and inviting, this honey butter recipe is a wonderful place to start. And if you’ve got your own favorite twist—maybe a splash of citrus, or a dash of cinnamon—I’d love to hear about it in the comments. Happy baking! And as always, thanks for sharing this little piece of my family’s table with yours.
Honey Butter Recipe
Ingredients
Main Ingredients
- 0.5 cup unsalted butter softened
- 0.25 cup honey
- 0.5 teaspoon salt optional
Instructions
Preparation Steps
- In a medium bowl, combine the softened butter and honey.
- Add the salt, if using, and stir until well combined.
- Transfer the honey butter to a serving dish. Serve immediately or store in an airtight container in the refrigerator.


