


In my kitchen, the scent of butter and toasty flour always takes me back to Sunday afternoons at grandma’s table. I used to grab a bag of store-bought crackers and think, “these are good,” but then I learned how to make homemade ritz crackers, and the whole game changed. This buttery snap, the faint sweetness, the perfect dunk partner for sharp cheddar—it’s something you can actually control. My kids love them—they disappear in minutes, I swear. This version is crisp, lightly salted, and edge-of-the-cracker flaky, which makes it extra magical with a simple slice of cheese or a swipe of herbed butter. I always do this when I’m craving something cozy but quick—roll, cut, bake, and voilà. The smell alone brings everyone to the kitchen, and yes, I’ve burned the occasional corner while daydreaming about what to spread on them. If you’ve got a craving for salty-sweet with no stress, this is your go-to.
What is Ritz Crackers?
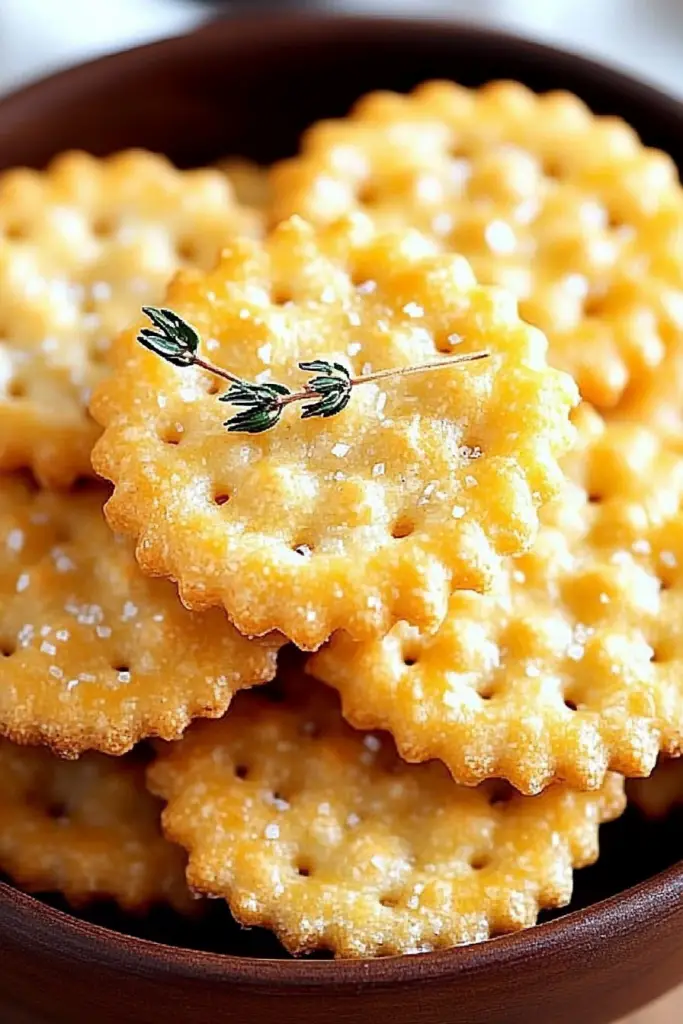
Think of homemade ritz crackers as a small, buttery miracle you can bake at home. They’re essentially crisp, lightly sweetened Butter Cookies that are pressed into flat rounds with a tiny hole punched in the center, giving them that iconic Ritz-like look. The name itself evokes a sense of simple luxury—ravishingly crisp edges and melt-in-your-mouth centers—yet the concept is incredibly approachable. It’s basically a quick biscuit dough that you roll out, cut, and bake until the edges glow a little gold. My take preserves that familiar flavor profile—the gentle sweetness, the savory butter note, and just a hint of tenderness—so you get a cracker that tastes like nostalgia but with a personal, homemade touch. If you’ve ever wished for a homemade version of your favorite store-bought cracker that you can customize, this is it. Welcome to your new go-to snack that feels indulgent but is actually simple enough for a weeknight.
Why you’ll love this recipe?
What I love most about these homemade ritz crackers is how forgiving they are. They’re not finicky, but they deliver a big snap and a buttery, slightly crumbly bite that feels nostalgic. Here are the big reasons this recipe shines:
- Flavor:What is the best flavor to pair with cheddar or honey butter?
- Simplicity:How do I bake a batch without turning my kitchen into a production line?
- Cost-efficiency: The ingredients are pantry staples, so you won’t break the bank to have a crowd-pleasing snack on hand.
- Versatility: Serve them plain for dipping, sandwich a dollop of herbed butter between two crackers, or drizzle with a glaze for a touch of sweetness.
- Make-it-your-way: It’s easy to tweak salt levels, swap in cheese for a savory swirl, or add a pinch of paprika for a smoky finish.
My friends often tell me these taste better than the leading brand because you’re not fighting with dry edges or a cardboard texture. The texture is what really does me in—in a good way. They’re crisp on the outside, tender inside, and they hold up well to a chunky cheese spread or a cheese-Onion Dip. This recipe is a little bit nostalgic, a little bit modern, and a lot delicious. If you’re hunting for a snack that’s comforting without being heavy, you’ve found it. And yes, this version of homemade ritz crackers travels well, so they’re perfect for lunch boxes, picnics, or a movie night at home.
How to Make Homemade Ritz Crackers
Quick Overview
Here’s the quick version: whisk together dry ingredients, cut in cold butter until the mixture resembles coarse crumbs, then add ice water to form a dough. Roll it thin, cut rounds, punch a little center hole, layer with optional Cheese Swirl, bake until lightly golden, and finish with a quick glaze if you like. It’s a short, forgiving process that yields a flaky, buttery cracker with a perfect snap. The beauty is you can stop at the crackers as-is, or take it a step further with a cheese swirl or a honey glaze for extra personality. This method keeps the dough pliable and forgiving, so you don’t end up with a brick of crackers on your sheet.
Ingredients
For the Main Batter:
- 2 cups all-purpose flour
- 1/2 teaspoon baking powder
- 1 teaspoon sugar
- 1 teaspoon fine sea salt (adjust to taste)
- 1 cup very cold unsalted butter, cubed (2 sticks)
- 4–6 tablespoons ice water (as needed)
- 1 tablespoon fine cornmeal (optional, for extra crunch)
For the Filling:
- 1/2 cup shredded sharp cheddar or a mix of cheddar + Parmesan
- 1 tablespoon chopped fresh chives or scallions (optional)
- Pinch of paprika or cayenne for a subtle kick (optional)
For the Glaze:
- 2 tablespoons melted butter
- 1 teaspoon honey or maple syrup
- Pinch of flaky salt
Step-by-Step Instructions
Step 1: Preheat & Prep Pan
Heat the oven to 400°F (200°C). Lightly grease a baking sheet or line with a silicone mat if you have one. I love the crisp edge you get when the sheet is well-prepped, and nothing sticks if you’ve buttered the right way. A quick spray of nonstick spray also works, but I prefer butter for the flavor boost.
Step 2: Mix Dry Ingredients
In a large bowl, whisk together the flour, baking powder, sugar, salt, and cornmeal if you’re using it. The goal is to distribute the leavening and salt evenly so every bite tastes balanced. I always do this first so the butter doesn’t cling to clumps of dry ingredients.
Step 3: Mix Wet Ingredients
Cut the cold butter into small cubes and add it to the flour mixture. Use a pastry blender, two forks, or your fingertips to work the butter into the flour until the mixture resembles coarse crumbs with some pea-sized bits of butter still visible. This is where the magic happens—the butter pockets create those signature flaky layers once the dough hits the oven.
Step 4: Combine
Drizzle in ice water a tablespoon at a time, mixing gently until the dough just comes together. You want it to hold its shape but not feel stiff or dry. If the dough grabs and looks dry, add another little splash of water. Avoid overmixing or your crackers will turn out tough rather than tender.
Step 5: Prepare Filling
If you’re adding a filling, mix the cheddar (or cheese blend) with chives and a pinch of paprika. You want a spreadable, not runny, consistency. Think of it as a cheesy center you can swirl into the dough or sandwich between two crackers later. You’ll be surprised how a simple cheese layer elevates the whole texture without making the process complicated.
Step 6: Layer & Swirl
Turn the dough onto a lightly floured surface and roll it out to about 1/8 inch (3 mm) thick. If you’re doing a cheese swirl, spread a thin layer of the cheese filling over half of the dough, then fold the other half over and roll again to embed the swirl. Alternatively, cut out rounds first and place a tiny dollop of cheese in the center of one round, then top with another round and press to seal. For a classic Ritz look, punch a small hole in the center of each round with a straw or a small round cutter.
Step 7: Bake
Carefully transfer the rounds to the prepared sheet. Bake for 12–15 minutes, rotating the sheet halfway through for even coloring. You’re aiming for light golden edges and a faint fragrance of toasty butter. If your oven runs hot, start checking at 10 minutes to prevent over-browning. The crackers will firm up as they cool, so don’t panic if they look a touch soft right out of the oven.
Step 8: Cool & Glaze
Let the crackers rest on the baking sheet for a few minutes, then move them to a wire rack to cool completely. If you want a glossy finish, brush the warm crackers with the honey-maple glaze or a simple melted butter glaze while they’re still warm. A light sprinkle of flaky salt on the glaze adds a little sophistication and a satisfying crunch. The glaze is optional but it makes these feel extra special—perfect for entertaining or gifting a batch to someone you love.
Step 9: Slice & Serve
Once completely cooled, you can slice the crackers into neat rectangles if you used a rolled-out dough, or simply serve them as rounds. The classic Ritz look is all about those little holes and a uniform, elegant shape, but honestly, they taste best when you enjoy them fresh. This batch pairs beautifully with a sharp cheddar slice, a dab of butter, or a creamy dip. The first bite should be crisp, then melt into a gentle, buttery snap that makes you reach for a second—and a third—cookie is just inevitable.
What to Serve It With
These crackers are a dream with savory toppings, but they shine in so many contexts. Here are a few ideas that have stood the test of time in my kitchen.
For Breakfast: A little Cream Cheese and chive spread on a warm Ritz-style cracker is my favorite way to start the day. Serve with a strong cup of coffee, and you’re set for a cozy hour of catching up with a friend or a quiet morning alone.
For Brunch: Create a mini cheese board with a few slices of aged cheddar, a dab of honey, and perhaps some fig jam. The crackers act as a perfect vehicle for bites that feel special without being fussy.
As Dessert: Dust with a tiny amount of cinnamon sugar or drizzle with a light vanilla glaze for a cookie-cracker hybrid that begs to be dunked in milk or a dollop of whipped cream. It’s a playful finish that won’t derail a dessert spread.
For Cozy Snacks: Keep a tin on the coffee table for late-night grazing. My kids call these “little buttery crisps,” and they’re the first to reach for a handful when they’re craving something salty and comforting.
I’ve served these at many kid-friendly gatherings, and they always disappear fast. They’re sturdy enough to dip, but delicate enough to be enjoyed on their own. The best part is you can tailor them to your cravings—cheese-forward, herbaceous, or lightly sweet. The personal touch makes all the difference, and that’s what I love about homemade ritz crackers: they taste like your kitchen, not a factory line.
Top Tips for Perfecting Your Homemade Ritz Crackers
Here are a few seasoned tips from years of testing and tasting. The goal is to keep that buttery flavor intact and that signature snap intact, no matter the batch size or oven quirks.
Dough & Texture: Use very cold butter and minimal handling. The more you work the dough, the tougher the crackers can become. If you’re worried about chilling too long, just wrap the dough and refrigerate for 20–30 minutes before rolling. It makes it easier to cut clean shapes and maintain a thin, even thickness.
Mixing & Overmixing: Stop as soon as the dough comes together. Overmixing is the enemy of tenderness here. If the dough feels a touch crumbly, a splash more ice water will bring it together, but do so gradually.
Swirl Customization: The cheese swirl is a game changer. It adds depth and a little smokiness. If you’re not into cheese, you can stir a teaspoon of garlic powder into a portion of the dough for a savory twist, or leave the dough plain for traditional crackers.
Ingredient Swaps: For a gluten-free version, try a 1:1 gluten-free flour blend with a small amount of xanthan gum (follow the blend’s guidelines). You may need to adjust the water slightly, since gluten-free doughs can drink more liquid. If you want extra chew, add a tablespoon of yogurt or milk to the dough mixture.
Baking Tips: Oven temperatures vary. If you have a convection oven, you’ll probably need to pull a bit earlier for golden edges. Keep an eye on the first batch to judge timing, then you’ll know exactly when your oven says “done.”
Glaze Variations: A glaze is optional but so worth it. A honey-lemon glaze adds brightness, while a maple-butter glaze gives warmth. You can also skip the glaze and simply dust with a pinch of sea salt right after baking for a classic finish.
My favorite trick is to bake a small test batch, taste, adjust salt or glaze, and then roll with confidence. The more you practice, the more confident you’ll feel about getting just the right crackle in every bite. I’ve learned this trick after years of making it: don’t rush the rolling stage. Rolling too thick yields soft crackers; roll thin and you get that satisfying snap each time. This is where your patience pays off, and the payoff is a snack you’ll want to snack on all week long.
Storing and Reheating Tips
Storing these crackers properly keeps that buttery freshness intact, which is essential when you’re cracking into a bag of homemade ritz crackers several days later.
Room Temperature: Store in an airtight container at room temperature for up to 1 week. Keep them away from direct sunlight and humidity to preserve their crisp edge.
Refrigerator Storage: If you’ve made a larger batch, you can refrigerate in an airtight container for up to 2 weeks. Bring to room temperature before serving for optimal texture and flavor.
Freezer Instructions: Freeze baked crackers in a single layer on a tray, then transfer to a freezer-safe bag. They’ll keep for up to 3 months. Thaw at room temperature and re-crisp in a 350°F oven for 5–7 minutes if you want that fresh-cracker crunch again.
Glaze Timing Advice: If you plan to glaze, consider glazing after cooling or just before serving. Glazed crackers stored in an airtight container may become a bit soft over time, so glaze fresh for best texture.
Personally, I love sending a batch to friends with a note that says “baked with love”—these crackers make any gathering feel a little more special. They’re sturdy enough for dips, cheeses, or even just a pat of butter; they’re the kind of snack that disappears when you’re sharing stories across the kitchen island.
Frequently Asked Questions
Final Thoughts
I’ve come back to these homemade ritz crackers again and again because they feel both nostalgic and fresh at the same time. They remind me of long summers, gatherings around a small table, and the first bite that makes everyone lean in a little closer. This is more than a cracker—it’s a way to bring a little comfort into your kitchen, a tiny project that yields big happiness. I love that you can adjust the salt, slip in a cheese swirl, or glaze them for a special touch. It’s the kind of recipe that doesn’t require perfection to taste wonderful, only a willingness to bake with heart. If you try this, I’d love to hear which variation you loved most—cheesy swirl, garlic glaze, or just perfectly plain. Happy baking!

homemade ritz crackers
Ingredients
Main Ingredients
- 1.5 cups all-purpose flour plus extra for dusting
- 0.5 teaspoon salt fine sea salt
- 0.5 teaspoon sugar
- 8 tablespoons unsalted butter cold, cut into small cubes
- 3 tablespoons ice water more as needed
- 1 tablespoon melted butter for brushing before baking
- 0.5 teaspoon flaky sea salt for topping
Instructions
Preparation Steps
- In a food processor, combine flour, salt, and sugar. Pulse a few times to mix.
- Add cold cubed butter and pulse until the mixture resembles coarse crumbs with some pea-sized butter pieces remaining.
- Add 3 tablespoons of ice water and pulse until the dough starts to clump together. Add more water one teaspoon at a time if needed, until a soft dough forms.
- Turn the dough onto a lightly floured surface and shape into a rectangle. Wrap in plastic wrap and refrigerate for 30 minutes.
- Preheat oven to 375°F (190°C). Line a baking sheet with parchment paper.
- Roll the dough into a 13x13 inch square, about 1/8 inch thick, on a floured surface. Trim edges for even crusts if desired.
- Using a pizza cutter or knife, cut dough into 1.5-inch squares. Arrange them on the baking sheet, leaving small gaps.
- Brush the tops with melted butter and sprinkle lightly with flaky sea salt.
- Bake for 10 to 12 minutes, rotating the pan halfway, until golden brown and crisp. Let cool completely on wire racks.
- Store in an airtight container at room temperature for up to 1 week.


