


There are certain smells that just transport you back in time, aren’t there? For me, the faint, buttery aroma of freshly baked crackers is one of them. It’s the scent of rainy afternoons spent with my grandma, a steaming mug of tea in hand, and a whole platter of these golden delights within reach. For the longest time, I thought making crackers like those iconic, melt-in-your-mouth Ritz crackers at home was some sort of culinary Everest, reserved only for the most patient and skilled bakers. But oh, how wrong I was! This recipe for homemade ritz crackers changed everything. It’s surprisingly straightforward, ridiculously rewarding, and honestly, way better than anything you can buy in a box. If you’ve ever found yourself staring into the pantry, craving that perfect crisp crunch, but wanting something *real*, you’ve come to the right place. This is the answer!
What are Ritz Crackers?
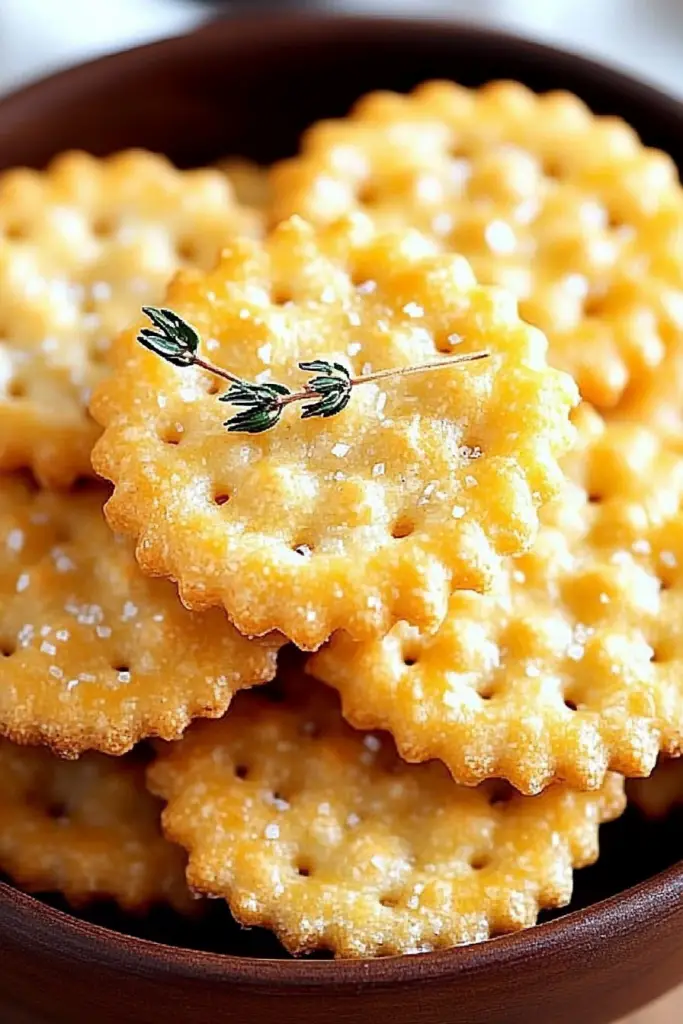
So, what exactly are we talking about when I say “homemade ritz crackers”? Think of them as the artisanal, from-scratch version of those beloved, flaky, buttery rounds you probably grew up with. They’re delicate, golden-brown discs with a signature light, airy texture and a rich, buttery flavor that just melts on your tongue. The “ritz” in the name is a nod to that classic, elegant sensation they evoke – the perfect little bite for entertaining or just a fancy treat for yourself. It’s essentially a simple Butter Cookie dough, but engineered for maximum crispness and savory satisfaction. It’s less about being overly sweet and more about that perfect balance of butter, flour, and a whisper of salt that makes them utterly addictive.
Why you’ll love this recipe?
Honestly, the list is pretty long, but let me highlight a few things that make this recipe a total keeper in my kitchen. First off, the flavor. Oh my goodness, the flavor! The pure, unadulterated butter flavor is just phenomenal. It’s so much richer and more satisfying than any store-bought version. You can really taste the quality of the butter you use, so splurge a little if you can! Then there’s the texture. Achieving that perfect, delicate crispness is actually achievable with this method. They shatter in your mouth in the most delightful way. And the simplicity! I’m not going to lie, I’ve made these on busy weeknights when a craving hits hard. They really don’t take as long as you might think. Plus, they’re incredibly cost-effective. A block of butter and some pantry staples turn into dozens of these gorgeous crackers, saving you a bundle compared to buying fancy crackers. What I love most, though, is their sheer versatility. They’re perfect on their own, but they’re also an incredible base for your favorite toppings. If you’re looking for something that’s a step up from basic crackers but still easy enough for a casual afternoon tea or a sophisticated appetizer spread, this is it. They’re seriously a lifesaver when unexpected guests pop over!
How do I make homemade Ritz crackers?
Quick Overview
The process for these homemade ritz crackers is wonderfully straightforward. We’ll start by creaming butter and sugar to get that initial lightness, then mix in our dry ingredients to form a pliable dough. After a quick chill to make it easier to handle, we’ll roll it out thinly, cut out our little rounds, and bake them until they’re perfectly golden and crisp. The magic really happens in that thin rolling and quick bake, which creates that signature delicate crunch. Don’t be intimidated; it’s more about technique than complex steps. You’ll be amazed at how quickly you go from a simple dough to a platter of your own incredible crackers!
Ingredients
For the Dough:
– 1 cup (2 sticks or 226g) unsalted butter, softened: I always use good quality butter, it really makes a difference in the final flavor. Make sure it’s softened, not melted, for the best texture.
– 1/4 cup (50g) granulated sugar: Just a touch to help with browning and a hint of sweetness. You can reduce this slightly if you prefer them less sweet.
– 1/2 teaspoon salt: Essential for flavor! Don’t skip this. I often use fine sea salt.
– 1 large egg yolk: This adds richness and helps bind the dough. It’s the secret to that extra tender bite.
– 1 teaspoon vanilla extract: A little warmth and aroma go a long way, even in a savory-ish cracker.
– 2 cups (250g) all-purpose flour: Spooned and leveled, please! Too much flour will make them tough.
– 1/4 teaspoon baking powder: Just a pinch for a little lift and flakiness.
For Brushing & Topping:
– 2 tablespoons unsalted butter, melted: For brushing right after they come out of the oven.
– Flaky sea salt: For sprinkling on top while they’re still warm and gooey. This is non-negotiable for that signature finish!
Step-by-Step Instructions
Step 1: Cream Butter and Sugar
In a large bowl, beat the softened butter, granulated sugar, and salt together with an electric mixer on medium speed until light and fluffy. This usually takes about 2-3 minutes. You want it to be pale yellow and airy. This step is crucial for developing that tender, flaky texture. Scrape down the sides of the bowl a couple of times to make sure everything is incorporated evenly.
Step 2: Add Egg Yolk and Vanilla
Beat in the egg yolk and vanilla extract until well combined. The mixture might look a little curdled at this point, but don’t worry, that will smooth out when you add the dry ingredients.
Step 3: Combine Dry Ingredients
In a separate medium bowl, whisk together the all-purpose flour and baking powder. This ensures the baking powder is evenly distributed, which helps the crackers rise uniformly.
Step 4: Gradually Add Flour Mixture
Add the dry ingredients to the wet ingredients in three additions, mixing on low speed until just combined after each addition. Be careful not to overmix! As soon as you no longer see streaks of flour, stop mixing. Overmixing will develop the gluten too much and result in tough crackers. The dough will be thick and a bit crumbly.
Step 5: Chill the Dough
Turn the dough out onto a lightly floured surface and gently bring it together into a cohesive disc. Wrap the disc tightly in plastic wrap and refrigerate for at least 30 minutes, or until firm enough to roll. This chilling period is super important; it makes the dough much easier to handle and prevents it from spreading too much while baking.
Step 6: Roll and Cut the Crackers
Preheat your oven to 375°F (190°C). Line two baking sheets with parchment paper. On a lightly floured surface, divide the chilled dough in half. Working with one half at a time, roll it out very thinly, about 1/16th of an inch thick. This is key to getting that delicate crispness. The thinner, the better! Use a small round cookie cutter (about 1.5 to 2 inches in diameter) to cut out as many circles as you can. Re-roll scraps gently as needed, but try not to overwork them. Place the cut-out crackers about 1 inch apart on the prepared baking sheets.
Step 7: Score and Dock
Using the blunt side of a knife or a fork, gently score a simple pattern onto each cracker (a cross is classic!). Then, using a fork or a toothpick, gently prick the center of each cracker a few times. This “docking” prevents them from puffing up too much in the oven and ensures an even bake. Honestly, this little step makes a huge difference in achieving that authentic look and texture.
Step 8: Bake Until Golden
Bake for 10-15 minutes, or until the edges are lightly golden brown and the crackers are firm. The exact time will depend on how thinly you rolled them and your oven. Keep a close eye on them, as they can go from golden to burnt very quickly due to their thinness!
Step 9: Brush and Salt
As soon as the crackers come out of the oven, while they are still hot, brush the tops lightly with the melted butter. Immediately sprinkle them generously with flaky sea salt. This is where they really transform into those irresistible, classic crackers. The butter adds a beautiful sheen and extra richness, and the salt is just perfection. Let them cool completely on the baking sheets. They will crisp up even more as they cool.
What to Serve It With
Honestly, these homemade ritz crackers are so good, they’re practically a meal on their own with a cup of tea! But if you’re looking to elevate them, the options are endless. For a delightful Breakfast, I love serving them lightly toasted with a dollop of Cream Cheese and a sprinkle of chives, alongside my morning coffee. They offer a sophisticated crunch that’s a far cry from your everyday toast. For Brunch, they’re absolutely stunning as a base for smoked salmon and a tiny bit of dill, or topped with a dollop of crème fraîche and a sliver of pickled onion. They just scream elegance and are perfect for any festive gathering. As a simple Dessert, they’re surprisingly good with a drizzle of honey or a thin swipe of good quality fruit jam – think raspberry or fig jam for a lovely sweet and salty contrast. My kids love them this way! And for those cozy Snacks when you just need a little something comforting, they are divine served with a small bowl of your favorite cheese spread, a bit of charcuterie, or even just a smear of hummus. My family often devours a whole batch with soup or chili, and they hold up beautifully without getting soggy. They’re also fantastic crumbled over salads for an extra layer of texture!
Top Tips for Perfecting Your Homemade Ritz Crackers
I’ve made these homemade ritz crackers so many times, and over the years, I’ve picked up a few tricks that really make a difference in achieving that perfect, buttery, flaky result. First off, when it comes to rolling the dough, patience is key. Aim for an even thickness, no thinner than 1/16th of an inch. If you have a pasta roller, it’s a game-changer for getting that uniform thinness consistently. Just feed the dough through progressively thinner settings. My biggest lesson learned was not to rush the chilling step; a well-chilled dough is so much easier to handle and results in a much better texture. When you’re mixing the dough, remember that “just combined” is your mantra. Overmixing flour is the enemy of tender baked goods, and it’s especially true for delicate crackers. You want to develop the gluten just enough for structure, not so much that they become tough. For the scoring and docking, don’t press too hard, you’re just making decorative marks and a few tiny holes to control puffing, not creating canyons! And for the ultimate golden crispness, keep an eye on them during baking. Ovens vary, so start checking a few minutes before the suggested time. The moment they look beautifully golden around the edges, they’re usually done. If some bake faster than others, just pull those off the sheet and let the rest finish. Finally, the flaky sea salt finish is non-negotiable! That little bit of crunch and burst of salt right after they come out of the oven is what makes them truly special. Trust me on this one, it elevates them from good to absolutely divine.
Storing and Reheating Tips
Proper storage is crucial for maintaining that delightful crispness of your homemade ritz crackers. Once they’ve cooled completely on the baking sheets, you’ll want to store them in an airtight container. At Room Temperature, they should stay wonderfully crisp for about 3-5 days, provided the container is truly sealed. Avoid storing them in a humid environment if you can! If you know you won’t get through them that quickly, Refrigerator Storage can extend their life, but I find they sometimes lose a tiny bit of their crispness when refrigerated. If you do refrigerate them, make sure they are completely cool and in a good quality airtight container; they’ll usually last up to a week to ten days, but check for any signs of softening. For long-term storage, these crackers freeze beautifully. Make sure they are thoroughly cooled, then wrap them in a single layer in parchment paper, followed by a layer of plastic wrap, and finally tuck them into a freezer-safe bag or container. They can stay frozen for up to 2-3 months. To reheat and bring back that ultimate crispness, you can pop them into a 300°F (150°C) oven for just 5-10 minutes. This is especially helpful if they’ve been in the fridge or if you want to revive frozen crackers before serving. For the glaze, I always apply it right after baking and while they’re still warm; it adheres best then. If you’re storing them unfrosted for a while, you can always melt a little butter and brush them with salt just before serving.
Frequently Asked Questions
Final Thoughts
There you have it – my recipe for homemade ritz crackers! I genuinely hope you give these a try. They’re more than just a cracker; they’re a little piece of comfort, a touch of nostalgia, and a testament to how delicious and rewarding homemade can be. They’re perfect for when you want something a little special without a lot of fuss. If you enjoyed this recipe, you might also love my recipe for buttery shortbread cookies or my easy focaccia bread for more baking adventures! I can’t wait to hear how yours turn out, so please leave a comment below and share your creations, tips, or any fun variations you try. Happy baking, everyone!

Homemade Ritz Crackers
Ingredients
Main Ingredients
- 2.5 cups all-purpose flour
- 1 teaspoon sugar
- 0.5 teaspoon salt
- 0.5 cup unsalted butter cold, cut into cubes
- 0.25 cup vegetable shortening
- 0.25 cup cold water
- 0.5 teaspoon salt for topping
Instructions
Preparation Steps
- In a large bowl, whisk together the flour, sugar, and salt.
- Cut in the cold butter and shortening using a pastry blender or your fingertips until the mixture resembles coarse crumbs with some pea-sized pieces of butter remaining.
- Gradually add the cold water, mixing until just combined. Be careful not to overmix.
- Turn the dough out onto a lightly floured surface and gently bring it together into a disc. Wrap in plastic wrap and refrigerate for at least 30 minutes.
- Preheat your oven to 400°F (200°C). Line baking sheets with parchment paper.
- On a lightly floured surface, roll out the dough thinly, about 1/16 inch thick. Use a round cookie cutter (about 2 inches in diameter) to cut out circles. Re-roll scraps as needed.
- Place the cracker circles on the prepared baking sheets. Prick each cracker several times with a fork to prevent puffing. Sprinkle with salt.
- Bake for 12-15 minutes, or until golden brown and crisp. Keep a close eye on them as they can brown quickly.
- Let the crackers cool completely on the baking sheets before serving.


