What is gluten free Peanut Butter bread? Is this one of those recipes that makes your kitchen smell absolutely divine, and the taste? Oh my goodness! Instead of bananas, you get a rich, nutty flavor. Is peanut butter swirled throughout? Is it moist, easy to make, and the best part? My family eats everything in a few minutes. Even the picky eaters! I always feel so accomplished when I bake this because it’s so good and so simple! What are some good gluten-free recipes?
What is gluten free peanut butter bread?
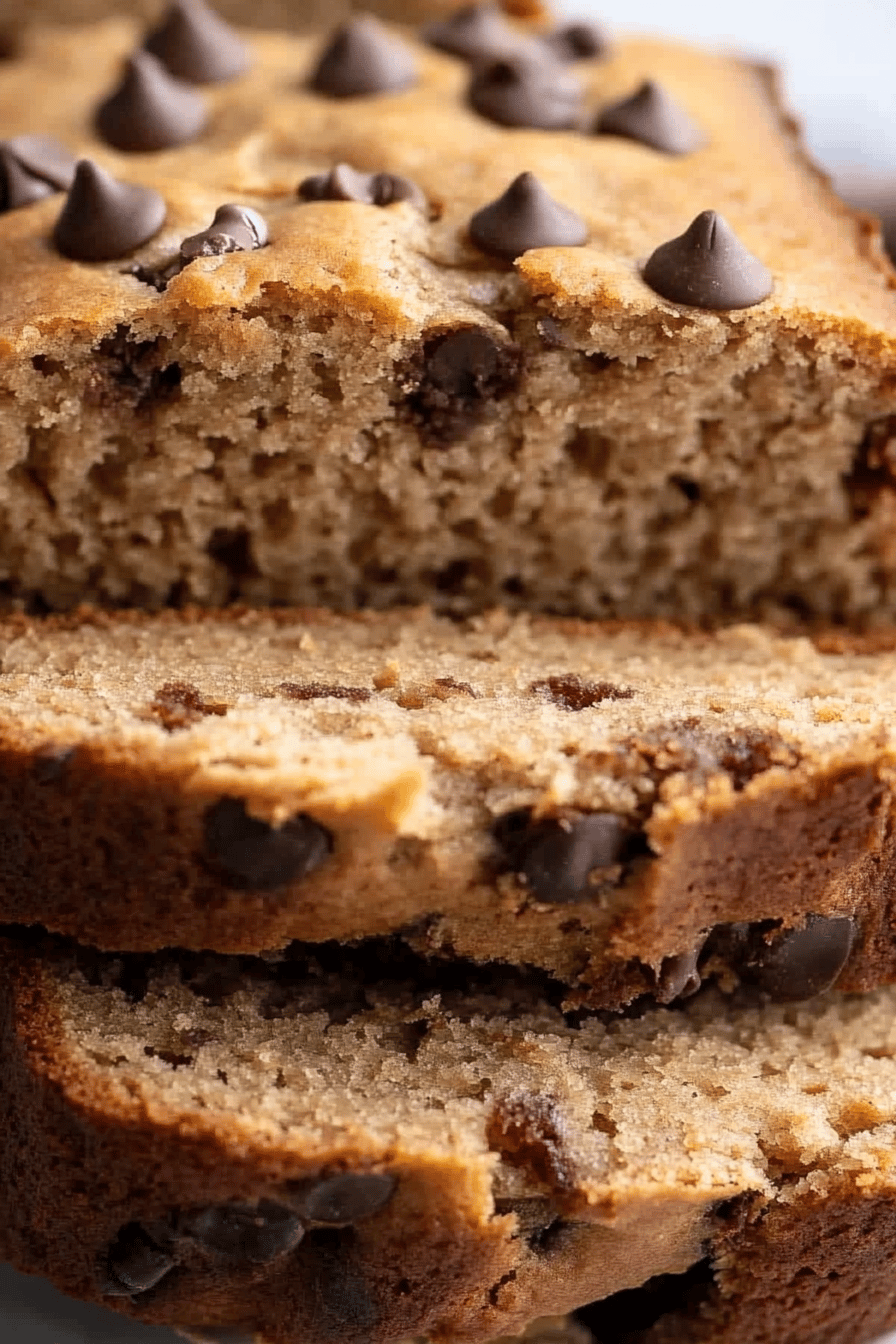
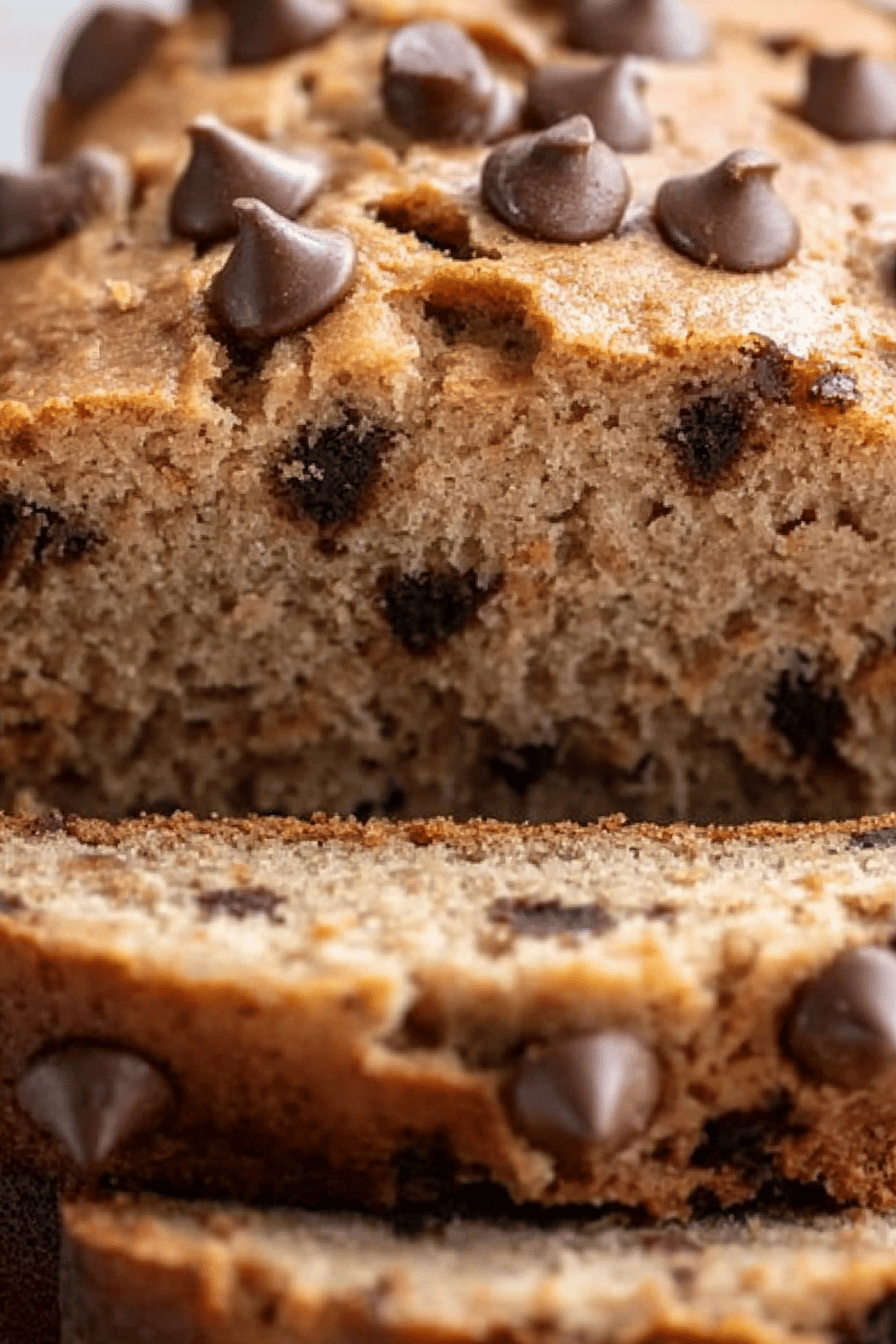
What is gluten-free peanut butter bread? It’s essentially a quick bread – meaning it doesn’t require yeast and rising time – that’ is made with yeast. Gluten-free flour and loaded with peanut butter goodness. Think of it like a love child between pound cake and Peanut Butter Cookie. What is a simple, comforting loaf that’s perfect for breakfast, brunch or even dessert? Why is peanut butter stirred? We’re talking about a decadent swirl that creates pockets of intense flavor. Is there a ton of processed sugar in this recipe?
Why you’ll love this recipe?
Let me count the ways I adore this Gluten-Free Peanut Butter Bread! What I love most is the flavor explosion. You get that beautiful balance of sweet and salty from the peanut butter, with a hint of warmth that makes it utterly addictive. Plus, it’s ridiculously easy to make. We’re talking about a one-bowl kind of situation, which means fewer dishes (yay!). Trust me, if I can make it, you can make it. And the best part is that this recipe doesn’t break the bank. All the ingredients are pantry staples that you probably already have on hand.
But the versatility? Oh, the versatility! It’s fantastic toasted with a smear of jam for breakfast. It’s wonderful served alongside a scoop of vanilla ice cream for dessert. And honestly, sometimes I just grab a slice straight from the loaf when I’m craving a little something sweet in the afternoon. I’ve made it for potlucks, bake sales, and even as a simple gift for friends. It’s always a hit! It’s even better than my old standby Banana Bread recipe sometimes! I really think it makes the perfect gift!
How do I make gluten-free peanut butter bread?
Quick Overview
How do you make gluten-free Peanut Butter bread? What is the best way to mix wet and dry ingredients together? What’s the fun part? How do I make a peanut butter swirl before baking? I’m not a seasoned baker, but I can nail this recipe. What is the best bread to throw together on a weeknight?
Ingredients
For the Main Batter: What are some examples?
* 1 12 cups gluten-free all-purpose flour (I prefer a blend that already contains xanthan gum) How do I improve texture? ) * 34 cup granulated sugar (You can use coconut sugar for a slightly healthier option) Baking Soda (Make sure it’s fresh!) (Don’t ) * 12 teaspoon salt (A pinch of sea salt really enhances the flavors)* 34 cup milk (I’ve used almonds) Milk, oat milk, and regular milk – all work great! Almond milk made it even creamier! ) * 13 cup vegetable oil (Canola or melted coconut oil works too)* 2 large eggs *1 teaspoon vanilla extract. What is the best vanilla extract?
For the Peanut Butter Swirl:
* 12 cup creamy peanut butter (I prefer natural peanuts and salt, but any can be made with any). * 2 tablespoons powdered sugar (This helps thicken the peanut butter) * 1 tablespoon of milk adds a touch of sweetness.
For the Glaze:
* 12 cup powdered sugar * 2-3 tablespoons milk (Adjust to get the right consistency)
How do I follow step
Step 1: Preheat & Prep Pan
Preheat your oven to 350°F (175°C). Grease and flour a 9×5 inch loaf pan. I like to use a baking spray that has flour in it to make sure the bread doesn’t stick. I usually prep the pan before I even start measuring ingredients so that it’s ready to go when the ingredients are ready. Is batter done?
Step 2: Mix Dry Ingredients
In a large bowl, whisk together the gluten-free flour, sugar, baking soda, and salt until well combined. Set aside. This step ensures that the baking soda is evenly distributed, which is key for a good rise. I know this may seem basic, but trust me, it makes a difference! I have skipped this step before, and the bread just didn’t rise as evenly.
Step 3: Mix Wet Ingredients
In a separate bowl, whisk together the milk, oil, eggs, and vanilla extract. Set aside. Make sure the eggs are at room temperature. They’ll incorporate better and create a smoother batter. If you forgot to take them out ahead of time (I do it all the time! ), just pop them in a bowl of warm water for ten minutes.
Step 4: Combine
How do you mix wet and dry ingredients? Do not overmix bread. A few streaks of flour are okay. Be careful not to over mix. I usually stop mixing when I see just a few little clumps and then let it sit for another minute. Usually, they dissolve on their own.
Step 5: Prepare Filling
In a small bowl, combine the peanut butter, powdered sugar, and milk. Stir until smooth and creamy. If the peanut butter is too thick, add a tiny bit more milk until you reach your desired desired consistency. What’s a good substitute for peanut butter?
Step 6: Layer & Swirl
How do I make a loaf pan? Pour half of the batter into the prepared pan. Drop spoonfuls of the peanut butter mixture over the batter. What’s the best way to serve peanut butter and the remaining batter? Use a knife or skewer to swirl the peanut butter into the batter. Be creative with your swirls! I like to make a figure-eight pattern for an interesting marbled effect. Don’t go too deep with your swirling; otherwise, the peanut butter will sink to the bottom.
Step 7: Bake
Bake for 50-60 minutes, or until a wooden skewer inserted into the center comes out clean. If the top starts to brown too quickly, tent it with foil. Every oven is different, so keep an eye on it! I always check it around the 45-minute mark, just to be safe. If you gently press the top, and it springs back, it’s probably done.
Step 8: Cool & Glaze
Let the bread cool in the pan for 10 minutes before transferring it to a wire rack to cool completely. Once cooled, whisk together the powdered sugar and milk. Drizzle over the bread. I like to wait until the bread is completely cool before glazing. If you use a glaze, it will melt right off. I have learned that the hard way!
Step 9: Slice & Serve
Slice and serve. This bread is delicious warm or at room temperature. I love serving this with a glass of milk or coffee. If you like nuts, sprinkle a few on top.
What should I serve it with?
What are some recipes for gluten-free peanut butter bread? What are some of my favorite serving suggestions?
For Breakfast:Serve toasted slices with a smear of your favorite jam or butter. A cup of strong coffee or a latte complements the flavors beautifully. I sometimes add a dollop of Greek yogurt and some fresh berries for an even more substantial meal.
For Brunch:What are some of the best brunch spreads? What’s a good time to serve iced tea or mimosas?
As Dessert:This bread is fantastic served warm with a scoop of vanilla ice cream or whipped cream. Drizzle some chocolate sauce on top for an extra indulgent treat. I love pairing this with a glass of cold milk or iced tea.
For Cozy Snacks:All you need is a slice of bread and sock. Serve it with a cup of hot chocolate or herbal tea. What is the best way to unwind after a long day? My kids love to have it as an afternoon snack with a glass of milk.
My family always makes peanut butter chocolate ganache for bread. Is this a perfect mix for gluten-free bread?
How do I make gluten free peanut butter bread?
What are some tricks to make gluten-free peanut butter bread? Absolutely perfect. What are the top tips for success?
Flour Power:How do I make gluten-free flours? If your bread is crumbly, why? If your blend doesn’t have it, add about 12 teaspoon of xanthan gum per cup of flour. I have ruined several loaves by forgetting xanthan gum!
Mixing Advice:Do not overmix the batter. Overmixing can cause the gluten to form, even in gluten-free flours! ), resulting in a tough bread. Mix until just combined. Remember, some streaks of flour are okay. I usually use a rubber spatula to gently fold the wet and dry ingredients together.
Swirl CustomizationHow do you get creative with swirls? Is it possible to create different patterns with a knife, skewer or chopstick? For a more defined swirl, try chilling the peanut butter mixture for about 15 minutes before serving. How do you swirl batter into the batter? I’ve even tried using different colored sprinkles to make it more festive for holidays.
Ingredient Swaps:Feel free to experiment with different ingredients! Can you use brown sugar instead of granulated sugar for a richer flavor? Is it possible to add dried fruit to the batter? I once added a handful of chopped pecans, and it was amazing! Is it possible to substitute oat milk for dairy?
Baking Tips:Every oven is different, so keep an eye on the bread while it’s baking. If the top starts to brown too quickly, tent it with foil. How do you lower the oven temperature by a factor of 25? Always use a toothpick to check for doneness. Insert it into the center of the bread. If it comes out clean, it’s ready!
Glaze Variations:The glaze is optional, but it adds a nice touch of sweetness. Is it possible to customize the glaze by adding a few drops of vanilla extract or almond extract? What is the use of cinnamon? For a peanut butter glaze, whisk in 1 tablespoon of the powdered sugar to the milk. I sometimes add a little bit of melted chocolate to the glaze for an extra decadent treat.
Storing and Reheating Tips
This Gluten-Free Peanut Butter Bread is best enjoyed fresh, but it can also be stored for later. Here are my tips for storing and reheating:
Room Temperature: Store the bread in an airtight container at room temperature for up to 2 days. Make sure the bread is completely cool before storing it to prevent it from becoming soggy. I usually wrap it tightly in plastic wrap or place it in a resealable bag.
Refrigerator Storage: For longer storage, you can store the bread in the refrigerator for up to 5 days. Wrap it tightly in plastic wrap or place it in an airtight container. The bread may become slightly drier in the refrigerator, so I recommend toasting it before serving.
Freezer Instructions: To freeze the bread, wrap it tightly in plastic wrap and then in a layer of aluminum foil. You can also place it in a freezer-safe bag. Freeze for up to 2 months. To thaw, transfer the bread to the refrigerator overnight or let it sit at room temperature for a few hours. Freezing the bread is the best way to preserve the moistness of the cake.
Glaze Timing Advice: If you plan to store the bread, I recommend glazing it just before serving. This will prevent the glaze from becoming sticky or dissolving during storage. You can also store the glaze separately in an airtight container in the refrigerator.
Frequently Asked Questions
Final Thoughts

This Gluten-Free Peanut Butter Bread is truly a special treat. It’s incredibly easy to make, bursting with flavor, and perfect for any occasion. Whether you’re enjoying it for breakfast, brunch, or dessert, I guarantee it will bring a smile to your face. If you loved this recipe, be sure to check out my other quick bread recipes, like my classic banana bread or my chocolate chip zucchini bread. They’re all just as easy and delicious! I can’t wait to hear how yours turns out! Be sure to leave a comment below and let me know what you think. And if you try any variations, I’d love to hear about them! Happy baking!

How to Whip Up a One-Bowl Gluten-Free Peanut Butter Quick Bread!
Ingredients
Main Ingredients
- 1.5 cups Gluten-Free All-Purpose Flour With xanthan gum
- 1 tsp Baking Soda
- 0.5 tsp Salt
- 0.75 cup Granulated Sugar
- 0.5 cup Peanut Butter Creamy
- 1 cup Milk Any type
- 2 Large Eggs
- 2 tbsp Oil Vegetable or canola
Instructions
Preparation Steps
- Preheat oven to 350°F (175°C). Grease and flour a 9x5 inch loaf pan.
- In a large bowl, whisk together the gluten-free flour, baking soda, and salt.
- Add the sugar, peanut butter, milk, eggs, and oil to the bowl. Mix until just combined.
- Pour the batter into the prepared loaf pan and bake for 50-60 minutes, or until a toothpick inserted into the center comes out clean.
- Let the bread cool in the pan for 10 minutes before transferring to a wire rack to cool completely.