How do you remember the soft, pillowy Oreo Cakesters from your childhood? What were the Oreo cookies in cake form? Is there a gluten-free version of this recipe? I think these are some of the best quotes ever writtenGluten-Free Oreo CakesterAre the originals better than the remakes? This recipe is a labor of love, tweaking and tasting until they were absolutely perfect. When I made these, my kids devoured them in minutes, practically inhaling the cream. What is the best surprise of all time? Is it like a soft, creamy hug in every bite, and I can’t wait for you to experience that too. What are some of the easiest to make than cutout Sugar Cookies? What are some good songs that will be a hit
What are gluten-free Oreo Cakesters?
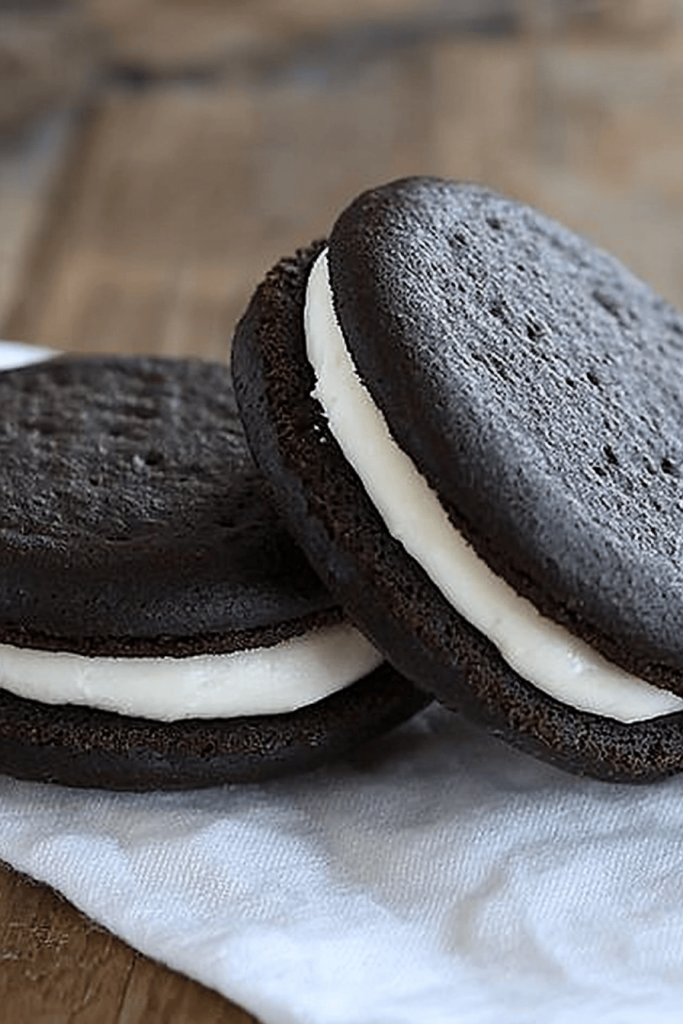
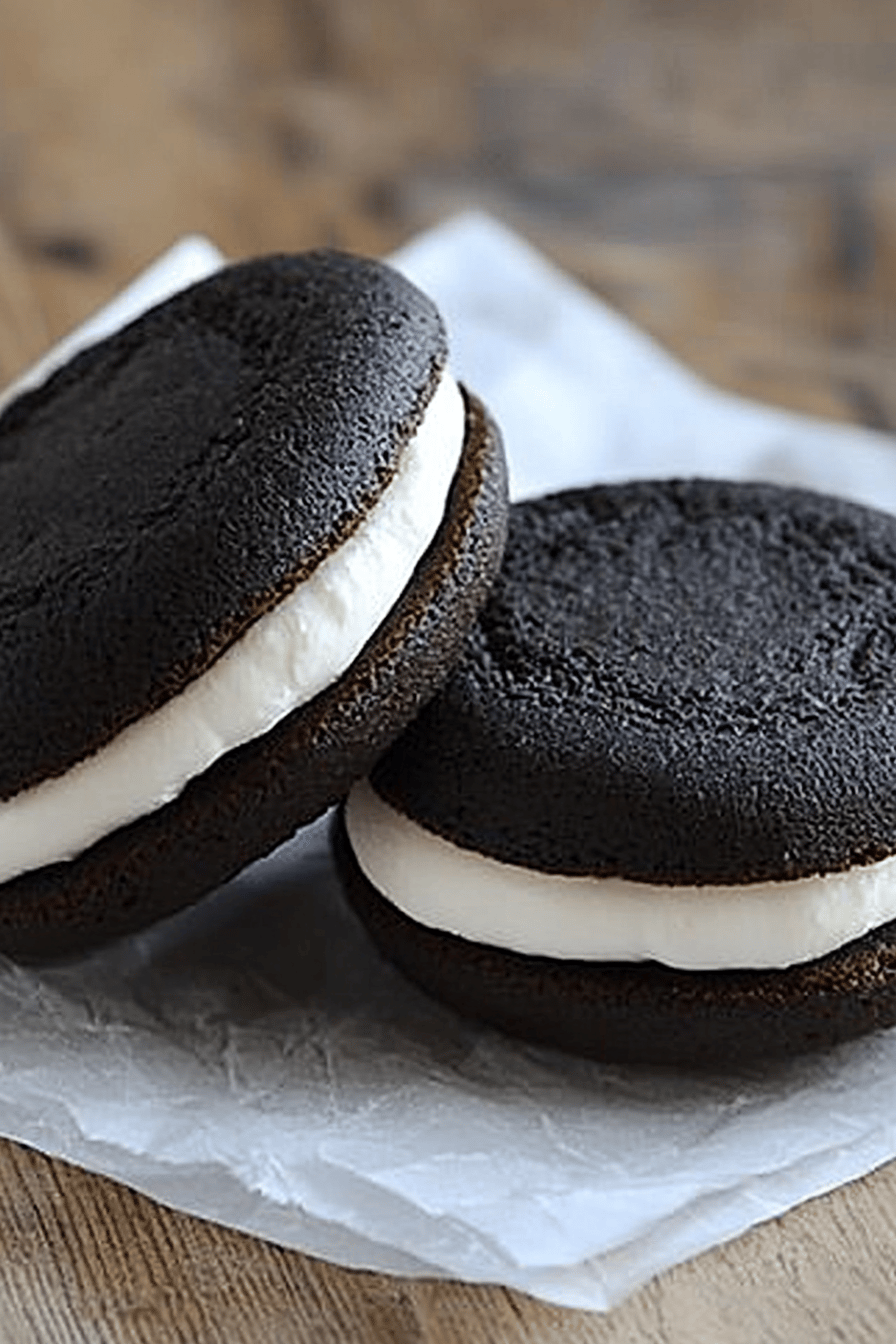
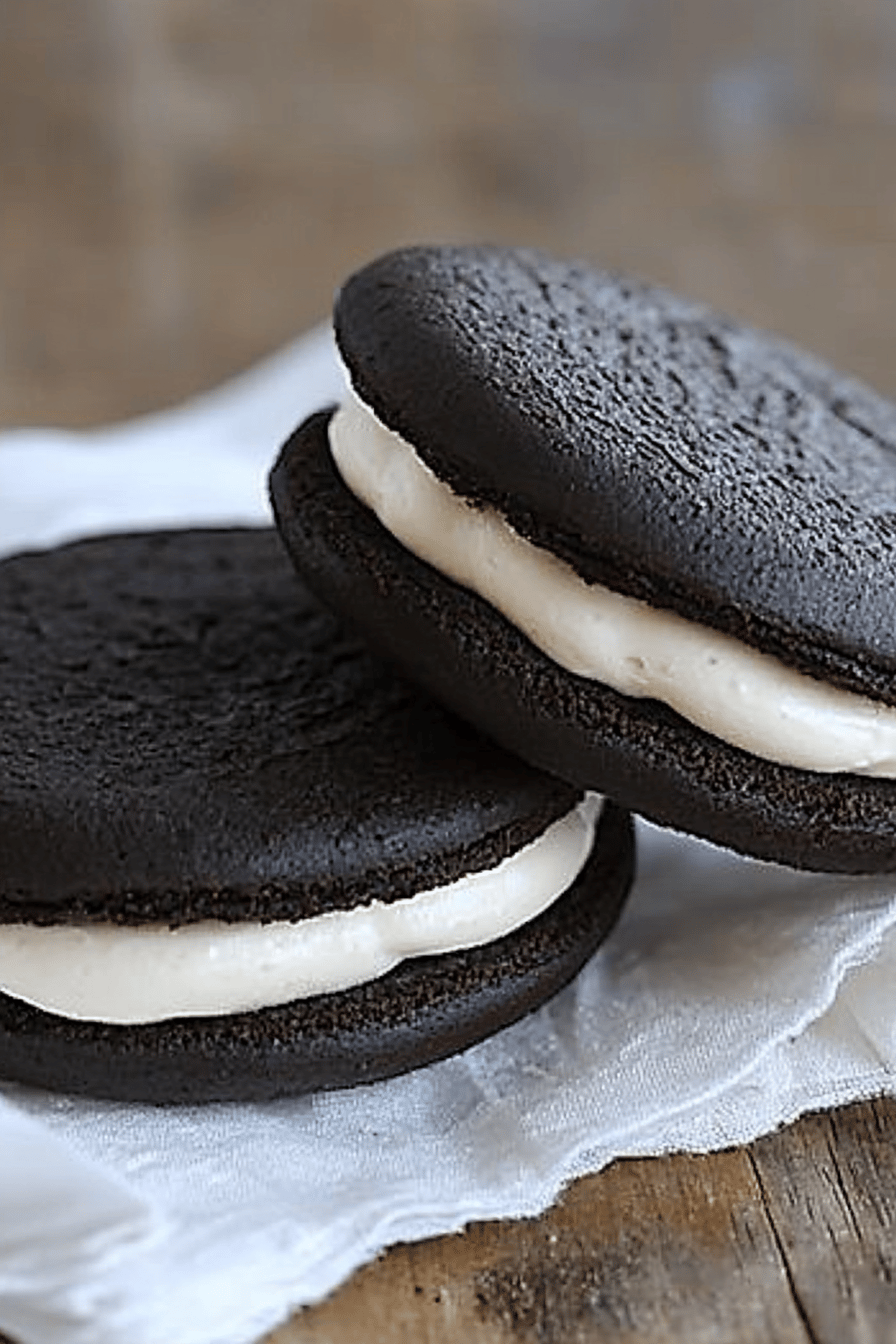
What would happen if a mini cake and an Oreo cookie had babies? What are the topics we’re talking about here?Gluten-Free Oreo Cakesterare soft, slightly chocolatey little cakes sandwiched together with a sweet, creamy filling. Is this a deconstructed Oreo? Think of it as a super soft cookie – no crunchy edges here! The name says it all – soft cake, filled with yummy cream and tastes just like Oreos. They’re a little bit nostalgic, sassy, and delicious. Are they gluten-free?
Why you’ll love this recipe?
What is your new favorite recipe? First and foremost, the flavor is incredible. We’re talking rich Chocolate Cake, balanced by the perfect amount of sweetness from the cream. Is it a classic combination that never gets old? What is the recipe for a cakester? This isn’t a complicated baking project. I’ve broken it down into easy-to-follow steps so even a beginner baker can nail it. What I love about this is how cost-efficient it is. You probably already have most of the ingredients in your pantry. No need to break the bank to make a truly special treat? My daughter likes them in her lunch. They are so versatile!
I’ve tried other Gluten-Free Chocolate cake recipes, and they often end up dry or crumbly. What is different about this recipe? The addition of yogurt keeps the cakes moist and tender, and the cream filling adds an extra layer of flavor. Is chocolatey and sweet?
How do I make gluten-free Oreo Cakesters?
Quick Overview
Making these Gluten-Free Oreo CakesterIs it easier than you think? What is the best gluten-free chocolate Cake Recipe? Then sandwiching them together with a dreamy cream filling. What’s the best part? You don’t need any fancy equipment. Just a couple of bowls, whisk and an oven. The method is straightforward, but the result is anything but ordinary. How do I impress my friends with minimal effort? I think the key to this recipe is not overbaking them. I always set the timer for less than what is recommended, and keep a close watch!
Ingredients
For the Main Batter: What are some examples?
* 1 cup gluten-free all-purpose flour blend (I recommend one that includes xanthan gum)
* ½ cup unsweetened cocoa powder
* ¾ cup granulated sugar
* ½ teaspoon baking soda
* ¼ teaspoon baking powder
* ¼ teaspoon salt
* 12 cup buttermilk (or 1 tsp milk with 1 tablespoon lemon juice)
* ¼ cup vegetable oil
* 1 large egg
* 1 teaspoon vanilla extract
* 12 cup boiling water (this is important – it helps bloom the cocoa! ) * 2 cups boiled water
For the Filling:
* ½ cup (1 stick) unsalted butter, softened
* 3 cups powdered sugar
* ¼ cup milk (or non-dairy milk)
* 1 teaspoon vanilla extract
How do I follow step
Step 1: Preheat & Prep Pan
How do I prepare a baking sheet for 350°F (180°C)? I prefer parchment paper because it prevents cakesters from sticking and makes cleanup a breeze. Make sure the oven is fully preheated before you start baking – this will ensure even cooking.
Step 2: Mix Dry Ingredients
In a large bowl, whisk together the gluten-free flour, cocoa powder, sugar, baking soda and salt. Set aside. What are powders, salt and powder Make sure everything is evenly distributed to prevent pockets of baking soda. This is a crucial step for consistency texture.
Step 3: Mix Wet Ingredients
In a separate bowl, whisk together the buttermilk, oil, vanilla extract, and salt. Set aside. The buttermilk adds a lovely tang and keeps the cakesters moist. If you don’t have buttermilk, you can easily make your own by adding a little lemon juice to regular milk.
Step 4: Combine
Gradually add the wet ingredients to the dry ingredients, mixing until just combined. Don’t overmix! Overmixing can develop gluten (even in gluten-free flour), resulting in tough cakesters. Now, carefully pour in the boiling water and mix until the batter is smooth. The boiling water will thin out the batter – don’t worry, this is normal.
Step 5: Prepare Filling
While the cakesters are cooling, prepare the filling. In a large bowl, beat the butter with an electric mixer until light and fluffy. Set aside. Gradually add the powdered sugar, mixing on low speed until combined. Beat in the milk and vanilla extract until the filling is smooth and creamy. If the filling is too thick, add a little more milk. If it’s too thin, add a little more powdered sugar.
Step 6: Layer & Swirl
Once the cakesters are completely cool, it’s time to assemble them! Spread a generous amount of cream filling on the flat side of one cakester and top with another. Gently press the two cakesters together to sandwich the filling in between.
Step 7: Bake
If you’re using a baking sheet, drop rounded tablespoons of the batter onto the prepared baking sheets. Leave some space between. Bake for 8-10 minutes, or until the cakesters spring back lightly when touched. Keep a close eye on them – they can burn easily! Let them cool on the baking sheet for a few minutes before transferring them to the wire rack to cool. I always do the toothpick test just to make sure the middle is not too gooey!
Step 8: Cool & Glaze
Let the assembled cakesters sit for at least 30 minutes to allow the filling to set. How do you prevent fillings from oozing out when you bite into them?Gluten-Free Oreo CakesterIs it okay to eat them at room temperature? I really think that sitting for that 30 minutes really helps with the flavor.
Step 9: Slice & Serve
To serve, arrange the order.Gluten-Free Oreo Cakesters on a plate or platter. You can dust them with a little powdered sugar for an extra touch of elegance. They’re perfect for parties, afternoon snacks, or just a sweet treat whenever you’re craving something delicious. I always make these when I need to bring something to a party and I never have any leftovers to bring home!
What to Serve It With
These Gluten-Free Oreo Cakesters are fantastic on their own, but they also pair well with a variety of other treats. Here are a few serving suggestions:
For Breakfast: Serve with a cup of hot coffee or tea for a sweet start to the day. The chocolatey flavor complements coffee perfectly. I love serving these alongside a yogurt parfait for a balanced breakfast.
For Brunch: Include them on a brunch platter with other pastries, fruits, and cheeses. They add a touch of indulgence to any brunch spread. Pair with mimosas or sparkling cider for a festive touch.
As Dessert: Enjoy them as an after-dinner treat with a scoop of vanilla ice cream. The warm cakesters and cold ice cream create a delightful contrast. Serve with a glass of milk or a dessert wine.
For Cozy Snacks: Curl up on the couch with a plate of cakesters and a good book or movie. They’re the perfect comfort food for a relaxing evening. Pair with a mug of hot chocolate or a cup of herbal tea. My family has always loved to enjoy snacks during movie nights. These gluten free oreo cakesters are always the perfect treat!
Growing up, my family always had Oreos on hand, but my mom would always hide them. I think that is why this recipe has become so important to me. These cakesters are always in plain sight!
Top Tips for Perfecting Your Gluten-Free Oreo Cakesters
Want to take your Gluten-Free Oreo Cakesters to the next level? Here are a few tips and tricks I’ve learned over the years:
Gluten-Free Flour Blend: Not all gluten-free flour blends are created equal. I recommend using one that includes xanthan gum, as it helps bind the ingredients together and prevents the cakesters from being too crumbly.
Mixing Advice: Be careful not to overmix the batter. Overmixing can develop the gluten (even in gluten-free flour), resulting in tough cakesters. Mix until just combined.
Cream Filling Consistency: Adjust the amount of milk in the cream filling to achieve your desired consistency. If you prefer a thicker filling, use less milk. If you prefer a thinner filling, use more milk.
Ingredient Swaps: You can easily customize this recipe to suit your dietary needs and preferences. For example, you can use dairy-free milk and butter to make it vegan. You can also add a drop of peppermint extract to the filling for a festive twist.
Baking Tips: Keep a close eye on the cakesters while they’re baking, as they can burn easily. They’re done when they spring back lightly when touched. Let them cool completely before assembling.
Glaze Variations: You can add a glaze to the cakesters for an extra touch of sweetness and flavor. Simply whisk together powdered sugar and milk until smooth, and then drizzle over the cakesters.
I’ve made these cakesters countless times, and I’ve learned that the key is to be patient and not rush the process. The extra effort is worth it, trust me!
Storing and Reheating Tips
These Gluten-Free Oreo Cakesters are best enjoyed fresh, but they can also be stored for later. Here’s how:
Room Temperature: Store in an airtight container at room temperature for up to 2 days. Make sure to keep them covered to prevent them from drying out.
Refrigerator Storage: Store in an airtight container in the refrigerator for up to 5 days. The cakesters may become slightly firmer in the refrigerator, so let them come to room temperature before serving.
Freezer Instructions: Freeze the cakesters in a single layer on a baking sheet until solid. Then, transfer them to a freezer-safe bag or container. They can be stored in the freezer for up to 2 months. Thaw at room temperature before serving.
Glaze Timing Advice: If you’re planning to glaze the cakesters, do so just before serving. This will prevent the glaze from becoming sticky or dissolving during storage.
I always make a double batch of these cakesters, so I can freeze some for later. They’re perfect for those times when you need a quick and easy treat!
Frequently Asked Questions
Final Thoughts
These Gluten-Free Oreo Cakesters are a true labor of love, but they’re so worth the effort. They’re soft, chocolatey, and filled with a dreamy cream filling – what’s not to love? Whether you’re gluten-free or not, you’ll be blown away by how delicious these little cakesters are. If you enjoy this recipe, you might also like my Gluten-Free Chocolate Chip Cookies or my Gluten-Free Brownies. Now, go get your bake on and create some magic in the kitchen! I can’t wait to hear how yours turn out! Be sure to leave a comment below and let me know if you tried it out and what you thought! Happy Baking!
Gluten-Free Oreo Cakesters: 7 Secrets to Perfect Pies Every Time!
Ingredients
Main Ingredients
- 1 cup Gluten-Free All-Purpose Flour Plus more for dusting
- 1 cup Granulated Sugar
- 0.75 cup Unsweetened Cocoa Powder
- 1 tsp Baking Soda
- 0.5 tsp Salt
- 1 cup Buttermilk
- 0.5 cup Vegetable Oil
- 2 Large Eggs
- 1 tsp Vanilla Extract
- 1 cup Boiling Water
Vanilla Filling
- 0.5 cup Unsalted Butter Softened
- 3 cup Powdered Sugar
- 2 tbsp Milk
- 1 tsp Vanilla Extract
Instructions
Preparation Steps
- Preheat oven to 350°F (175°C). Grease and flour a 9x13 inch baking pan.
- In a large bowl, whisk together the flour, sugar, cocoa powder, baking soda, and salt.
- In a separate bowl, combine the buttermilk, oil, eggs, and vanilla extract. Add to the dry ingredients and mix until just combined.
- Gradually add the boiling water to the batter and mix until smooth. Pour the batter into the prepared pan and bake for 25-30 minutes, or until a toothpick inserted into the center comes out clean.
- Let the cake cool completely before frosting. To make the filling, beat the butter until smooth and creamy. Gradually add the powdered sugar, alternating with the milk and vanilla extract, until the filling is light and fluffy.
- Cut the cake into squares or circles. Spread a generous amount of frosting on half of the cake pieces, then top with the remaining cake pieces to form sandwiches.