


You know those recipes that just feel like a warm hug? The ones that, the moment you start making them, a sense of cozy contentment washes over you? This cranberry cake is exactly that for me. It’s a recipe I’ve tweaked and loved for years, and it always, *always* brings a smile to people’s faces. It’s not just a cake; it’s a memory maker. I remember the first time I made it for a holiday gathering, and before I even cut the first slice, people were asking what that amazing aroma was. It’s got that perfect balance of sweet, tart, and wonderfully moist texture that just makes you want another piece. If you’re a fan of classic Pound Cake but looking for something with a little more pizzazz, or if you’re simply in the mood for the best cranberry cake imaginable, you’ve found your match. This one’s a keeper, I promise.
What is Cranberry Cake?
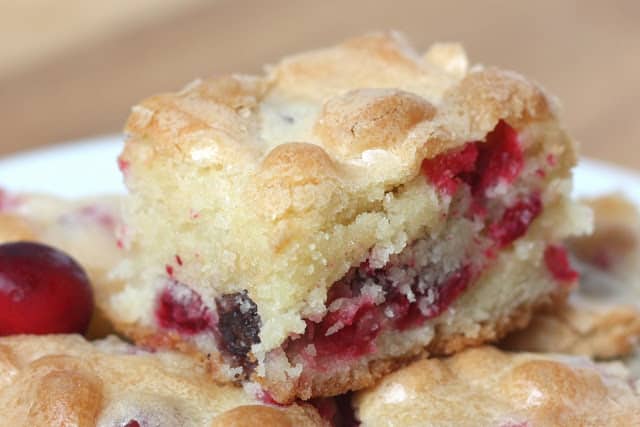
So, what exactly is this cranberry cake that has my heart? Think of it as your favorite, comforting, slightly dense cake, but with a vibrant burst of ruby-red cranberry goodness woven throughout. It’s not overly sweet, which is one of the things I adore about it. The cranberries provide this delightful tartness that cuts through the richness of the cake, making every bite incredibly balanced. It’s essentially a beautifully tender Cake Batter, studded with fresh or frozen cranberries, and often finished with a light, simple glaze that adds just a touch more sweetness and shine. The name itself, “cranberry cake,” is straightforward, but the flavor is anything but ordinary. It’s a cake that’s sophisticated enough for a special occasion but humble and delicious enough for a casual afternoon treat. It’s the kind of dessert that feels both celebratory and utterly comforting, all at once.
Why you’ll love this recipe?
Honestly, there are so many reasons why this cranberry cake has become a staple in my kitchen, and I just know you’re going to fall in love with it too. First off, let’s talk about the flavor. It’s truly phenomenal. The tartness of the cranberries is the star here, playing beautifully against the sweet, buttery cake. It’s not a cloying sweetness; it’s more of a sophisticated balance that keeps you coming back for more. Then there’s the texture. This cake is unbelievably moist. I’ve tested this recipe countless times, and it always has that perfect tender crumb that just melts in your mouth. It’s not dry or crumbly, which, let’s be honest, is a common pitfall with some cakes. And the simplicity! You don’t need any fancy equipment or obscure ingredients for this. It comes together relatively quickly, making it a lifesaver on busy days when you still want to bake something special. It’s also incredibly cost-effective. Cranberries are often available year-round, and the other ingredients are pantry staples. You get so much deliciousness without breaking the bank. Plus, it’s wonderfully versatile! I’ll get to more on that in a bit, but the fact that it can be a breakfast treat, a brunch centerpiece, or a delightful dessert means you’ll find yourself reaching for this recipe again and again. What I love most, though, is the sheer joy it brings. Whether it’s a holiday gathering, a potluck, or just a Tuesday afternoon when you need a pick-me-up, this cranberry cake never disappoints. It’s a genuine crowd-pleaser.
How do you make a Cranberry cake?
Quick Overview
Making this cranberry cake is surprisingly straightforward. We’ll start by creaming butter and sugar, then incorporate eggs and vanilla. Next, we’ll gently combine our dry ingredients with the wet, fold in those gorgeous cranberries, and bake until golden. A simple glaze finishes it off, but it’s delicious even without it! The key is to not overmix, and the result is a tender, flavorful cake that’s perfect every time. It’s truly a low-stress, high-reward bake.
Ingredients
For the Main Batter:
Here’s what you’ll need to create that wonderfully moist and tender cake base. I always recommend using unsalted butter that’s softened to room temperature – it makes a huge difference in how well it creams with the sugar, giving you that light texture. For the flour, all-purpose is perfect. Make sure to measure it correctly by spooning it into your measuring cup and leveling it off, rather than scooping directly from the bag, which can lead to a dry cake. And for the sugar, granulated white sugar is best for that classic cake sweetness. Don’t skip the baking powder and baking soda; they work together to give the cake its lift and lovely tender crumb. A pinch of salt is crucial for enhancing all those flavors! And vanilla extract? It’s the soul of so many baked goods; use a good quality one if you can.
For the Filling:
This is where the magic happens! Fresh or frozen cranberries are essential. If you’re using frozen, there’s no need to thaw them beforehand; they’ll bake right into the cake. For an extra pop of flavor and a lovely visual, I sometimes toss them with a tablespoon of flour and a little extra sugar. This helps them distribute evenly and prevents them from sinking to the bottom, although with this recipe, they tend to stay put beautifully. If you’re feeling adventurous, you can even add a touch of orange zest to the cranberries – it’s a classic pairing that’s out of this world!
For the Glaze:
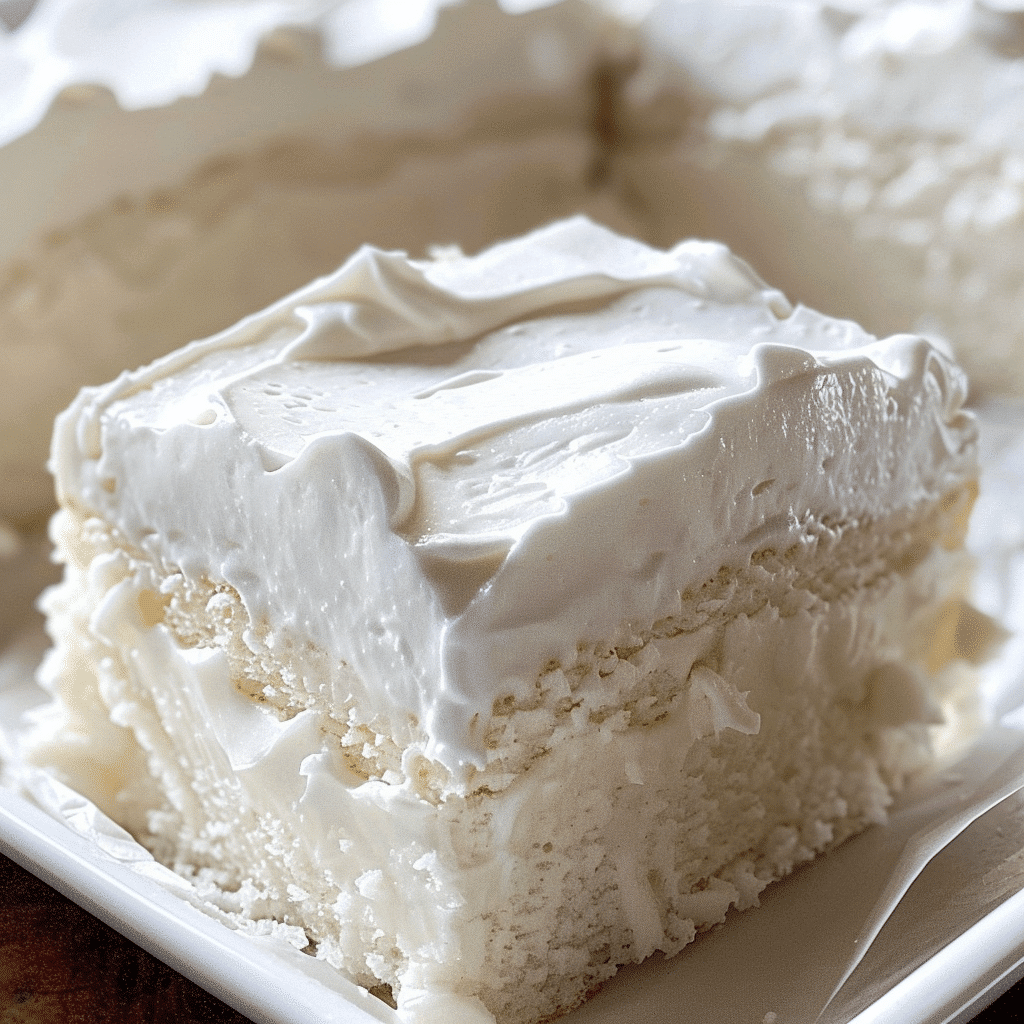
This is optional, but highly recommended for that extra touch of sweetness and elegance. It’s incredibly simple: powdered sugar, a splash of milk (or even orange juice for a citrusy twist!), and a touch of vanilla extract. You want the glaze to be thick enough to coat the back of a spoon but still pourable. It’s all about getting that perfect drizzling consistency.
Step-by-Step Instructions
Step 1: Preheat & Prep Pan
First things first, let’s get our oven preheated to 350 degrees Fahrenheit (175 degrees Celsius). This is crucial for even baking. While the oven heats up, grease and flour a 9×13 inch baking pan. I like to use butter for greasing, then a good dusting of all-purpose flour. You can also line the bottom with parchment paper for extra insurance, especially if you plan to serve it right out of the pan. Make sure you get into all the corners and up the sides. This step might seem basic, but a well-prepped pan is key to a cake that releases easily and looks gorgeous.
Step 2: Mix Dry Ingredients
In a medium-sized bowl, whisk together your all-purpose flour, baking powder, baking soda, and salt. Whisking them together thoroughly ensures that the leavening agents and salt are evenly distributed throughout the flour. This is super important for an even rise and consistent flavor in your cake. Don’t just shake the bowl; give it a good whisk for about 30 seconds. This also helps to aerate the flour slightly.
Step 3: Mix Wet Ingredients
In a separate, larger bowl, cream together your softened unsalted butter and granulated sugar. Beat them with an electric mixer (or a whisk and some serious arm power!) until the mixture is light and fluffy. This usually takes about 3-5 minutes. Gradually beat in your eggs, one at a time, making sure each one is fully incorporated before adding the next. Scrape down the sides of the bowl as needed. Then, stir in the vanilla extract. The mixture should look smooth and slightly pale yellow.
Step 4: Combine
Now, it’s time to bring the wet and dry ingredients together. Add about half of the dry ingredient mixture to the wet ingredients and mix on low speed (or stir gently) until just combined. Then, add about half of the milk and mix until just combined. Repeat with the remaining dry ingredients and the remaining milk, mixing until just incorporated. The most important rule here is: DO NOT OVERMIX! Overmixing develops the gluten in the flour, which can lead to a tough cake. Stop as soon as you no longer see streaks of flour. A few small lumps are perfectly fine.
Step 5: Prepare Filling
If you haven’t already, gently toss your cranberries (fresh or frozen) with a tablespoon of flour and a tablespoon of granulated sugar in a small bowl. This extra step helps them suspend in the batter and adds a touch more flavor. Honestly, I’ve skipped this step before and it still turned out great, so don’t stress too much if you’re in a hurry. But it does give them a nice little boost!
Step 6: Layer & Swirl
Gently fold about two-thirds of the cranberries into your cake batter. Don’t overmix; just a few gentle folds will do. Pour about half of the batter into your prepared baking pan and spread it evenly. Sprinkle about half of the remaining cranberries over this layer. Pour the rest of the batter on top and gently spread it out. Scatter the last of the cranberries over the top. If you like, you can use a knife or a skewer to gently swirl them into the top layer of the batter for a pretty marbled effect. It’s not necessary, but it looks lovely.
Step 7: Bake
Place the pan in your preheated oven and bake for 35-45 minutes, or until a wooden skewer or toothpick inserted into the center of the cake comes out clean. The top should be golden brown, and the edges should be pulling away slightly from the sides of the pan. Every oven is a little different, so start checking around the 35-minute mark. If the top is browning too quickly, you can loosely tent it with aluminum foil.
Step 8: Cool & Glaze
Once the cake is done, remove it from the oven and let it cool in the pan on a wire rack for about 15-20 minutes. This allows the cake to set up properly. Then, you can either serve it directly from the pan or carefully invert it onto a wire rack to cool completely. If you’re adding the glaze, wait until the cake has cooled down significantly, almost completely. For the glaze, whisk together powdered sugar, a tablespoon or two of milk (or orange juice!), and a teaspoon of vanilla extract. Start with a little liquid and add more as needed until you reach a thick but pourable consistency. Drizzle it over the cooled cake. It’s so satisfying to watch it drip down the sides!
Step 9: Slice & Serve
Once the glaze has set a bit (or if you skipped the glaze entirely), slice the cake into squares. I love serving this cake slightly warm, but it’s also fantastic at room temperature. It cuts cleanly and is just the perfect texture to handle easily. It looks beautiful with those pops of red from the cranberries peeking through.
What to Serve It With
This cranberry cake is such a versatile treat, I find myself serving it for all sorts of occasions! For a simple, comforting **Breakfast**, a warm slice alongside a steaming mug of coffee is pure bliss. The tartness of the cranberries is a lovely wake-up call, and the cake itself is satisfying enough without being too heavy. It’s also wonderful with a glass of cold milk or a cup of herbal tea. When it comes to **Brunch**, this cake really shines. It looks so elegant sliced and arranged on a platter, perhaps with a few fresh cranberries and a sprig of rosemary for garnish. It pairs beautifully with mimosas or a nice sparkling cider. For **Dessert**, it’s a fantastic alternative to heavier cakes. I love serving it with a dollop of lightly sweetened whipped cream, a scoop of vanilla bean Ice Cream, or even a drizzle of crème anglaise. The tartness of the cranberry cuts through any richness beautifully. And for those purely **Cozy Snacks**, when you just need something delicious to nibble on with a cup of tea or hot chocolate, this cake is your best friend. It’s the perfect accompaniment to a good book on a chilly afternoon. My family has a tradition of having a slice on Christmas Eve while we open presents – it’s become a cherished part of our holiday.
Top Tips for Perfecting Your Cranberry Cake
I’ve learned a few things over the years of making this glorious cranberry cake, and I’m happy to share them with you so you can achieve absolute perfection! When it comes to the cranberries, whether fresh or frozen, they’re pretty forgiving. If you’re using fresh, just make sure they’re firm and bright red. If they seem a little sad, a quick rinse and pat dry is all they need. Frozen cranberries work just as well, and as I mentioned, no need to thaw. Some folks like to toss them with a bit of flour and sugar; I find it helps them distribute nicely, so it’s a step I usually don’t skip. For mixing, the biggest piece of advice I can give is: don’t overmix the batter once you add the flour. Seriously, this is the most common mistake people make that leads to a tough cake. Mix just until the streaks of flour disappear. A few lumps? Totally fine. Your batter should look slightly lumpy, not perfectly smooth. When it comes to the swirl, if you decide to do it, don’t go too deep or try to make it too intricate. Just a gentle swirl with a knife through the top layer of batter and the cranberries will give you a lovely marbled effect without disturbing the cake too much. For ingredient swaps, if you can’t find cranberries, other tart berries like raspberries or even chopped tart cherries can work, though the flavor will change. I’ve also had success using a mix of cranberries and orange segments for a different citrusy twist! When it comes to baking, pay attention to your oven. Ovens can be notoriously inaccurate. Use an oven thermometer if you have one to ensure your 350°F (175°C) is truly 350°F. Also, placing your cake in the center of the oven ensures the most even heat distribution. If your cake is browning too quickly on top, a loose tent of aluminum foil is your best friend. For the glaze, the consistency is key. You want it pourable but not watery. If it’s too thick, add milk or juice a teaspoon at a time. If it’s too thin, add more powdered sugar. Start with less liquid than you think you’ll need! And remember, it’s okay if the glaze isn’t perfectly smooth; a slightly rustic drip can be charming!
Storing and Reheating Tips
One of the best things about this cranberry cake is how well it keeps! If you’ve got leftovers (which is rare in my house, but it happens!), storing it is a breeze. For storing at **Room Temperature**, I usually let the cake cool completely, then cover it tightly with plastic wrap or place it in an airtight container. It will stay wonderfully fresh for about 2-3 days. This is perfect for when you want a slice on demand without any fuss. If you’re planning to keep it for a bit longer, **Refrigerator Storage** is your best bet. Again, ensure it’s well-covered to prevent it from drying out. In the fridge, it should stay delicious for up to 5 days. I find that the texture can become a little firmer when chilled, so I often let it sit at room temperature for about 15-20 minutes before serving if it’s been refrigerated. For longer storage, **Freezer Instructions** are excellent. Once the cake has completely cooled, you can wrap it tightly in a layer of plastic wrap, followed by a layer of aluminum foil, or place it in a freezer-safe container. It will keep beautifully in the freezer for up to 3 months. When you’re ready to enjoy it, thaw it overnight in the refrigerator, and then let it come to room temperature. For **Glaze Timing Advice**, if you plan to freeze the cake, it’s best to glaze it *after* it has thawed. Glazing before freezing can sometimes make the glaze a bit sticky or uneven when thawed. If you’re storing it in the fridge or at room temperature, you can glaze it once it’s mostly cooled, and the glaze will set up nicely.
Frequently Asked Questions
Final Thoughts
I truly hope you give this cranberry Cake Recipe a try. It’s one of those recipes that has brought so much joy to my kitchen and to my table, and I’m so excited for you to experience it too. It’s the perfect example of how simple ingredients can come together to create something truly special. That delightful balance of sweet and tart, the wonderfully moist texture, and the comforting aroma that fills your home – it’s just pure baking magic. If you enjoy this recipe, I think you might also love my recipe for a classic Apple Crumble or perhaps my Lemon Blueberry Bread for another burst of fruity goodness. They’re all recipes that have that same comforting, homemade feel. I can’t wait to hear what you think! If you make this cranberry cake, please leave a comment below and let me know how it turned out. I’d also love to see your photos if you share them on social media – just tag me! Happy baking, and enjoy every single delicious bite!
Cranberry Cake
Ingredients
Main Ingredients
- 3 large eggs
- 2 cup granulated sugar
- 0.75 cup butter softened
- 1 teaspoon vanilla extract
- 2 cup all-purpose flour
- 12 oz fresh cranberries
Instructions
Preparation Steps
- Preheat oven to 350 degrees Fahrenheit. In a mixer, beat the eggs with the sugar until slightly thickened and light in color, about 5-7 minutes. The mixture should almost double in size. This mixture should form a ribbon when you lift the beaters out of the bowl.
- Add the butter and vanilla; mix for two more minutes. Stir in the flour until just combined. Add the cranberries and stir to mix throughout.
- Spread the batter in a buttered 9x13 inch pan. Bake for 40-50 minutes, or until very lightly browned and a toothpick inserted near the center of the cake comes out clean.
- Let the cake cool completely before cutting into small slices. Enjoy!


