


Morning light spills across the kitchen, the kettle starts its soft whistle, and I swear you can smell nostalgia in the air. My memory of Sundays is all cinnamon-sugar sunshine and the way Grandma’s kitchen clung to the warmth like a cozy blanket. These easy sticky buns are my grown-up version of that moment—a recipe that tastes like a hug, but comes together so easily you can pull it off on a busy morning or a lazy weekend. I’m not kidding when I say this is the kind of bake that makes the whole house smile. If you’ve ever tucked into a classic cinnamon roll and wished for something just as comforting but a touch simpler, you’ve found your new favorite. This is the recipe I make when I want that gooey, caramel-kissed bite without spending hours in the kitchen. Easy sticky buns, my friends—reliable, irresistible, and perfectly cozy.
What is Easy Sticky Buns?
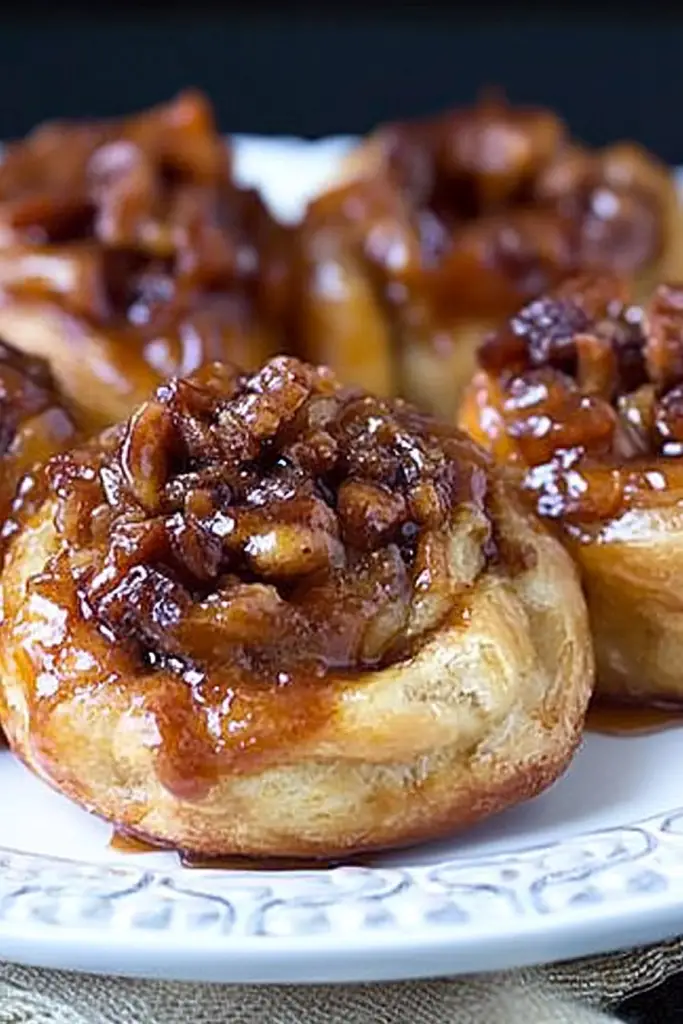
Think of easy sticky buns as the friendlier cousin of the traditional Cinnamon Roll. It’s essentially a soft, yeast-leavened dough bathed in a caramel-brown sugar glaze, rolled with cinnamon-spiced filling, sliced into rounds, and baked over a luscious, syrupy base. The name says it all: you don’t need a marathon of resting dough or a pastry chef’s velvet touch to get that gorgeous, sticky pull. It’s a one-pan wonder that comes together with pantry staples, a few simple steps, and a lot of heart. I love how this version uses a straightforward dough (or a trusty shortcut like pre-made crescent roll dough for speed) and still delivers that irresistible glaze that clings to every bite. It’s essentially comfort food you can bake on a weeknight and still feel like a celebration on a weekend morning.
Why you’ll love this recipe?
What I love most about this easy sticky buns recipe is the way it balances indulgence with practicality. It’s a dish you can tailor to your mood and your pantry, and it never feels fussy. Here’s what keeps it in the rotation:
- Flavor: The caramel-brown sugar glaze mingles with cinnamon into a warm, cozy aroma. The buns stay soft, with a gentle chew that makes you want to pull the next piece while you’re still licking the glaze off your fingers.
- Simplicity: You don’t need overnight proofing or fancy equipment. A stand mixer (or good old-fashioned elbow grease) and a pan do the heavy lifting. This is the kind of recipe that makes weeknights feel special without stealing your evening.
- Cost-efficiency: What is the best way to measure cost-efficiency?: Pantry staples, a little butter, brown sugar, cinnamon—nothing extravagant. It’s a dessert that gives you big flavor without a big price tag, and that’s a win when you’re feeding a crowd or craving something comforting on a budget.
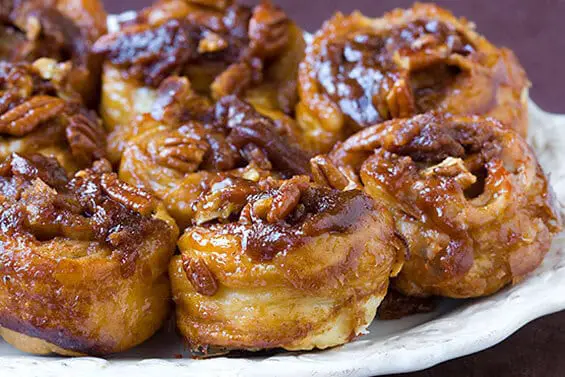
- Versatility: Switch up the fillings with nuts, dried fruit, or a drizzle of orange zest. Swap in almond milk for a dairy-free version that still feels indulgent. It’s also a great base for brunch: bake a sheet and cut into generous squares for everyone to share. If you’ve got a craving for chocolate, a few mini chips tucked into the filling can be a game-changer. My kids actually ask for seconds, which is basically proof that this recipe has staying power in a busy family kitchen.
How do I make sticky buns?
Quick Overview
This is one of those recipes that feels like a masterclass in comfort cooking, but it’s actually quite forgiving. You’ll mix a soft dough, roll it out, smear it with a cinnamon-sugar filling, and nestle slices into a shallow pan with a caramel-syrup base. Bake until glossy, golden, and irresistible. The best part? The glaze clings to every surface, so you get sticky, glossy bites from the first piece to the last. It’s a reliable method that produces bakery-worthy buns at home with minimal fuss and maximum nostalgia.
Ingredients
For the Main Batter:
- 2 1/4 cups all-purpose flour
- 1/4 cup granulated sugar
- 1 teaspoon instant yeast
- 1/2 teaspoon salt
- 3/4 cup warm milk (about 110°F/43°C) or dairy-free alternative
- 2 tablespoons unsalted butter, melted
- 1 large egg
For the Filling:
- 1/3 cup light Brown Sugar, packed
- 1 1/2 tablespoons ground cinnamon
- 2 tablespoons unsalted butter, melted (for brushing the dough)
- Optional: 1/4 cup chopped pecans or walnuts
- Optional: a pinch of nutmeg or cardamom for warmth
For the Glaze:
- 1/2 cup packed light Brown Sugar
- 3 tablespoons unsalted butter
- 2 tablespoons heavy cream or coconut milk
- 1 teaspoon vanilla extract
- Pinch of salt
- Additional milk (as needed) to reach desired glaze consistency
Step-by-Step Instructions
Step 1: Preheat & Prep Pan
Heat your oven to 350°F (175°C). Lightly grease a 9×13-inch baking pan and swirl a spoonful of extra glaze or melted butter across the bottom. I like to keep the pan well-greased so the caramel doesn’t stick, and I’ll sometimes line the pan with parchment for easy lifting of the slabs after baking. If you’re using a glass pan, give it an extra minute in the oven at the start to avoid uneven browning.
Step 2: Mix Dry Ingredients
In a large bowl or the bowl of a stand mixer, whisk together the flour, sugar, yeast, and salt. The goal is to distribute the yeast evenly so every bite gets a little lift. If you’re using instant yeast, you can skip the proofing step; it’s happy to dive right in with the liquids.
Step 3: Mix Wet Ingredients
Warm the milk just until it’s comfortable to the touch, then whisk in the melted butter and the egg. If you’re dairy-free, almond milk or oat milk with a little extra butter substitute works beautifully here. The liquids should be warm, not hot, or you’ll risk killing the yeast.
Step 4: Combine
With the mixer on low or with a wooden spoon, bring the wet and dry ingredients together into a soft dough. If it’s a touch sticky, sprinkle in a tablespoon of flour at a time until it comes together. Knead for about 5-7 minutes by hand, or 3-4 minutes in a mixer with a dough hook, until the dough is smooth, supple, and just slightly tacky. I learned this trick after years of overworking dough: a touch of stickiness is better than a tough, dry bun.
Step 5: Prepare Filling
While the dough rests, whisk the brown sugar, cinnamon, and a pinch of salt in a small bowl. If you’re using nuts, toss them with a teaspoon of flour to keep them from sinking. Brush the dough with melted butter, then sprinkle the filling in an even, generous layer. The butter helps the cinnamon and sugar cling and creates that unctuous ribbon in every bite.
Step 6: Layer & Swirl
Roll the dough into a rectangle about 14×9 inches. Brush with the remaining butter and scatter the filling evenly. If you’re adding nuts or zest, sprinkle them now. Roll tightly along the long edge, sealing the seam. Slice into 12 equal pieces and place them cut-side up in the prepared pan. The cut sides will reveal a gorgeous cinnamon swirl, and the caramel base will start to perfume the room as they bake.
Step 7: Bake
Cover the pan loosely with a towel and let the buns rise for about 20-25 minutes while the oven finishes preheating. Bake for 25-30 minutes, until the tops are golden and the glaze is bubbling up the edges. If you notice the tops browning too fast, tent with a bit of foil for the last 5-10 minutes. My trick is to do a gentle nudge test: if the center springs back slowly when you poke it, you’re good to go.
Step 8: Cool & Glaze
While the pan rests on a rack for about 10 minutes, whisk together the glaze ingredients. Pour over the buns while they’re still warm so it glazes and thickens into that glossy, sticky blanket we all crave. If you like extra drizzle, you can make a second, lighter glaze to flood the tops after slicing. The key is to aim for a glaze that’s pourable but not runny—viscous enough to cling to every surface.
Step 9: Slice & Serve
Use a sharp knife or a serrated blade to slice between the buns only after 10-15 minutes of rest. The glaze will set a touch as they cool, so serve them warm with coffee or cold milk. If you’ve got leftovers, reheat a single bun briefly in the microwave to revitalize that soft, flake-crumb texture. This is one of those recipes that tastes better the next day if you’re pulling them from the fridge, so don’t panic if you’re feeding a crowd across two mornings.
What to Serve It With
These easy sticky buns shine in a variety of settings, from casual mornings to festive brunches. Here are a few ideas that have become family traditions in my kitchen:
For Breakfast: Set a warm pan on the table with fresh coffee, sliced oranges, and a small bowl of mixed berries. The aroma will wake everyone up before the first bite, and the glaze on the buns provides that comforting sweetness to start the day.
For Brunch: Pair with a light mimosa or sparkling water with a splash of cranberry juice. Plate them with lemon zest curls and a dollop of yogurt or crème fraîche for a refined touch that still feels homey.
As Dessert: A gentle scoop of vanilla Ice Cream or a brush of vanilla whipped cream complements the cinnamon without overpowering it. You can even drizzle a bit of caramel sauce for extra drama on a celebratory table.
For Cozy Snacks: Midnight cravings? These buns are a lifesaver. Warm them for a few seconds in the microwave and pair with a steaming cup of tea or hot cocoa. The smell alone brings everyone to the kitchen, even if it’s late.
Family traditions often mean swapping in pecans one week, adding orange zest the next, or using almond milk when dairy is off the table. This recipe loves being personalized. It’s the kind of dish that gathers people because it invites conversation—about what to nibble first, which piece has the deepest caramel, and whose kid used too much cinnamon on the last batch. It’s also a great make-ahead option: you can assemble the buns, cover, refrigerate, and bake the next morning for an almost-immediate brunch win.
Top Tips for Perfecting Your Easy Sticky Buns
Over the years, I’ve learned a few tricks that take these buns from good to unforgettable. Here are the ones I reach for most often, organized by technique:
Dough Prep: If your dough feels a touch sticky, spray your hands and rolling pin with a little oil. It’s amazing how a slick surface makes rolling easier and prevents tearing. If you’re using a traditional yeast dough, give it a gentle rest after mixing so the gluten relaxes and you get a smoother roll without springing back.
Mixing Advice: Don’t overmix. You want a soft, supple dough, not a stiff one. If you’re using a stand mixer, stop as soon as the dough clings to the hook and rides up in a smooth, cohesive mass. A few tiny bubbles are a sign you’ve done it right.
Swirl Customization: Want a more dramatic swirl? Brush two parallel lines of filling rather than a single layer, then sprinkle a little extra cinnamon along those lines for a striking marmalade-like spiral through the slices. If you’re intimidated by rolling, consider a shorter rectangle and a tighter roll so the swirls stay close together in the pan.
Ingredient Swaps: For a dairy-free version, swap in plant-based butter and coconut milk. For a deeper caramel flavor, add a teaspoon of dark brown sugar to the glaze. If you’re chasing a zesty note, a teaspoon of orange zest in the filling works wonders without overpowering the cinnamon.
Baking Tips: Oven temperature can vary. If your oven runs hot, lower to 325°F (165°C) and bake a bit longer; if it runs cool, go with 350°F (175°C) and keep an eye on the glaze’s bubble. Use the jiggle test for doneness: the buns should look set in the center but still be glossy and delicious at the edges.
Glaze Variations: If you’re short on brown sugar, you can keep the glaze simple with melted butter and powdered sugar whisked with a splash of vanilla and milk. A maple-vanilla glaze adds a cozy pancake-syrup vibe that some people adore on family brunch days.
This is the part of the journey where I’ve learned to trust my senses. The dough should feel soft, the filling evenly distributed, and the glaze glossy enough to catch the light but not so thin that it pools away from the buns. When you nail those cues, you’ll taste the years of weekend mornings in every bite.
Storing and Reheating Tips
These buns travel well, but they’re at their best fresh from the oven. Here’s how I handle leftovers so you don’t lose that cozy magic:
Room Temperature: Leftover buns stay delicious for about 24 hours in a loosely covered container. They’ll soften as they sit, which is how we like them for a quick breakfast. If you’re serving them later in the day, a quick gentle re-warm will revive the softness.
Refrigerator Storage: Wrap individual buns or store them in an airtight container for up to 3 days. Reheat gently in a low oven (300°F / 150°C) for about 8-10 minutes or a quick 15-20 seconds in the microwave for a softer bite.
Freezer Instructions: Freeze baked buns in a single layer on a tray, then transfer to a freezer bag for up to 3 months. Thaw overnight in the fridge and re-warm gently in the oven to restore that fresh-glaze glow. If you’re freezing unbaked buns, assemble, seal, and freeze; bake directly from frozen, adding a few extra minutes to the bake time.
Glaze Timing Advice: If you’re freezing or refrigerating, you can glaze after warming. A warm bun accepts glaze more evenly, and you won’t lose that glossy finish that makes you reach for another piece.
Frequently Asked Questions
Final Thoughts
This recipe is a little pocket of comfort you can reach for any time you crave something sweet, soft, and soothing. The beauty of easy sticky buns is that they feel special without demanding perfection. It’s not about chasing bakery-level drama; it’s about sharing a moment—the warm scent, the caramel sheen, the way a bite melts into a sigh. I’ve made these countless times and I’ve watched friends gather around the kitchen island, plates in hand, the way a good story does when you pass it around. If you’re in a rush or you want to linger over a Sunday morning, this recipe is your best friend in the oven. Give it a try, and tell me in the comments how your family loves to spin it—extra nuts, orange zest, a chocolate twist, or a dairy-free glaze. Happy baking! And I can’t wait to hear how yours turns out.
Easy Sticky Buns
Ingredients
For the Dough
- 0.5 cup warm milk
- 0.25 cup granulated sugar
- 2.25 teaspoons active dry yeast
- 2.5 cups all-purpose flour
- 0.5 teaspoon salt
- 0.25 cup unsalted butter melted
- 1 large egg
For the Filling
- 0.75 cup packed brown sugar
- 1.5 tablespoons ground cinnamon
- 0.25 cup unsalted butter softened
For the Caramel Topping
- 0.75 cup packed brown sugar
- 0.5 cup unsalted butter
- 2 tablespoons light corn syrup
- 0.5 teaspoon vanilla extract
Instructions
Preparation Steps
- In a small bowl, combine warm milk, sugar, and yeast. Let it sit for 5-10 minutes until foamy.
- In a large bowl, whisk together flour and salt. Make a well in the center and pour in the yeast mixture, melted butter, and egg. Mix until a shaggy dough forms.
- Turn the dough out onto a lightly floured surface and knead for 5-7 minutes until smooth and elastic. Place in a greased bowl, cover, and let rise in a warm place for 1 hour, or until doubled in size.
- While the dough is rising, prepare the filling: In a small bowl, mix together brown sugar and cinnamon. Softened butter will be used to spread on the dough.
- Prepare the caramel topping: In a saucepan over medium heat, melt the butter. Stir in the brown sugar and corn syrup. Bring to a boil, then remove from heat and stir in the vanilla extract. Pour into the bottom of a 9x13 inch baking pan.
- Punch down the risen dough and roll it out into a 12x9 inch rectangle on a lightly floured surface.
- Spread the softened butter evenly over the dough, leaving a small border. Sprinkle the cinnamon-sugar mixture evenly over the buttered surface.
- Starting from the long side, tightly roll up the dough. Cut the roll into 12 equal slices.
- Place the sticky bun slices cut-side down into the prepared baking pan over the caramel topping.
- Cover loosely with plastic wrap and let rise for another 20-30 minutes.
- Preheat oven to 350°F (175°C).
- Bake for 20-25 minutes, or until golden brown and bubbly.
- Let cool in the pan for 10 minutes, then invert onto a serving platter. Serve warm.


