


Oh, these easy sticky buns! They’re the kind of treat that instantly makes any morning feel special, and honestly, any *evening* feel special too. I remember the first time I made them, it was a blustery Saturday morning, and the whole house just filled with the most incredible, warm, cinnamon-sugar aroma. My little one, who was usually glued to cartoons, actually peeked her head into the kitchen, eyes wide, asking, “What’s that yummy smell, Mommy?” That’s when I knew I was onto something good. They’re not like those fancy bakery ones that require hours of proofing and intricate rolling; these are genuinely, wonderfully easy. Think of them as a hug in a pastry – soft, gooey, and utterly comforting. If you’ve ever found yourself craving a Cinnamon Roll but dreaded the effort, you are going to adore this recipe. It’s my go-to when I need a little sweetness and don’t want to spend all day in the kitchen. They’re so much simpler than most other sticky bun recipes out there, but they deliver all the flavor and gooey goodness you could ever dream of. This is truly the best of both worlds!
What are easy sticky buns?
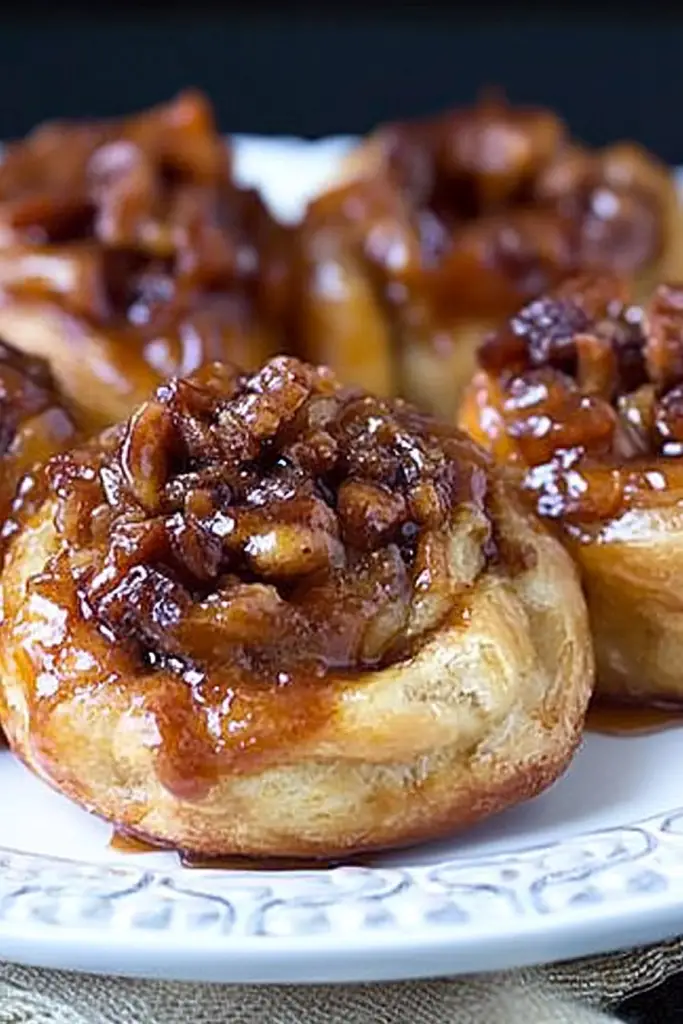
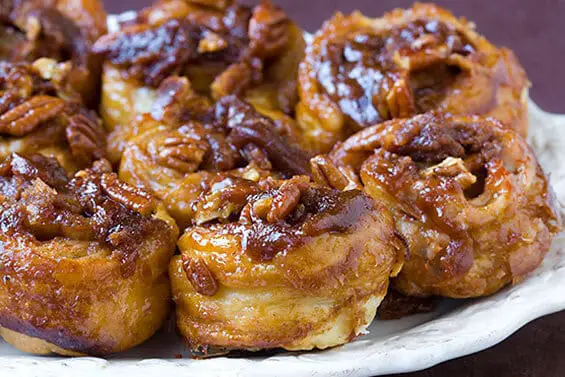
So, what exactly are these delightful little swirls of heaven? At their core, easy sticky buns are a type of sweet roll, very similar to cinnamon rolls, but with a key difference: they’re baked Upside Down! The “sticky” part comes from a rich, caramel-like topping that gets poured into the bottom of the baking pan before the dough is added. As the buns bake, this topping bubbles up and coats them in a wonderfully gooey, sticky layer of caramel, nuts (if you like!), and cinnamon. Think of it as a deconstructed caramel pecan roll, but even simpler to assemble. They are essentially a soft, slightly enriched yeast dough, swirled with a cinnamon-sugar filling, and then baked atop a luscious caramel glaze. The magic happens in that caramel layer, which caramelizes beautifully in the oven, creating that irresistible sticky texture and deep, toasty flavor. They’re less about perfect spirals and more about pure, unadulterated deliciousness. This recipe focuses on making the whole process approachable, even for beginners!
Why you’ll love this recipe?
There are so many reasons why this easy sticky bun recipe has become a staple in my kitchen, and I just know you’re going to fall in love with it too. First off, the flavor. Oh, the flavor! You get that comforting warmth of cinnamon, the sweet richness of caramel, and the tender, slightly chewy texture of the dough. It’s a symphony of deliciousness in every bite. It hits all the right notes without being overly sweet, which I really appreciate. What I love most about this recipe, though, is how incredibly simple it is. I’ve had some sticky bun recipes that felt more like a science experiment, but this one is wonderfully forgiving. You don’t need to be a master baker to get fantastic results. The ingredients are all pretty standard pantry staples, too, so you likely have most of what you need on hand already. This makes it a budget-friendly treat that still feels incredibly indulgent. Plus, the versatility is fantastic! You can easily adjust the nuts, add a touch of spice, or even make a dairy-free version. Honestly, these are perfect for any occasion. They’re a lifesaver for busy weekend mornings when you want something special without the fuss, and they’re a guaranteed crowd-pleaser when you have guests over. They just disappear so fast at my house – my kids ask for them all the time! It’s the kind of recipe that brings smiles and happy sighs, and that’s what cooking is all about for me.
How do I make sticky buns?
Quick Overview
This recipe is designed for maximum flavor with minimal fuss. We’ll start by making a quick, foolproof dough, whip up a simple cinnamon-sugar filling, and then prepare a luscious caramel sauce that bakes up perfectly in the pan. The key is the “upside-down” baking method, which ensures every bun gets beautifully coated in that sticky caramel goodness. You’ll mix the dough, let it rise briefly (or sometimes I skip a long rise altogether if I’m in a pinch!), roll it out, spread the filling, roll it up, slice it, and then bake it on top of the caramel. It sounds like a lot, but each step is straightforward and quick. Trust me, the result is so worth it!
Ingredients
For the Main Batter:
2 ¼ teaspoons active dry yeast (one packet)
¼ cup warm water (around 105-115°F) – this is crucial for waking up the yeast!
½ cup milk, warmed slightly (whole milk makes it extra tender, but 2% or even almond milk works well too – I’ve tested this and it actually makes it even creamier!)
¼ cup granulated sugar
1 large egg, at room temperature
¼ cup unsalted butter, melted and slightly cooled
1 teaspoon vanilla extract
3 to 3 ½ cups all-purpose flour, plus more for dusting
1 teaspoon salt
For the Filling:
½ cup packed light brown sugar
2 tablespoons ground cinnamon (I love using a good quality cinnamon for the best flavor)
¼ cup unsalted butter, softened
For the Glaze:
½ cup packed light brown sugar
¼ cup unsalted butter
⅓ cup light corn syrup or golden syrup (this is what makes it truly “sticky” and prevents crystallization)
½ cup chopped pecans or walnuts (optional, but highly recommended!)
Step-by-Step Instructions
Step 1: Preheat & Prep Pan
First things first, grab a 9×13 inch baking pan. This is where all the magic will happen. In the bottom of this pan, we’re going to mix the ingredients for our sticky glaze. If you’re using nuts, sprinkle them evenly over the bottom of the pan now. You can use pecans, walnuts, or even skip them if you’re not a nut person. Then, in a small saucepan over medium heat, combine the ½ cup light Brown Sugar, ¼ cup butter, and ⅓ cup corn syrup. Stir it constantly until the butter is melted and everything is smooth and bubbly. Let it simmer for about a minute, then carefully pour this glorious mixture over the nuts (or directly into the pan if you’re skipping nuts). Try to spread it out evenly. Set this pan aside while we make the dough.
Step 2: Mix Dry Ingredients
In a large mixing bowl, whisk together 3 cups of the all-purpose flour, the salt, and the granulated sugar for the dough. Give it a good mix to ensure everything is evenly distributed. This is your base for a tender and flavorful dough. I always give it a good whisk to make sure there are no lumps of salt or sugar.
Step 3: Mix Wet Ingredients
In a separate, smaller bowl, combine the warm water and the active dry yeast. Give it a gentle stir and let it sit for about 5-10 minutes. You’ll know it’s ready when it gets foamy on top – that means the yeast is alive and ready to work! Once foamy, stir in the warmed milk, the egg, the melted butter, and the vanilla extract. Whisk it all together until it’s well combined. It should look a little creamy and smell wonderful.
Step 4: Combine
Now, pour the wet ingredients into the dry ingredients in the large bowl. Mix everything with a wooden spoon or a spatula until a shaggy dough starts to form. It will look a bit sticky and messy, and that’s perfectly okay! Gradually add the remaining ½ cup of flour, a little at a time, until the dough just comes together and pulls away from the sides of the bowl. Be careful not to add too much flour, or your buns will be tough. You want a soft, slightly tacky dough. Turn the dough out onto a lightly floured surface and knead it for about 5-8 minutes, until it’s smooth and elastic. If it’s too sticky, add a tiny bit more flour, but just a tablespoon at a time. I usually do this by hand, but a stand mixer with a dough hook works wonders too!
Step 5: Prepare Filling
While the dough is having a little rest (or if you’re short on time, right after kneading), let’s make the filling. In a small bowl, combine the ½ cup packed light Brown Sugar and the 2 tablespoons of ground cinnamon. Stir them together until they’re well mixed. This is your flavor powerhouse!
Step 6: Layer & Swirl
Lightly flour your work surface again. Take your kneaded dough and roll it out into a large rectangle, about 12×18 inches. Aim for an even thickness. Now, take your softened butter (that ¼ cup) and spread it evenly all over the surface of the dough, all the way to the edges. Don’t worry if it’s not perfectly smooth. Then, sprinkle the cinnamon-sugar mixture evenly over the buttered dough. Gently press it down with your hands to help it adhere. Now, starting from one of the longer sides, tightly roll up the dough, jelly-roll style. Try to keep it as even as possible as you roll. Pinch the seam closed at the end. Once rolled, use a sharp knife or dental floss (my secret weapon for clean cuts!) to slice the log into 12 equal rolls. Place these rolls, seam-side down, into the prepared baking pan on top of the caramel mixture. Give them a little space, as they will expand.
Step 7: Bake
Now for the best part! Cover the pan loosely with plastic wrap or a clean kitchen towel and let the buns rise in a warm spot for about 30-45 minutes, or until they look puffy. They don’t need to double in size; just get a nice lift. While they’re rising, preheat your oven to 350°F (175°C). Once they’ve puffed up, remove the cover and bake the sticky buns for 25-30 minutes, or until they’re golden brown on top and the caramel is bubbly around the edges. Keep an eye on them; ovens can vary!
Step 8: Cool & Glaze
This is where patience is key, and it’s the hardest part! Once the buns are out of the oven, let them cool in the pan for about 10-15 minutes. This allows the caramel to set slightly but remain gooey. Then, place a large serving platter or a baking sheet over the top of the pan. Carefully, and with oven mitts, flip the pan over so the buns and the caramel glaze land on the platter. You might need to gently loosen any buns that stick with a knife. If any caramel or nuts are left in the pan, just scrape them out and spoon them over the buns. The aroma at this stage is just heavenly!
Step 9: Slice & Serve
Once the sticky buns have cooled a little more (they are best served warm, but not scorching hot!), you can gently separate them and serve. The best way to cut them is usually with a sharp knife or even kitchen shears if you want to be really precise. They are absolutely divine served warm with a cup of coffee or a cold glass of milk. Enjoy that sticky, gooey perfection!
What to Serve It With
These easy sticky buns are so versatile, they’re practically a meal in themselves, but they pair beautifully with so many things! For a relaxed weekend breakfast, I love serving them alongside a big pot of freshly brewed coffee. The warmth and richness of the buns complement the coffee perfectly. If you’re feeling a bit more ambitious for brunch, these are a showstopper! They look so elegant piled high on a nice platter. I often serve them with some fresh fruit salad – the brightness of berries or melon cuts through the richness of the buns beautifully. A side of crispy bacon or savory sausage also makes for a lovely contrast. For dessert, these are just divine, especially served warm with a scoop of vanilla bean Ice Cream or a dollop of whipped cream. The melting ice cream mingling with the caramel is pure bliss. And for those cozy evenings when you just need a little something sweet, they’re perfect on their own, maybe with a hot chocolate or a chai tea. My family has a tradition of having these on the first snow day of the year; it just makes the whole day feel extra special and cozy.
Top Tips for Perfecting Your Easy Sticky Buns
Over the years, I’ve learned a few little tricks that take these easy sticky buns from good to absolutely spectacular. One thing I always stress is not to overheat your milk for the dough – too hot and it kills the yeast, too cold and it won’t wake up properly. Aim for that lukewarm sweet spot, around 105-115°F. When it comes to flouring your surface and your dough, be gentle. You don’t want to incorporate too much extra flour, as this can make the buns tough. Think of it as just enough to prevent sticking. For the swirl, I’ve found that spreading the softened butter evenly before adding the cinnamon-sugar helps it stick and creates those lovely layers. And when you roll it up, try to keep it as tight and consistent as possible – this leads to beautiful, uniform swirls. Don’t be afraid of the corn syrup in the glaze; it’s essential for that signature sticky, glossy finish and prevents the caramel from getting grainy. If you can’t find corn syrup, golden syrup is a great substitute. For the nuts, I often give them a light toast in a dry skillet before adding them to the pan; it really wakes up their flavor. When it comes to baking, every oven is a little different, so watch for those golden-brown edges and bubbly caramel. If the tops are browning too quickly, you can always tent the pan loosely with foil. And the trickiest part? Waiting those 10-15 minutes after they come out of the oven before flipping. It’s agonizing, I know, but it’s crucial for allowing the caramel to set up just enough so it coats the buns beautifully without just running everywhere. If your glaze looks a little thin after flipping, you can always pop the pan back under the broiler for just a minute or two (watching it *very* closely!) to thicken it up.
Storing and Reheating Tips
These sticky buns are absolutely at their best when they’re fresh and warm, but they store surprisingly well too! If you happen to have any leftovers (which is rare in my house!), you can store them at room temperature in an airtight container for up to 2 days. Just make sure they’ve cooled completely before covering. The glaze might get a little less shiny over time, but they’ll still be delicious. For longer storage, I keep them in the refrigerator. Again, make sure they’re completely cooled first, then seal them in an airtight container. They’ll stay good in the fridge for about 4-5 days. They’re still pretty tasty cold, but for that fresh-baked gooeyness, reheating is key. To reheat, I like to pop a bun or two in a moderate oven (around 300°F or 150°C) for about 5-10 minutes, just until warmed through and the glaze is melty again. You can also microwave them for about 15-20 seconds, but be careful not to overdo it, or they can become a bit chewy. If you’re really planning ahead, these freeze wonderfully! Let them cool completely, then wrap them individually in plastic wrap, followed by a layer of aluminum foil, or place them in a freezer-safe container. They’ll keep in the freezer for up to 3 months. To thaw, simply remove them from the freezer and let them defrost at room temperature, or reheat them directly from frozen in a low oven. For the glaze, it’s usually best to add it right after baking for the ultimate sticky goodness. If you plan to freeze them, you can either freeze them with the glaze on, or bake them, cool them, then freeze. When reheating from frozen, the glaze will re-melt nicely!
Frequently Asked Questions
Final Thoughts
So there you have it – truly easy sticky buns that deliver on every single promise. They’re a testament to the fact that you don’t need complicated steps or fancy ingredients to create something truly magical in the kitchen. The combination of the soft, tender dough, the warm cinnamon-sugar swirl, and that rich, gooey caramel topping is just divine. It’s the kind of recipe that makes your kitchen smell incredible and your loved ones happy. If you enjoyed making these, I bet you’d also love my recipe for [Link to a related recipe, e.g., “Fluffy Buttermilk Pancakes”] or perhaps my [Link to another related recipe, e.g., “Simple Apple Crumble”]. They share that same spirit of deliciousness made easy! I can’t wait to hear how your easy sticky buns turn out. Please leave a comment below and let me know your favorite part, or if you tried any fun variations! Happy baking, everyone!
Easy Sticky Buns
Ingredients
Dough Ingredients
- 0.25 cup warm milk around 105-115°F
- 0.25 cup warm water around 105-115°F
- 2.25 teaspoon active dry yeast
- 0.25 cup granulated sugar
- 0.5 cup unsalted butter melted
- 2 large eggs room temperature
- 3.5 cup all-purpose flour plus more for dusting
- 0.5 teaspoon salt
Filling Ingredients
- 0.75 cup packed light brown sugar
- 1.5 tablespoon ground cinnamon
- 0.25 cup unsalted butter softened
Topping Ingredients
- 0.75 cup packed light brown sugar
- 0.25 cup light corn syrup
- 0.25 cup unsalted butter cut into pieces
- 1 cup chopped pecans
Instructions
Preparation Steps
- In a small bowl, combine warm milk, warm water, yeast, and 1 tablespoon of the granulated sugar. Let it sit for 5-10 minutes until foamy.
- In a large bowl, whisk together the melted butter, remaining granulated sugar, and eggs. Add the yeast mixture and stir to combine.
- In a separate bowl, whisk together the flour and salt. Gradually add the flour mixture to the wet ingredients, mixing until a soft dough forms.
- Turn the dough out onto a lightly floured surface and knead for 8-10 minutes until smooth and elastic. Place the dough in a greased bowl, cover, and let rise in a warm place for 1-1.5 hours, or until doubled in size.
- While the dough is rising, prepare the topping: In a small saucepan, melt the butter for the topping. Stir in the brown sugar and corn syrup. Bring to a simmer over medium heat and cook for 1 minute. Remove from heat and stir in the pecans.
- Once the dough has risen, punch it down and turn it out onto a lightly floured surface. Roll the dough into a rectangle, approximately 12x18 inches.
- In a small bowl, mix together the softened butter, brown sugar, and cinnamon for the filling. Spread this mixture evenly over the rolled-out dough, leaving a small border at the top.
- Starting from the long side, tightly roll up the dough. Pinch the seam to seal.
- Cut the roll into 12 equal slices. Pour the prepared topping into a greased 9x13 inch baking dish.
- Place the dough slices, cut-side down, on top of the topping in the baking dish. Cover and let rise for another 30 minutes.
- Preheat oven to 350°F (175°C). Bake for 20-25 minutes, or until golden brown and the topping is bubbly.
- Let the buns cool in the dish for 5-10 minutes before inverting them onto a wire rack to cool completely.


