


I’m convinced there are few things as comforting as a pot of shepherd’s pie bubbling away on the stove, the kitchen smelling like caramelized onions, beefy goodness, and Mashed Potatoes that are practically velvet. This Easy Shepherd’s Pie is my weeknight lifesaver—it’s creamy, hearty, and a total crowd-pleaser without requiring hours of labor. I remember my grandmother making something similar on cold Saturdays, and the aroma would drift through the whole house, pulling everyone to the table like a magnetic force. These days I whip it up after soccer practice or when the fridge is a little too full of odds and ends. It’s basically a destination casserole: you get savory filling underneath, a pillow of buttery potato on top, and a glossy finish that makes it feel special. If you’ve got 30 minutes to spare and a craving you can’t shake, this Easy Shepherd’s Pie might just become your new best friend.
What is easy shepherd’s pie?
Think of Easy Shepherd’s Pie as a cozy, all-in-one comfort dish that travels well from stove to table. It’s essentially ground meat simmered with aromatics and vegetables, crowned with a creamy mashed potato layer, and finished with a little glaze or cheese that browns to a perfect golden top. The name comes from the traditional shepherd’s pie, which folks in the British Isles have been making for generations with meat on the bottom and Mashed Potatoes on top. This version keeps the spirit but streamlines it for weeknights: it’s hearty without being fussy, flexible with pantry staples, and forgiving if you’re juggling a thousand other things. It’s comfort food that feels like home, no matter where you live.
Why you’ll love this recipe?
What I love most about this Easy Shepherd’s Pie is how foolproof it feels while still delivering that “wow” factor when you lift the spoon and see the Creamy Potato crown. The flavor is deeply satisfying—savory, slightly sweet from caramelized onions, and a gentle kiss of herbs that makes it smell like a hug in a bowl. It’s incredibly simple: you can prep the components while the kids do their homework, then bake and greet your family with a complete meal in under an hour. Budget-wise, it’s friendly too; you’re using affordable ground meat, potatoes, and pantry staples you probably already have. And the versatility—oh, the versatility. You can swap in ground turkey, add a handful of mushrooms, or sneak in grated carrots for a hint of sweetness. What I love most about this recipe is that it travels seamlessly between casual weeknight dinners and cozy Sunday dinners with guests. It’s the dish my friends ask for when they’re tired after work and want something that tastes like somebody’s grandmother cooked it just for them. This one’s a lifesaver on busy nights, and it never fails to deliver that comforting, homey vibe.
How do I make a Shepherd’s Pie?
Quick Overview
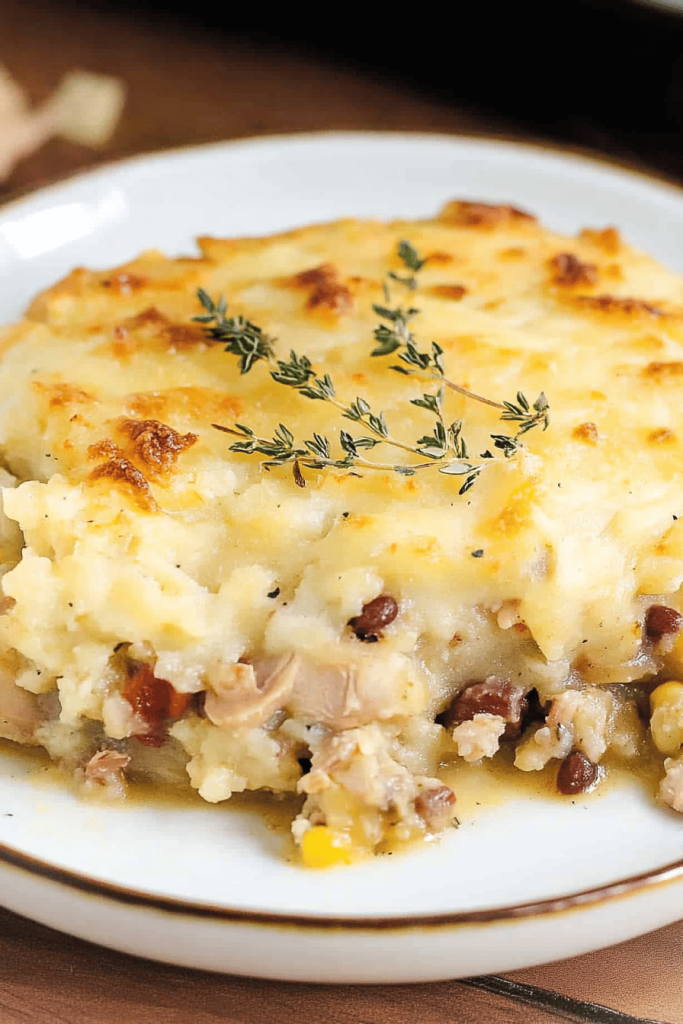
This is basically a two-chapter meal: a savory filling simmered to develop flavor, and a fluffy Mashed Potato topping that comes together with butter, cream, and a pinch of salt. You’ll layer the mash over the filling, slick it into an even layer, and finish with a light glaze that helps the top bronzy and glossy. The beauty is in the balance—soft potatoes, meaty filling, and a hint of cheese or glaze to pull everything together. The method is forgiving: you can prep ahead, assemble, and bake when you’re ready. It’s the kind of recipe that tastes like you spent hours over a hot stove, but you didn’t have to.
Ingredients
For the Main Batter:
- 2 pounds russet or Yukon Gold potatoes, peeled and cut into chunks
- 4 tablespoons unsalted butter, plus a little extra for the mash
- 1/2 cup heavy cream or whole milk (almond milk works for a lighter version)
- Salt, to taste (start with 1 teaspoon and adjust)
- Freshly ground black pepper
For the Filling:
- 1 1/2 pounds ground beef (or a mix of beef and lamb)
- 1 tablespoon olive oil
- 1 large onion, finely chopped
- 2 medium carrots, diced
- 2 cloves garlic, minced
- 1 tablespoon tomato paste
- 1 cup beef stock (or chicken stock)
- 1 tablespoon Worcestershire sauce
- 1 teaspoon dried thyme or 1 tablespoon fresh thyme
- 1 cup frozen peas (optional)
- Salt and pepper to taste
For the Glaze:
- 1/4 cup grated Parmesan or sharp cheddar (optional for a cheesy finish)
- 1 teaspoon butter, melted (to brush over the potato surface)
- A pinch of paprika or smoked paprika for color and a hint of warmth
Step-by-Step Instructions
Step 1: Preheat & Prep Pan
Set your oven to 375°F (190°C). Lightly grease a 9-by-13-inch baking dish or a similar casserole pan. If you’re using a cast-iron skillet, that’s amazing too—the skillet will give you a bit of extra caramelization on the edges, which I’m not mad about. You want the pan to be comfortable to carry, because you’ll be moving it from stove to oven with hot hands and a confident grin.
Step 2: Mix Dry Ingredients
In a small bowl, season the ground meat with a pinch of salt and pepper, plus any dry herbs you’re using (thyme is a classic). This step isn’t about building flavor so much as ensuring the beef hits the pan ready to brown evenly. If you like, you can sprinkle in a touch of paprika to give the meat a warm hue as it cooks.
Step 3: Mix Wet Ingredients
Have your minced garlic, tomato paste, Worcestershire sauce, and stock ready. These are your flavor boosters. Stir the tomato paste into the stock so it dissolves and glistens; it’ll help the filling cling to the meat without becoming watery. Mixing the wet components ahead of time keeps things moving smoothly once you start browning the meat.
Step 4: Combine
Heat a splash of olive oil in a skillet over medium-high heat. Add the onion and carrot, cooking until they’re soft and just starting to brown around the edges—this is the moment the kitchen fills with that sweet, almost caramelly aroma. Add the ground meat and sear it until it’s evenly browned. Break up any clumps so you’ve got a uniform mixture. Stir in the garlic and tomato paste, cooking for another minute to wake up the flavors. Pour in the stock and Worcestershire, then sprinkle in thyme. Let it simmer until the mixture thickens a bit and looks glossy, about 6–8 minutes. If you’re using peas, fold them in at the end so they stay bright and not mushy.
Step 5: Prepare Filling
Season the filling generously with salt and pepper. Taste and adjust—this is where I’ll balance a touch more Worcestershire or a pinch more thyme if the flavors are feeling flat. If you want extra depth, a splash of red wine or a teaspoon of Dijon mustard can be whisked in at this stage. The filling should look saucy but not soupy; you want it to settle a bit when you spoon it into the pan.
Step 6: Layer & Swirl
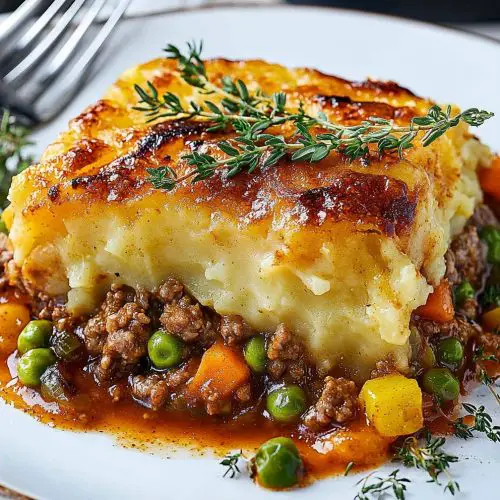
Now the hero: the mashed potatoes. Boil the potatoes until they’re tender, then drain well. Mash with butter, cream, and a generous pinch of salt and pepper until smooth and luxurious. Spread the mash over the filling in an even layer, then use the back of a spoon to make a few decorative swirls on top. If you’re feeling fancy, you can sprinkle a little grated cheese over the top for a bubbly crust that’s irresistible to pull apart with a fork.
Step 7: Bake
Pop the dish into the oven and bake for 25–30 minutes, or until the filling is bubbling at the edges and the potato topping is lightly golden. If you’re after a deeper browning, switch the oven to broil for the last 2–3 minutes, watching carefully so nothing burns. The scent is enough to lure everyone to the table—I promise you.
Step 8: Cool & Glaze
Let the pie rest for 10 minutes after you pull it out. Resting allows the filling to reabsorb some juices and makes slicing cleaner. Brush on the glaze if you’re using one—melted butter mixed with a touch of paprika gives a gorgeous gloss and a subtle kick. If you’re cheese-forward, sprinkle a light layer of Parmesan or cheddar and give it a quick bake to melt and crisp the top.
Step 9: Slice & Serve
Slice into squares or generous wedges and plate with a simple green salad or steamed greens to cut the richness. The first bite should reveal the creamy potato texture, the savory meat filling, and a hint of caramelization from the browned edges. My kids actually ask for seconds—every single time—and I’m not complaining. This is the sort of dish that disappears in minutes when you’re feeding hungry humans who crave comfort.
What to Serve It With
This Easy Shepherd’s Pie shines on its own, but a few thoughtful accompaniments can elevate the experience and help you tailor it to the moment.
For Breakfast: Leftover slices warmed with a fried egg on top and a sprinkle of chives. The salty meat, creamy potatoes, and yolk all mingle in a way that somehow feels right in the morning. Serve with a strong cup of coffee and you’ve got a cozy start to the day.
For Brunch: A bright side salad with lemon vinaigrette and maybe a light bacon crumble. A chilled glass of sparkling apple cider or a mimic of a Bloody Mary can balance the richness, turning a hearty dish into a late-m-morning feast.
As Dessert: Okay, hear me out—this is the kind of dish you could stretch into a savory-sweet if you add a spoonful of cranberry chutney into the filling or a touch of fig jam in the glaze. It’s not traditional, but it’s a playful twist that can surprise your guests. For most folks, though, it’s best as a dinner staple, not a dessert.
For Cozy Snacks: Cut into petite squares and serve as a bite-sized treat with a dollop of sour cream or tangy pickles on the side. It’s the kind of thing you can pull out while you’re standing at the counter, chatting with a friend, and still feel like you’ve got a real meal in hand.
We keep leftover slices tucked into the fridge for a quick reheated lunch, and I love to pair them with a simple green salad or roasted vegetables. The leftovers are just as good as day one, and sometimes I’ll even grate a little extra cheese over the top before reheating for an extra indulgent touch.
Top Tips for Perfecting Your Easy Shepherd’s Pie
Small tweaks can make a big difference, especially when you’ve got a crowd to feed or you’re cooking on a tight schedule.
Zucchini Prep: I don’t rely on zucchini in this version, but if you ever want to sneak it in, grate a small zucchini, salt it to draw out moisture, and squeeze it dry before folding into the filling. It adds moisture and a hint of sweetness without diluting the beefy flavor. If you skip it, you’ll still have a perfect texture—the potatoes stay plush and the filling stays robust.
Mixing Advice: Don’t overwork the mashed potatoes. Aim for a smooth, fluffy texture rather than a glossy, overworked mash. A few light stirs and a touch of butter go a long way. When you overmix potatoes, they turn gluey, which is not the dream here.
Swirl Customization: If you love a little color, dust the top with paprika or smoked paprika before baking. It gives a gorgeous rosy top and a hint of warmth. If you’re cheese-obsessed, add a layer of shredded cheese beneath the glaze for a bubbling, golden cap.
Ingredient Swaps: Ground turkey works beautifully if you’re avoiding red meat. If you’re vegetarian, you can use lentils or textured vegetable protein with the same aromatics and a vegetable stock, though you’ll want to thin it with a bit more liquid. For a gluten-free version, thicken the filling with a slurry of cornstarch and water instead of flour.
Baking Tips: If your oven runs hot, check at 20 minutes and cover the top with foil to prevent the potatoes from browning too quickly. If it runs cool, give it a few extra minutes. You’re aiming for bubbling edges and a lightly bronzed top.
Glaze Variations: A glossy glaze is optional but delightful. Try a honey-butter glaze for a touch of sweetness, or a balsamic glaze for a tangy, sophisticated finish. For a savory-salty vibe, brush a light coat of garlic-herb butter over the top before returning to the oven.
My best lessons came from trying this with a few different meats, experimenting with thyme vs. rosemary, and adjusting the stock level until the filling clings to the spoon just right. It’s not a high-stress recipe; it’s a comforting one that invites you to taste, adjust, and put your own stamp on it. If you’ve got a trick that makes it even better, I’d love to hear it—the kitchen is always more fun with a few shared tweaks!
Storing and Reheating Tips
Storage and reheating are where this dish really shines, because you can make it once and savor it for a few days without sacrificing flavor or texture.
Room Temperature: Leftover slices stay delicious for up to two hours on the counter, covered loosely with foil. If your kitchen runs warm, move leftovers to the fridge sooner rather than later to keep the potatoes from sweating and the filling from breaking down.
Refrigerator Storage: Store in an airtight container for up to 4 days. Reheat gently in the microwave in 1–2 minute bursts, or in a 350°F (175°C) oven, covered, until warmed through. A quick stir halfway helps everything rejoin its creamy texture.
Freezer Instructions: You can freeze the assembled pie (without glaze) for up to 2 months. Wrap well with foil and then place in a freezer bag for extra protection. Thaw in the fridge overnight, then bake at 350°F (175°C) until bubbling and hot throughout, roughly 25–35 minutes depending on thickness. If you’re freezing already baked slices, reheat covered at 325°F (165°C) until heated through, about 15–20 minutes.
Glaze Timing Advice: If you plan to freeze, skip the glaze on the top; you can brush it on after reheating for a fresh glossy finish. If you’re serving immediately, the glaze or cheese topping adds a nice finish right out of the oven.
In my kitchen, this is the dish I’ll pull from the fridge after a long day and still present with pride. It reheats beautifully, and the flavors deepen after a night in the fridge—the kind of thing that makes you feel like you’ve discovered something wonderfully comforting and simple all at once.
Frequently Asked Questions
Final Thoughts
There’s something almost nostalgic about Easy Shepherd’s Pie—the way it feels like a warm hug from your own kitchen, no matter how wild the day has been. It’s the kind of recipe that travels through generations, but adapts beautifully to your table. Creamy potatoes, savory filling, and that comforting aroma all come together in a way that makes you want to pause, breathe, and savor the moment. If you’re cooking for a crowd, this dish scales with ease and rewards you with a big, satisfying payoff. If you’re cooking for one or two, it’s still a generous, forgiving companion for a simple weeknight supper. I’ve made this countless times and it never fails to delight, especially when you hear a chorus of “mmm”s around the table. Give it a try, tweak it to your taste, and share your variations with me in the comments—I’d love to hear how your family styles this cozy classic. Happy baking!
Easy Shepherd's Pie
Ingredients
For the Filling
- 1.5 pound ground beef
- 1 cup chopped onion
- 2 cloves garlic minced
- 1 cup frozen peas
- 1 cup frozen corn
- 0.5 cup beef broth
- 2 tablespoons tomato paste
- 1 tablespoon Worcestershire sauce
- 0.5 teaspoon dried thyme
- 0.25 teaspoon black pepper
- 0.5 teaspoon salt
For the Topping
- 2 pounds potatoes peeled and quartered
- 0.5 cup milk
- 4 tablespoons butter
- 0.5 teaspoon salt
- 0.25 teaspoon black pepper
Instructions
Preparation Steps
- Preheat oven to 375°F (190°C).
- For the filling: In a large skillet, brown the ground beef over medium-high heat. Drain off any excess grease.1.5 pound ground beef
- Add the chopped onion and minced garlic to the skillet and cook until softened, about 5 minutes.1.5 pound ground beef
- Stir in the frozen peas, frozen corn, beef broth, tomato paste, Worcestershire sauce, thyme, pepper, and salt. Bring to a simmer and cook for 5 minutes, stirring occasionally.1.5 pound ground beef
- For the topping: While the filling is simmering, boil the potatoes in a large pot of salted water until tender, about 15-20 minutes. Drain well.1.5 pound ground beef
- Mash the potatoes with milk, butter, salt, and pepper until smooth and creamy.1.5 pound ground beef
- Pour the beef filling into a 9x13 inch baking dish.
- Spread the mashed potatoes evenly over the beef filling.
- Bake in the preheated oven for 20-25 minutes, or until the topping is golden brown and the filling is bubbly.
- Let stand for 5-10 minutes before serving.


