


There’s something about walking into the kitchen and being greeted by the warm, sweet aroma of roasting butternut squash that instantly takes me back to chilly autumn evenings with my family. I remember the first time I made roasted butternut squash—it was a last-minute side for dinner, and honestly, I was blown away at how simple and incredible it was. I always thought squash was kind of fussy, but roasting it? Total game changer. If you’re used to mashed potatoes or roasted carrots as your go-to, roasted butternut squash might just become your new favorite—it’s like autumn in a bowl, slightly sweet, tender, with edges caramelized to pure magic. Plus, it’s ridiculously easy to throw together when you’re juggling dinner and trying to keep the kids from arguing over the TV remote. Trust me, once you make this, it’ll disappear in minutes at your house too.
What is roasted butternut squash?
Think of roasted butternut squash as nature’s candy, baked to perfection. It’s essentially chunks or slices of butternut squash, which itself is a type of winter squash known for its sweet, nutty flavor and velvety texture once cooked. Roasting is the magic trick that turns this pale orange gourd into tender golden edges that could convince even the pickiest eaters to take seconds. The name’s straightforward—“roasted” because you cook it dry in the oven with a bit of oil and seasoning, and “butternut squash” because well, that’s the star of the show. It’s comfort food without any fuss, which makes it a staple in my kitchen, especially when the days start getting shorter and we all want food that feels like a warm hug.
Why you’ll love this recipe?
What I adore about roasted butternut squash is that it hits all the marks without any complicated steps. First off, the flavor—when you roast butternut squash, the natural sugars caramelize and bring out this deep, buttery sweetness with just a hint of earthiness. It’s not overwhelming, but it’s definitely addictive. My kids ask for this all the time, and honestly, that’s saying a lot since they can be stubborn with veggies.
Then there’s the simplicity. Seriously, prepping this is a breeze. Chop, toss with olive oil and a pinch of salt, maybe a few extra spices if you’re feeling fancy, and roast. No standing over the stove or babysitting it for hours. It’s a lifesaver on busy nights when you want something healthy but don’t have the energy to slave in the kitchen.
Cost-wise, butternut squash is wonderfully affordable and lasts well in the pantry, so you can keep it in stock without worrying it’ll go bad the next day. Plus, it’s so versatile—serve it as a side with your roast chicken; toss it into salads for a tasty twist; or puree it for soups and pastas. I even love blending leftovers into smoothies for a subtle sweetness boost! If you like recipes like roasted carrots or baked sweet potatoes, you’ll find roasted butternut squash fits right in but offers that unique rich, buttery flavor that’s just something else.
How do I make roasted butternut squash?
Quick Overview
Here’s the scoop: peeling, chopping, tossing with olive oil and seasoning, and roasting until golden and tender—super straightforward. What makes this method a winner is how the oven’s dry heat caramelizes the sugars in the squash, creating crisp edges and a melt-in-your-mouth interior, with minimal hands-on time. You can even prep it ahead or make extra to use in other dishes throughout the week. It’s like magic, but way easier than it sounds.
Ingredients
For the Roasted Butternut Squash:
- 1 medium butternut squash (about 2-3 pounds, store-bought or local farmer’s market is best for freshness)
- 2-3 tablespoons olive oil (extra virgin adds great flavor)
- Salt to taste (I like flaky sea salt for the finishing touch)
- Freshly ground black pepper (optional, for a subtle kick)
- Optional spices: ground cinnamon, smoked paprika, nutmeg, or chili flakes for some warmth or subtle heat
For a Simple Glaze (optional):
- 1 tablespoon maple syrup or honey (adds a lovely sheen and subtle sweetness)
- 1 tablespoon melted butter or more olive oil
- A pinch of salt
Step-by-Step Instructions
Step 1: Preheat & Prep Pan
Preheat your oven to 425°F (220°C). This temperature is perfect for getting those crispy browned edges without dry, shriveled squash. Line a large baking sheet with parchment paper or lightly oil it to prevent sticking—trust me, this helps clean-up later and keeps your squash looking pretty.
Step 2: Peel and Cut the Squash
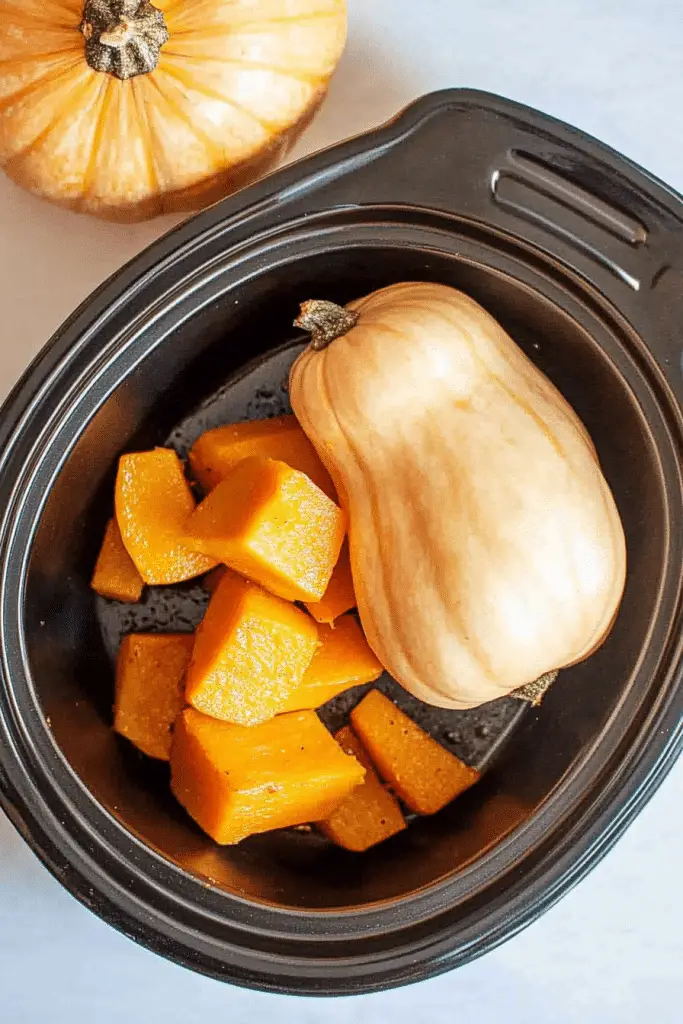
Carefully peel the butternut squash with a sturdy vegetable peeler or a sharp knife—if you’ve got one of those Y-shaped peelers, you’re golden. I always take my time here because the skin’s a bit tough; rushing leads to accidents (yes, I’ve learned the hard way!). Then slice it in half lengthwise, scoop out the seeds, and chop into roughly 1-inch cubes. Don’t stress about perfect sizes; it’s all about rustic charm and even roasting.
Step 3: Toss with Oil and Seasoning
Place the cubes in a large bowl. Drizzle with olive oil, sprinkle salt and any spices you want to try, then toss everything gently with your hands or a big spoon. You want every piece coated but not drowning in oil—too much makes them soggy, too little and they stick or dry out.
Step 4: Spread on Baking Sheet
Spread the squash evenly in a single layer on your sheet. Crowding the pan means steaming instead of roasting, so give those chunks some breathing room. If you’ve got two pans, it’s worth using both to keep air circulating and get that perfect texture all around.
Step 5: Roast
Pop them in the oven and roast for 25-30 minutes, flipping halfway through so both sides get their golden caramelization. The smell at this point? Absolutely irresistible. You’ll know they’re done when a fork pierces easily and the edges are beautifully browned but not burnt.
Step 6: Optional Glaze
If you want to make it a little extra special, whisk your maple syrup or honey with the melted butter and a pinch of salt, and brush over the squash in the last 5 minutes of roasting. This glaze brings out a shimmering sweetness that’s next-level but totally optional.
Step 7: Serve Warm
These little golden nuggets are best enjoyed fresh and warm, straight from the oven. I like to sprinkle a little flaky sea salt over the top right before serving to enhance all those rich roast flavors.
What to Serve It With
For Breakfast: These roasted cubes are divine tossed over soft scrambled eggs or alongside avocado toast. A cup of dark roast coffee seals the deal for a cozy morning. My family likes to add a sprinkle of feta for that tangy contrast.
For Brunch: Serve them on a platter with poached eggs, crispy bacon or sausages, and a drizzle of herb-infused olive oil. A chilled mimosa or a fresh-squeezed juice pairs beautifully. This setup never fails to impress guests.
As Dessert: You wouldn’t expect butternut squash here, but roasted with a maple glaze and dusted with cinnamon sugar, it’s lovely served warm with vanilla ice cream or whipped cream. My kids love this twist—it’s like sneaking veggies into an indulgent treat!
For Cozy Snacks: When you’re curled up with a good book or watching a movie, these are your go-to cozy bites. Serve with a sprinkle of chili flakes and a squeeze of fresh lime for a spicy-sour kick that’s surprisingly addictive. Perfect for those nights when you want something comforting but not heavy.
Top Tips for Perfecting Your Roasted Butternut Squash
Peeling and Cutting: If you struggle with the tough skin, microwave the squash for 2-3 minutes first—it softens up the skin slightly and makes peeling easier. Also, try to keep your cubes uniform in size to ensure even cooking. I learned the hard way when some chunks burned while others were still raw!
Seasoning Magic: Salt is your best friend here. Don’t be shy with it. I like to add a pinch of smoked paprika or a touch of cinnamon; these tiny flavor boosts make a big difference. Freshly ground pepper adds a nice touch of warmth without overpowering the natural sweetness.
Tossing Technique: Use your hands for tossing instead of a spoon—this gives you better control and ensures a light, even coat. I’ve found that over-oiling leads to soggy edges, so just a light drizzle is enough.
Roasting Tips: If your oven tends to have hot spots, rotate the pan halfway through for even browning. Also, for an extra crispy edge, turn on the broiler for the last 2 minutes but watch carefully—it can go from perfect to burnt in seconds!
Glazing Variations: Maple syrup is my go-to, but honey, molasses, or even a balsamic reduction work wonders. I once tried a brown butter glaze and it was heavenly—next-level richness without being over the top.
Storing and Reheating Tips
Room Temperature: Roasted butternut squash holds up well for a few hours on the counter—just cover it loosely with foil or a clean dish towel to keep the edges from drying out. Great if you’ve got guests and need to prep ahead.
Refrigerator Storage: Store leftovers in an airtight container for up to 4 days. I always let the squash cool completely before refrigerating to avoid sogginess. When ready to eat again, I reheat it in a 350°F oven for 10 minutes to bring back the crispiness—microwaving tends to make it a bit mushy.
Freezer Instructions: Roasted squash freezes surprisingly well. Spread cooled cubes on a baking sheet and freeze individually for an hour before transferring to a freezer bag. This way they won’t freeze into one big clump. Keep frozen for up to 3 months. Reheat straight from the freezer in a hot oven until heated through.
Glaze Timing Advice: If using glaze, it’s best added just before serving rather than before storing, as the syrups can make the squash sticky and softer over time, especially in the fridge or freezer.
Frequently Asked Questions
Final Thoughts
Roasted butternut squash is one of those recipes I make over and over because it ticks every box: easy, affordable, unbelievably tasty, and flexible enough for every meal. It’s become my secret weapon on nights when I want something satisfying without fuss, and a family favorite that never lasts long. If you’re someone who loves simple veggies but hates spending too much time prepping, this is your jam. Plus, it pairs so well with so many dishes, it’s like having a multiplication effect on your dinners.
Try this recipe, mess around with your favorite spices or glaze variations, and let me know what flavor combo you fall in love with! I’m always excited to hear how it turns out or what you’ve added to make it your own. Happy roasting—and don’t forget to savor the smell while it fills your kitchen.
roasted butternut squash
Ingredients
Main Ingredients
- 1 medium butternut squash about 3 to 4 pounds
- 1 tbsp butter
- 0.5 tsp salt
- 0.25 tsp black pepper
Instructions
Preparation Steps
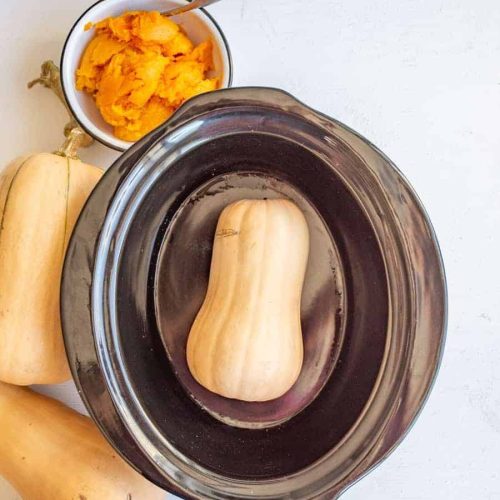
- Wash the butternut squash well and break off the stem if possible. No need to prick the skin.
- Place the whole unpeeled butternut squash in the slow cooker. No water is needed.
- Cover and cook on low for 6 to 8 hours or on high for 4 to 5 hours, until the squash is tender and a fork pierces easily.
- Allow the squash to cool enough to handle safely.
- Remove the squash from the slow cooker and place it on a cutting board.
- Cut the squash in half lengthwise from the stem end to the blossom end. Use a spoon to scoop out and discard the seeds.
- Scoop out the soft squash flesh and mix with butter, salt, and pepper to taste. Serve warm.


