


You know that feeling when the air gets a little crisp, and you just *need* something warm and comforting? That’s when my brain immediately goes to pumpkin. And not just any pumpkin treat, but my absolute favorite pumpkin dessert: these unbelievably delicious pumpkin crumble bars. Honestly, I’ve tried a million pumpkin recipes over the years – from pies that take forever to intricate layer cakes – but these bars? They’re the ones that actually get made week after week. They’re so easy, so ridiculously good, and they smell like pure autumn magic wafting through the house. Forget complicated desserts; these are the real deal, the ones that bring smiles to faces without a fuss.
What are pumpkin crumble bars?
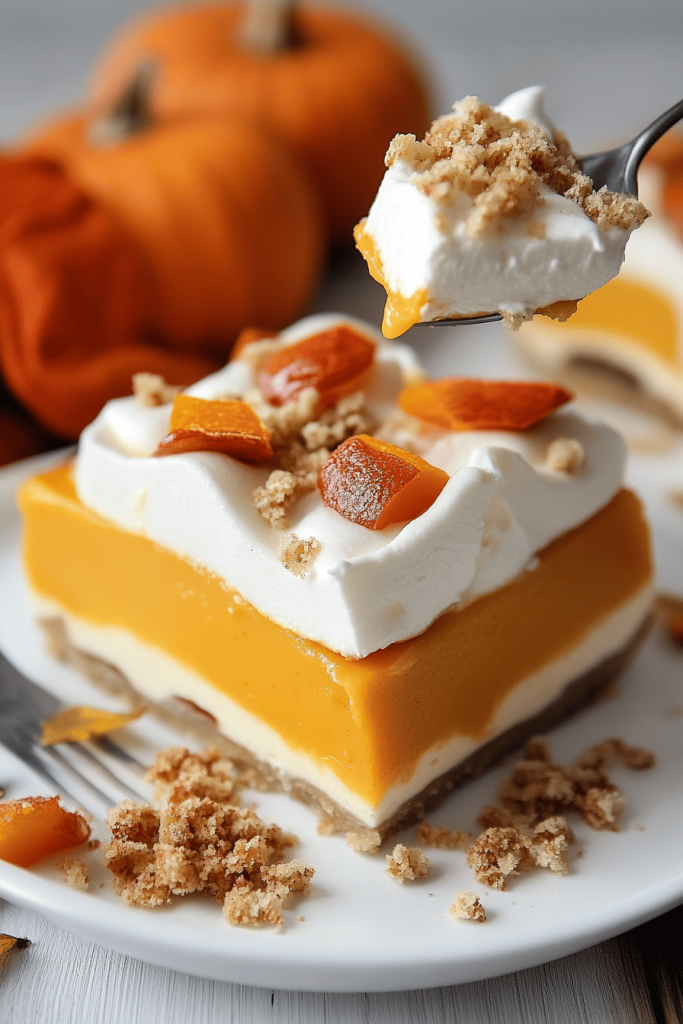
So, what exactly are these magical bars? Think of them as the love child of a pumpkin pie and a streusel cake, all baked into one glorious, portable square. We’ve got a soft, chewy, cake-like base that’s bursting with that classic Pumpkin Spice flavor, topped with a generous layer of gooey, spiced pumpkin filling, and then crowned with a buttery, crunchy oat crumble. It’s essentially all the best parts of fall comfort food squished together. It’s not a fussy pie that needs perfect slicing, nor is it a crumbly mess. It’s the perfect handheld treat that delivers maximum flavor with minimal effort. They’re just… easy and delicious, which is my favorite kind of recipe.
Why you’ll love this recipe?
Honestly, I could write a novel about why I adore these pumpkin crumble bars, but let’s break down the highlights. First, the flavor. Oh, the flavor! It’s that perfect balance of sweet pumpkin, warm spices like cinnamon, nutmeg, and ginger, all brought together by a rich, buttery base and topping. It’s like a warm hug in every bite. Then there’s the simplicity. This is a lifesaver on busy weeknights or when unexpected guests pop over. You can mix the batter and filling in about 15 minutes, and then the oven does all the heavy lifting. Plus, they’re incredibly budget-friendly; the ingredients are staples you probably already have in your pantry. And let’s talk versatility! These are fantastic for breakfast with a cup of coffee, perfect for a mid-afternoon pick-me-up, and absolutely divine as a dessert after dinner. I’ve even packed them into lunchboxes, and they’re always a huge hit. What I love most is that they satisfy that deep craving for a classic pumpkin dessert without the commitment of a whole pie. They truly are a crowd-pleaser, and I find myself making them more often than I probably should!
How do I make pumpkin crumble bars?
Quick Overview
Making these bars is a breeze! You’ll whip up a simple buttery base, spread it into your pan, then mix up a quick pumpkin filling to dollop on top. A generous crumble goes over that, and then it’s into the oven for a magical transformation. The aroma alone is worth the effort, and the result is a perfectly spiced, tender, and satisfying pumpkin treat that’s so much easier than pie. It’s basically a one-pan wonder!
Ingredients
For the base and crumble topping: For the base and crumble topping: For the base and crumble topping: For the base and
You’ll need all-purpose flour – about 2 cups. Make sure it’s regular all-purpose flour; I haven’t had as much luck with alternative flours here, though I’m always experimenting! Granulated sugar provides sweetness, around 3/4 cup. For that classic crumble texture, rolled oats are essential, about 1.5 cups. Quick oats can work in a pinch, but rolled oats give you that lovely chew. We’ll also need baking soda (1 teaspoon) to help it rise just right, and a pinch of salt (1/2 teaspoon) to balance the sweetness. And for that irresistible buttery flavor? 1 cup (2 sticks) of unsalted butter, melted. I always opt for unsalted so I can control the saltiness myself.
For the Pumpkin Filling:
The star here is pumpkin puree. Make sure you grab pure pumpkin puree, *not* Pumpkin Pie filling, which is already spiced and sweetened. You’ll need one 15-ounce can. For creaminess and richness, I use 1/3 cup of evaporated milk. You can use regular milk or even half-and-half in a pinch, but evaporated milk gives it a special depth. For sweetness, about 1/2 cup of granulated sugar, though you can adjust this slightly based on your preference. Eggs are key for binding, so we’ll use 2 large eggs. And the spice blend is crucial! About 1 teaspoon of ground cinnamon, 1/2 teaspoon of ground nutmeg, and 1/4 teaspoon each of ground ginger and cloves. You can also use a pre-made pumpkin pie spice blend if you prefer – just use about 1.5 to 2 teaspoons total.
For the Optional Glaze:
This is totally optional but highly recommended for that extra pop of sweetness and visual appeal. It’s super simple: 1 cup of powdered sugar, about 2-3 tablespoons of milk (again, you can use regular, almond, or even a bit of the evaporated milk), and a splash of vanilla extract. You want it thick enough to drizzle but not so stiff it won’t spread. Just whisk until smooth and pourable.
Step-by-Step Instructions
Step 1: Preheat & Prep Pan
First things first, get your oven preheating to 350 degrees Fahrenheit (175 degrees Celsius). This is the magic temperature for these bars. Now, grab a 9×13 inch baking pan. I like to line mine with parchment paper, leaving a little overhang on the sides. This makes lifting the bars out *so* much easier once they’re baked. If you don’t have parchment, just grease and flour the pan really well, but trust me, parchment is a game-changer.
Step 2: Mix Dry Ingredients
In a large bowl, combine your flour, rolled oats, granulated sugar, baking soda, and salt for the base and crumble. Give it a good whisk with a fork or a whisk until everything is evenly distributed. This ensures your crumble topping and base have consistent texture and flavor throughout.
Step 3: Mix Wet Ingredients
Now for the wet ingredients for the base. Melt your butter – I usually do this in a microwave-safe bowl or a small saucepan on the stove. Once it’s melted and just slightly cooled, pour it into the dry ingredients you just mixed. Stir it all together until it forms a crumbly, cohesive mixture. It should feel a bit like wet sand.
Step 4: Combine
Take about two-thirds of this crumble mixture and press it evenly into the bottom of your prepared baking pan. This will form your delicious base. Reserve the remaining one-third of the crumble mixture for the topping later on.
Step 5: Prepare Filling
In a separate medium bowl, whisk together the pumpkin puree, evaporated milk, granulated sugar, eggs, and all those wonderful pumpkin spices (cinnamon, nutmeg, ginger, cloves). Whisk until everything is smooth and well combined. Don’t overbeat it; just ensure there are no lumps of pumpkin or egg.
Step 6: Layer & Swirl
Pour the pumpkin filling evenly over the pressed base in the pan. Now, take that reserved crumble mixture and sprinkle it evenly over the pumpkin filling. You can leave it as is for a more rustic look, or gently press it down slightly with your fingers or the back of a spoon. For an extra touch, you can even swirl a little extra pumpkin puree or some caramel sauce on top before adding the crumble, but I usually keep it simple!
Step 7: Bake
Pop the pan into your preheated oven. Bake for about 30-40 minutes. You’ll know they’re ready when the crumble topping is golden brown and the edges of the pumpkin filling look set. A toothpick inserted into the center should come out mostly clean, though it might have a few moist crumbs attached (that’s okay!).
Step 8: Cool & Glaze
This is crucial! Let the bars cool completely in the pan on a wire rack. I know, I know, it’s tempting to cut into them while they’re warm, but trust me on this one. Cooling allows them to set up properly, making them much easier to slice and preventing them from becoming a gooey mess. Once they’re totally cool, you can make your glaze. Whisk together the powdered sugar, milk, and vanilla extract until smooth. Drizzle this over the cooled bars.
Step 9: Slice & Serve
Once the glaze has set a bit (or if you skipped the glaze, just as soon as they’re cool enough to handle), use the parchment paper overhang to lift the whole slab out of the pan. Place it on a cutting board and slice into squares. I usually get about 16-20 bars out of a 9×13 pan, depending on how big I cut them. Serve them at room temperature or slightly chilled. They are just perfect!
What to Serve It With
These pumpkin crumble bars are so versatile, they fit into any meal or occasion! For breakfast, they’re a treat that makes the morning feel special. I love pairing them with a hot mug of coffee or a creamy latte. They’re also fantastic alongside some fresh fruit, like berries or a sliced apple, for a balanced start to the day. For a more elegant brunch spread, cut them into smaller, bite-sized squares and arrange them on a platter with other pastries and maybe a fruit salad. A mimosa or a sparkling cider would be lovely alongside. As a dessert, they’re absolutely divine served with a scoop of vanilla bean Ice Cream or a dollop of whipped cream. The contrast of the warm spices and cool creaminess is just heavenly. And for those cozy snack moments, when you just need something sweet and comforting, these bars are it. They’re perfect for curling up with a good book and a cup of tea. My family loves them as a simple after-school treat, and they’re always gone in a flash!
Top Tips for Perfecting Your Pumpkin Crumble Bars
I’ve made these bars more times than I can count, and through trial and error (and lots of delicious eating!), I’ve picked up a few tricks. For the pumpkin, always use pure pumpkin puree, not pie filling. The difference in sweetness and spice is significant. Also, make sure your pumpkin is drained of any excess liquid; if it seems very watery, you can press it gently through a fine-mesh sieve. When mixing the base and crumble, don’t overwork it once the butter is added. You want it to stay crumbly so it bakes up tender and crisp. For the swirl effect, if you decide to do one, don’t overdo it, or you’ll muddy the flavors. Just a few gentle turns with a knife or skewer are perfect. If you’re unsure about doneness, a toothpick test is your best friend. It should come out with moist crumbs, not wet batter. Overbaking will make them dry. For ingredient swaps, I’ve experimented with almond milk in place of evaporated milk, and it worked quite well, making them a touch lighter. You can also try adding a touch more spice if you like it really bold. If you’re out of rolled oats, quick oats can be used, but the texture will be a bit softer, less chewy. And for that glaze, if it’s too thick, add milk a tiny bit at a time until you reach the desired drizzling consistency. If it’s too thin, add more powdered sugar. The key to perfect bars is often patience with cooling – resist the urge to cut them too soon!
Storing and Reheating Tips
These bars are pretty forgiving when it comes to storage, which is another reason I love them. At room temperature, they’ll stay fresh for about 2-3 days, as long as they’re stored in an airtight container. I usually just cover the pan tightly with plastic wrap or foil if they’re still in it, or transfer them to a good quality food storage container. If you’ve glazed them, letting the glaze set completely before covering is important. For longer storage, your refrigerator is your best bet. They’ll keep well for up to a week in the fridge, still in an airtight container. This is also a great way to have them on hand for when that craving strikes. And yes, you can freeze these! They freeze beautifully. I usually cut them into individual portions before freezing. Wrap each bar tightly in plastic wrap, then place them in a freezer-safe bag or container. They can be frozen for up to 2-3 months. To thaw, just unwrap them and let them sit at room temperature for an hour or so, or you can gently reheat them. If you want to reheat them, a few seconds in the microwave (about 10-15 seconds) can bring back a bit of that fresh-baked warmth, or you can pop them in a low oven for a few minutes. If they were glazed, sometimes the glaze can get a little sticky when reheated, so keep an eye on them!
Frequently Asked Questions
Final Thoughts
These pumpkin crumble bars have truly earned their spot as my go-to fall dessert. They strike that perfect balance between being comforting and special, incredibly easy to make, and absolutely bursting with flavor. They’re the kind of treat that makes your kitchen smell amazing and brings people together. If you love pumpkin, or just love a good, satisfying dessert that doesn’t require a ton of fuss, you absolutely have to give these a try. I’m already planning my next batch! If you enjoy these bars, you might also love my classic Apple Crumble or my easy gingerbread cookies – they hit similar cozy notes. I can’t wait to hear what you think, so please leave a comment below to let me know how yours turned out, or if you have any fun variations! Happy baking!
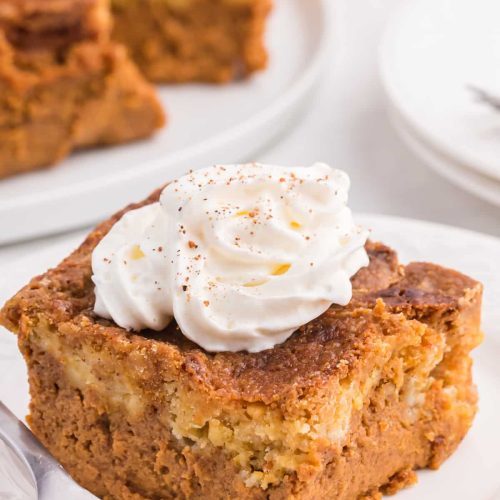
Pumpkin Dump Cake
Ingredients
Main Ingredients
- 4 large eggs eggs
- 1.25 cup sugar
- 1 can pumpkin puree (28 oz/796ml)
- 1.5 tsp cinnamon
- 1 tsp ground cloves
- 0.5 tsp nutmeg
- 1 tsp ginger
- 1 tsp salt
- 1 can evaporated milk (12oz/354ml)
- 1 box yellow cake mix (13.25oz/375g)
- 1 cup salted butter (cold and sliced thin into squares)
Instructions
Preparation Steps
- Preheat oven to 350°F. With an electric mixer, beat the eggs until they are frothy. Add in the sugar and continue to beat.
- Add pumpkin, the spices and beat until mixed well.
- Add in evaporated milk and beat on low to blend. Pour pumpkin mixture in a greased 9x13 inch pan.
- Sprinkle yellow cake mix on top of the pumpkin mixture in the pan. Place squares of butter on top to cover the cake mix.
- Bake for 1 hour and 15 minutes to 1 hour and 30 minutes or until a toothpick comes out of the center pretty much clean. Serve hot or cold!


