


You know those days? The ones where a birthday sneaks up on you, or you just get that overwhelming craving for something sweet, something truly comforting, something that feels like a hug in cookie form? That’s precisely when I reach for this recipe. These aren’t just any Chocolate Chip Cookies; these are my go-to, never-fail, absolutely crowd-pleasing chocolate chip birthday cookies. They’ve been a staple in my kitchen for years, surviving countless school bake sales, impromptu playdates, and those late-night dessert emergencies. If you’ve ever tried those fussy, complicated bakery-style cookies and ended up more stressed than satisfied, you’re going to love these. They’re the perfect balance of chewy, gooey, and perfectly chocolatey, and honestly, they taste even better than they look. This recipe is my secret weapon, and I’m so excited to finally share it with you.
What is chocolate chip birthday cookie?
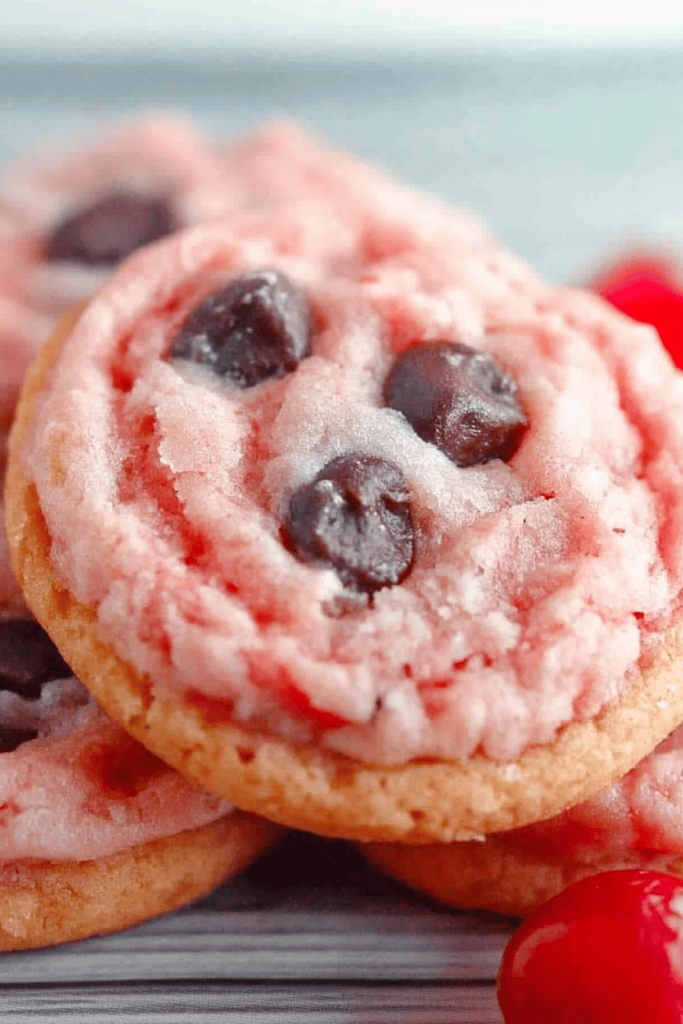
So, what exactly makes these “birthday cookies”? For me, it’s the sheer joy they bring. They’re the kind of cookie that instantly makes any day feel a little more special, a little more celebratory. Think of them as the classic Chocolate Chip Cookie, but with an extra sprinkle of magic. They’re generously studded with melty chocolate chips, have that irresistible golden-brown edge with a soft, chewy center, and the aroma that fills your kitchen while they bake? Pure bliss. They’re not overly fancy, which is exactly why they work so well for birthdays or any day you want to feel a little bit festive. It’s that nostalgic taste of childhood, of parties and cake, but in a portable, perfectly shareable cookie form. It’s essentially your favorite chocolate chip cookie, elevated just enough to feel like a treat worthy of a celebration, without requiring you to be a pastry chef.
Why you’ll love this recipe?
Honestly, there are so many reasons why this Chocolate Chip birthday cookie recipe has earned a permanent spot in my heart (and my recipe binder!). First and foremost, the flavor is just *spot on*. Each bite delivers that perfect harmony of sweet dough and rich, melty chocolate. It’s incredibly satisfying without being overly sweet, which is a balance I’m always searching for. Then there’s the texture – oh, the texture! They have a lovely crisp edge that gives way to a wonderfully soft, chewy center. It’s that classic, melt-in-your-mouth experience that makes you want to grab another one (or two… or three!).
Beyond the incredible taste and texture, the simplicity of this recipe is a lifesaver. I’ve made these countless times, even when I’m short on time or feeling a bit overwhelmed. The steps are straightforward, and the ingredients are pantry staples. You don’t need any fancy equipment, just a bowl, a whisk, and a good old-fashioned baking sheet. What I love most about this is that it’s genuinely forgiving. Even if you’re new to baking, I’m confident you’ll have fantastic results. They’re also surprisingly cost-effective. Using common ingredients means you don’t have to break the bank to whip up a batch of these delightful cookies, making them perfect for feeding a crowd or just treating yourself without guilt.
And versatility? These cookies have it in spades! While they are perfect for birthdays, they’re also fantastic for care packages, after-school snacks, or simply when you’re craving something sweet. I’ve found they pair wonderfully with a cold glass of milk, a hot cup of coffee, or even a scoop of ice cream for a decadent dessert. If you enjoyed my classic chewy Chocolate Chip Cookies or my gooey double chocolate cookies, I guarantee you’ll fall head over heels for these birthday-themed beauties.
How do I make chocolate chip birthday cookies?
Quick Overview
This recipe is all about bringing together simple ingredients to create something truly special. We’ll cream together butter and sugars for that perfect chewy base, then gently incorporate the dry ingredients. The magic really happens when we fold in those glorious chocolate chips. You’ll scoop, bake until golden, and then let them cool just enough before diving in. It’s a straightforward process that yields incredibly rewarding results, proving that amazing cookies don’t need to be complicated.
Ingredients
For the Main Batter:
- 1 cup (2 sticks or 226g) unsalted butter, softened to room temperature. This is key! If your butter is too cold, it won’t cream properly. If it’s too melty, your cookies will spread too much.
- 3/4 cup (150g) granulated sugar. This contributes to the crisp edges.
- 3/4 cup (165g) packed light brown sugar. This is where the chewy texture and caramel notes come from.
- 2 large eggs. Make sure they’re at room temperature too; they incorporate better.
- 1 teaspoon pure vanilla extract. Don’t skimp here; good vanilla makes a huge difference!
- 2 1/4 cups (280g) all-purpose flour. Spooned and leveled, not scooped directly from the bag.
- 1 teaspoon baking soda. This helps with leavening and texture.
- 1/2 teaspoon salt. Balances the sweetness and enhances the chocolate flavor.
- 2 cups (about 340g) semi-sweet chocolate chips. I love a mix of semi-sweet and dark chocolate chips for depth, but use your favorite!
Step-by-Step Instructions
Step 1: Preheat & Prep Pan
First things first, get your oven preheating to 375°F (190°C). This ensures the oven is at the perfect temperature by the time your Cookie Dough is ready. While the oven heats up, line your baking sheets with parchment paper. I swear by parchment paper; it prevents sticking and makes cleanup a breeze. You can also lightly grease your baking sheets, but parchment is my preferred method for even baking.
Step 2: Mix Dry Ingredients
In a medium bowl, whisk together your flour, baking soda, and salt. Whisking them together ensures the baking soda and salt are evenly distributed throughout the flour, which is crucial for consistent cookie texture and rise. Don’t skip this step! It might seem minor, but it really does help prevent pockets of salt or baking soda.
Step 3: Mix Wet Ingredients
In a large bowl, using an electric mixer (handheld or stand mixer with a paddle attachment), cream together the softened butter, granulated sugar, and packed brown sugar. Beat this on medium speed for about 2-3 minutes until it’s light, fluffy, and pale yellow. This creaming process incorporates air, which is what makes your cookies tender and gives them structure. Next, add the eggs one at a time, beating well after each addition until fully incorporated. Stir in the vanilla extract. Make sure your eggs and butter are at room temperature; this helps everything emulsify beautifully and create a smooth batter.
Step 4: Combine
Gradually add the dry ingredients to the wet ingredients, mixing on low speed until just combined. Be careful not to overmix here! Overmixing develops the gluten in the flour too much, which can lead to tough cookies. Stop mixing as soon as you no longer see streaks of flour. It’s totally okay if there are still a few tiny bits of flour visible; the chocolate chips will help distribute everything when you fold them in.
Step 5: Prepare Filling
Okay, time for the stars of the show! Add your chocolate chips to the dough. Gently fold them in with a spatula or wooden spoon until they’re evenly distributed throughout the batter. Again, avoid overmixing. We want those lovely pockets of chocolate!
Step 6: Layer & Swirl
This step is optional but adds a nice touch! For that “birthday cookie” flair, I sometimes like to add a few extra chocolate chips on top of the scooped dough balls just before baking. It makes them look extra decadent. Alternatively, if you’re feeling super fancy, you could drizzle a little melted chocolate over the baked and slightly cooled cookies.
Step 7: Bake
Using a cookie scoop (about 1.5 to 2 tablespoons), drop rounded balls of dough onto your prepared baking sheets, leaving about 2 inches between each cookie to allow for spreading. Bake for 9-12 minutes, or until the edges are lightly golden brown and the centers still look slightly soft. They’ll continue to bake a bit on the hot baking sheet after you take them out of the oven. This is the secret to that perfect chewy center!
Step 8: Cool & Glaze
Let the cookies cool on the baking sheets for about 5 minutes before transferring them to a wire rack to cool completely. This is crucial for them to set properly. If you’re adding a glaze (which I sometimes do for extra birthday pizzazz!), make sure the cookies are completely cool before drizzling.
Step 9: Slice & Serve
Once cooled, these chocolate chip birthday cookies are ready to be devoured! For the ultimate presentation, arrange them on a festive platter. They are fantastic served at room temperature, and their aroma alone will draw everyone to the kitchen.
What to Serve It With
These chocolate chip birthday cookies are so versatile, they truly fit into any part of your day or any kind of celebration. For breakfast, though a bit indulgent, they’re surprisingly good with a strong cup of coffee – think of it as a little sweet kickstart to your morning. I sometimes pack one in my husband’s lunchbox, and he always says it makes his workday feel a little brighter.
For a proper brunch spread, these cookies add a delightful, casual sweetness. You can arrange them alongside muffins and pastries. They pair wonderfully with a mimosa or a glass of sparkling cider. They’re also a fantastic addition to a dessert table at any party. Instead of a whole cake, or as an accompaniment to it, these cookies are often gone first! I love serving them with a scoop of vanilla bean ice cream for an instant, simple sundae experience that everyone adores.
And for those cozy snack times? Oh, they are perfect. Imagine curling up with a good book and a warm cookie and a glass of milk. It’s pure comfort. My kids also love to “decorate” them with a tiny bit of frosting or sprinkles after they’ve cooled, making them feel even more like special birthday treats, even on a random Tuesday.
Top Tips for Perfecting Your Chocolate Chip Birthday Cookies
Over the years, I’ve picked up a few tricks that I think make a big difference in getting these cookies just right, every single time. One of the most important things is the butter. Make sure it’s *softened*, not melted. I usually take it out of the fridge about an hour before I plan to bake. If I forget, I’ll cut it into small cubes and let it sit on the counter while I gather my other ingredients. This ensures it creams properly with the sugars, creating that light and fluffy base that’s crucial for texture.
When it comes to mixing, the rule of thumb is “gentle is best.” Once you add the flour, mix *just* until it’s combined. Seriously, don’t go crazy with the mixer. A few streaks of flour are perfectly fine because they’ll get incorporated when you fold in the chocolate chips. Overmixing the dough at this stage is probably the most common culprit for tough cookies. Trust me, I learned that lesson the hard way early on!
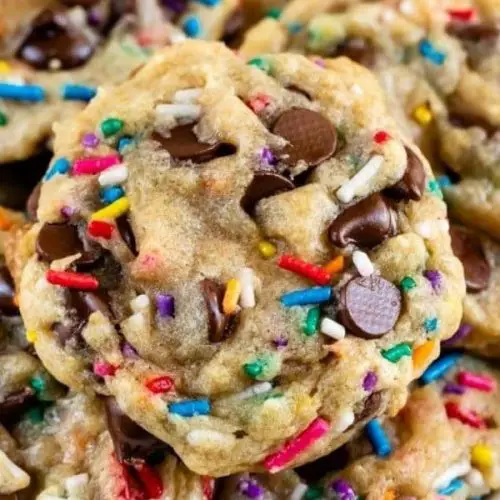
For the chocolate chips, I always recommend using good quality ones. If you can, a mix of different types of chocolate chips (like semi-sweet, milk chocolate, and even dark chocolate chunks) can add wonderful complexity. I also like to reserve a small handful of chips to press onto the tops of the dough balls before baking. It makes them look so much more appealing and guarantees a good chocolate hit with every bite. If you want to get really festive, adding some colorful sprinkles to the dough or pressing them onto the tops after baking can really amp up the “birthday” feel!
I’ve also experimented with ingredient swaps over time. For instance, if you’re out of granulated sugar, you *can* use a bit more brown sugar, but your cookies might spread a little more and be chewier. I tested this recipe with almond extract instead of vanilla once, and while it was good, it was a different flavor profile – the pure vanilla is what really makes these taste like classic birthday cookies. When it comes to baking, ovens can be quirky. Keep an eye on your cookies during the last few minutes. They should look golden brown around the edges but still slightly soft and underbaked in the center. They’ll continue to cook on the hot baking sheet, which is key for that perfectly gooey texture.
Storing and Reheating Tips
These chocolate chip birthday cookies are so delightful fresh from the oven, but they also store beautifully, making them perfect for making ahead. Once they’ve completely cooled on a wire rack, you can store them in an airtight container at room temperature for up to 3-4 days. They tend to stay chewy and delicious for a good while. I often place a piece of parchment paper between layers to prevent them from sticking together, especially if it’s a humid day.
If you find you have more cookies than you can possibly eat in a few days (which, let’s be honest, is rare in my house!), they refrigerate well too. Pop them into an airtight container or a sturdy zip-top bag and they should stay good in the fridge for about a week. They might firm up a bit in the fridge, but that’s easily fixed.
For longer storage, freezing is your best friend! You can freeze the baked cookies for up to 3 months. Again, make sure they’re completely cool. Wrap them tightly in plastic wrap, then place them in a freezer-safe zip-top bag or an airtight container. To thaw, just let them sit at room temperature for about 30 minutes. If you want them to taste like they just came out of the oven, you can pop them into a warm oven (around 300°F/150°C) for a few minutes to warm them through and get that gooey center back.
If you’re planning on glazing your cookies, I highly recommend doing that *after* they’ve completely cooled and right before serving. If you glaze them too early, especially if they’re going into a container for storage, the glaze can get sticky and messy. For any cookies that will be stored for more than a day, it’s usually best to glaze them just before you plan to eat them.
Frequently Asked Questions
Final Thoughts
So there you have it – my beloved chocolate chip birthday cookies. They’re more than just a recipe to me; they represent countless happy moments, shared laughter, and the simple joy of baking for the people you love. The smell that wafts through the house while they’re baking is pure comfort, and watching people’s faces light up when they take that first bite? That’s the best part. They’re a testament to the fact that sometimes, the most cherished recipes are the ones that are easy to make but deliver big on flavor and heart.
If you’re looking for a dessert that’s foolproof, incredibly delicious, and always a hit, look no further. These cookies are perfect for any celebration, big or small, or even just for making an ordinary day feel a little more special. I truly hope they become a favorite in your kitchen too. Don’t hesitate to leave a comment below to let me know how yours turn out, or share any of your own special twists! And if you loved this recipe, you might also enjoy my classic chewy chocolate chip cookies or my decadent brownie recipes!
Happy baking!
chocolate chip birthday cookies
Ingredients
Main Ingredients
- 0.5 cup unsalted butter, melted
- 0.33 cup granulated sugar
- 0.5 cup packed light brown sugar
- 1 teaspoon vanilla extract
- 0.5 teaspoon baking soda
- 0.5 teaspoon salt
- 1.5 cups all-purpose flour
- 1.5 cups chocolate chips semi-sweet or milk
- 0.5 cup sprinkles rainbow jimmies preferred
Instructions
Preparation Steps
- Note: This dough requires chilling.
- Place melted butter in the bowl of a stand mixer fitted with the paddle attachment (or a large bowl if using a hand mixer). Add granulated and brown sugars and mix on low speed until the mixture is smooth. Mix in egg and vanilla extract and mix on medium speed until combined.
- Mix in baking soda and salt, then slowly mix in flour and mix just until the batter is smooth and comes together. Be sure to scrape the sides of the bowl during mixing. Slowly mix in chocolate chips and sprinkles.
- Line a cookie sheet with a silicone baking mat or parchment paper. Scoop 2 tablespoon balls of dough onto the cookie sheet. Spacing doesn’t matter because you will be chilling the dough. Cover with plastic wrap and chill for at least 2 hours.
- Preheat oven to 350°F. Line a second cookie sheet with parchment paper or a silicone baking mat.
- Remove the chilled cookie dough balls from the refrigerator and space them 2-inches apart on the cookie sheets. Bake (2 tablespoon sized cookies) for 11-15 minutes, or until the edges are a light golden and the tops are no longer glossy. Let cool on the cookie sheets at least 10 minutes before removing.


