


There’s something almost magical about tearing the crusty top off a warm, golden bread bowl, dipping it into a creamy soup, and savoring that perfect marriage of soft interior and crispy crust. I remember the first time I made homemade bread bowls, I was a little nervous—like, could I really pull off a bread that’s both beautiful and sturdy enough to hold chili? Spoiler: yes, and the smells wafting through the kitchen instantly took me back to cozy family dinners where everyone gathered around sharing stories and bowls full of goodness. If you’re used to those tired store-bought bread bowls, trust me, making your own at home is a game changer. Not only do they taste far richer and fresher, but they bring this homey, hand-crafted feel that’s hard to beat. Plus, once you get the hang of it, you’ll find they’re surprisingly easy—something I can’t say about most “from scratch” bread recipes. This one’s a lifesaver on busy weeknights when you want something impressive but don’t want to be stuck in the kitchen all day.
What is a bread bowl?
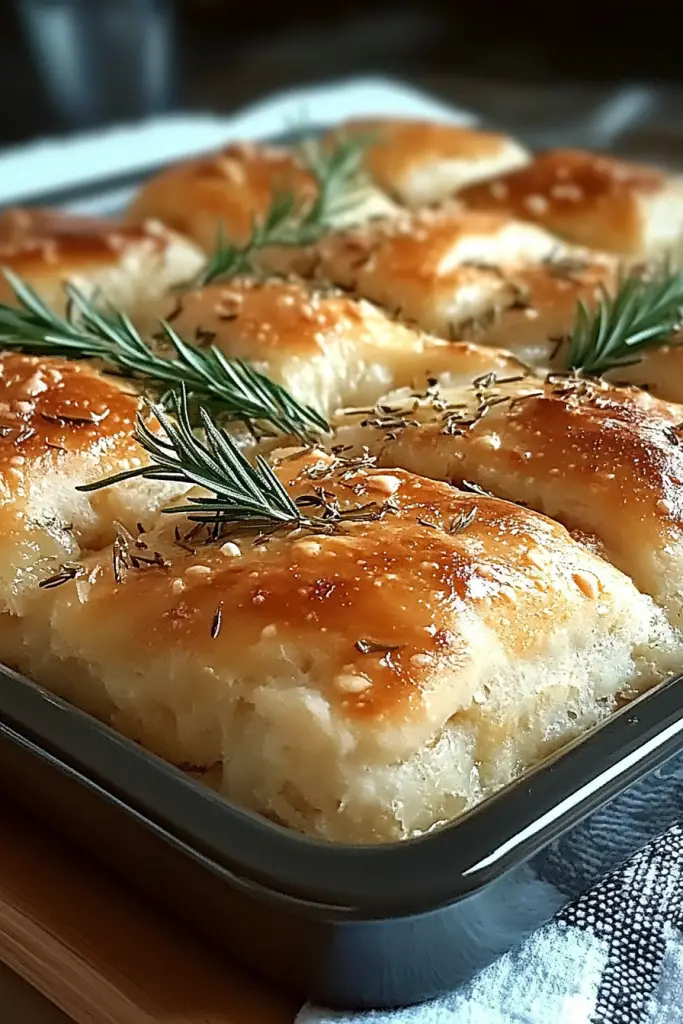
Think of homemade bread bowls as little edible vessels for your favorite soups, stews, and dips. Essentially, they’re round loaves of bread with the center hollowed out, creating a perfect bowl that holds warmth and flavor. The name “bread bowl” says it all—it’s bread you can eat like a bowl! These aren’t just regular buns; they’re a bit heartier, with a crust that stands up to moist fillings, yet tender enough inside to soak up whatever you ladle inside without falling apart. It’s this balance that makes bread bowls such a beloved Comfort Food classic. Plus, they’re fun to make at home because you get to play with the shape, size, and crustiness, tailoring them exactly to your taste, which isn’t something you get from supermarket versions. Once you’ve made a few, you’ll feel like a true kitchen wizard serving up edible bowls that wow everyone from kiddos to grown-ups alike.
Why you’ll love this recipe?
What I love most about making homemade bread bowls is how effortlessly they elevate any meal — whether it’s a cozy bowl of tomato bisque or hearty Beef Stew, the bread bowl adds that extra layer of satisfaction that just makes dinner feel like an event. Flavor-wise, the crust develops this deep golden crunch while the inside stays soft and chewy, soaking up all the deliciousness without getting soggy too fast — something store-bought just can’t do. It’s kind of like the difference between fresh-baked cookies and prepackaged ones; you notice the difference immediately.
Beyond taste, what makes these bowls my go-to is their simplicity. The ingredients are ones you likely already have at home: flour, yeast, water, a pinch of salt, and a little sugar. No fancy or expensive additions needed. Plus, bread dough is surprisingly forgiving, so even if you’re not a baking pro, you can make these with confidence. Another win? Versatility. You can make them mini-sized for adorable lunch servings or giant ones to impress guests. I’ve filled them with everything from crab chowder at a summer picnic to creamy spinach artichoke dip for game day, and every time they’ve disappeared in minutes. It’s comfort food, sure, but with a punch of creativity and showmanship that makes everyone feel special.
If you’ve ever made Homemade Pizza Dough or classic sandwich bread, you’ll find this recipe beautifully familiar but with a fun twist—it’s like those popular no-knead breads, but shaped and baked just right to cradle fluffy fillings. It’s truly a recipe that brings people together, and after years of testing, these bread bowls have earned a permanent spot in my kitchen rotation.
How do I make homemade bread bowls?
Quick Overview
Making homemade bread bowls is pretty straightforward and not as intimidating as it sounds. You start by mixing a simple yeast dough, letting it rise until puffy and full of life. From there, you shape round little balls, let them proof again for a short bit to get nice and springy, then bake until golden and crusty. Once done and cooled slightly, you hollow out the center to create that perfect bowl. The whole process is hands-on, which I love because you get a feel for the dough—no fancy machines required. Plus, this method yields bread that’s sturdy enough for thicker soups or dips without falling apart, but still soft and tender inside. It’s just the kind of recipe you’ll want to keep coming back to.
Ingredients
For the Dough:
- I always go for unbleached and fresh if I can find it; it makes a difference in texture.
- 1 packet (2 ¼ tsp) active dry yeast — feels magical seeing it foam up.
- 1 ¼ cups warm water (about 110°F) — warm enough to wake up the yeast but not so hot it kills the little guys.
- 1 tbsp sugar — just a touch to feed the yeast and encourage rising.
- 2 tsp sea salt — don’t skip the salt; it balances the flavor beautifully.
- 2 tbsp olive oil — optional, but I find it makes the crust a bit softer and adds a hint of richness.
For the Filling:
- Your favorite soup or dip — creamy broccoli cheddar, hearty chili, or classic clam chowder all work wonders.
- Optional toppings like shredded cheese or fresh herbs to sprinkle on top once filled.
For the Glaze:
- 1 egg, beaten with 1 tbsp water — this gives the bread that beautiful golden shine.
- Optional sprinkle of coarse sea salt or sesame seeds for texture and flavor.
Step-by-Step Instructions
Step 1: Preheat & Prep Pan
First things first, preheat your oven to 400°F. I like to line a baking sheet with parchment paper to keep the bread from sticking and make cleanup a breeze. If you want an extra crisp crust, place a small pan of water on the oven floor when you start baking—it creates steam that helps with crust development.
Step 2: Mix Dry Ingredients
In a large mixing bowl, whisk together the flour, salt, and sugar until evenly combined. Mixing these dry ingredients well means that the yeast and salt won’t interfere with each other during fermentation — a small detail that goes a long way for a well-risen dough.
Step 3: Mix Wet Ingredients
In a separate cup or bowl, combine the warm water with olive oil and sprinkle the yeast on top. Let it sit for 5-10 minutes until foamy and bubbly—this “blooming” signals your yeast is active and ready to work its magic.
Step 4: Combine
Pour the yeast mixture into the flour blend and stir gently with a wooden spoon or your hand until everything starts coming together into a shaggy dough. I always remind myself not to overwork this step; the dough should look a bit rough but come together. Overmixing can make it dense.
Step 5: Prepare Filling
While the dough rises, this is a perfect time to prepare your filling if it needs warming. I love letting my soups simmer gently so they’re piping hot and ready to nestle inside the bread bowls. If you’re going with dips, just make sure they’re not too runny to avoid sogginess.
Step 6: Layer & Swirl
Since bread bowls aren’t layered like a swirl bread, this step is more about shaping. Divide your dough into 4-6 equal balls, depending on your desired bowl size. Shape each ball tightly so the top is smooth and the bottom pinched well. This tight shaping means a nice round bowl that won’t spread too much in the oven.
Step 7: Bake
Place the dough balls spaced out on your prepared baking sheet. Brush each with the egg wash to encourage that rich golden crust, then pop them into your hot oven. Bake for 20-25 minutes until golden brown and hollow-sounding when tapped. The smell alone will have everyone in the kitchen, trust me.
Step 8: Cool & Glaze
Once out of the oven, let the bread bowls cool on a wire rack for about 10-15 minutes. You want them warm but not too scorching to handle. If you prefer, brush on a little extra olive oil or melted butter here for a softer crust feel.
Step 9: Slice & Serve
Carefully cut a circle around the top of each bowl, about 1-2 inches wide, and gently scoop out the crumb inside, leaving about a ½-inch thick wall for structure. Fill with your chosen soup or dip right before serving to keep the bread from going soggy. Serve hot and watch faces light up with every hearty spoonful.
What to Serve It With
For Breakfast: I love filling mini bread bowls with scrambled eggs, cheddar, and a dash of salsa — paired with a freshly brewed cup of coffee, it starts the day just right.
For Brunch: Imagine a creamy crab bisque nestled in a golden bread bowl alongside a crisp green salad and a glass of sparkling mimosa — total crowd-pleaser.
As Dessert: Sweeten things up by brushing the inside of a smaller bread bowl with cinnamon butter and filling it with warm fruit compote or chocolate pudding. Drizzle some honey on top and serve with a latte.
For Cozy Snacks: Nothing beats a bread bowl full of chili or loaded potato soup with cheese and green onions scattered on top. It’s a hug in food form — perfect for chilly nights when you want comfort and warmth wrapped together.
At our house, bread bowls are a treasured tradition, especially on lazy Sunday afternoons. Kids feel like they’re eating something special, and adults can’t help but reminisce about family dinners past. It’s a simple idea that feels, well, magical when it’s done just right.
Top Tips for Perfecting Your Homemade Bread Bowls
Dough Prep: Always use warm water—too hot, and you’ll kill the yeast; too cold, and it won’t activate properly. I learned this the hard way when my dough refused to rise once. Also, if your kitchen is cold, place the dough bowl inside the turned-off oven with the light on; that little warmth jumpstarts the rise beautifully.
Mixing Advice: Keep your mixing gentle initially—overmixing can toughen your bread. The dough should feel sticky but come together. If it’s too dry, add a tablespoon of water at a time. If too wet, sprinkle in a little more flour. This balance is key for a light crumb.
Shaping Swirls: Since these are bread bowls, shaping is all about creating a tight, smooth exterior. Try to pinch the bottom firmly to prevent “pizza dough” flattening, which I’ve accidentally done before—I tell you, even the best dough can flop if shaped wrong.
Ingredient Swaps: I’ve tested this with whole wheat and spelt flour, and the bread was denser but still delicious—just add a tad more water to compensate. Olive oil is optional but enhances flavor and tenderness. For a gluten-free version, combine a blend of almond and tapioca flour, but expect a slightly different texture.
Baking Tips: Placement in the oven matters! Bake on the middle rack for even heat; if your oven runs hot, reduce the temperature by 25°F. Tap the bottom of a loaf to check for a hollow sound—an old-school trick to know when it’s done.
Glaze Variations: If you want to skip the egg wash, try brushing with milk or melted butter post-bake for a softer, less shiny crust. For savory bread bowls, sprinkling on a bit of garlic powder or herbs before baking adds a delicious twist.
Storing and Reheating Tips
Room Temperature: Store your bread bowls loosely covered with a clean kitchen towel for up to 2 days. This keeps the crust from getting too hard but prevents staleness. I avoid airtight containers at this stage since they can make the crust rubbery.
Refrigerator Storage: If you want to keep bread bowls a little longer (up to a week), wrap them tightly in plastic wrap and store in an airtight container. When reheating, let them come to room temp and warm in the oven for a few minutes to revive crust crispness.
Freezer Instructions: These freeze beautifully, wrapped twice in plastic wrap and then foil. Freeze for up to 2 months. Thaw overnight at room temperature and warm gently in the oven before serving for best texture.
Glaze Timing Advice: It’s best to add the glaze before baking to get that gorgeous golden crust. If you want to add an extra finishing glaze like butter or olive oil, do it right after baking while the bread’s still warm.
Frequently Asked Questions
Final Thoughts
Making homemade bread bowls is one of those kitchen adventures that feels like a small act of love—transforming basic ingredients into something cozy, fun, and endlessly satisfying. The balance of that crispy crust with soft, tender insides is like comfort food with a little extra magic baked in. It’s gone from being a fancy restaurant treat to a beloved family staple in my home, partly because you can customize it endlessly and partly because who doesn’t love a bowl you can eat? I hope this recipe invites you to slow down, enjoy the process, and share those moments around the table with people you care about. Whether dipped in chili, loaded with creamy soup, or dipped in spinach dip at a party, homemade bread bowls deliver a little extra joy with every bite. Can’t wait to hear how yours turn out—drop a comment or share your variations—I’m all ears. Happy baking!
homemade bread bowls
Ingredients
Main Ingredients
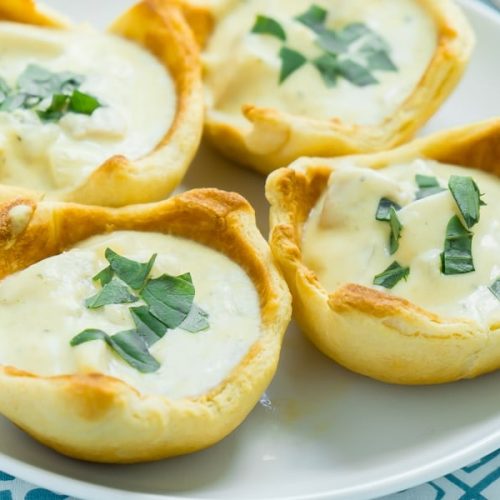
- 1 can store-bought biscuits
Instructions
Preparation Steps
- Preheat your oven according to the instructions on the biscuit can.
- Carefully place a biscuit over the backside of each muffin cup in a metal muffin tin to form a bowl shape.
- Cover the backs of all muffin cups with one biscuit per cup.
- Bake the biscuits in the oven as per package instructions until lightly browned.
- Remove the baked bread bowls from the muffin tins and let them cool.
- Serve your bread bowls filled with soup, dip, or your favorite filling and enjoy!


