


Sometimes the best memories show up with a spoon in hand and the scent of cocoa curling through the kitchen. I still remember my grandmother tapping the kitchen timer and saying, “If you’re craving chocolate, you don’t need a whole cake — you need a Chocolate Mug Cake.” The first time I tried it, I stood over the sink laughing at how the batter went from “meh” to a warm, fudgy explosion in under two minutes. This little single-serving dessert is a lifesaver on busy nights, a hug in a mug after a long day, and a reminder that simple pantry magic can be truly special. I’ve made this countless times and it never fails. The aroma alone brings everyone to the kitchen, like a reminder that comfort can be fast, easy, and utterly satisfying. This is the kind of recipe I reach for when the day ends with a craving I can’t shake. And yes, it pairs perfectly with a shy splash of milk or a bold shot of espresso if you’re into mochas. Welcome to my favorite quick chocolate fix: Chocolate mug cake.

What is a chocolate mug cake?
Think of Chocolate mug cake as a little personal cake you can summon in minutes in the microwave. It’s essentially a single-serving chocolate sponge that comes together with a few pantry staples: flour, cocoa powder, sugar, a little leavening, and milk or a dairy-free alternative. The concept is simple: you mix dry and wet ingredients in one mug, add a quick swirl of your favorite filling if you like, and nuke it until it’s just set and incredibly fudgy. The name says it all—Chocolate mug cake—yet the experience feels almost like a traditional cake moment: warm, comforting, and deeply chocolatey. I love that it’s customizable, too: you can swirl in Peanut Butter, Nutella, or a dollop of jam for a surprise center, then finish with a glossy glaze or a light dusting of powdered sugar. It’s a tiny dessert, but the satisfaction is big enough to share a memory with someone you care about, or to keep all to yourself on a quiet evening.
Why you’ll love this recipe?
What I love most about this Chocolate mug cake is how it checks so many boxes at once. It’s quick enough to make on a weeknight, and it’s indulgent enough to feel like a treat without the fuss of a full-batch cake. The flavor is rich and cocoa-forward, with a soft crumb that’s almost brownie-like in texture, but lighter on your afternoon. It’s also incredibly forgiving: a pinch more flour or a splash of milk won’t derail it, so you can tailor it to what you have on hand. This recipe shines in its versatility—swap milk for almond or oat milk, toss in a handful of chocolate chips, or swirl in your favorite filling for a personalized center. What I tell friends who are new to mug cakes is this: you don’t need to be an expert baker to make something cozy and delicious in minutes. You just need a mug, a moment, and a little willingness to experiment. If you’re watching your budget, you’ll notice how the pantry-friendly ingredients stretch a sweet moment without breaking the bank. And yes, my kids actually ask for seconds, which is basically the gold standard in our house. The aroma—oh, the aroma—makes the kitchen feel like a little party, even on a Tuesday.
How do I make a chocolate mug cake?
Quick Overview
Here’s the quick gist: mix the dry ingredients right in a microwave-safe mug, whisk the wet ingredients separately, combine, and then bake in the microwave for a short time. The goal is a batter that’s just combined and a cake that stays moist, not dry. The result is a single-serving dessert with a glossy top, a fudgy interior, and a scent that instantly lifts the room. It’s a method I return to when I need something quick, comforting, and personal. The best part is that you can tailor the flavor in minutes, and you won’t feel guilty about indulging a little. This is the Chocolate mug cake you’ll crave after a long day or when friends drop by unannounced and you want to show off a little, but without any showroom fuss.
Ingredients
For the Main Batter:
– 4 tablespoons all-purpose flour (or a 1:1 gluten-free flour blend)
– 2 tablespoons unsweetened cocoa powder
– 2 tablespoons granulated sugar
– 1/4 teaspoon baking powder
– pinch of salt
– 3 tablespoons milk (dairy or almond/oat milk)
– 1 tablespoon vegetable oil or melted butter
– 1/2 teaspoon vanilla extract
– Optional: a pinch of espresso powder for deep cocoa flavor
For the Filling:
– 1 teaspoon Peanut Butter or Nutella, or a teaspoon of your favorite jam (optional but delicious)
– A small dollop in the center or a swirl through the batter to create a surprise)},
For the Glaze:
– 2 tablespoons powdered sugar
– 1 teaspoon milk (adjust for desired drizzle)
– 1/2 teaspoon cocoa powder (optional for extra chocolate hit)
– Optional: a splash of vanilla or a pinch of salt for a professional finish
Step-by-Step Instructions
Step 1: Preheat & Prep Pan
There’s no oven preheating for a mug cake—you’ll be microwaving, which is the magic here. But you still want your mug ready. Lightly grease a microwave-safe mug with a touch of oil or butter so the cake doesn’t stick. If your mug is highly glazed or dark, give it a quick wipe to avoid any hot spots. A quick spray of nonstick cooking spray is my go-to. If you’re using a pretty mug you love, you’ll want to keep it pristine for serving, so a light grease is perfect. Also have your filling ready if you’re swirling in a center—this is where the little moment of surprise happens and people say, “Wow, really?”
Step 2: Mix Dry Ingredients
In a small bowl or directly in the mug, whisk the flour, cocoa powder, sugar, baking powder, and salt together until evenly combined. I like to whisk right in the mug so I don’t have to dirty another dish. The key is to break up any lumps, especially in the cocoa, so your batter stays smooth. If you notice the cocoa looks a bit blotchy, sift it for a lighter, more precise texture. This helps prevent speckled pockets in the final cake, which is a disappointment I’ve learned from more than once.
Step 3: Mix Wet Ingredients
In a separate small bowl, whisk together the milk, oil (or melted butter), and vanilla until glossy. If you’re using espresso powder for a mocha twist, whisk it in here with the wet ingredients so it dissolves fully and your cake gets that velvety finish. The warmth of the milk helps loosen the batter so it blends with the dry ingredients more easily, which is a small trick I learned after I overmixed a batch once and ended up with a dense crust on top.
Step 4: Combine
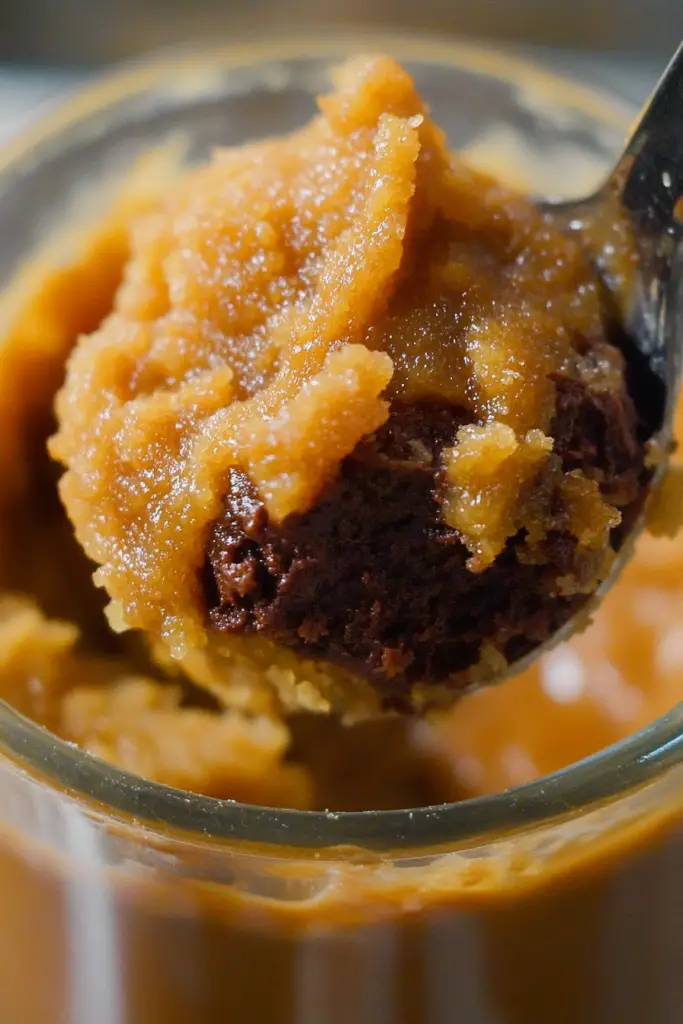
Pour the wet mixture into the mug with the dry ingredients, then stir with a small spoon or fork until just combined. It’s important not to overwork the batter; a few small lumps are totally fine. If you overmix, you risk a tougher crumb. The batter should be thick, almost like Brownie Batter, not runny. If you’re adding a filling, this is the moment to add a tiny dollop in the center and swirl lightly with a toothpick after the batter lands in the mug.
Step 5: Prepare Filling
If you’re going for a filled mug cake, place a small dollop of peanut butter, Nutella, or jam in the center, then cover it with a spoonful of batter. You can also swirl a little both ways for a marbled effect. I love a peanut butter swirl because it adds a creamy contrast to the deep chocolate. If you skip the filling, this step becomes even quicker, and you still get a wonderfully moist chocolate cake in minutes.
Step 6: Layer & Swirl
If you’ve added a filling, you’ll want to create a nice swirl so the center remains gooey. Use a toothpick to swirl the filling through the top few spoonfuls of batter, creating a gentle marble. Don’t over-swirl; you don’t want the filling to vanish completely into the batter. This is where you can make each mug cake unique: a little swirl here, a little pattern there—visually and in flavor.
Step 7: Microwave Bake
Microwave on high for 70–90 seconds, depending on your microwave’s power and the mug’s size. Start with 70 seconds and test with a toothpick: it should come out with a few moist crumbs. If it still looks wet, microwave in 5–10 second bursts. The cake will continue to cook a touch as it rests, so avoid overdoing it. The top should look set with a slightly glossy finish, and the sides will pull away just a touch from the mug’s edges.
Step 8: Cool & Glaze
Let the mug cake rest for a couple of minutes. It’s extremely hot right out of the microwave, and resting lets the crumb set a bit so you don’t burn your tongue. If you’re glazing, whisk the glaze ingredients until smooth and drizzle over the top in a slow, steady line. The glaze adds a hair of sweetness and a satin finish that makes the surface gleam. If you’re not glazing, a light dusting of powdered sugar or a pinch of flaky salt is a lovely finish that enhances the chocolate without overpowering it.
Step 9: Slice & Serve
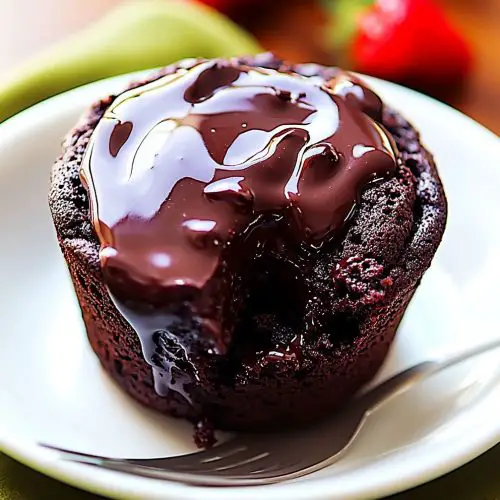
Insert a spoon and dive in while it’s still warm. The inside should be fudgy and moist, with a delicate crumb—almost like a brownie turned into a single-serving cake. If you’ve added a swirl, you’ll notice a peek of filling that’s just enough surprise with each bite. For a more complete presentation, you can plate the mug with a small scoop of vanilla ice cream or a dollop of whipped cream, and a few berries for color. My family loves the contrast between hot cake and cool topping—a little theater in a mug, right at the table.
What to Serve It With
This Chocolate mug cake is a tiny celebration, so plan a few serving ideals that fit different moments.
For Breakfast: A warm mug cake with a chai latte is basically a cozy morning ritual. You can add a spoonful of yogurt on the side for a tangy balance, and a sprinkle of espresso powder in the glaze if you’re feeling bold. It feels indulgent but still light enough to pair with a quiet morning routine.
For Brunch: Turn it into a small “dessert-for-brunch” moment by topping with citrus zest, toasted almonds, and a drizzle of orange-honey glaze. The brightness from the citrus brightens the deep chocolate and makes the moment feel special without taking much extra time.
As Dessert: A warm slice with a scoop of vanilla bean ice cream, a few raspberries, and a mint leaf is a classic pairing that never fails. If you want to keep it fancier, a glossy chocolate glaze plus a pinch of flaky salt can elevate the plate without much extra effort.
For Cozy Snacks: Serve with a mug of hot cocoa or a cinnamon-spiced coffee. The single-serving size makes it perfect for a little afternoon treat while you’re curled up with a book or chat with a friend.
In our home, this ritual usually begins with me saying, “Just one more bite,” and ends with everyone in the kitchen smiling as we lick the last trace of glaze from the spoon. It’s a tiny thing that somehow makes the evening feel complete, and that memory is what I keep coming back to when I’m testing a new tweak or a new flavor combo. This Chocolate mug cake has a way of turning small moments into sweet ones.
Top Tips for Perfecting Your Chocolate Mug Cake
These little refinements are the things I keep in mind every time I mix up a mug cake. They’re the difference between “okay” and “I’ll have another.”
Dry Ingredients Prep: Sift or whisk the cocoa powder with the flour and baking powder to avoid lumps and to ensure a smoother top. A few clumps on the surface can look like tiny craters when the cake finishes—nobody wants that in a bite of soft cake.
Mixing Advice: Stir just until the batter comes together. Overmixing builds gluten and can make the crumb a touch tougher. If you’re using almond milk or another non-dairy option, give it a quick whisk to emulsify the fats so the batter stays cohesive.
Swirl Customization: For a pretty swirl, drop in a teaspoon of your favorite filling and use a toothpick to marble it through the center of the batter. Patterning on top looks delightful and adds a little drama to the first bite. I’ve found that a peanut butter swirl or a quick Nutella ribbon is a crowd-pleaser for kids and adults alike.
Ingredient Swaps: Oat flour and half-and-half can work in a pinch if you’re avoiding gluten or dairy. For a lighter cake, reduce the sugar by a teaspoon and add a pinch more cocoa for depth. If you’re using dairy-free milk, a splash of olive oil or applesauce can help maintain moisture without biasing flavor.
Baking Tips: Microwaves vary—so start with 70 seconds and check in. If your cake looks set around the edges but the middle is still jiggly, give it 10–15 seconds more. Resist the urge to microwave until it’s dry; the center should be tender. If you’re baking in a conventional oven for a larger batch, you’ll want to bake at a low temperature in a small ramekin for a longer time; that’s a different approach but still very doable for ‘mug cake’ fans who want a bigger portion.
Glaze Variations: A glaze can transform the mouthfeel and the overall sweetness. For extra gloss, add a teaspoon of corn syrup or a tiny amount of cream to the glaze. If you want something fruitier, drizzle with a berry reduction instead of a traditional glaze. A pinch of sea salt in the glaze is a genius move—it makes chocolate sing and helps balance sweetness.
Lessons learned over the years? Don’t skip the resting moment after microwaving. The cake firms up as it cools, making it easier to slice and plate. And yes, you can still love a plain mug cake without any filling or glaze; it’s delicious in its own right, especially when you use high-quality cocoa and a good vanilla that sings with warmth.
Storing and Reheating Tips
Here’s how I keep a Chocolate mug cake tasting bright, whether there’s leftovers or I’m planning ahead for later in the week.
Room Temperature: If you plan to eat it within a few hours, keep it in the mug with a light cover or wrap to keep the surface from drying out. The cake is best eaten fresh, but a short wait helps it settle into that fudgy center.
Refrigerator Storage: For longer storage, transfer to an airtight container and refrigerate up to 2 days. Reheat in short bursts of 15–20 seconds in the microwave, checking for warmth and a texture that’s still moist. You may need to blot the surface with a paper towel if it looks a little brittle after cooling.
Freezer Instructions: If you want to freeze a single-serving cake, wrap tightly in plastic wrap and freeze up to 2 months. Thaw in the fridge overnight and reheat gently in the microwave with a quick check for moisture. Freezing can affect texture slightly, but a quick reheat keeps it deliciously chocolatey.
Glaze Timing Advice: If you’re freezing, it’s often best to skip the glaze and add it after reheating. Glaze can become a little tacky or clump when frozen and then thawed, so a fresh glaze is always a better finish after warming.
Frequently Asked Questions
Final Thoughts
If there’s a recipe that tastes like a warm hug and still fits in a mug, it’s this Chocolate mug cake. It’s the one I reach for when I crave something chocolaty but don’t want to roll out the flour or clean up a big mess. It’s forgiving, adaptable, and incredibly comforting—the kind of dessert that has earned spots in our weekly rotation even on the busiest nights. The joy comes from the way a few simple ingredients mingle into something that feels indulgent without requiring a special occasion. The aroma is, honestly, better than most store-bought snacks, and the moment you take that first bite, you’ll understand why this has become a family favorite. Try it with a swirl, try it plain, try it with glaze, and tell me which variation becomes your new go-to. Happy baking, friends—and remember, sometimes the smallest treats create the biggest smiles. I’d love to hear how yours turns out, so drop a comment, rate the recipe, or share your own twist below. Here’s to cozy cocoa moments and quick, heartfelt desserts!
Chocolate Mug Cake
Ingredients
Main Ingredients
- 4 tablespoon all-purpose flour
- 4 tablespoon granulated sugar
- 2 tablespoon unsweetened cocoa powder
- 0.25 teaspoon baking soda
- 3 tablespoon milk
- 3 tablespoon vegetable oil
- 1 teaspoon vanilla extract
- 2 tablespoon chocolate chips optional
Instructions
Preparation Steps
- In a microwave-safe mug, whisk together the flour, sugar, cocoa powder, and baking soda.
- Add the milk, vegetable oil, and vanilla extract to the mug. Stir until just combined and smooth. Do not overmix.
- If using, stir in the chocolate chips.
- Microwave on high for 1 to 1.5 minutes, or until the cake is set and cooked through. The cooking time will vary depending on your microwave's wattage.
- Let it cool slightly before enjoying directly from the mug.


