


When I close my eyes, I can smell the cocoa drifting through the house like a warm hug. These chocolate cloud cookies are the kind of treat that shows up when you want something indulgent but not heavy—a soft, airy bite with a fudgy center that somehow feels like a little party in your mouth. I first tasted something similar at a neighborhood bake sale, and I’ve been chasing that delicate, cloud-soft texture ever since. What I love is how easy they are to throw together on a weeknight, yet they feel special enough for weekend guests. Chocolate cloud cookies are a bit nostalgic for me—think of them as a more delicate sister to your go-to Chocolate Chip Cookies, with the same chocolatey love, but lighter, loftier, and just as comforting. The aroma alone is enough to spark conversation in the kitchen and maybe even a chorus of “Mmm, what’s that?” These cookies became a family favorite because they’re forgiving, adaptable, and absolutely irresistible with a simple glaze or a creamy filling. If you’re craving something chocolatey at 10pm but don’t want to bake a full cake, these are the answer I reach for every time.
What is chocolate cloud cookies?
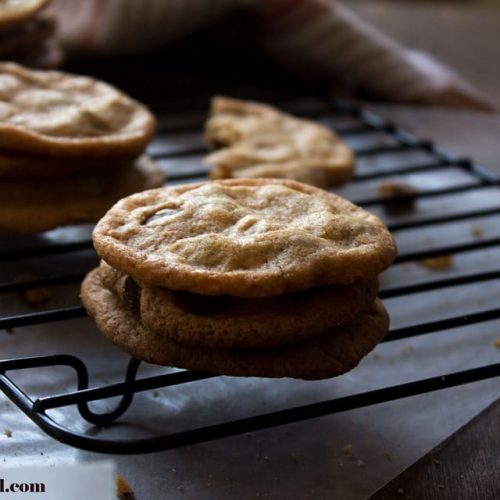
Chocolate cloud cookies are essentially light, airy cookies that melt in your mouth with a touch of chocolatey richness. Think of them as a delicate biscuit or meringue-inspired cookie that’s gently bread-like on the inside and slightly crisp around the edges. They’re designed to be soft, pillowy, and nearly cloud-like—hence the name—while still delivering a true chocolate flavor. The texture comes from folding in whipped egg whites into a cocoa-spiked batter, which creates lift without sacrificing structure. For a little extra delight, you can sandwich two cookies with a fluffy chocolate cream filling or drizzle them with a glossy glaze. It’s basically a chocolate dream you can hold in your hands, and because they’re lighter than a traditional dense brownie, they’re perfect for sharing with friends and family. If you’ve loved crackly-top chocolate macarons or airy almond cookies, you’ll find a familiar joy in these chocolate cloud cookies, with a more approachable, homey vibe.
Why you’ll love this recipe?
What I love most about these chocolate cloud cookies is how they manage to feel fancy without being fussy. They’re a lifesaver on busy nights but still feel like a special treat, and yes, my kids actually ask for seconds. Here are the big wins that keep me coming back to this recipe again and again:
- Flavor: The cocoa is bold but not overwhelming, and when you bite into a cloud-cookie, you get that instant melt of chocolate with a gentle sweetness that lingers on the tongue. It’s like a hug in cookie form, and the filling (whether creamy or glossy glaze) deepens the chocolate experience without turning dessert into a sugar storm.
- Simplicity: You can mix these in a standard mixer or by hand, and the batter comes together with a few straightforward steps. The whipped egg whites do the heavy lifting for you, giving you a tender interior without fuss.
- Cost-efficiency: What is the best way to measure cost-efficiency? Basic pantry ingredients—cocoa, flour, sugar, butter—do the job beautifully, and you can play with little add-ins (chocolate chips, nuts, a pinch of espresso powder) to tailor the flavor without blowing the budget.
- Versatility: They’re fantastic as a simple two-cookie sandwich with a fluffy filling, or as a no-fuss glazed bite. I also love using a drizzle of chocolate glaze to dress them up for guests, or a swirl of peanut butter inside for a little salty-sweet magic.
- Texture range:How do you bake cookies?
How to Make Chocolate Cloud Cookies
Quick Overview
These cookies start with a cocoa-spiked batter that’s lightened by folded-in whipped egg whites. The result is an airy, tender cookie that bakes into a gentle dome with a kiss of cocoa. The magic happens when you fold in the whites carefully so you preserve that lift. After baking, you can glaze the tops or sandwich two cookies with a luscious filling. If you’re in a rush, you can skip the filling and glaze and still finish with a wonderfully chocolatey bite. The beauty is in the balance: a crisp edge, a soft center, and a deep chocolate aroma that fills the kitchen as they bake.
Ingredients
For the Main Batter:
- 1/2 cup (115 g) unsalted butter, melted and cooled
- 3/4 cup (150 g) granulated sugar
- 2 large egg yolks
- 2 large egg whites, room temperature
- 1 teaspoon vanilla extract
- 1/2 cup (45 g) unsweetened cocoa powder
- 3/4 cup (95 g) all-purpose flour
- 1/4 teaspoon baking powder
- 1/4 teaspoon salt
- 1/2 cup (90 g) semisweet chocolate chips (optional, for extra chocolatey pockets)
For the Filling:
- 1/2 cup (115 g) unsalted butter, softened
- 1 cup confectioners’ sugar, sifted
- 2 tablespoons cocoa powder
- 2–3 tablespoons heavy cream or milk, as needed
- 1/2 teaspoon vanilla extract
- Pinch salt
For the Glaze:
- 1/2 cup dark chocolate chips or chopped chocolate
- 1 tablespoon light corn syrup or honey (optional, for shine)
- 1 teaspoon coconut oil or cream to loosen
Step-by-Step Instructions
Step 1: Preheat & Prep Pan
Preheat your oven to 350°F (177°C). Line two baking sheets with parchment paper or silicone baking mats. Set aside a cooling rack nearby. These cookies spread a bit, so give each round room to breathe. If you have a scale, weigh the batter to keep the cookies uniform—about 1 to 1 1/2 tablespoons per cookie is perfect for a tender bite.
Step 2: Mix Dry Ingredients
In a medium bowl, whisk together the cocoa powder, flour, baking powder, and salt. Sifting is optional but it helps avoid cocoa lumps. This is the moment the chocolate dreams start forming into a cohesive batter, and you’ll notice the motor on your whisk or mixer getting a little happier as the powders come together.
Step 3: Mix Wet Ingredients
In a separate bowl, whisk the melted butter with the granulated sugar until glossy and smooth. Beat in the egg yolks and vanilla until the mixture looks light and satin-soft. In another small bowl, whip the egg whites with a pinch of salt until they hold stiff peaks—think ribbons that keep their shape when you lift the whisk. The goal is to fold air into the batter without deflating it later.
Step 4: Combine
Fold the dry ingredients into the wet mixture in two additions. Don’t overmix—just until you no longer see dry flour. Gently fold in the whipped egg whites in three stages, using a spatula and a light hand. You want the batter to look airy and creamy, with a delicate lift. If you’re using chocolate chips, fold them in now so they’re evenly distributed but don’t sink to the bottom.
Step 5: Prepare Filling
Beat the softened butter until pale. Add the confectioners’ sugar and cocoa powder in two additions, alternating with a splash of cream to reach a fluffy, pipeable texture. Stir in vanilla and a pinch of salt. This filling should be light and not too sweet, so you still taste the chocolate. If you prefer a glossy ganache-like vibe, you can swap some of the cream for a touch more melted chocolate and whip it a bit longer.
Step 6: Layer & Swirl
Scoop small mounds of batter onto the prepared sheets, leaving plenty of space. If you want a marbled look, dollop a little extra batter in the center and swirl with the tip of a knife or a wooden skewer. Bake until the tops look set and the edges are just beginning to crack, about 10–12 minutes. Let the cookies rest on the sheet for 2 minutes, then transfer to a cooling rack. Once completely cooled, spread a generous layer of filling on the flat side of one cookie and top with another to make a little sandwich. If you’re going for a glaze instead, drizzle a thin line across the tops once fully cooled.
Step 7: Bake
Slide the sheets into the oven and bake. Avoid opening the oven during the first 6–8 minutes to prevent the batter from deflating. The cookies should be set around the edges but remain soft in the centers. If you prefer crisper edges, bake an extra 1–2 minutes, watching closely so they don’t overcook. For a chewier center, pull them a touch earlier. The texture you’re aiming for is a delicate, cloud-like interior with a barely-there crack on the surface.
Step 8: Cool & Glaze
Cool the cookies on the rack completely before glazing or assembling. For a glaze, melt the chocolate with the oil, then stir until glossy. Drizzle lightly over the tops or dip half the cookie for a fancy, tuxedo-like look. The glaze sets beautifully as the cookies come to room temperature. If you’re storing these for later, you can glaze them later to keep the shine intact, or leave them unglazed for a more classic chocolate bite.
Step 9: Slice & Serve
If you’ve made sandwich cookies, you can slice each large sandwich in half for an elegant, bite-sized presentation, though I usually keep them whole for easy sharing. The key is to serve them at room temperature so the filling stays creamy and the cookies maintain their airy texture. These chocolate cloud cookies are perfect with a pot of coffee or a tall glass of milk. They also travel well for picnics or a dessert spread, because the cloud-like texture stays tender even after a little rest time.
What to Serve It With
These cookies are so versatile, you’ll want to pair them with a few different things depending on the moment:
For Breakfast: A small plate with a latte and a couple of cookies on the side makes a cozy, indulgent start to the day. The aroma of cocoa pairs wonderfully with a creamy coffee. You can also crumble a cookie into yogurt or oats for a chocolate-y morning twist.
For Brunch: Serve alongside a fruit platter and a flute of sparkling water with a splash of orange. A light glaze adds a shiny finish that looks celebratory on a brunch table.
As Dessert: Plate two cookies with a scoop of vanilla Ice Cream or a dollop of whipped cream. A dusting of cocoa or a pinch of flaky salt elevates the presentation and taste, especially after a rich dinner.
For Cozy Snacks: They’re perfect with a mug of hot chocolate or an herbal tea before bedtime. The cloud-like texture is comforting and not overly sweet, making it a satisfying late-night bite without feeling too heavy.
My family loves when I pair these with a little story about the bake—sometimes I share a memory from a snowy afternoon or a favorite moment from a summer visit to the coast. It’s funny how a simple chocolate cloud Cookies Recipe can turn into a small but meaningful memory in the making.
Top Tips for Perfecting Your Chocolate Cloud Cookies
Here are a few insider tricks I’ve learned after countless trials with this chocolate cloud Cookies Recipe:
Egg whites prep: Whip the whites with a pinch of salt until stiff but not dry. Fold them into the batter gently in stages to preserve the air you’ve whipped in. If you overmix, you’ll lose that cloud-like lightness and end up with a denser cookie.
Don’t overmix the batter: After adding dry ingredients, mix just until incorporated. A few streaks are fine; the goal is a cohesive batter without the gluten getting tough.
Texture tweaks: For softer cookies, bake for 9–10 minutes and pull early; for a crisper edge, bake 11–12 minutes. I usually go middle-road and aim for 10–11 minutes for a balanced bite.
Filling consistency: If your filling seems too thick, add a small splash of cream or milk. If it’s too loose, chill it a bit before piping or spreading. You want a light, fluffy filling that doesn’t ooze out when you sandwich the cookies.
Glaze variations: For a shiny finish with a peanut butter twist, stir in a tablespoon of Creamy Peanut Butter into the glaze and drizzle. For a minty vibe, a drop of peppermint extract in the glaze is lovely, but use it sparingly.
Ingredient swaps: I’ve tested this with almond flour partially replacing all-purpose flour for a nuttier flavor and a slightly denser texture; it works, but the cloud effect is milder. A little espresso powder mixed into the cocoa intensifies the chocolate if you’re craving a deeper finish.
Storage tricks: Store cookies in an airtight container at room temperature for up to 3 days, or freeze baked cookies for longer. If you’re freezing, freeze once cooled and separated by parchment so they don’t stick together. Thaw at room temperature and re-glaze if you want extra shine.
Storing and Reheating Tips
Storing these chocolate cloud cookies properly keeps that tender interior and glossy finish intact. Here’s how I tend to handle them:
Room Temperature: In an airtight container, layered between sheets of parchment, for up to 3 days. Keep away from direct sunlight and heat to prevent the glaze from softening too much.
Refrigerator Storage: In a sealed container, they’ll stay fresh for about 5–7 days. If you’ve filled them, separate the layers to avoid the filling sticking to the cookie tops.
Freezer Instructions: Freeze baked cookies unglazed for up to 2 months. Thaw at room temperature and glaze just before serving for maximum sparkle and contrast with the soft interior.
Glaze Timing: If you’re refrigerating the cookies before glazing, glaze at room temperature for the best drape and shine. If you glaze after chilling, you may need to re-warm slightly to get a smooth glaze.
Frequently Asked Questions
Final Thoughts
These chocolate cloud cookies have earned a permanent spot in my recipe box. They’re a little bit theatrical in texture, a lot chocolatey in flavor, and incredibly forgiving for home cooks who want something impressive without a lot of drama. I’ve made them for busy weeknights, lazy Sundays, and last-minute gatherings, and they consistently bring smiles. If you’re looking for a dessert that feels special but isn’t fussy, this is the one I reach for—soft, airy, and deeply chocolatey in every bite. Give them a try, invite a friend to bake with you, and tell me how you modified the filling or glaze to make them your own. Happy baking!
chocolate cloud cookies
Ingredients
Main Ingredients
- 2 cups all-purpose flour
- 1 teaspoon baking soda
- 0.25 teaspoon salt
- 1.5 cups superfine sugar
- 1 cup packed light brown sugar
- 2 sticks butter room temperature, cut into 0.5-inch cubes
- 0.25 teaspoon pure vanilla extract
- 2 large eggs at room temperature, beaten
- 12 ounces semisweet chocolate chips
- 2 cups sliced toasted almonds
Instructions
Preparation Steps
- Preheat oven to 350 degrees Fahrenheit.
- Line 3 cookie sheets with parchment paper; set aside.
- In a medium bowl, sift together the flour, baking soda, and salt; set aside.
- In a small bowl, whisk together the superfine sugar and light brown sugar; set aside.
- Place the butter in your mixer's bowl and beat until creamy and smooth.
- Slowly add the sugar mixture; continue to beat until thoroughly combined.
- Mix in the vanilla extract.
- Continue to beat for 5 minutes, or until the mixture is a pale yellow.
- Gradually beat in the eggs.
- With the mixer speed on low, slowly mix in the flour mixture; continue to beat until incorporated.
- Fold in the chocolate chips and toasted sliced almonds.
- Scoop out the dough using a 2-inch diameter ice cream scoop, and drop batter onto the prepared pans, leaving at least 3 inches in between each cookie.
- Flatten each ball of dough with the heel of your palm.
- Bake for 15 to 18 minutes, or until the cookies are golden brown.
- Rap each pan on the rack 3 minutes before the cookies are done baking. This will make the cookies deflate and cracks will appear on the tops.
- Repeat with the rest of the cookies.
- Cool cookies on the pans.


