


There are some recipes that just feel like coming home, aren’t there? For me, these Peanut Butter Cookie bars are exactly that. They’re the kind of treat that instantly brings a smile to my face, conjuring up memories of childhood afternoons spent baking with my grandma. You know those classic chewy peanut butter cookies that are just heavenly? Well, imagine all that deliciousness, but in a super easy-to-make bar form. No more scooping individual cookies, no more worrying about them spreading too much! These peanut butter cookie bars are seriously a lifesaver when that sweet craving hits and you don’t have a ton of time, or frankly, energy. They’re forgiving, incredibly satisfying, and pretty much disappear the second they’re out of the oven. If you thought you loved peanut butter cookies before, just wait until you try them as bars.
What are peanut butter cookie bars?
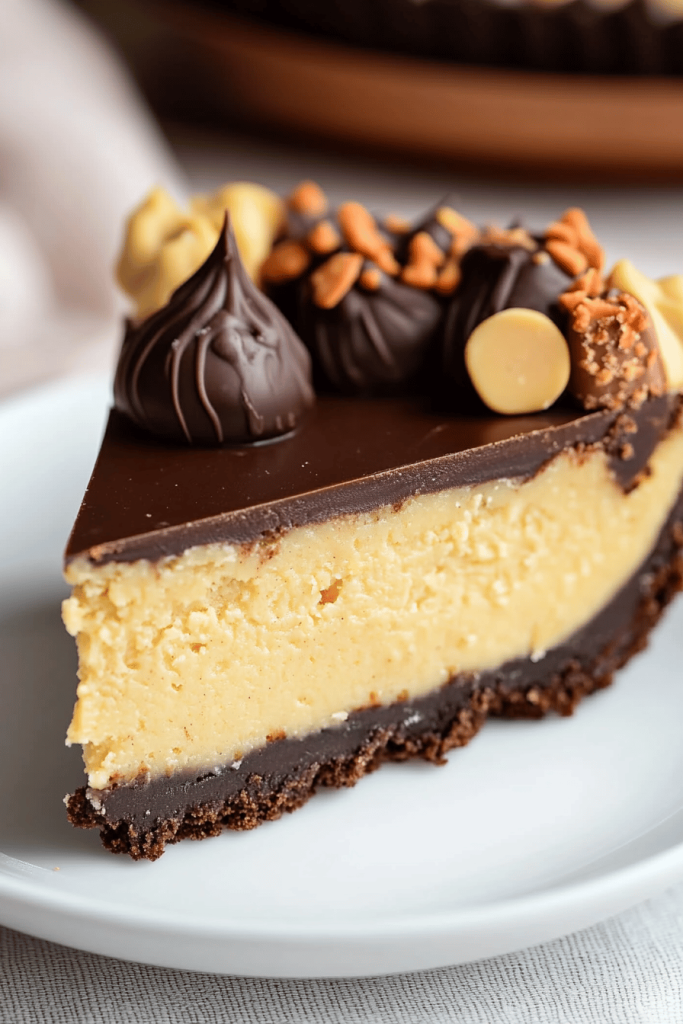
So, what exactly are peanut butter cookie bars? Think of them as the ultimate shortcut to peanut butter cookie bliss. Instead of rolling and baking individual cookies, you press a delicious, rich peanut butter cookie dough into a pan, bake it all together, and then slice it into perfect, chewy bars. It’s like a giant, shareable peanut butter cookie, but even better because it’s more manageable and, let’s be honest, more efficient to make. The dough is similar to traditional cookie dough – buttery, sweet, with that unmistakable peanut butter flavor that we all adore. The magic happens when it bakes into a dense, satisfying bar with slightly crisp edges and a wonderfully soft, chewy center. It’s basically the best of both worlds: the comforting taste of homemade peanut butter cookies with the effortless convenience of a bar. No fancy shaping, no intricate decorating, just pure, unadulterated peanut butter goodness.
Why you’ll love this recipe?
There are so many reasons why I keep coming back to this Peanut Butter cookie bars recipe, and I just know you’re going to fall in love with it too. First off, the flavor is out of this world. That deep, nutty, sweet peanut butter taste is so prominent, and it’s perfectly balanced with the other ingredients. It’s not just a hint of peanut butter; it’s a full-on celebration. Then there’s the simplicity. Seriously, if you can press dough into a pan, you can make these. It cuts down the baking time significantly compared to individual cookies, and there’s no fuss about perfectly spaced cookies on a baking sheet. For anyone who’s ever felt overwhelmed by baking, this is your jam. And let’s talk about cost-efficiency. The ingredients are all pantry staples: flour, sugar, butter, peanut butter – things most of us have on hand. It’s a budget-friendly way to create an incredibly satisfying treat. What I love most, though, is the sheer versatility. These bars are amazing on their own, but you can easily elevate them. Drizzle them with chocolate, add some sprinkles, or even swirl in some jam for a fun twist. They’re perfect for bake sales, potlucks, quick after-school snacks, or just when you need a little comfort food. I’ve also found that they hold up really well, making them fantastic for packing in lunches or taking on picnics. Compared to a traditional cake or pie, these peanut butter cookie bars offer that satisfying homemade taste without all the effort. They are truly a crowd-pleaser that never disappoints.
How do I make peanut butter cookie bars?
Quick Overview
Making these Peanut Butter cookie bars is surprisingly straightforward. You’ll cream together your wet ingredients, then mix in your dry ingredients to form a dough. This dough gets pressed into a baking pan, baked until golden, and then cooled before being sliced into perfect bars. The whole process is incredibly hands-off, with most of the work being the mixing and then just waiting for them to bake. It’s one of those recipes that feels impressive but is actually wonderfully simple to execute, making it a go-to for busy days.
Ingredients
For the Main Batter:
Butter: I always use unsalted butter, softened to room temperature. This is crucial for proper creaming, which creates that lovely light texture. Make sure it’s not melted, just soft enough to indent with your finger. You’ll need 1 cup (2 sticks).
Peanut Butter: Creamy, regular peanut butter is my preference here. Natural peanut butter can sometimes separate, so stick with the classic Jif or Skippy for the most consistent results. About 1 cup is perfect for that intense peanut butter flavor.
Sugar: A mix of granulated sugar and packed brown sugar gives these bars the perfect balance of sweetness and chewiness. I use 3/4 cup granulated sugar and 3/4 cup packed light brown sugar. The brown sugar adds moisture and that irresistible caramel-like depth.
Eggs: Two large eggs, at room temperature, help bind everything together and add richness. Room temperature eggs incorporate much better into the batter.
Vanilla Extract: A full teaspoon of good quality vanilla extract really enhances all the flavors, especially the peanut butter.
Flour: All-purpose flour is what I always reach for. Make sure to measure it accurately by spooning it into your measuring cup and leveling it off with a straight edge. About 2 1/4 cups should do the trick.
Baking Soda: This is your leavening agent, giving the bars a little lift and tenderness. 1 teaspoon.
Salt: A pinch of salt (1/2 teaspoon) is essential for balancing the sweetness and bringing out all the other flavors.
For the Filling (Optional, but highly recommended!):
More Peanut Butter: About 1/2 cup of creamy peanut butter for a gooey, concentrated layer.
Powdered Sugar: This helps thicken the peanut butter filling and makes it wonderfully smooth. Start with 1/4 cup and add more if needed.
Milk or Cream: Just a tablespoon or two, to get the filling to a spreadable consistency.
For the Glaze (Optional, but so good!):
Powdered Sugar: About 1 cup for a sweet, smooth glaze.
Milk or Cream: 1-2 tablespoons, again, to reach your desired consistency. I often use milk.
Melted Chocolate (for drizzling): Optional, but who can resist a chocolate drizzle on peanut butter?
Step-by-Step Instructions
Step 1: Preheat & Prep Pan
First things first, get your oven preheating to 350°F (175°C). You’ll want a 9×13 inch baking pan. I like to line mine with parchment paper, leaving a little overhang on the sides. This makes lifting the bars out so much easier later on, and cleanup is a breeze! Lightly grease the parchment paper and any exposed pan edges, too.
Step 2: Mix Dry Ingredients
In a medium bowl, whisk together your all-purpose flour, baking soda, and salt. Give it a good whisk to make sure the baking soda and salt are evenly distributed. This ensures consistent texture throughout your bars. Set this aside for now.
Step 3: Mix Wet Ingredients
In a large bowl, cream together your softened butter and peanut butter. Beat them until they’re light and fluffy. This usually takes a few minutes with an electric mixer. Then, gradually add in your granulated sugar and packed brown sugar, beating until well combined and smooth. Beat in the eggs one at a time, then stir in the vanilla extract. Make sure everything is nicely incorporated!
Step 4: Combine
Now, gradually add the dry ingredients to the wet ingredients. Mix on low speed or by hand until just combined. Be careful not to overmix here! Overmixing can lead to tough bars, and nobody wants that. You want to see just a few streaks of flour remaining before you switch to a spatula to finish incorporating the last bits. The dough will be thick and a bit sticky.
Step 5: Prepare Filling
If you’re making the optional filling, whisk together the additional peanut butter, powdered sugar, and 1 tablespoon of milk or cream in a small bowl. You’re aiming for a thick but spreadable consistency. If it’s too stiff, add another teaspoon of milk. If it’s too thin, add a bit more powdered sugar. Set aside.
Step 6: Layer & Swirl
Press about two-thirds of the cookie dough evenly into the bottom of your prepared pan. Really get it into the corners. Then, dollop spoonfuls of the peanut butter filling over the dough. If you’re feeling fancy, you can swirl it in gently with a knife or toothpick. Now, crumble the remaining one-third of the cookie dough over the top of the filling, covering as much as you can. Don’t worry if it’s not perfect; rustic is beautiful here!
Step 7: Bake
Bake in your preheated oven for 25-35 minutes, or until the edges are golden brown and a toothpick inserted into the center comes out with moist crumbs (not wet batter). Keep an eye on it, as ovens can vary. You want them baked through but still wonderfully chewy in the middle.
Step 8: Cool & Glaze
Let the bars cool in the pan on a wire rack for at least 20-30 minutes before attempting to glaze or cut them. This is important for them to set up properly. For the glaze, whisk together powdered sugar and 1 tablespoon of milk until smooth. Add more milk a teaspoon at a time if needed to reach a drizzly consistency. Drizzle over the cooled bars. If you’re adding melted chocolate, drizzle that over the glaze. Let the glaze set completely before slicing.
Step 9: Slice & Serve
Once the glaze is set, use the parchment paper overhang to lift the entire slab out of the pan. Transfer it to a cutting board and slice into squares or bars. I usually get about 16-20 bars, depending on how I cut them. Serve them at room temperature for the best texture and flavor.
What to Serve It With
These peanut butter cookie bars are pretty fantastic all on their own, but they also pair wonderfully with a variety of drinks and other treats, depending on the occasion. For a quick breakfast or coffee break, I love to just grab one with a hot cup of coffee. The richness of the coffee cuts through the sweetness of the bar perfectly. For a more leisurely brunch, I’ll sometimes serve a smaller cut of these alongside fresh fruit or yogurt parfaits. They add a lovely, comforting element to the spread. As a dessert, these are a no-brainer. They’re amazing served slightly warm with a scoop of vanilla ice cream – talk about decadent! They’re also wonderful after dinner with a glass of cold milk, just like you’d have with traditional cookies. For cozy snacks, they’re ideal. My kids practically inhale them after school with a glass of milk, and honestly, I’m not far behind them! We also have a family tradition of having these on movie nights; they’re easy to share and eat while watching, and everyone always asks for seconds. They also make a great addition to a dessert charcuterie board, nestled amongst some chocolates and fruit.
Top Tips for Perfecting Your Peanut Butter Cookie Bars
I’ve made these peanut butter cookie bars more times than I can count, and over the years, I’ve picked up a few tricks that really make a difference. For the peanut butter itself, I strongly recommend using a standard creamy peanut butter like Jif or Skippy. Natural peanut butters can sometimes release more oil, which can alter the texture of the bars, making them greasy or too crumbly. Stick with the conventional stuff for guaranteed success! When it comes to mixing the dry and wet ingredients, the golden rule is ‘do not overmix.’ Once you add the flour, mix just until there are no dry streaks left. Overmixing develops the gluten in the flour too much, leading to tough, dense bars instead of the chewy, tender ones we’re going for. I’ve definitely made that mistake before, and the texture was just disappointing. For the filling, the consistency is key. You want it thick enough to hold its shape but spreadable. If it’s too thick, it’s hard to spread evenly; if it’s too thin, it’ll just melt into the dough. Start with a little liquid and add more very sparingly until you reach that perfect consistency. For the swirl, don’t overthink it! A few random dollops and gentle swirling with a knife or skewer creates beautiful marbling without sinking the filling too much. Regarding ingredient swaps, while these are formulated for perfection with standard ingredients, I have had success using a gluten-free all-purpose flour blend – it might yield a slightly different texture, but it’s definitely doable for those with sensitivities. I haven’t personally experimented with vegan butter or egg substitutes, but I imagine it would require some careful adjustment to achieve the same richness and binding. When baking, the visual cues are your best friend. The edges should be golden brown, and the center should look set but still slightly soft. Overbaking is the enemy of chewy bars, so pull them out when they’re *just* done. If you want them even chewier, you can slightly underbake them, as they’ll continue to cook as they cool in the pan. For the glaze, the consistency can be tweaked easily. If you like a thicker glaze, use less liquid; for a thinner, more translucent glaze, add a tiny bit more liquid. And a pro-tip for slicing: make sure the bars are sufficiently cooled. Trying to cut warm bars, especially with a glaze, can lead to messy edges and a less-than-perfect presentation. A sharp knife dipped in hot water and wiped dry between cuts can help create super clean slices!
Storing and Reheating Tips
One of the best things about these peanut butter cookie bars is how well they store, making them perfect for making ahead. If you’re planning to enjoy them within a day or two, storing them at room temperature in an airtight container is perfectly fine. They’ll stay fresh and chewy. Just make sure they’re completely cooled before sealing them up to prevent condensation, which can make them soggy. If you think you’ll need longer than a couple of days, or if your kitchen is particularly warm, popping them into the refrigerator is a good idea. They’ll keep well in an airtight container in the fridge for up to a week. When you’re ready to eat a chilled bar, I highly recommend letting it come back to room temperature for about 15-20 minutes to regain its perfect chewy texture. For longer storage, these bars freeze beautifully. Wrap them tightly in plastic wrap, then place them in a freezer-safe bag or container. They can stay frozen for up to 2-3 months. To thaw, simply remove them from the freezer and let them come to room temperature. I usually avoid reheating them in the microwave, as it can sometimes make them tough, but if you absolutely must, a very short burst (10-15 seconds) on low power might work, just to take the chill off. The glaze can sometimes soften a bit in the fridge or freezer, but it usually firms up again as it comes to room temperature. I typically apply the glaze *after* the bars have completely cooled and set, so it’s best to do that just before serving or storing at room temperature for a day or two.
Frequently Asked Questions
Final Thoughts
I truly hope you give these peanut butter cookie bars a try. They are more than just a recipe to me; they’re a little bit of comfort, a lot of nostalgia, and a whole lot of deliciousness wrapped up in one easy-to-make treat. The combination of that rich peanut butter flavor, the perfect chewy texture, and the simple bar form just can’t be beat. They’re the kind of baked good that makes your house smell amazing and brings everyone running to the kitchen. If you love peanut butter anything, these are an absolute must-try. They’re fantastic for sharing, but I won’t judge if you want to keep the whole pan to yourself! For those who enjoy this recipe, you might also love my classic chewy peanut butter cookies or my peanut butter swirl brownies. I can’t wait to hear what you think once you’ve made them! Please feel free to leave a comment below with your thoughts, ratings, or any fun variations you come up with. Happy baking!
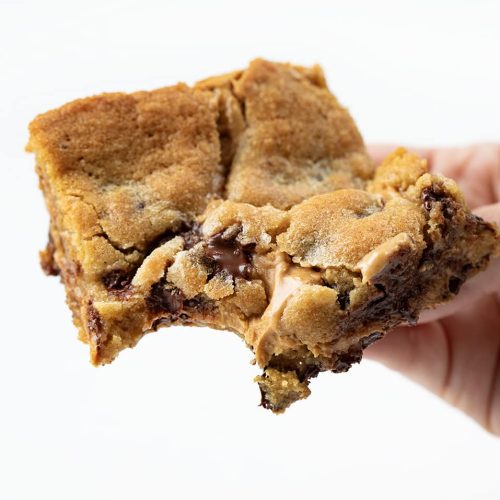
Peanut Butter Chocolate Chip Cookie Bars
Ingredients
Cookie Dough
- 1 cup unsalted butter, softened
- 1.5 cups brown sugar, packed
- 1 teaspoon vanilla extract
- 2 large eggs
- 2.25 cups all-purpose flour
- 1 teaspoon baking soda
- 1 teaspoon kosher salt
- 2 cups semi-sweet chocolate chips
Peanut Butter Layer
- 1.5 cups peanut butter melted
Instructions
Preparation Steps
- Preheat oven to 350°F (175°C). Grease and flour a 9x13 inch baking pan.
- In a large bowl, cream together softened butter and packed brown sugar until light and fluffy. Stir in vanilla extract.
- Beat in the eggs one at a time until fully incorporated.
- In a separate bowl, whisk together all-purpose flour, baking soda, and kosher salt.
- Gradually add the dry ingredients to the wet ingredients, mixing until just combined. Do not overmix.
- Stir in the semi-sweet chocolate chips.
- Press half of the cookie dough evenly into the bottom of the prepared baking pan. Reserve the remaining dough for the topping.
- Bake for 15 minutes, or until lightly golden.
- Remove the pan from the oven and carefully spread the melted peanut butter evenly over the baked cookie layer.
- Crumble or flatten small pieces of the remaining cookie dough and place them over the peanut butter layer. It's okay if some peanut butter shows through.
- Return to the oven and bake for an additional 20-23 minutes, or until the cookie topping is golden brown and the peanut butter is bubbling.
- Let the bars cool completely in the pan on a wire rack before cutting into squares.


